CREATE YOUR OWN 360° IMAGES WITH THE RICOH THETA S OR THETA V
Be the agent who does something different & let us guide you along the way with our innovative marketing ideas… So, you have more time for selling!
Successful real estate sales
BoxBrownie.com is the first company to commercially edit HDR bracketed 360° images, blend them and make them suitable for Facebook upload. Using 360° images is a great way of marketing a listing because it enables buyers to feel as though they are standing in the home.
In the past 360° images have been of low quality, either overexposed or dark, because of their inability to take HDR bracketed shots…
Well not anymore!
BoxBrownie.com has been testing out devices capable of taking 360° images in HDR brackets, that are affordable and easy to use. We came across Ricoh Theta S & Ricoh Theta V.
If your budget allows for it... Co-Founder Brad Fillponi highly recommends the Ricoh Theta Z1 as it is best quality 360° camera on the market for the price - This Virtual Tour example has been shot with it (When you're inside the property you can turn on/off 360° Virtual Staging by clicking the top right icon).
Using the Ricoh Theta S, Theta V or Theta Z1 technology, we are the only company to commercially blend HDR bracketed photos, for amateurs and professionals, via a cloud-based editing service. These 360° images work perfectly on Facebook, which has the software to recognize 360° image uploads. This technology is the first of it’s kind and BoxBrownie.com are the leaders in commercially offering this service to real estate agents around the world.

The Ricoh Theta S Camera
What Can 360 Images Be Used For?
360 images have huge versatility, as they can be used on a range of platforms that accept the 360° image format, specifically Facebook. They allow Realtors to display the key rooms in the house (eg. Kitchens, living rooms, bedrooms) in the most effective way. Effectively taking the home to the buyer. Property Professionals can use our edited 360° images anywhere that recognizes the 360° image format.
Creating Your Own 360° Images
Facebook has the greatest reach of any other social media network for property agents, builders, and developers. Now is the time to sperate yourself from the competition, and we’re going to show you how.
Here are 4 basic steps to professional 360° images:
The gear – We recommend using the Ricoh Theta S, Ricoh Theta V or better yet the Ricoh Theta Z1 if within your budget, because of their ability to bracket 360° images (We run through the steps on how to use it later). PLEASE DO NOT purchase the older Theta m15 model, the quality is not as good as the newer Theta cameras. Brad's pick is either the Theta V or Theta Z1.
Upload – Once you have taken your photos, download the 360 camera images directly to your computer with the included camera cord (please don't use the Wifi transfer option as it can send low-resolution images) upload the Jpeg images through the BoxBrownie.com 360° Image Enhancement edit, 360° Virtual Staging edit or just straight into our 360 Virtual Tours platform. Our editors will blend your shots to create one eye-catching image or create a beautiful 360 Walkthrough Property Tour using your images!
Download – You’ll get your Single/HDR blended 360° images back within 24 hours ready to use (Please allow 48 hours for 360° Virtual Staging) (360° Virtual Tours are also a 24-hour turn-around).
Preview photos – If you want to review your 360° photos before using them download the FREE Ricoh Theta program.
Marketing – You can use your 360° image as part of your Facebook targeted ad campaign or create a 360° Virtual Tour with them to place on your business website or as a link on your MLS.
Gear You Need for The Best 360° images
To get the best 360° images you need the right gear, this is what we recommend:
360° Camera - Ricoh Theta S, V or Z1 360° camera.
This is one of the few brands on the market able to take proper HDR bracketed 360° images.
Approx starting price is. AUD$500.00 - best to purchase directly online. Ricoh Theta m15 is not recommended.
Tripod or Monopod - A sturdy tripod to keep your images still and free of blurriness.
We have x2 setups we can highly recommend:
- Neewer Light stand + if you want to be able to level out your tripod on uneven ground you also require the Neewer ball head. This setup is a great 360° Tripod hack & is HIGHLY Recommended for realtors! The reason is legs are super wide compared to monopods, so the tripod will not tip over in windy conditions making this the BEST option for real estate agents or amatuer 360° photographers.
- Cobra 2 A180-11 Monopod is the best Monopod on the market we believe for 360° photography (Please note these tripods can still easily tip over so amateurs really should go for our above Tripod hack). Key features being: 3 levels for feet adjustment with ball head for easy shooting on uneven ground, Ergonomic buckles for length adjustment, Single hand operation patented quick release system top and bottom, Lightweight, Quality built.
Using your Ricoh Theta S, Theta V or Z1 to Create Standout 360° Images
BoxBrownie.com Director and Photographer, Brad Filliponi, is constantly testing new equipment and techniques for getting the best real estate photos. Here are his tips on taking the best 360° images on the Ricoh Theta S, Theta V or Theta Z1 device.
A Few Notes Before You Start
Always ensure your Ricoh Theta S, V or Z1 device is fully charged before use. The Ricoh Theta S is able to take up to 260 images on one charge, but if you are shooting multiple homes on the 1 day you will need to purchase a Ricoh Theta Riser Extension so you can gain access to the charging port when your device is on a Monopod/Tripod. You can then sticky tape a SmartPhone Power Bank to your tripod with your charging cable.
Ricoh Theta 360° cameras are quite awkward to stand or hold when not using, it is SUPER important to be careful with them as they have dual-lenses are extremely easy to scratch. When connected to your computer or storing we recommend to always place it in its carry pouch. This enables you to connect the USB cable and protect the delicate lens at the same time when transferring your images.
Using the Ricoh Theta
The settings:
1. Downloaded the Ricoh Theta app on your smartphone/mobile device.
2. Turn the Ricoh Theta S or V on by pressing the “top” button on the side of the device.
3. Connect to your Ricoh Theta via Wi-Fi pairing.
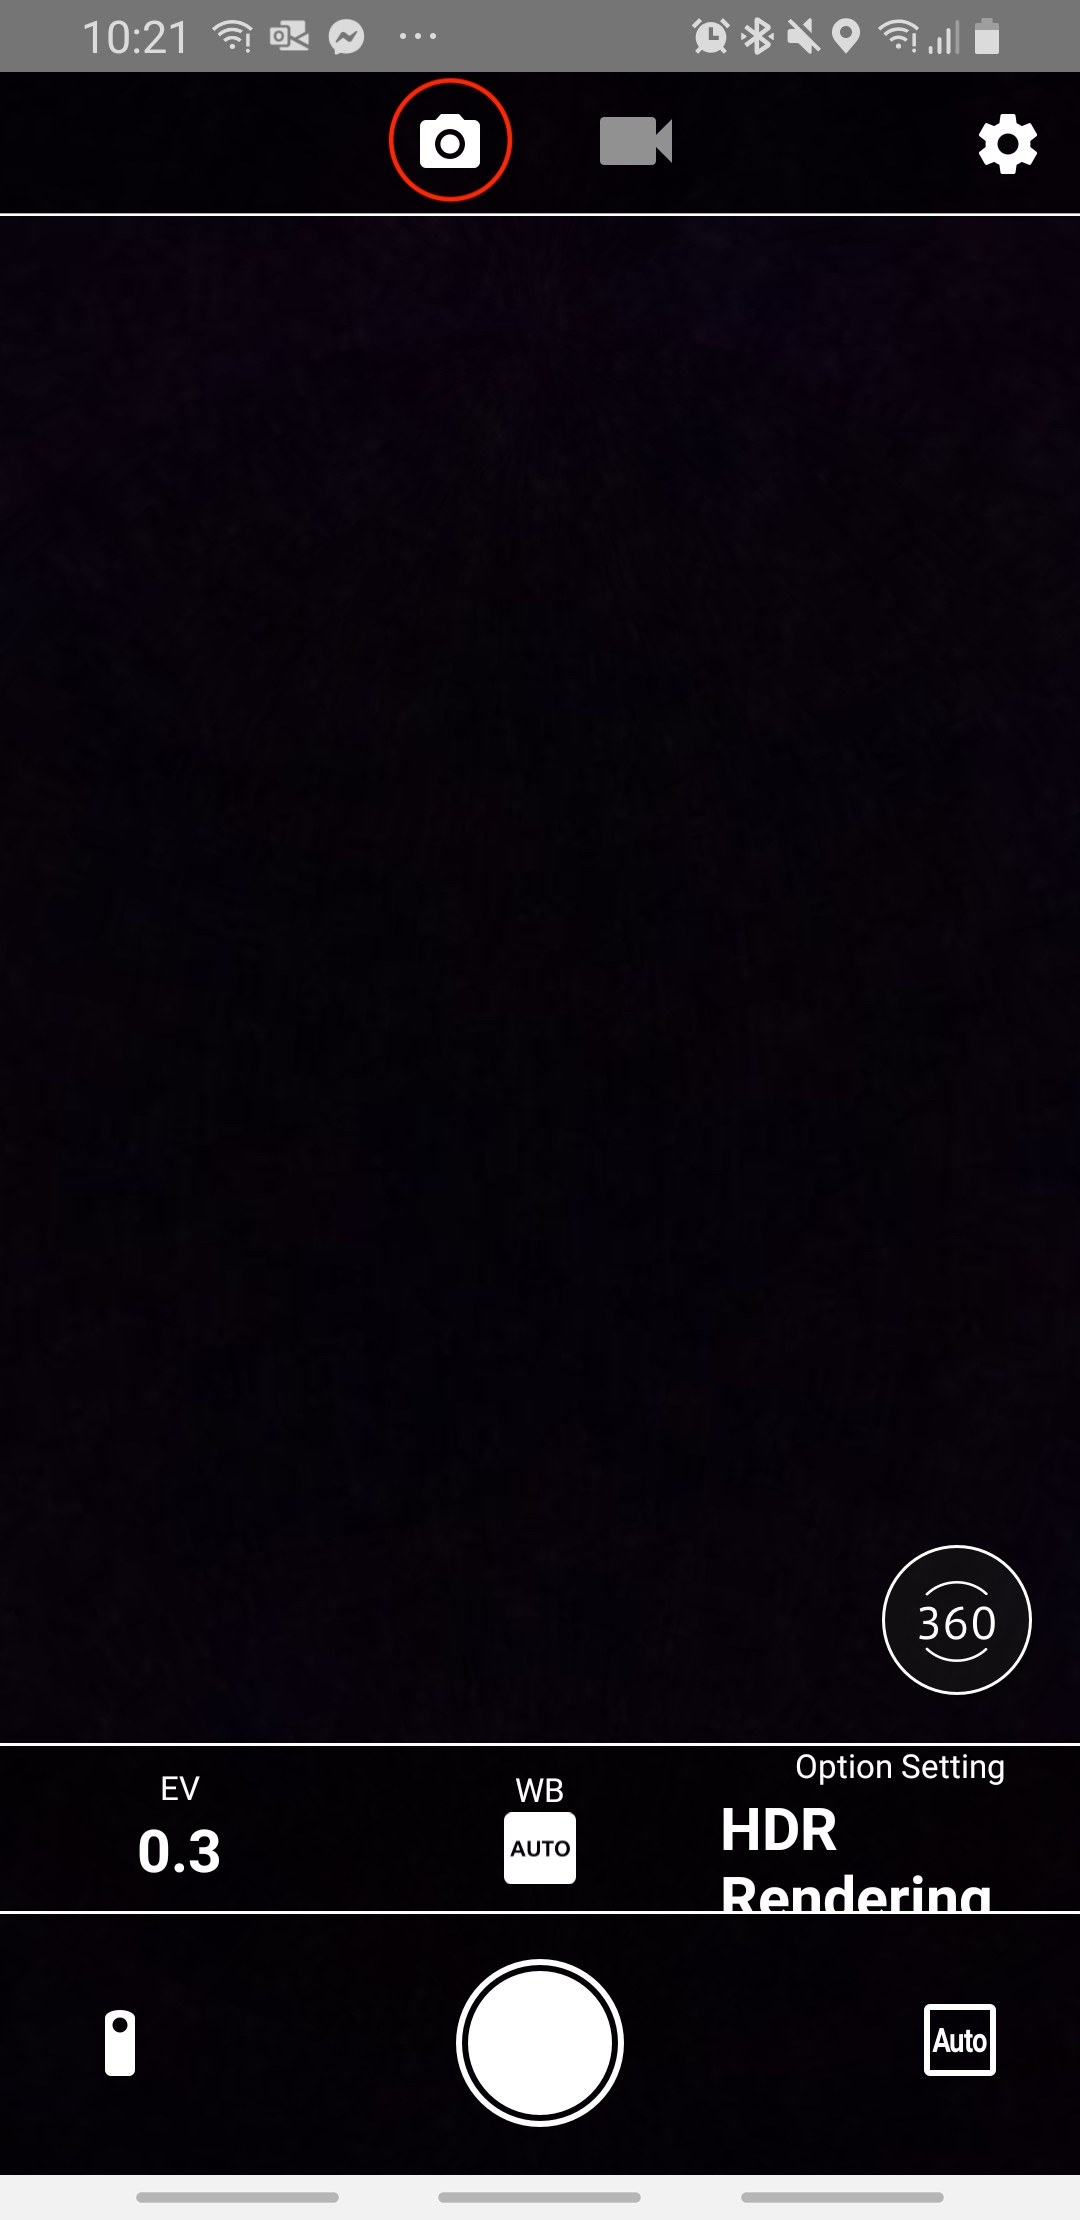
4. Turn on the Ricoh Theta app and press the middle “Shooting” button to access the camera viewer.
5. Place the Ricoh Theta on a sturdy Monopod or Tripod.
6. Ensure you are in the Photo setting (not Video) – See below.
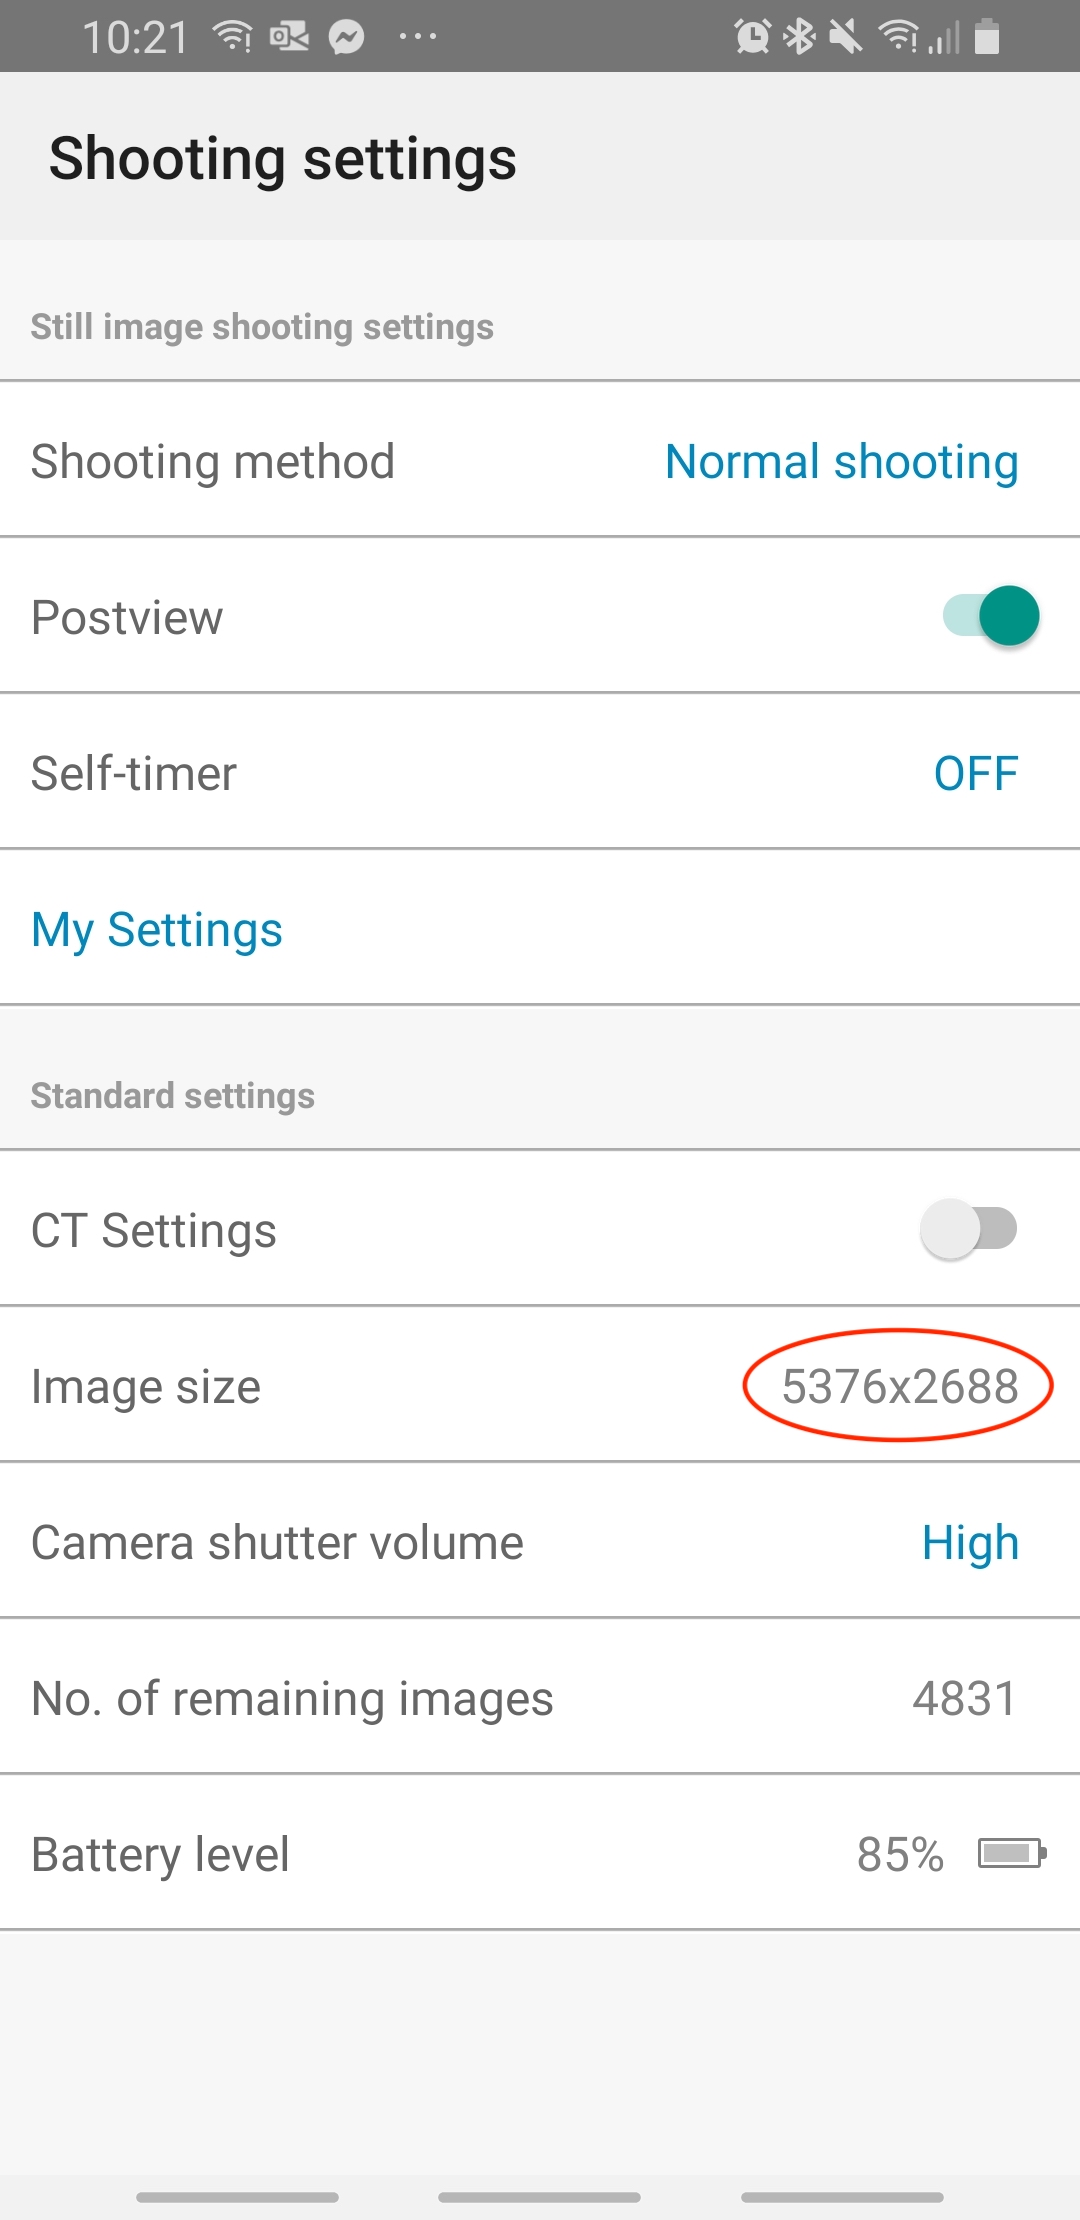
7. On the top right side
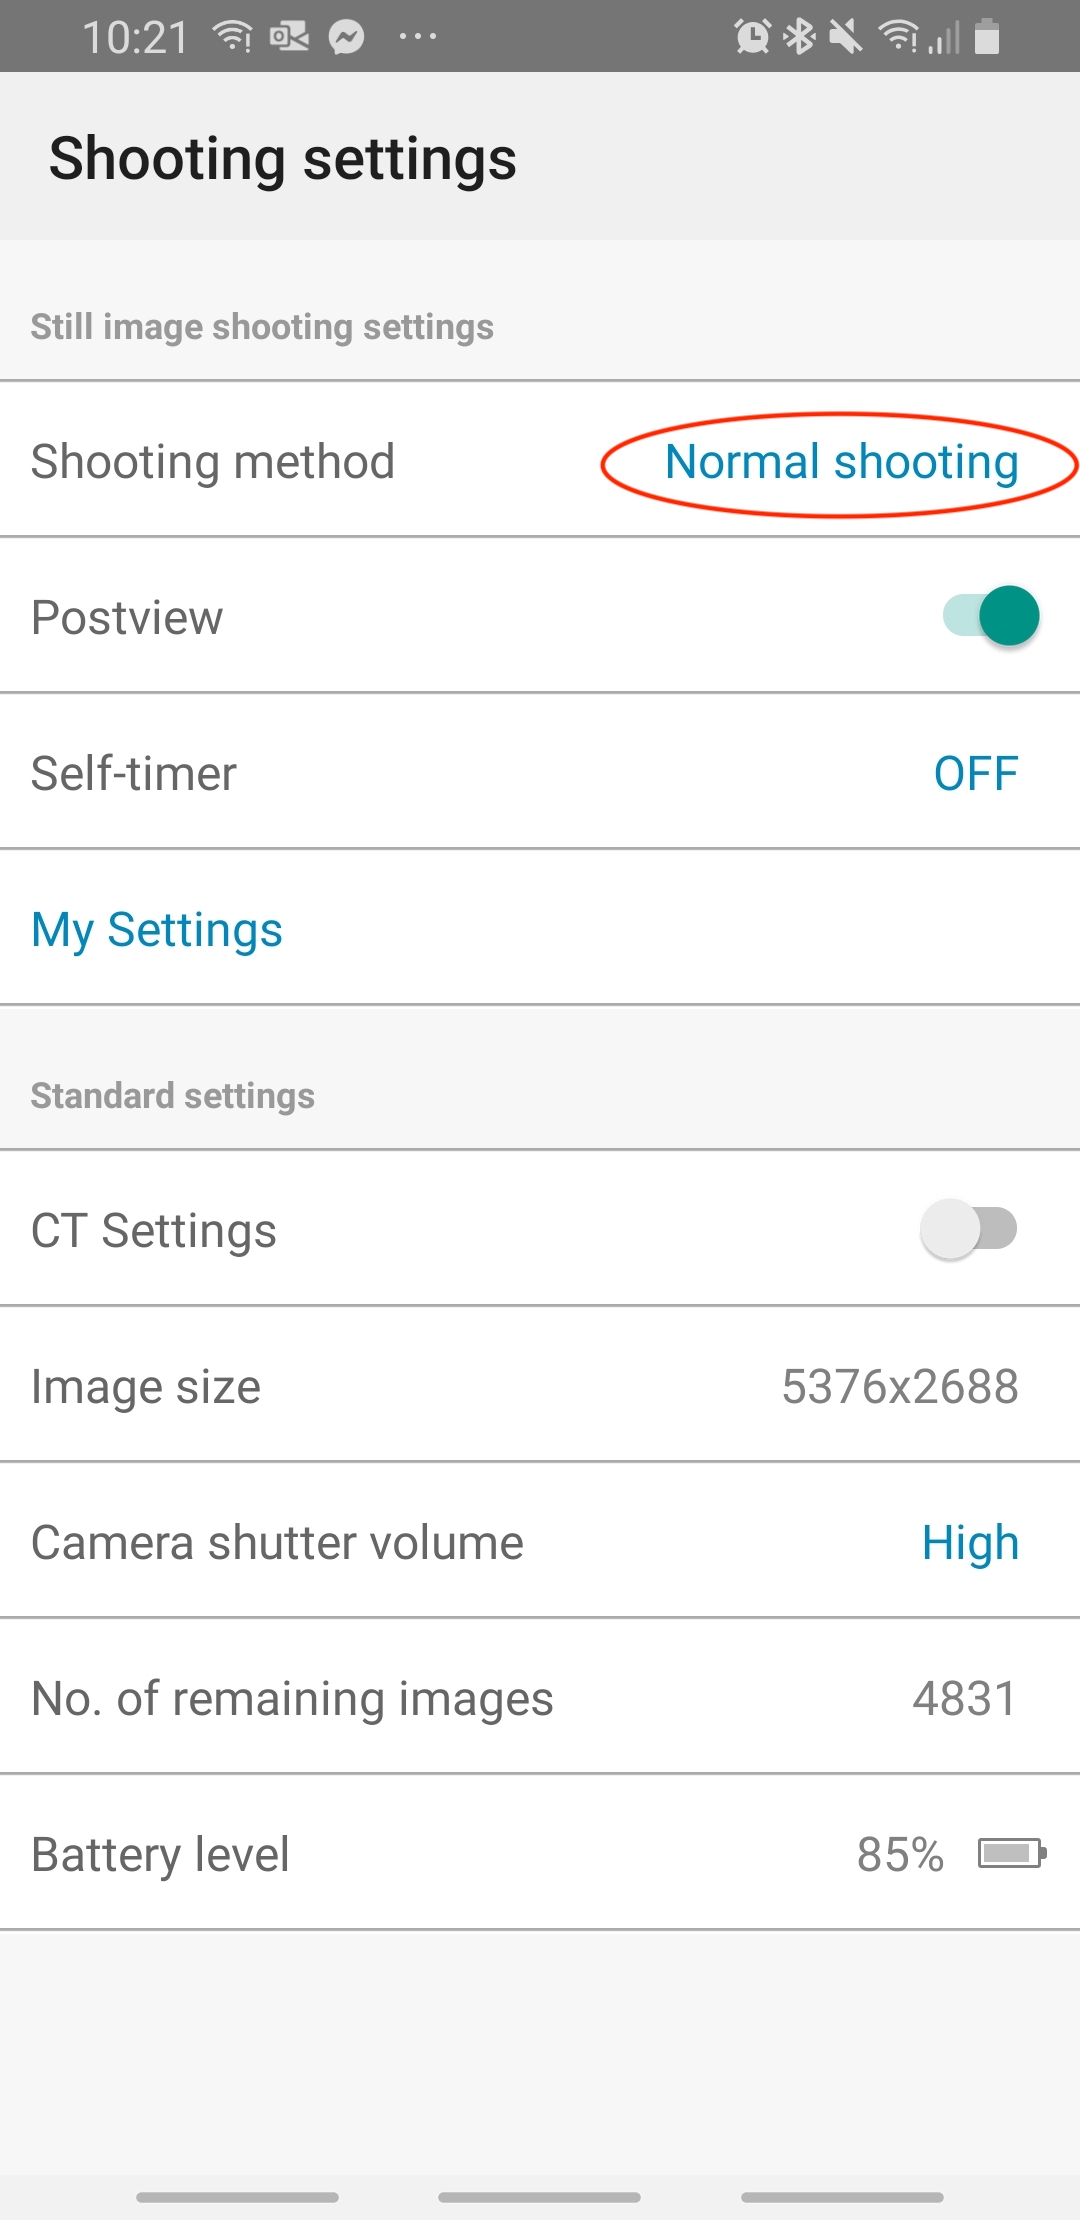
8. The same setting menu, ensure the Shooting method is on “Normal shooting” and select Done.
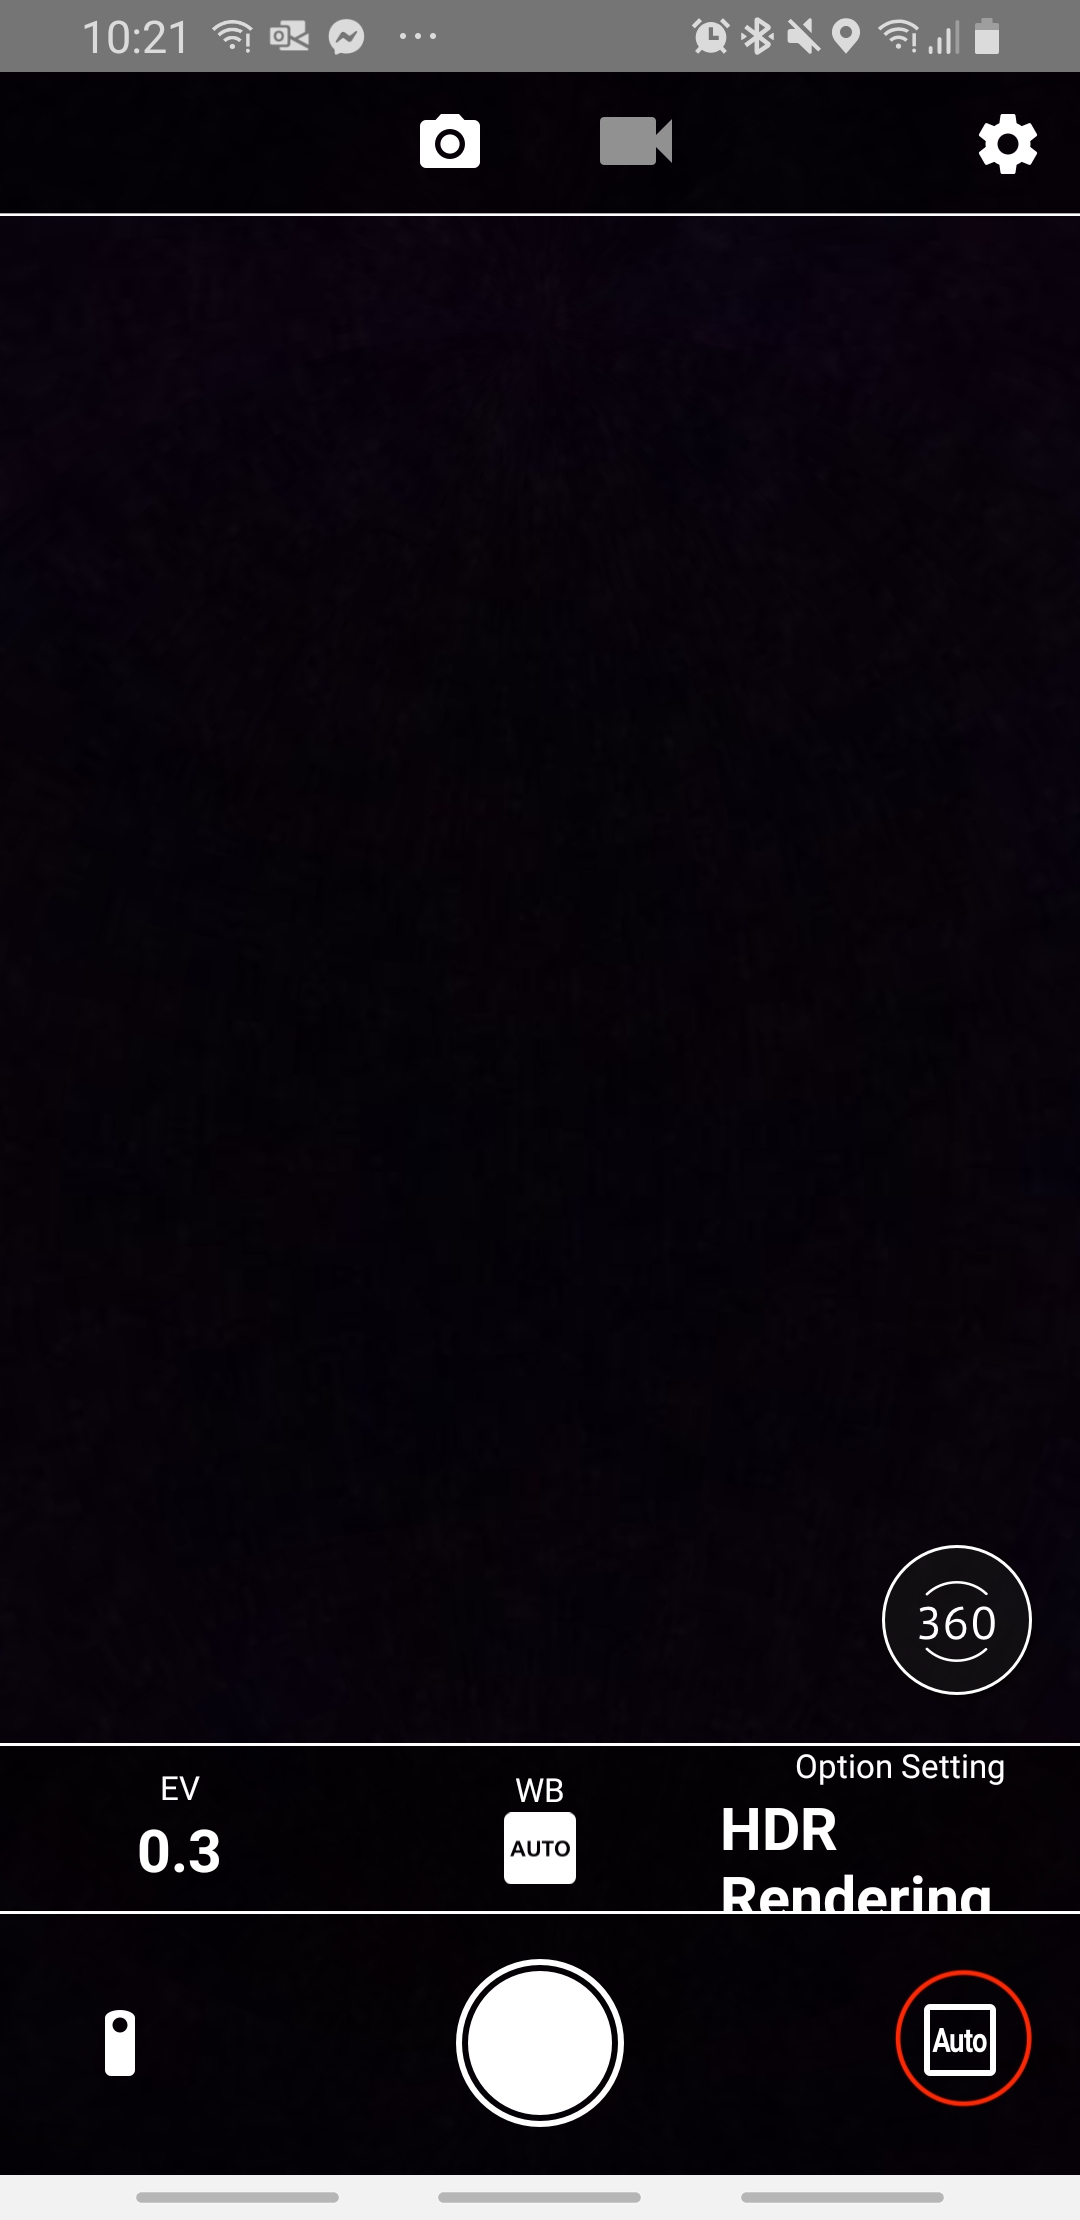
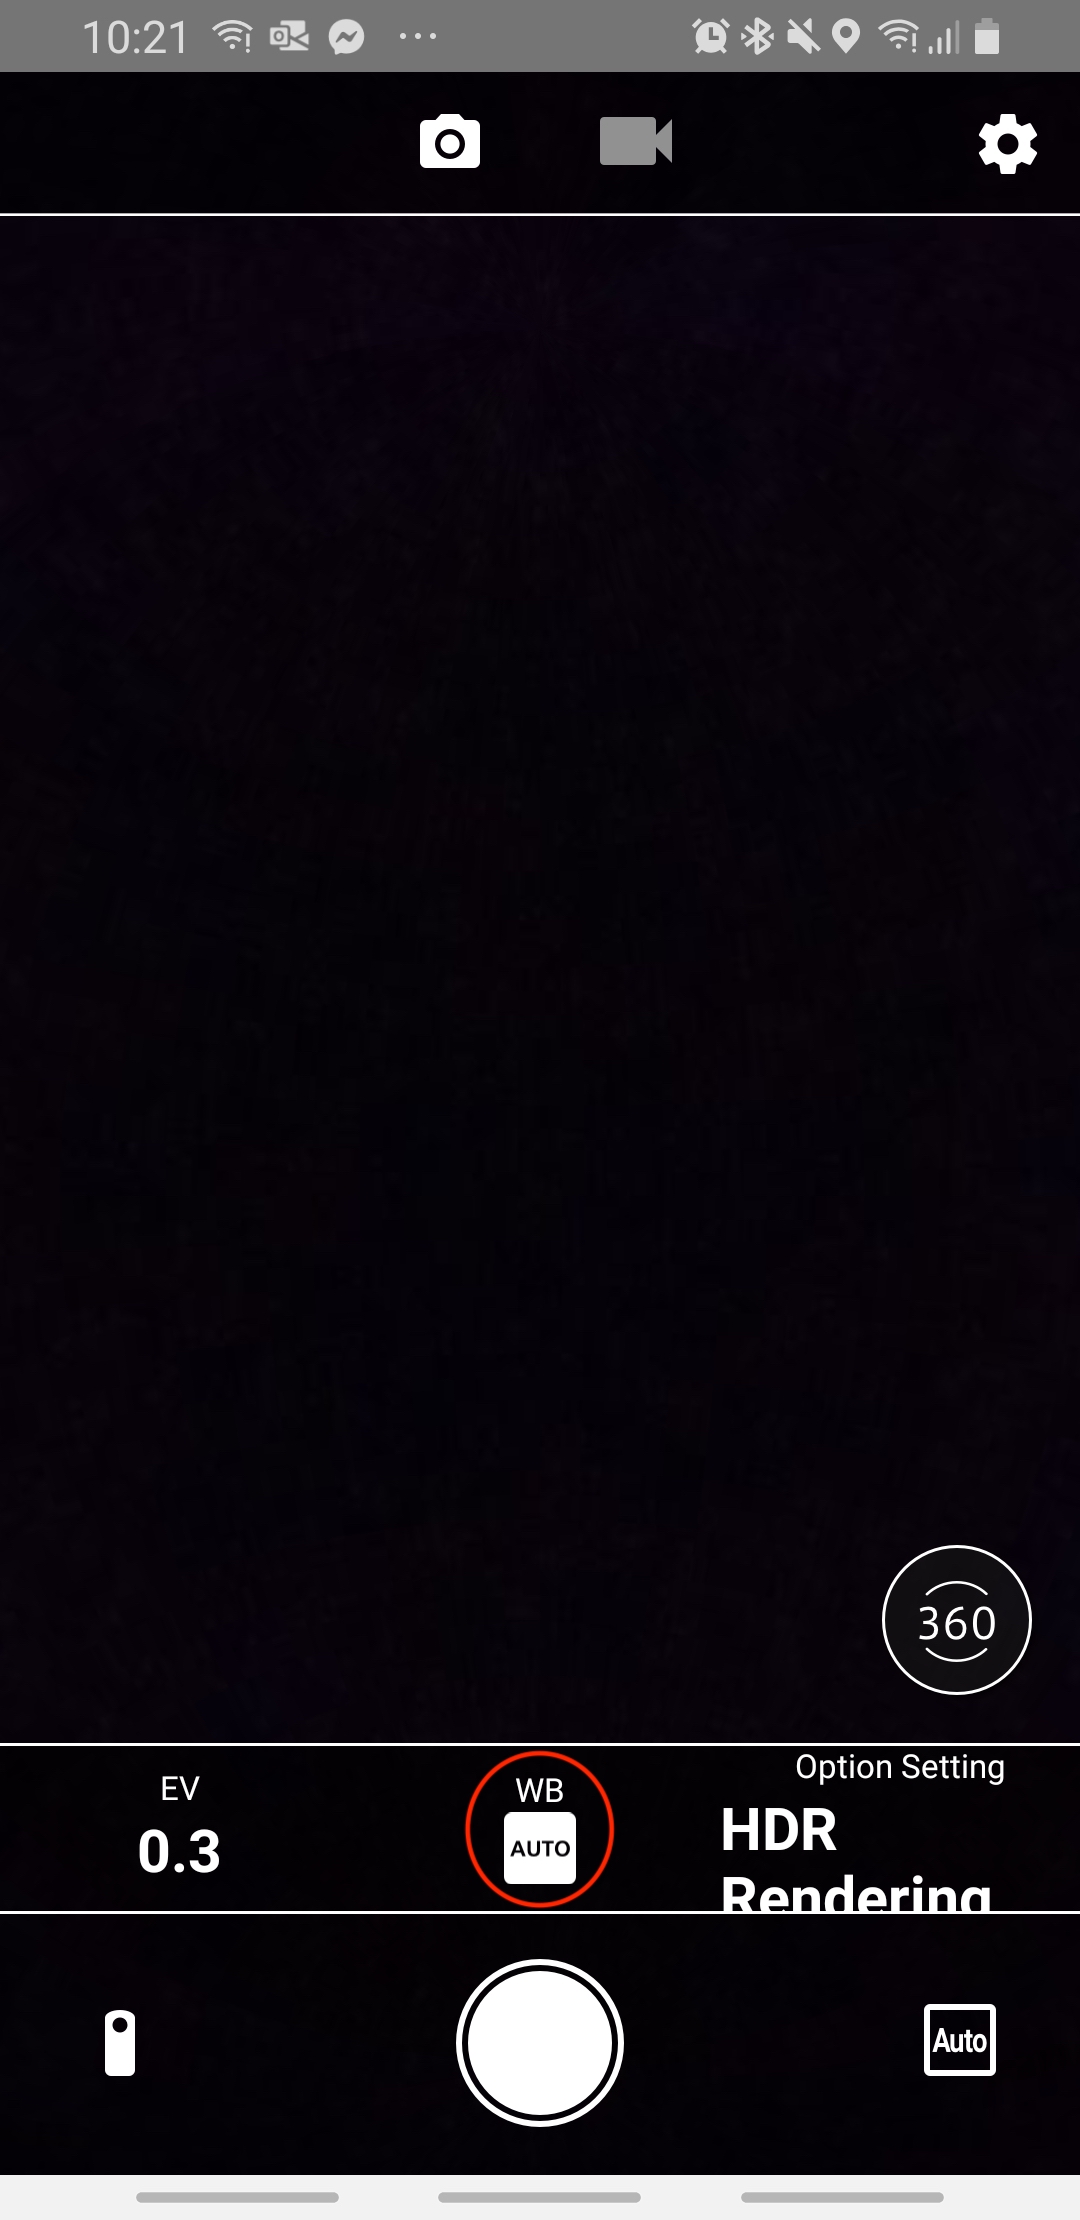
9. This brings you up to the live exposure viewing screen, Amateurs, here you then need to hit the button in the lower right corner and keep it on Auto – Professionals, if you want to HDR Bracket, you need to click this into Manual mode to create multiple exposures for shooting interiors.
10. Then, ensure WB is on Auto.
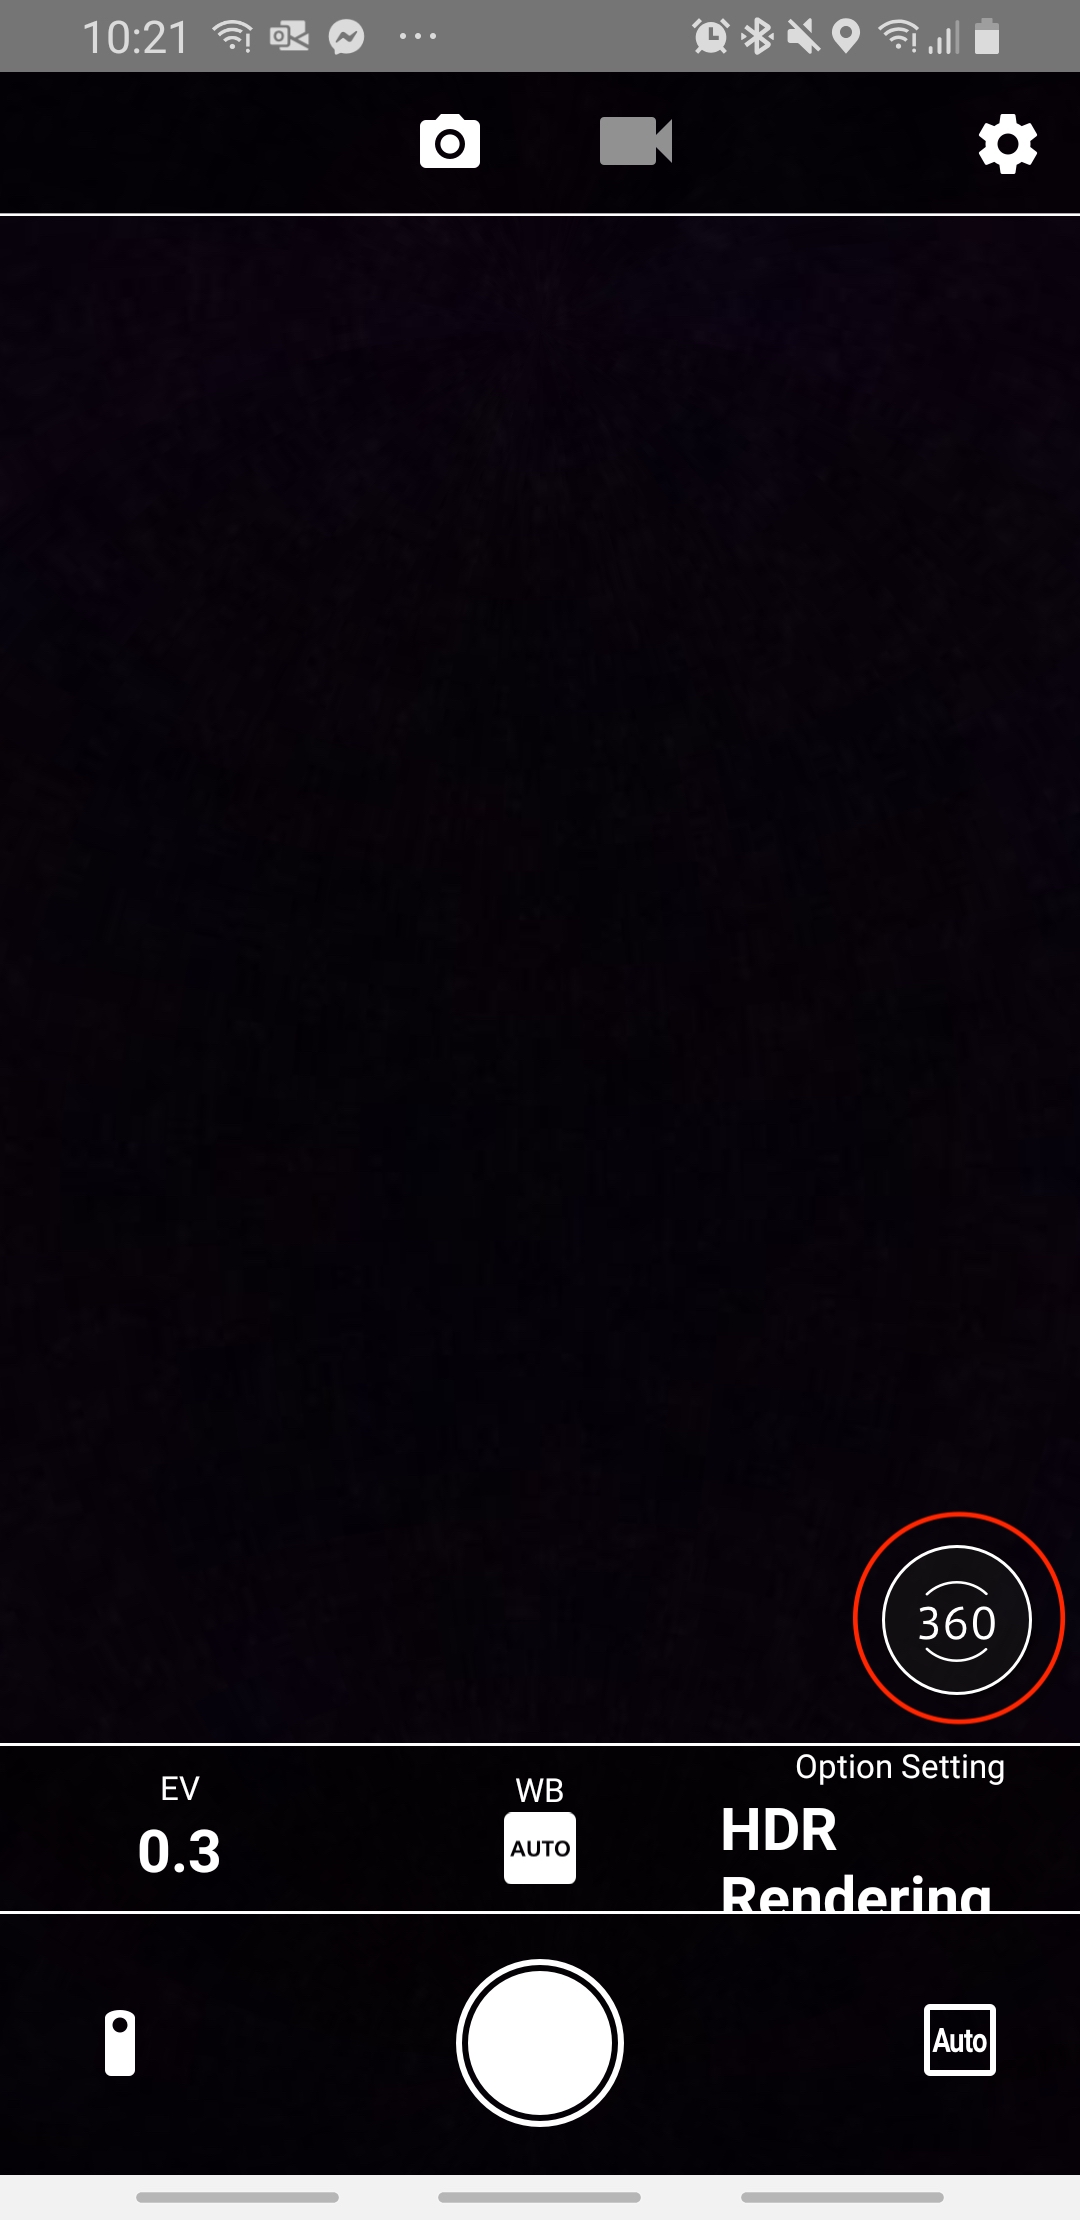
11. Ensure the “360” style button is selected – See below.
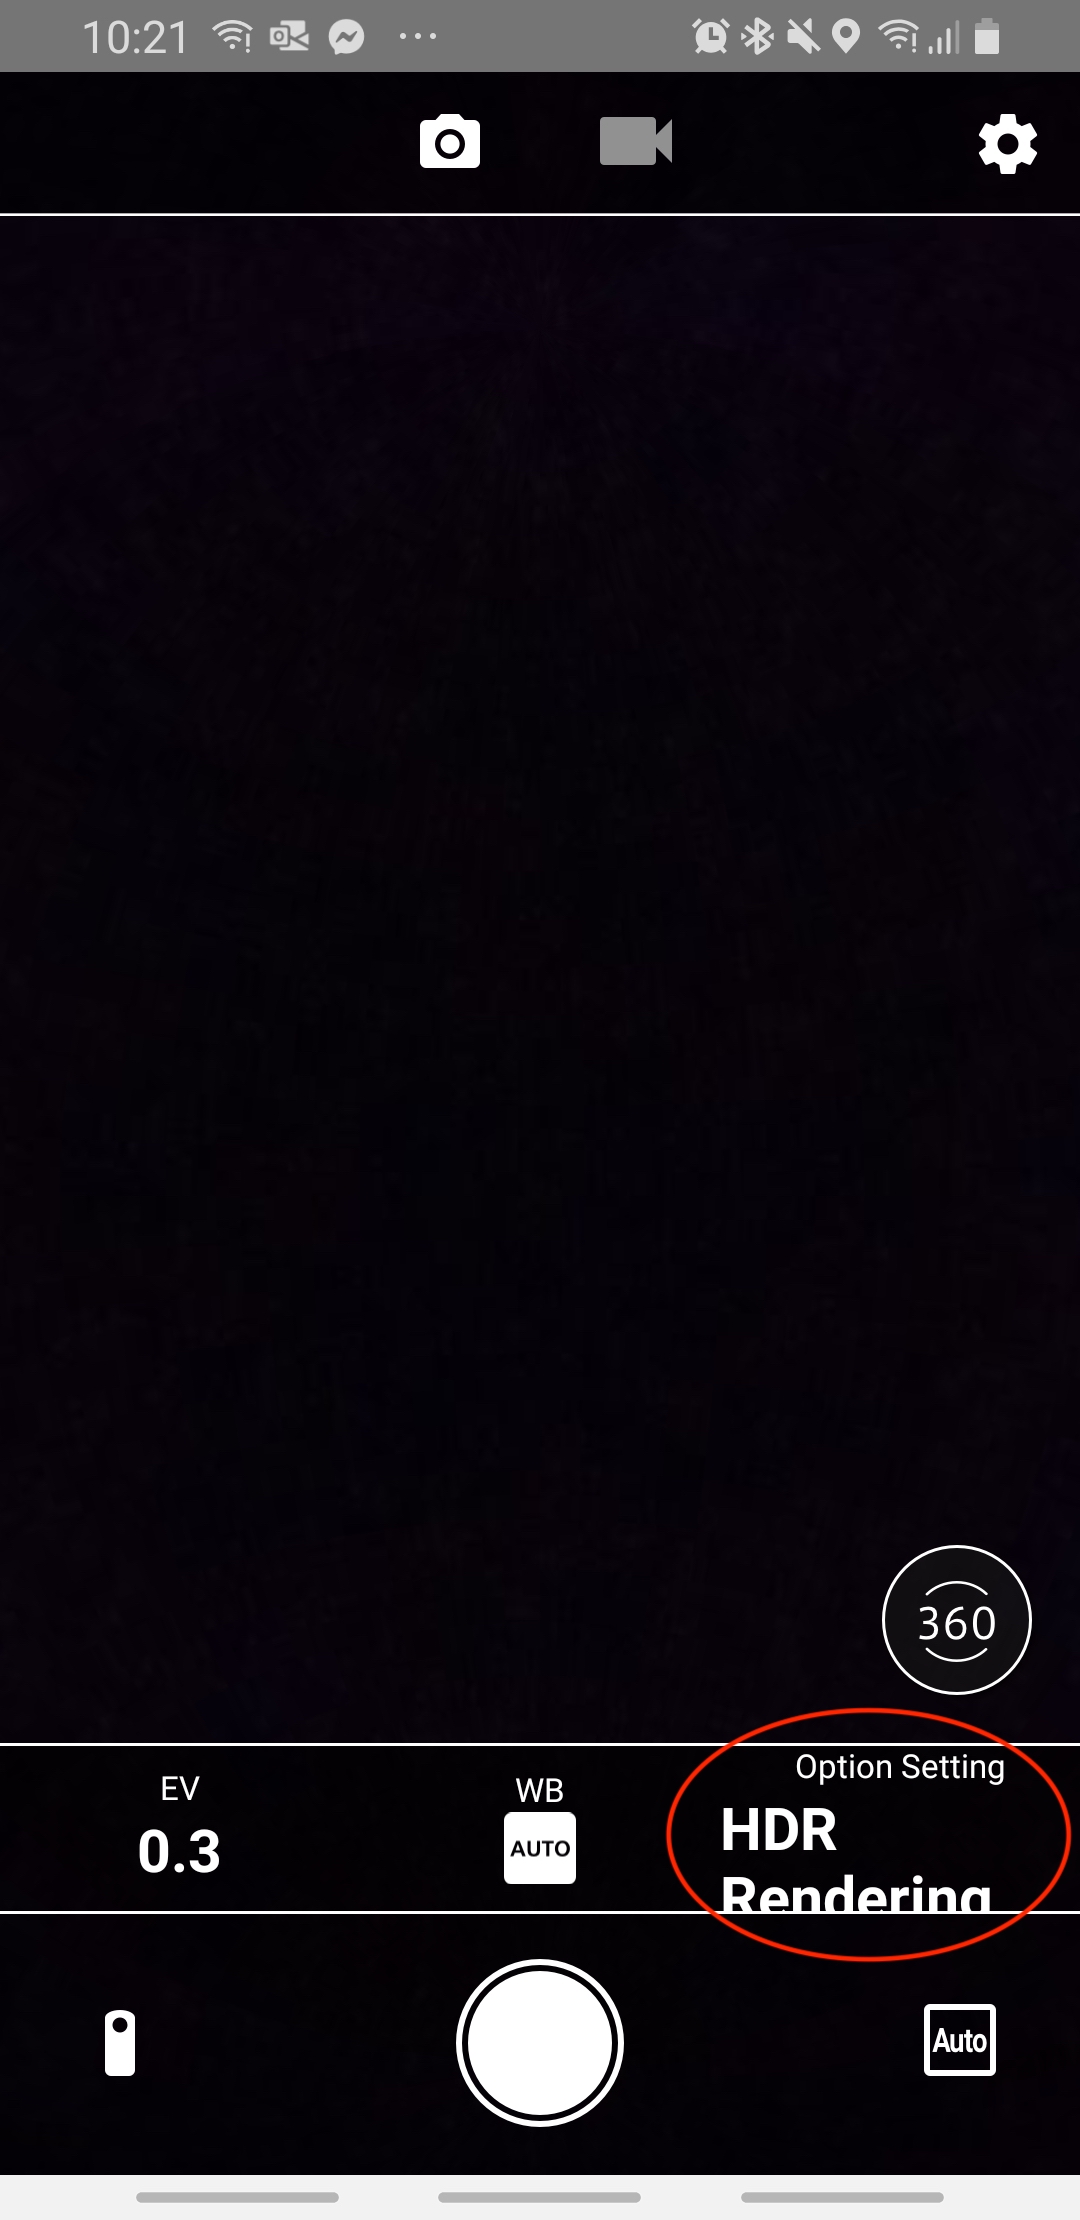
12. Lastly, on the bottom right-hand side ensure the HDR Rending button is selected.
To note: On any 360° camera, always ensure you ISO is 100 or as low as possible – This creates less grain and a cleaner edited finish.
Taking the shots
Now you have all the settings dialled in, you are ready to start shooting. The Ricoh Theta 360° camera's are unique in that it can create HDR brackets which are required for a well exposed and detailed image. How this works is you control the shutter speed, which then controls the light levels on the Ricoh Theta.
Check out this video for guidance with the HDR bracketing method. To create the best 360° image, we need between 3 to 6 brackets, at all different light sources to edit the exterior window detail in your shots.
Tip: When shooting HDR brackets make sure you avoid moving objects, as they will come blurred in the final edit output. If shooting people, we recommend doing this in a single shot Auto mode and playing around with the shutter speed until the best single image exposure is found.
Finally, when shooting “360 Bracketed” photos DO NOT move the tripod or camera during shots... Even be careful with people walking around in the property as blurry images cannot be fixed.
When taking the photos, start with the exterior window detail first (the internals will look dark, but the view outside the window should be exposed correctly), then work your way backward taking lighter exposures each time. You want to have enough “photo information” in each section of the image, so our editors are able to overlay the shots and erase the unnecessary areas in the editing process. The outcome - Creating a single 360° image with the photo data you have shot yourself.
Here is What Your 360° HDR Brackets Should Look Like:
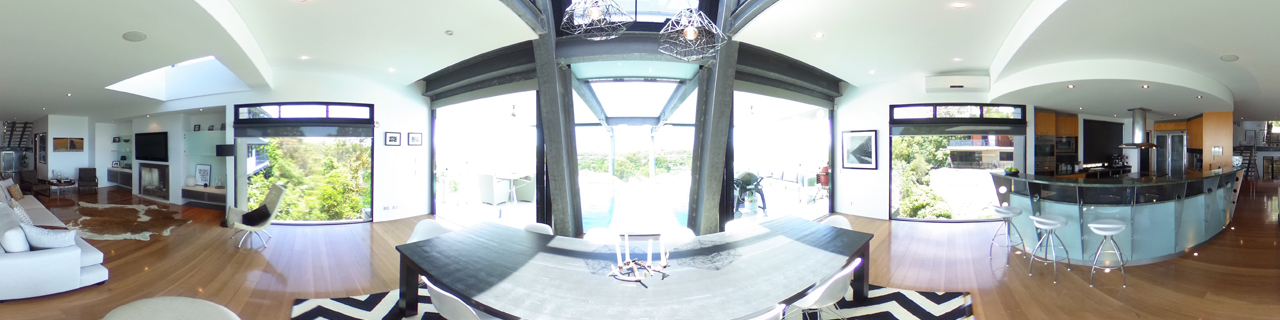
Shot 1
A very dark exposed image… The idea is to get the correct window detail required for the edit.
Shot 2

This image is also about getting exterior window detail, as well as the interior. This exposure is perfect to finalize the window blend with the interior.
Shot 3
The aim is to get
Shot 4
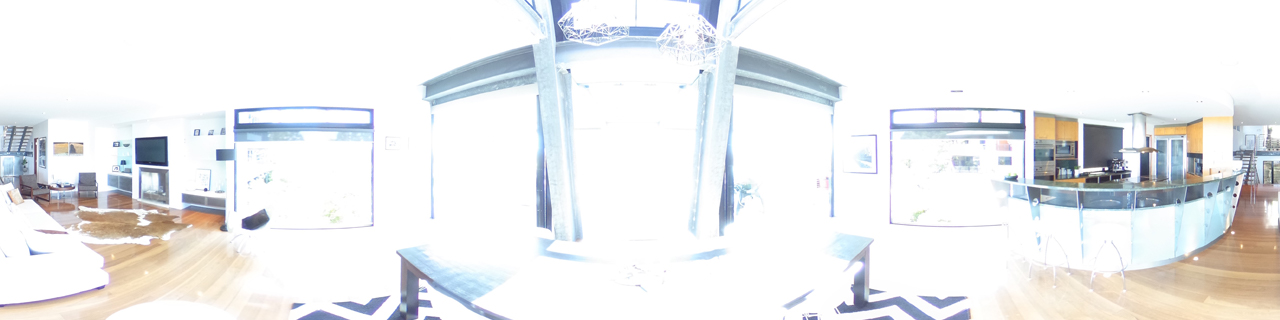
We need 1 final exposure to make this all work. The shot that is very light and bright – This is used to fill in all the dark shadows in the photo. It can be good practice to supply two versions of this lighter image! 3to 6 brackets will always ensure you get a great final output!
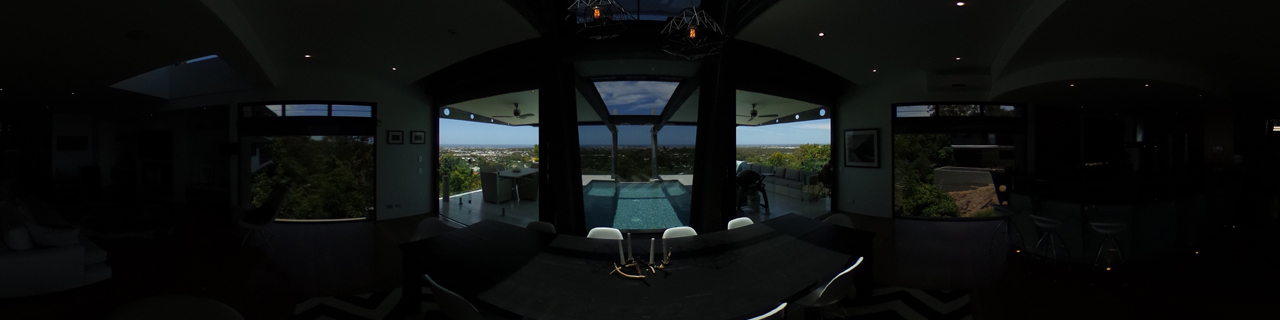
The End Result
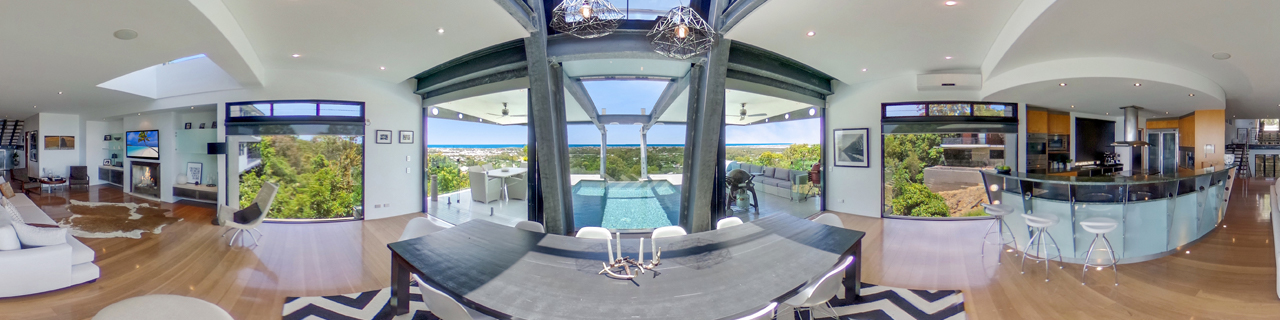
The final 360° image output. This outcome cannot be created from one image alone. You need a mixture of different lights sources to make this 360° work with exterior window detail. If you’re not HDR bracketing and editing your 360 photos – Your still in amateur mode!
Once complete, use the Facebook 360° upload feature with a link to your property listing, to market your property to a wider market. Incorporate this with some Facebook advertising spend and you have an instant 360° landing page on your next property! Off course we can turn all of your 360° images into an amazing 360° Virtual Tour also.
**Brad’s Professional 360° Image Shooting Tips**
- Here are some additional tips to use before you start your 360° shoot, and shoot be applied whenever photographing a property for sale.
- Ensure the house is tidy… being 360° EVERYTHING shows up! We recommend using Brad’s Pre-Photography Check-list so nothing is missed.
- Don’t park your car out the front of the property unless you want your vehicle to feature in every shoot you do.
- Always use a Monopod or Tripod... When shooting outside, BE CAREFUL of windy days or animals knocking your camera over. Our tripod hack is amazing & terrific value for money. For monopod users, I see a lot of people on 360 Forums using gym bumper plate weights on the base for stability when shooting exteriors. If you use this Light Stand & this Mini Ball head for your 360° tripod, you won’t require the extra weights!
- If your property has external views… It’s always good to inform our editing team when you upload the images. That way they can take extra care when editing the view outside.
- Ensure nobody is visible in the property shots – Always use a self-timer and hide away from the camera shot via Bluetooth – Pairing smartphone as remote is the easiest method.
- Don’t shoot straight into the sun if you can handle it… Always ensure your camera is in the shadows of the home outside to minimise camera flare. If possible, it’s best to take both angles (1 in the sun & 1 in the shadows of the home) & edit out the worst shots later when you can see on a full screen. If you can use tree foliage shadows also this can help reduce solar flare from the sun. If you are HDR Bracketing directly into the sun, please send us
double the number of brackets to work with. This gives us more photo information to work with to get the best outcome. - Go for a walk through the property first to work out your flow – Straighten all chairs & ensure everything is ready to go. It’s never best to move items once you have shot joining rooms for premium results.
- I usually keep the front door closed, but this is personal preference.
- Open up all of the doors, sliding doors + blinds to create space & flow – Close blinds if you are trying to hide neighbours.
- Turn on all of the lights & lamps in the home.
- Keep all of your 360 shots on the 1 level for consistent results. Usually shoot between average chin & eye level. Always keep your tripod on the ground.
- I usually take my images in the middle of the room or area of the home. It's super important to include hallways showing doors or joining access areas so we can create the hot spots to jump smoothly from spot to spot on the tour.
- Garages, Walk-in Closet’s, Balconies, Lobby’s, Patio’s, Pool areas or Common Property is always a good idea to shoot while on-site.
- ISO should always be 100 or as low as possible.
- Keep 360 camera in Jpeg setting – Largest size possible.
- Automatic HDR setting “on” if your camera has that option. For more advanced shooters, Manual mode & bracket yourself for premium exterior window detailing. If you want to know more about how to HDR bracket using a 360 camera watch this video.
- For premium results its best to include a Floor plan on your Virtual Tour. These are easy to measure yourself & we have a great guide on this here… off course we can re-draw them professionally & our 3D options are very popular (Similar to a Doll House view). If you don’t have a laser or tape measurer, here is a cool hack if you have a paper & a pen.
- Once you have taken your images on-site, Upload to www.BoxBrownie.com 360 Virtual Tours section. REMEMBER, if you want to “edit” the photos first, you must upload a job prior to creating the Virtual Tour via 360 Image Enhancement or 360 Virtual Staging.
- Here is a great Blog on how to shoot & upload your Virtual Tours to BoxBrownie.com.
This all sounds awesome… What’s the catch?
All you need is the 360° camera to start and we’ll do the rest. Just upload your bracketed 360° images and we’ll blend and enhance them for US$4.00 per image.
To top this off, you also receive free advice from the Global real estate marketing experts!
Get ahead of your competition with 360° images to market your listings, and upload your photos for editing here.