USING YOUR CANON M3 CAMERA LIKE A PRO
[UPDATE] The Canon M5 EOS has superseded the M3.
You have all the gear (Canon M3 Camera and external flash), you need to get out and start shooting!
Having the correct equipment is only part of getting the best real estate photos, being able to utilize them to their full capacity involves practice and a bit of inside knowledge. The following are a list of steps using your camera like a pro.
How To Take Photos Like a Pro On Your Canon M3 Camera
Getting Ready to Shoot
- Set the camera up on the tripod at your preferred angle, turn the camera on. Ensure the tripod is steady and on an even surface, this will reduce the chances of the photos being blurry. This is particularly important when taking Bracketed photos, as it involves an overlay process of the same image at different exposures.
- Select the AV setting and ensure your Aperture Priority settings are between F7.1 and F11 for best results. Use front circle thumb wheel to change the aperture value (Every camera is slightly different, so check the manual as well).
- ISO film speed is always
on 100 ISO. It never changes, and you will have already set this up in the previous step. - Mount your flash securely on top of the camera, turn flash power onto lowest setting. Open built-in wide Flash Extender. Make sure the flash is tilted to face the roof at 45 degrees.
- Press the Q SET button near the camera LCD screen. Use the circle button, and toggle down to the Self Timer icon. Ensure you have it set on 2 seconds per photo (this will stop any camera shake between your shots by pressing the shutter release button).
This timer function will automatically stay on for the whole shoot, so unless you turn the camera off, the function will stay on which is handy!
(There is more information on this in the camera manual). - Half press the Shutter Release button to focus on your subject and release. Then press the MF button, this is VERY IMPORTANT – Its located next to the Q SET button. This will turn the automatic focus OFF between your bracketed shots, this stops the camera from altering focus points which can change each shot.
(More information in the camera manual)
Taking The Photo
- Take a single photo with the exposure compensation dialed to “O” (Top circle dial on the right side of the camera).
Don’t worry if the room is dark and the windows are bright. This is why you take a mixture of images and then our team blend them together. Click here to see how the photography and editing process works.
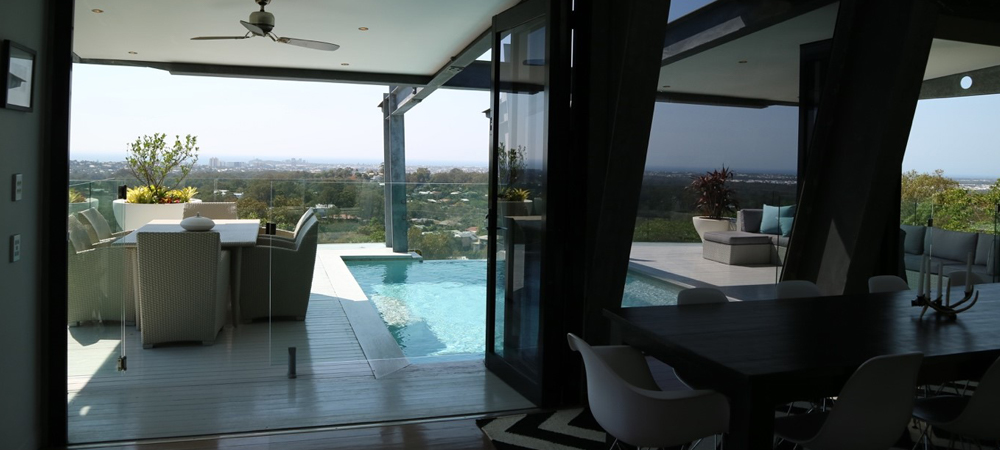
Your first image will look something like this:
Parts of the interior will look dark, and minor exterior window details will be presented mixed with bright light outside the window.
- Take another exposure compensation between “+2 and +3” (or both). This image is used to brighten the interior shadows, so windows will look very overexposed and interiors will look much lighter. Every home is different
so ensure the interior is very light, we can use this photo data later.
Our photoshop gurus will place the light areas of the photo, over the darker areas, and erasing what they don’t require.
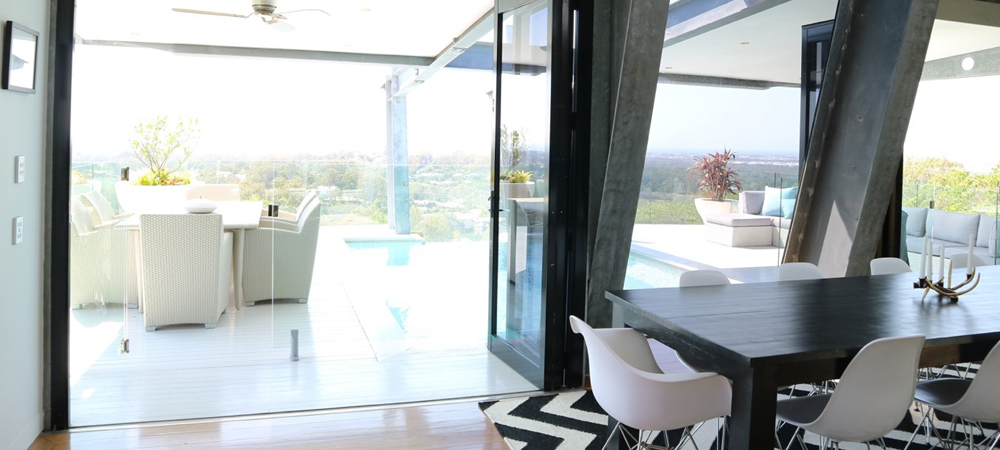
Your next image should look something like this:
Interior should be much lighter in focus, and the exterior window detail will be lost in a white ‘haze’ outside the windows. If the camera compensation does not look light enough, you may need to take a quick MANUAL shot.
- Finish it off with another bracket to make the minimum of three photo HDR blend, with the exposure compensation between “-2 and -3”. The internal part of the image will look very dark and outside the window will look good. This darker shot is used in our blending process so that in the final image you will be able to see out the window. It is essential that this shot is taken so our editors have enough “photo information” available to create professional quality images.
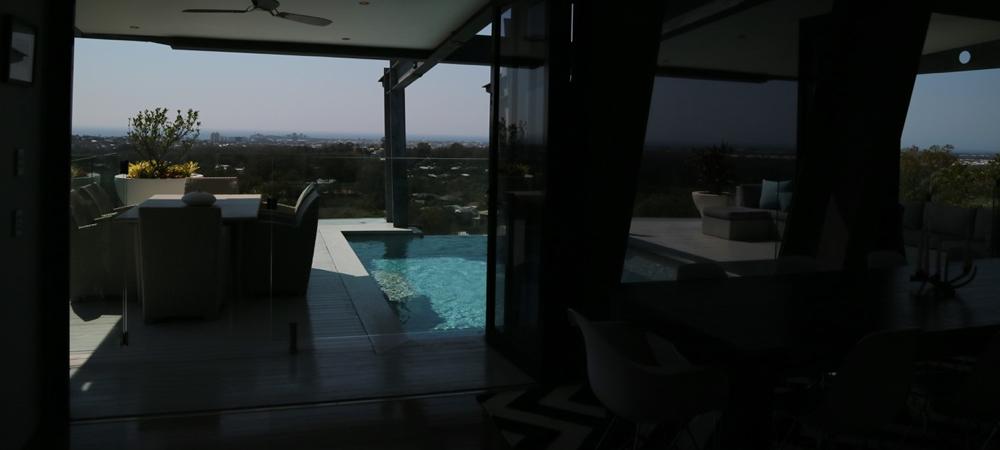
Your image should look something like this:
The interior walls will be very dark, and the window details should be more present. As mentioned, if you have a high contrast area you may need to take an additional MANUAL photo.
Using Manual Mode
If you feel you don’t have enough ‘photo info’, on the standard 3 x bracket photo exposure compensation dial (eg. You can’t see the ocean view outside the window property or the interior brightness isn’t light enough), you’ll need to turn the camera to MANUAL mode by switching the dial to the “M” icon. Once you have selected the MANUAL mode you will need to do the following:
- Adjust the shutter speed lighting on the camera by turning the knob until you find the exposure that works best for your space (Note: Ensure only shutter speed is changed, not the aperture). This will give you the photo information needed in higher contrast areas to see outside the window or to light the dark interior that bit extra.
(Refer to the camera manual for further information). - For most homes 3 brackets are enough, however, if you’re worried about your lighting brackets send us between 5 and 7 jpeg brackets at different exposures. With the flash on LOW and on HIGH if required (don’t move the camera or tripod between brackets, as we can’t fix blurry images), we can always blend the additional images you send us. Generally, the more photo information we have, the better the editing will be.
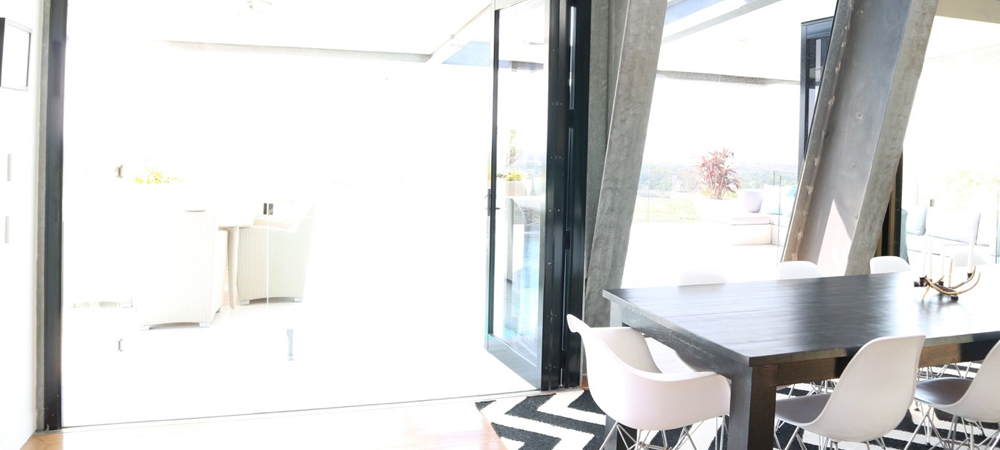
Your ‘Manual’ image should look something like this:
The interior detail will be very light, and the window details should be overexposed. This additional image will give our editor enough photo information to create a beautiful blend and will lift all the internal shadowed areas.
- Before taking your next photo, don’t forget to push the MF button to OFF before you focus on your next shot.
Editing Your Photos
Once you have taken all your “bracketed” images, all you need to do is upload them to BoxBrownie.com and let us do the rest.
When you upload the images on your dashboard ensure you select the ‘Use HDR bracketing’ tick box and upload the files using the ‘Image Enhancement with HRD Bracketed images’ tab. Then it is just as easy as following the prompts to get your image off to our photoshop guru.
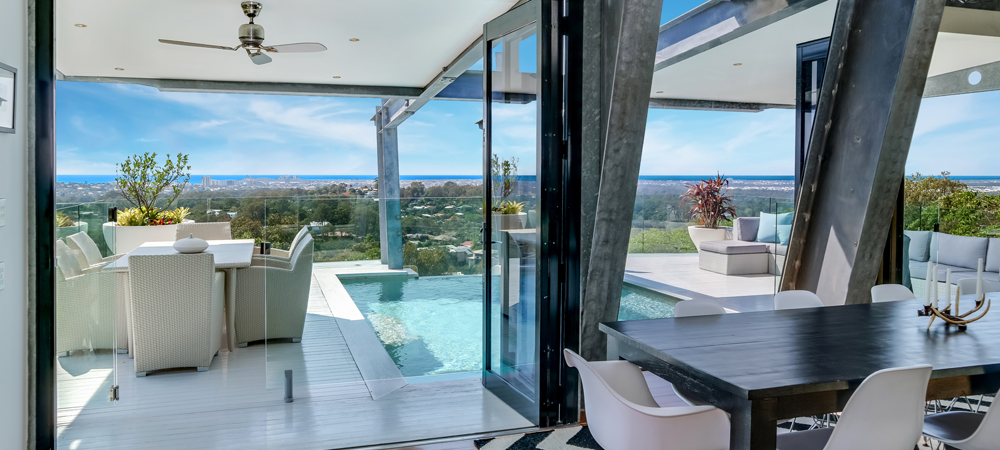
Your final image will come back looking something like the one below. All the different exposures are blended together to form one stunning image, showing all the details of the room.
Finally, if you ever want to delete images from your memory card, we recommend you FORMAT your memory card by going into SETUP 1 and following the FORMAT prompts. Formatting your memory card is much better for it than deleting images from it over time.
Once you’ve received back your bracketed images for enhancement, why not check out some of our other edits like Day to Dusk and Item Removal.