WHAT IS A VIRTUAL TOUR?
Introduction:
There’s no doubt you’ve heard of the term ‘virtual tours’ when it comes to the real estate industry but have you ever seen one for yourself or even created one for your own listing?
In this blog, we are going to break down all the key elements of virtual tours including what a virtual tour actually is, how to create a high-quality tour from start-to-finish and how to go about virtually staging your 3D tour so it is engaging for your potential buyers.
For this example, we will be walking you through a real-world commercial listing and show you just how easy it is to start leveraging the power of Virtual Tours in your own property marketing.
Before we go any further, if you’d like to try out a virtual tour for yourself, you can click here and get the complete user experience for yourself.
What Is A Virtual Tour?
Virtual Tours are becoming very popular in the real estate industry as agents look to leverage virtual reality and give their potential buyers an engaging experience.
Essentially, Virtual Tours are an interactive simulation of an existing property that allows buyers to experience the listing in a way that floorplans, panoramic images, videos, or still images can’t deliver.
 You don’t have to be a professional photographer to create one and your buyers can view them online and across all devices (including mobile devices) from anywhere in the world.
How To Create A Virtual Tour?
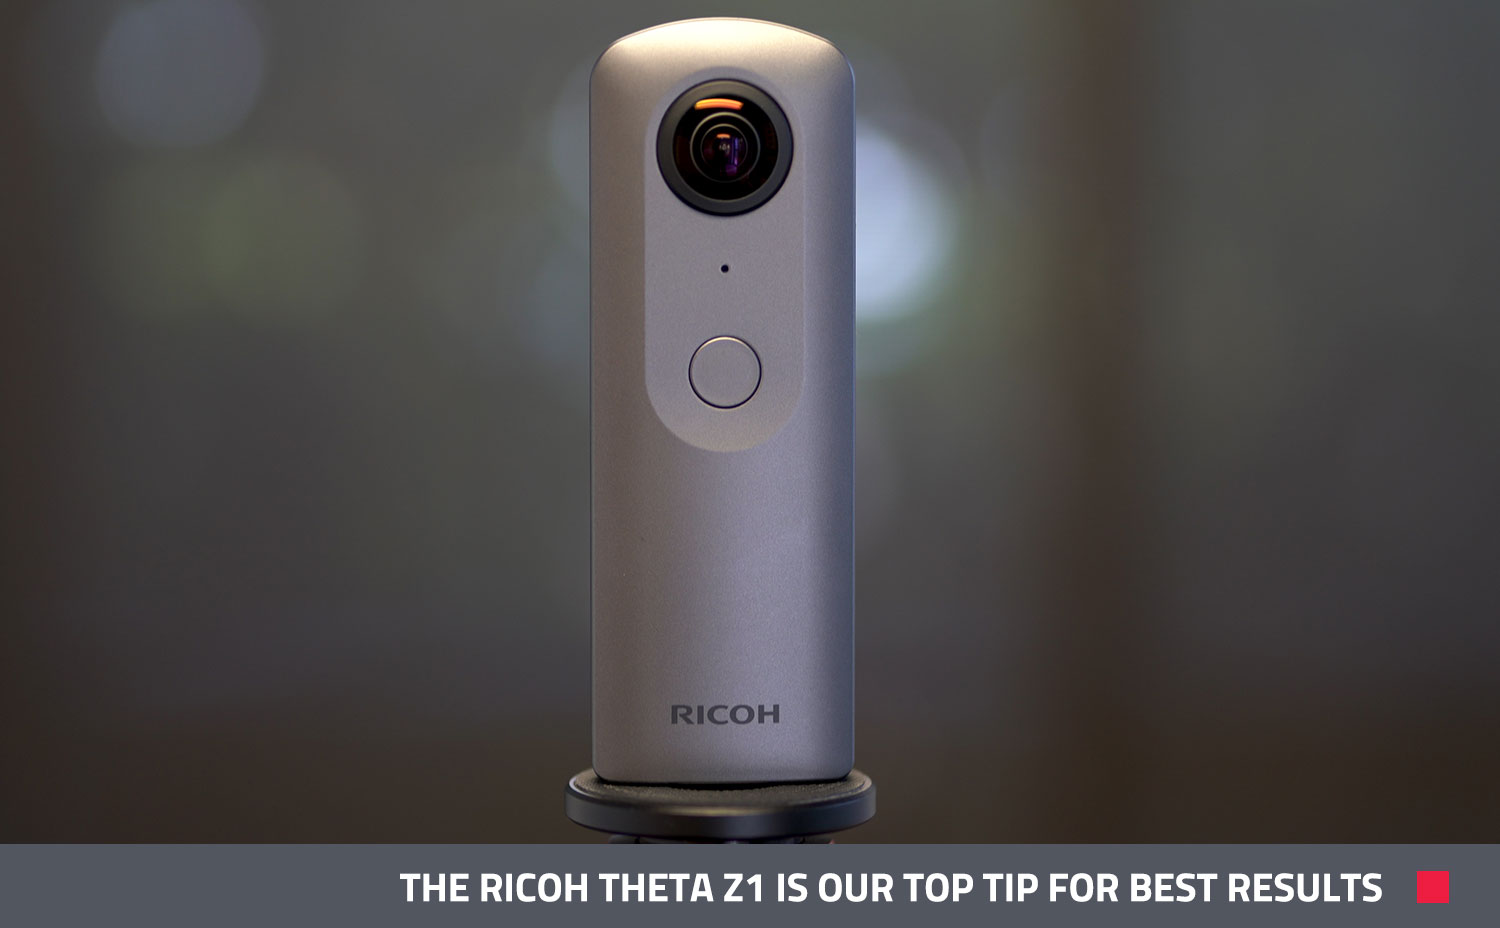
To get started, you will need a 360 camera. At the time of writing this blog, we recommend the Ricoh Theta Z1 camera as it produces the best quality results and is simple to use. You will also need a monopod stand. The Ricoh Theta V is a great option for agents on a smaller budget.
To take the photo, place the camera in the centre of the room, remove yourself from frame, use your smartphone to scan around the room and then take the shot. The camera will produce an image that looks like a stretched-out photo.

Complete this same process for each room that you want to display in your virtual tour. When shooting a commercial listing this will likely include the reception, boardroom and office spaces. Where suitable, it’s a great idea to capture the outdoor areas to give buyers a feel for the location, similar to Google Maps.
Once you’re happy with your shots, it’s time to have your images edited so your listing stands out from the crowd and is showcased in the best possible light.
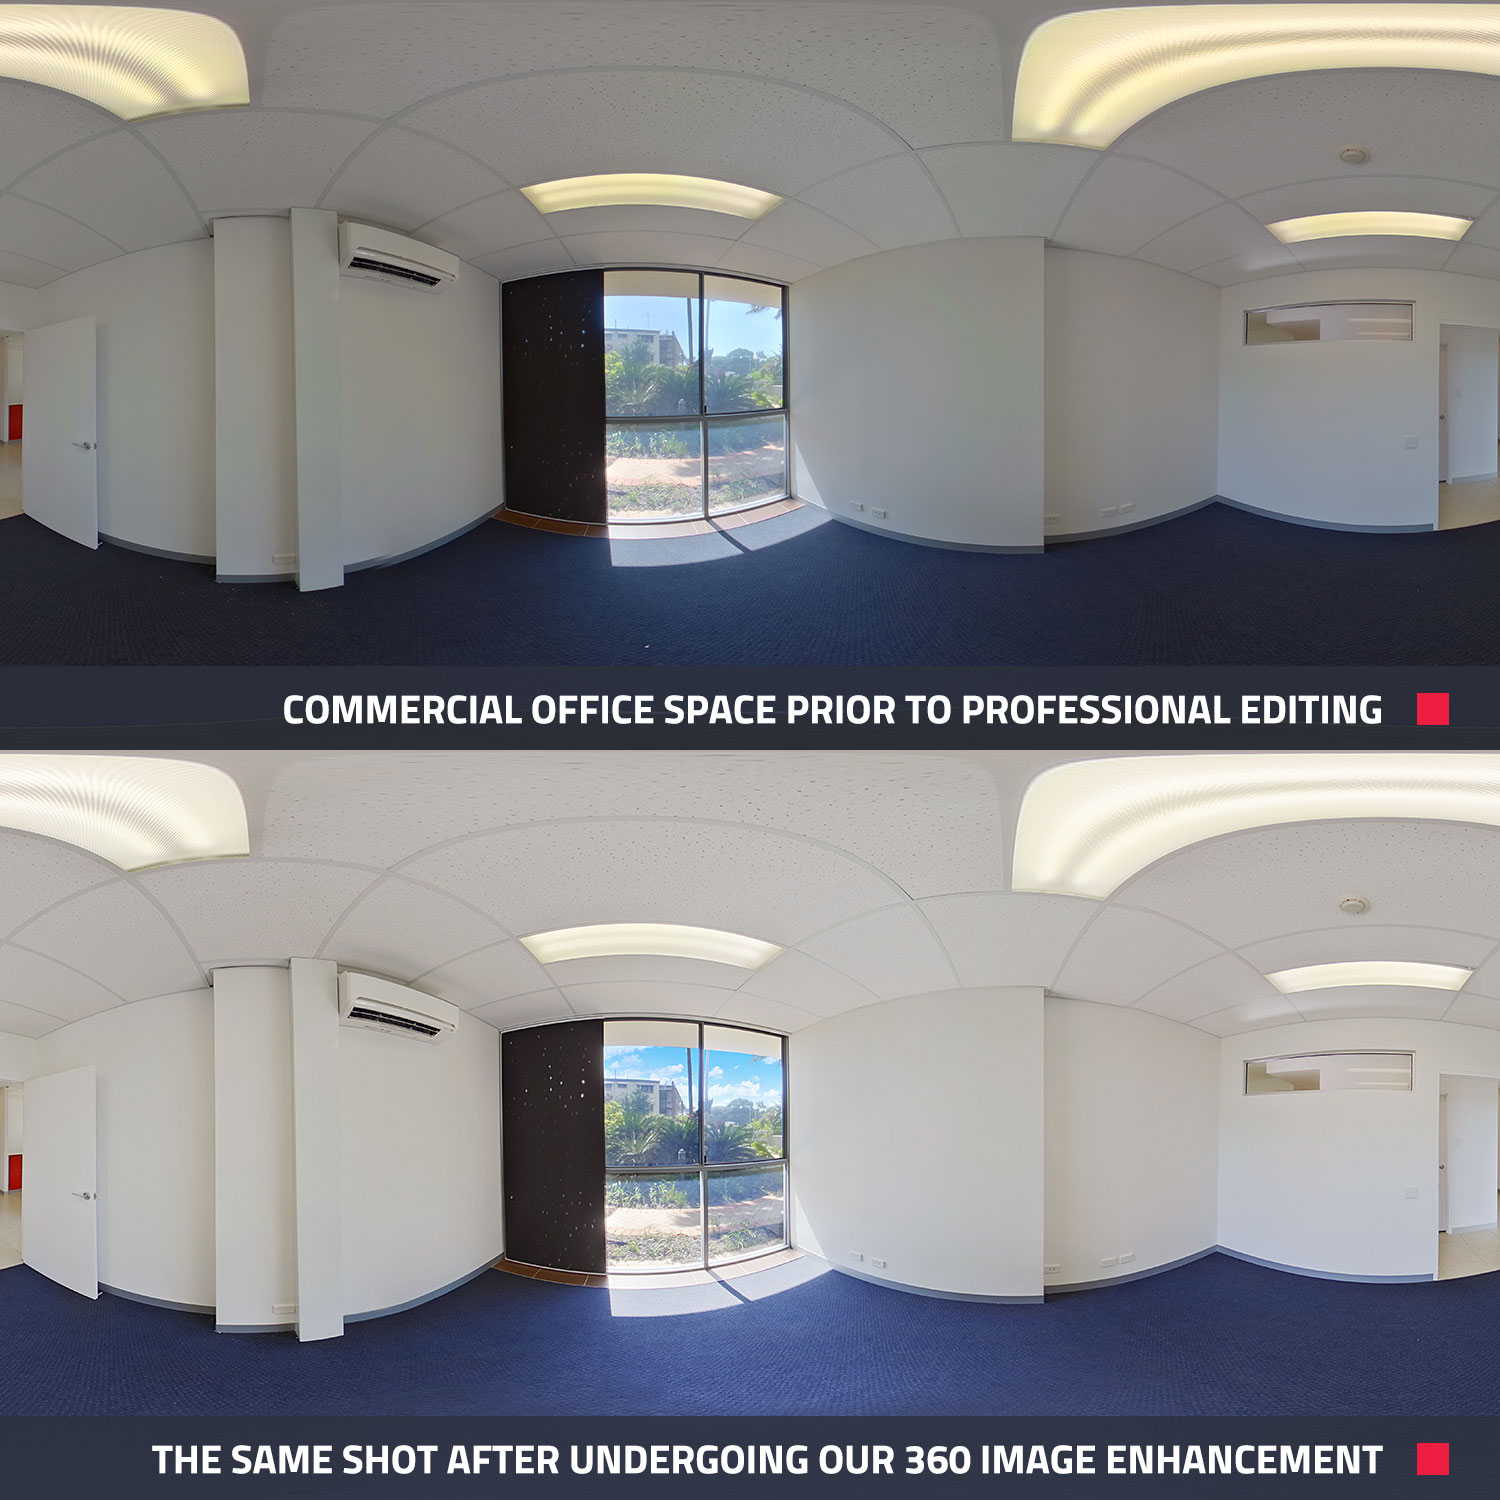 To have your 360 images edited, simply log on to the BoxBrownie.com dashboard and select the 360 Image Enhancement edit. Then, upload your images, select your preferences and submit your job. Within 24 hours, your images will be ready to be built into a Virtual Tour.
To build the tour, log back into the BoxBrownie.com dashboard and select 360 Virtual Tours. Upload your edited images, name each room and submit your job. Within 24 hours, you will receive a completed Virtual Tour ready for your marketing. This tour can be shared on your website, social media, email or MLS.
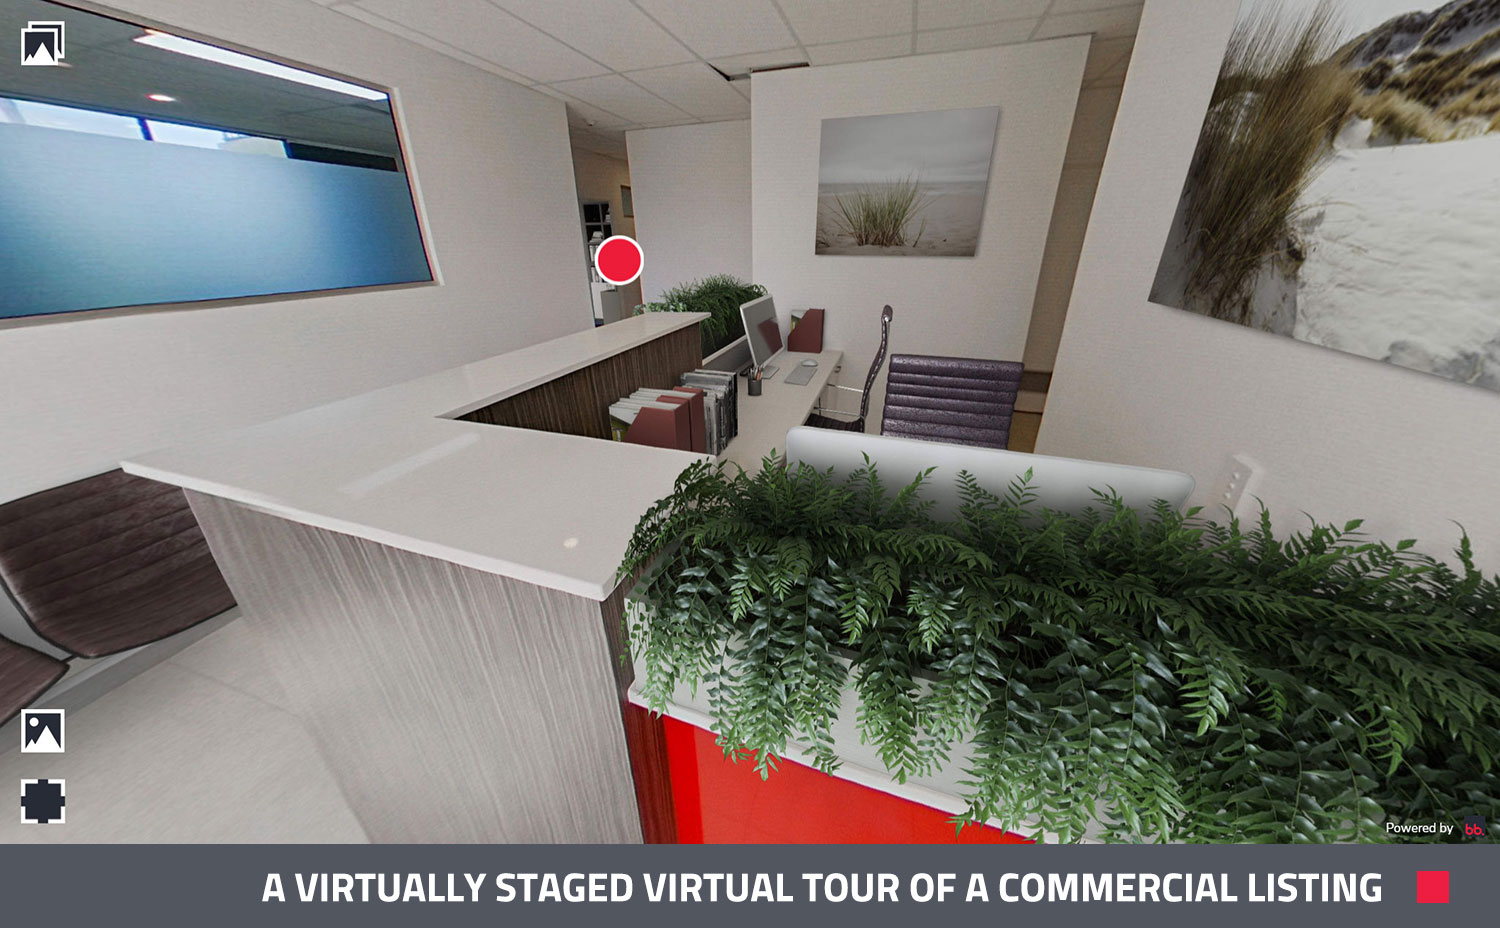
How To Virtually Stage Your 360 Virtual Tour?
Virtual staging is a great way to show the potential of a property and give context to each room. To have your tour Virtually Staged, log into the BoxBrownie.com dashboard, select 360 Virtual Staging, submit your job and we’ll handle the rest. It’s a great idea to give our team an indication of the style of decor you like, even by simply grabbing a reference image and uploading it along with your job.
Conclusion:
As you’ve seen in this blog, creating a Virtual Tour, having it edited and then virtually staged can be quick, easy and super effective. If you’re keen to give it a go, simply head to BoxBrownie.com and sign up for FREE today. If you have any questions or would like to know more shoot an email to [email protected].