HOW TO SHOOT A HOUSE FROM START TO FINISH
Introduction
There’s no doubt, photographing an entire property from start to finish can feel like a daunting process. You might have a small window of time to capture every area of the house, finding the right angles can seem like an impossible task and the pressure of showcasing the property to its potential can all get a bit too much.
These are common challenges people within the real estate industry face every day, and our co-founder Brad Filliponi was no different when he was a real estate photographer. But don’t despair, Brad has taken the time to put together a video demonstrating a property shoot from start to finish and highlighting his top tips to ensure you nail your property marketing.
In this blog, we will deconstruct Brad’s video and look at what it takes to prepare and shoot a property from the perspective of a photographer and how to make the most of their time when shooting your next listing. To demonstrate this, we will be photographing this beautiful four-bedroom, two-bathroom home worth $625,000.
Preparing The Home
Preparation is key when it comes to saving time and ensuring the photographer can get straight down to what they do best. We have a pre-photography checklist which is a must-read for anyone looking to get their listings prepared for a shoot.
“It is the small details that can make all the difference when photographing a property. A good photographer will have a good eye for detail,” Brad Filliponi.
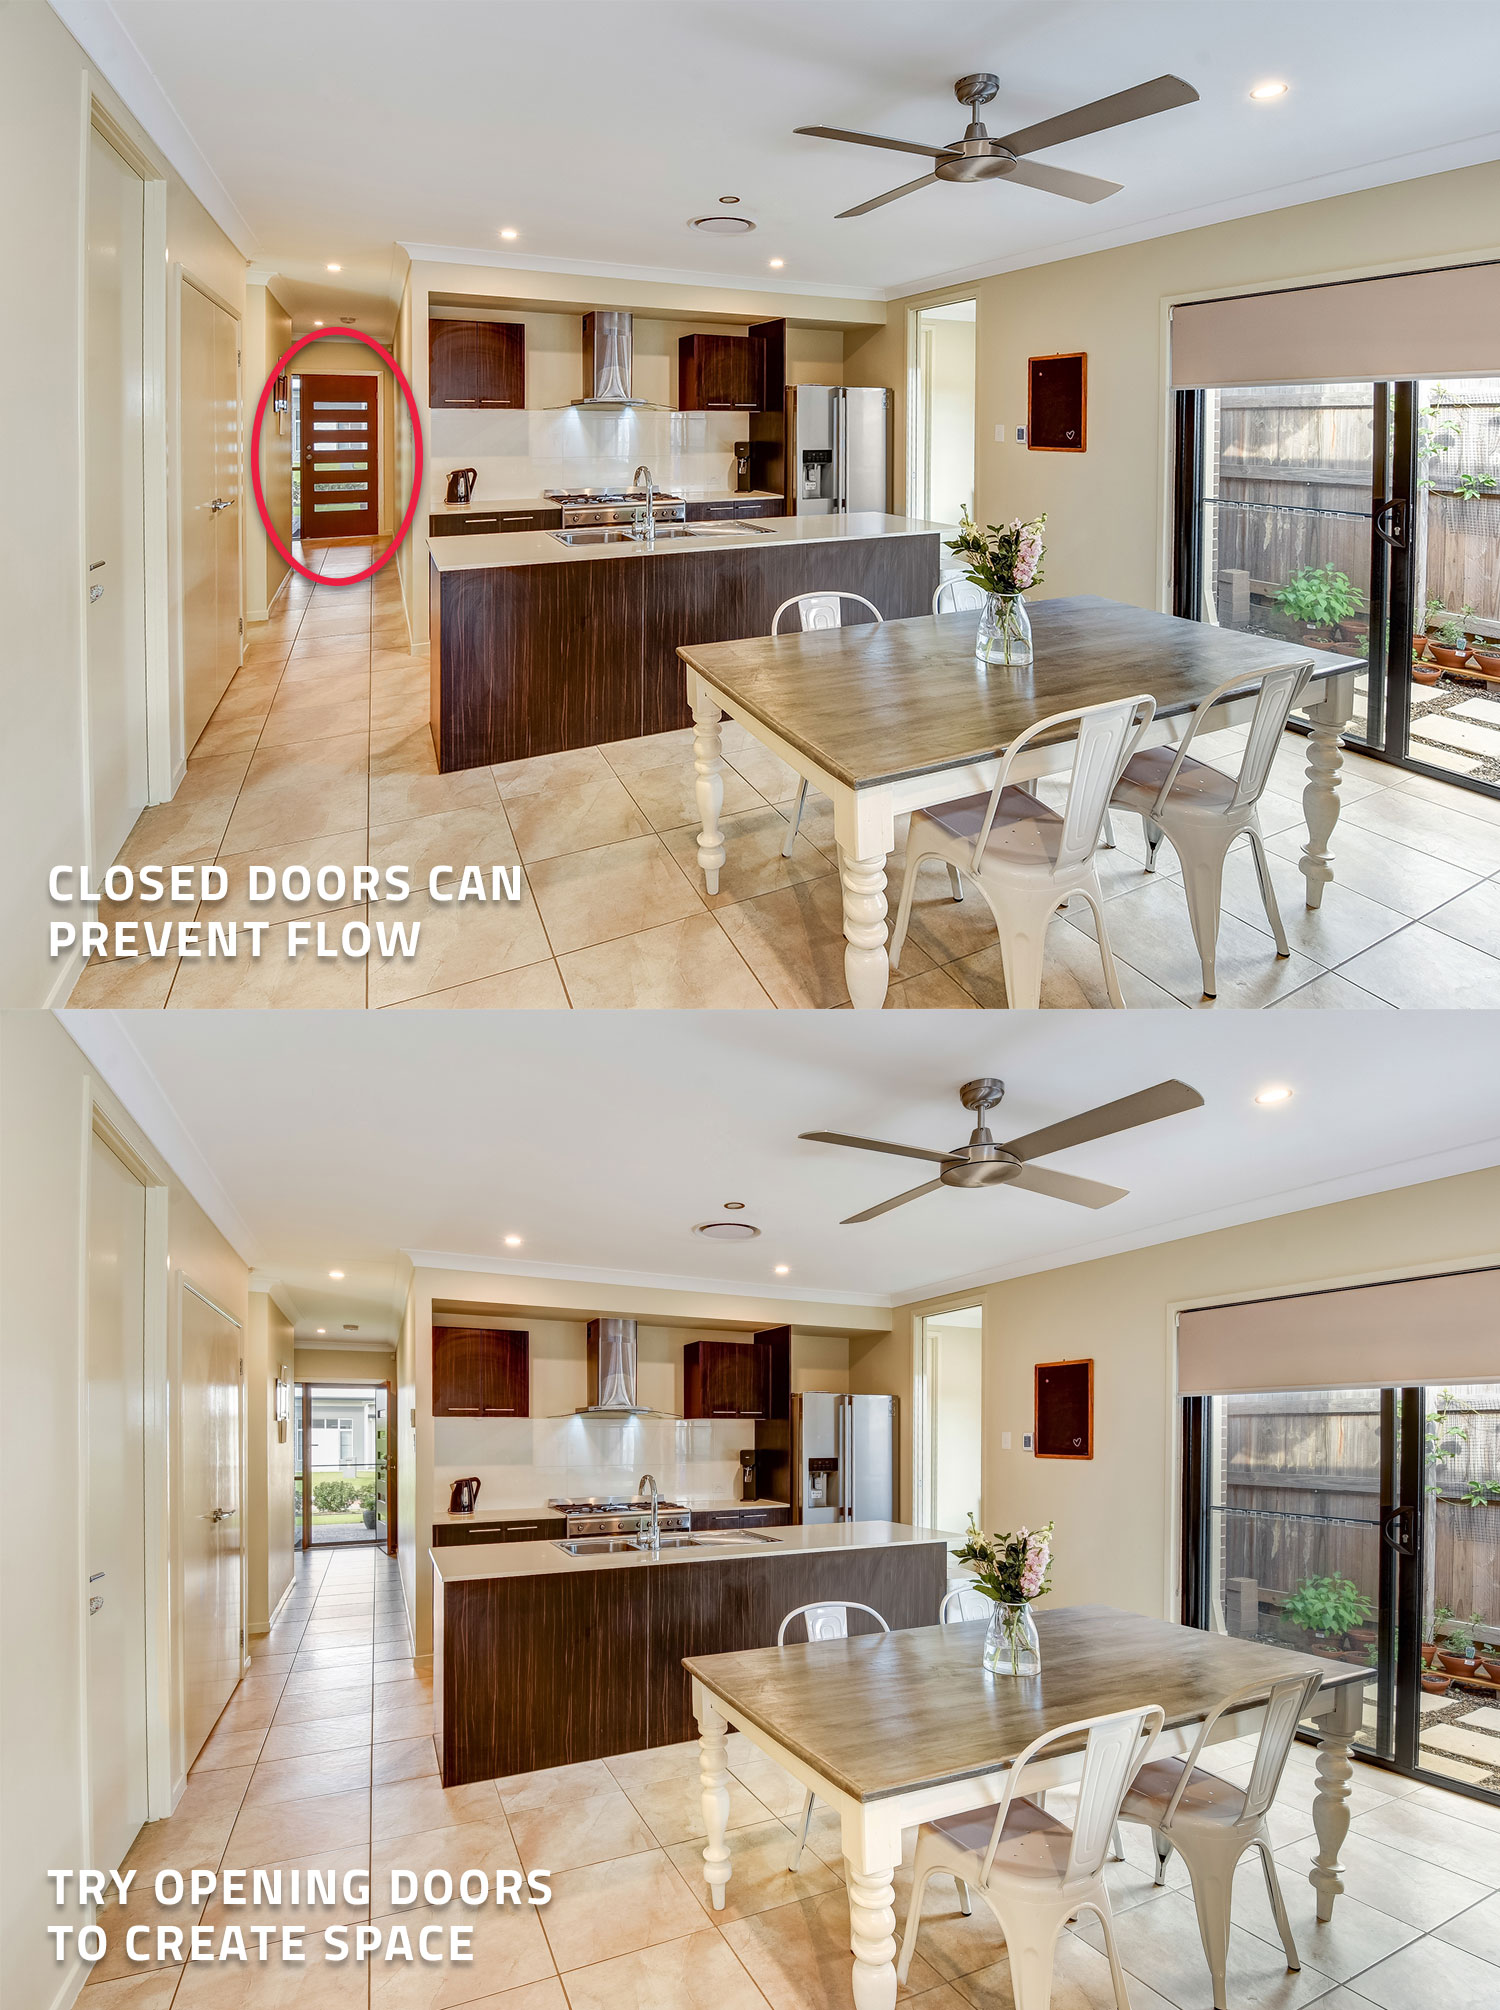
It might sound simple but removing your shoes when you enter the property will stop you from traipsing dirt into the home that may be obvious in the photos. While we are at the front of the house, take the time to open any windows as it frames the image of the façade better and open the front door.
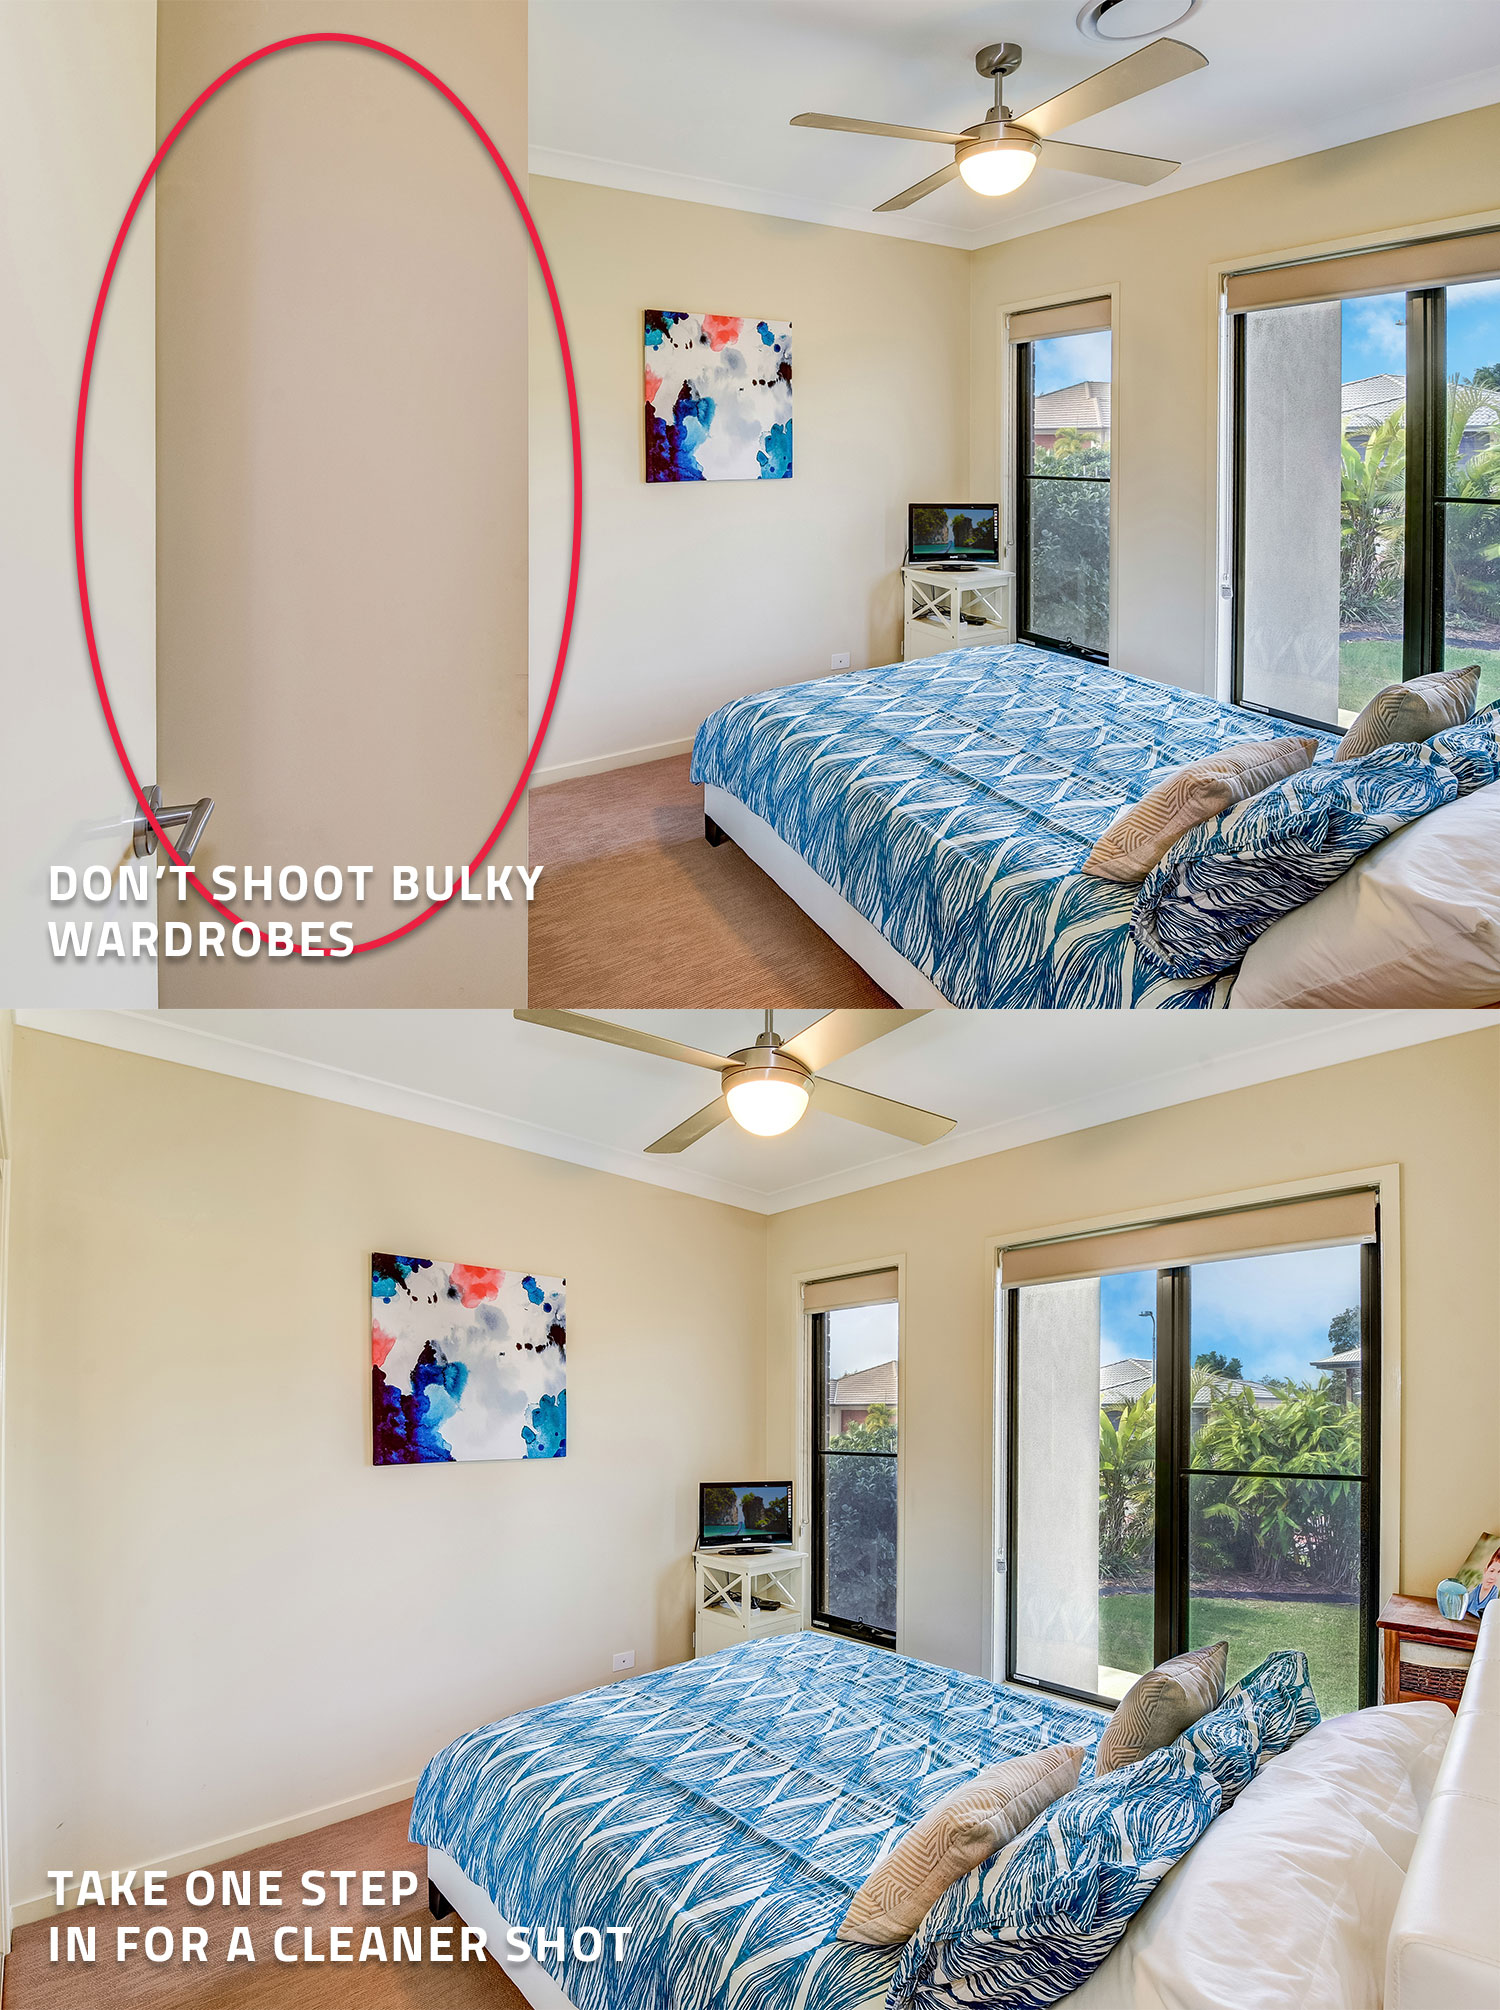
Clutter can have a big impact on the overall feel of the finished shoot. To ensure the home feels clutter-free, hide any remotes, remove any unwanted items from dressers or bedside tables and leave the bedside table lights turned off if only one works.
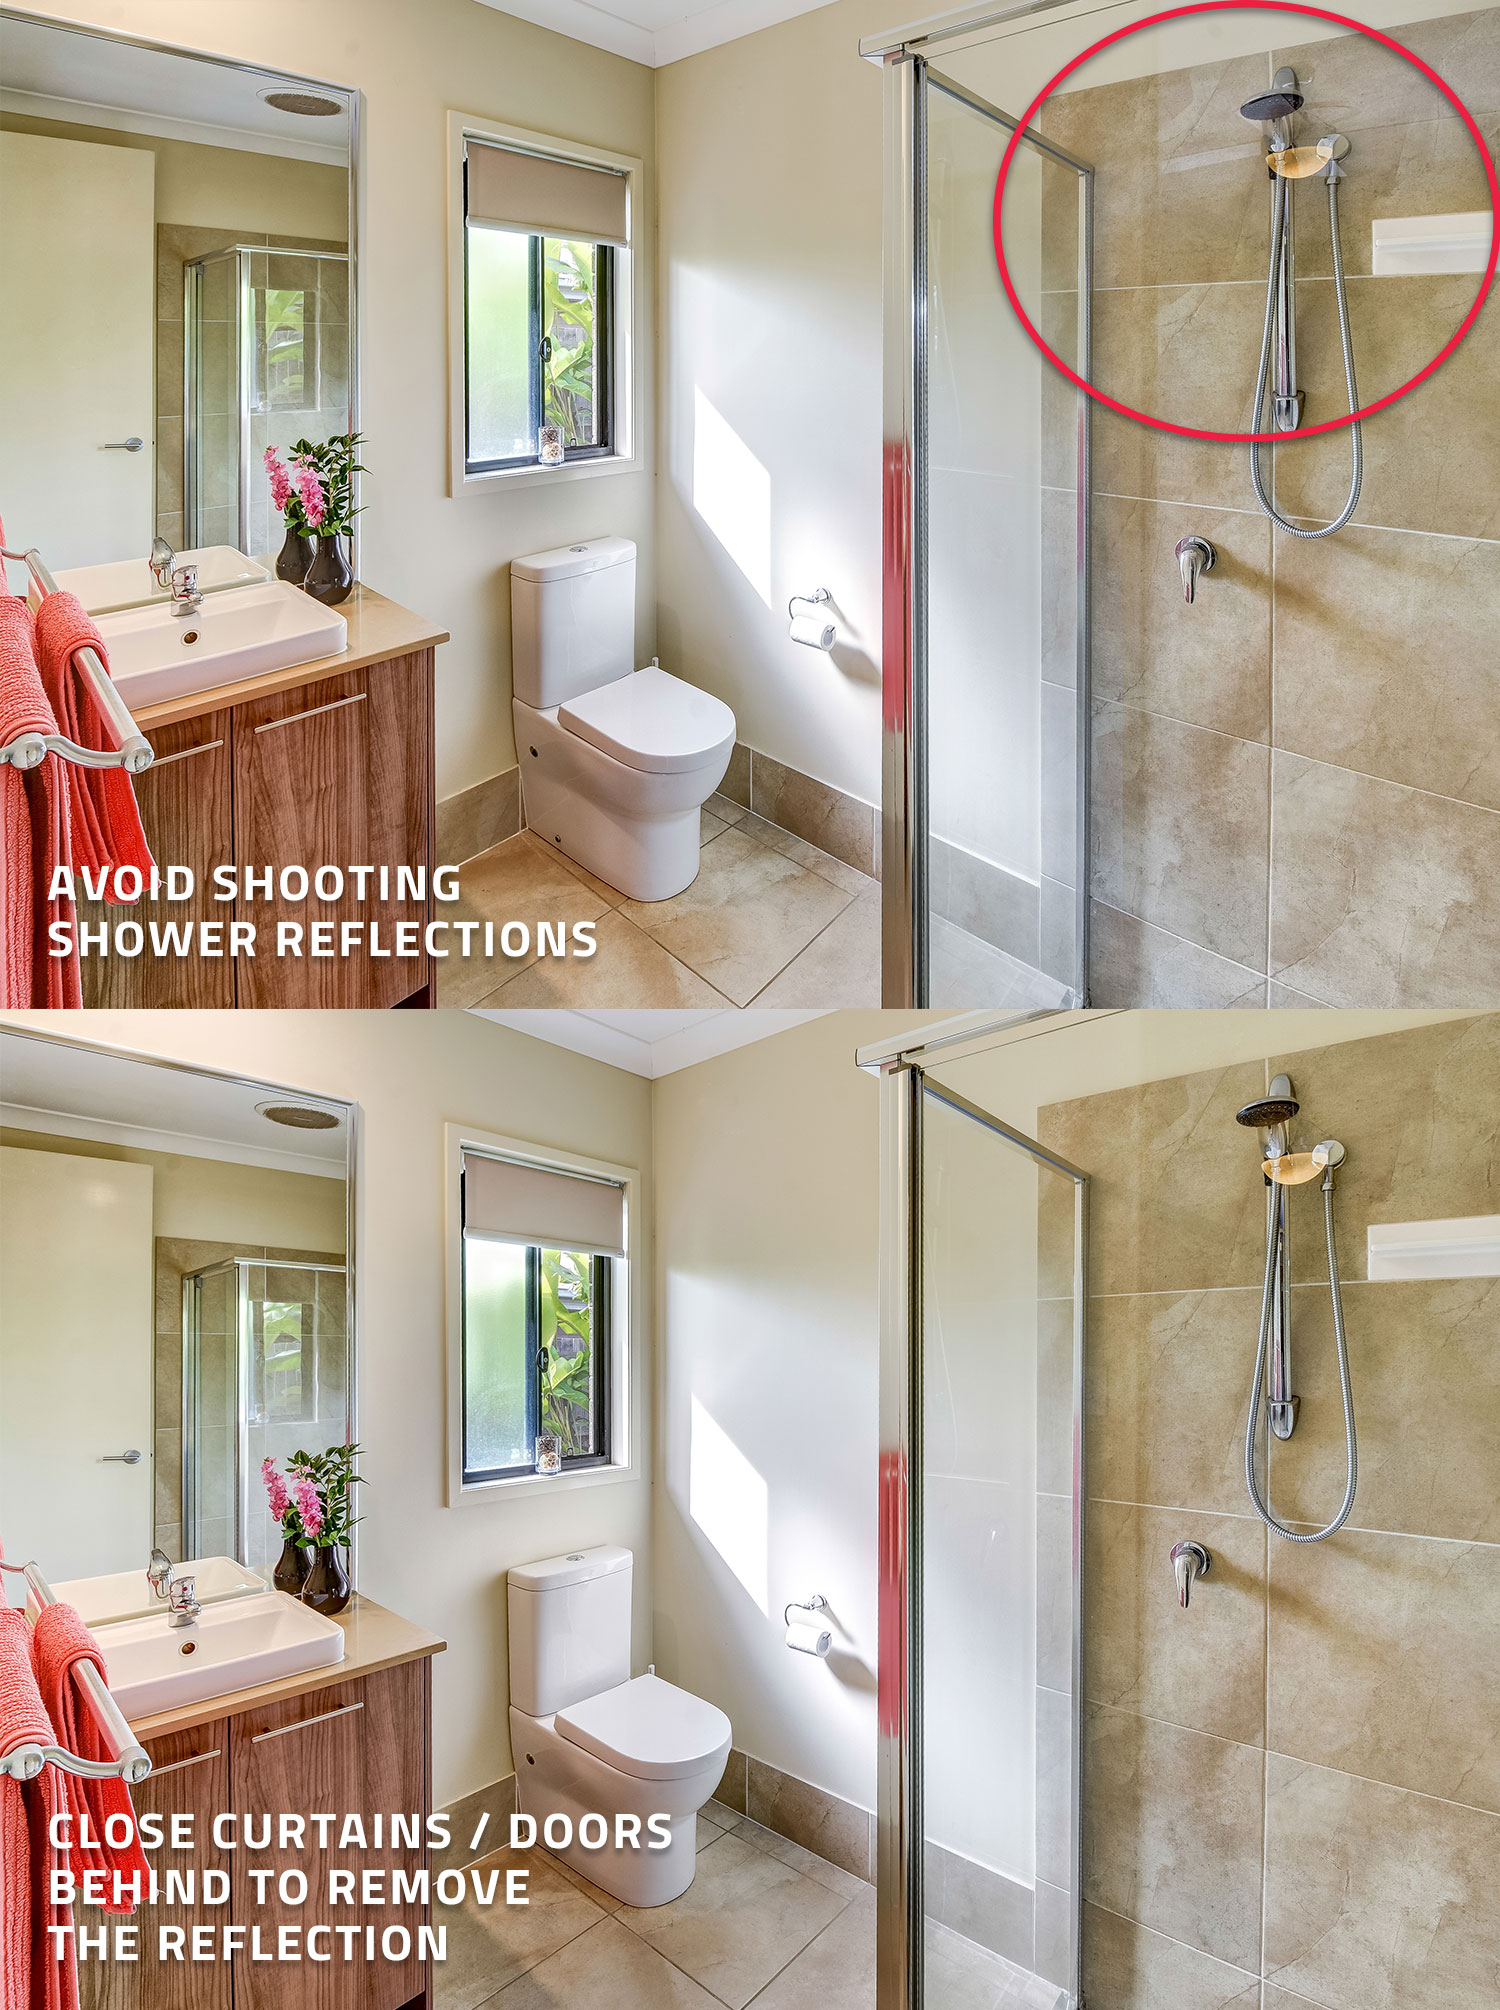
While we’re in the bedrooms, it’s important to ensure the bedding is neat and the cushions are straight. In the bathrooms and ensuites, center the tapware, remove any excess towels and bath mats and hide all the shower items. We can also remove the photographer’s reflection from shower screens using our Image Enhancement edit.
Showcasing appliances is important so be sure to remove any tea towels or oven mitts and turn on the range hood light. Always try and hide any electrical cords where possible and switch on any lights and turn off any ceiling fans throughout the home.
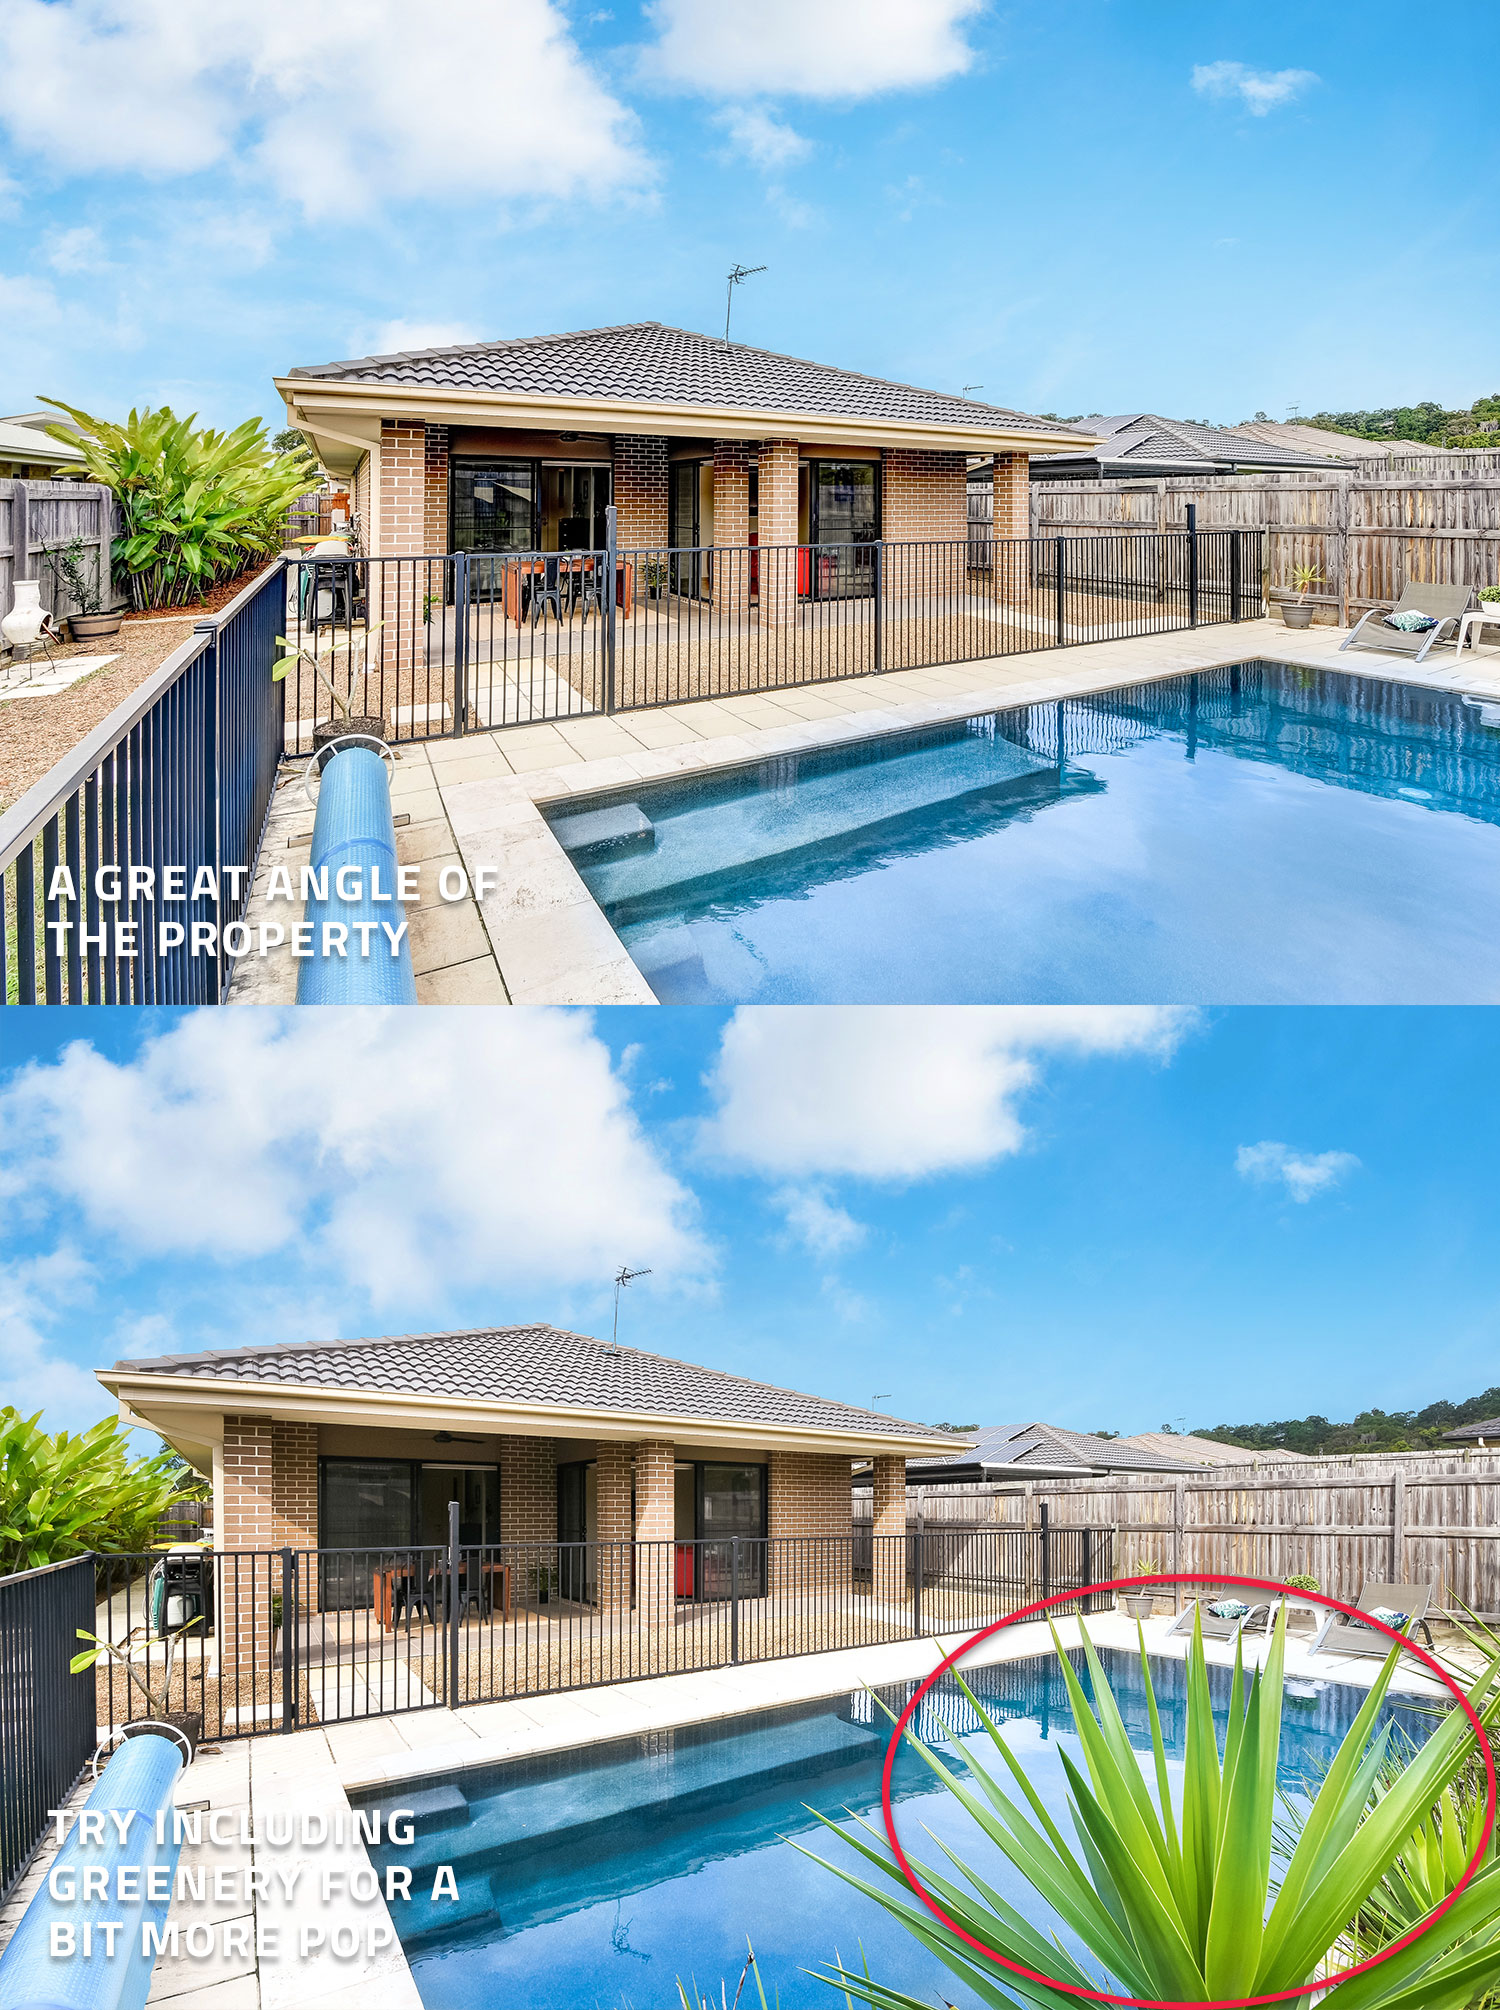
Generally, it’s good practice to open any sliding doors and windows but be sure to pull down blinds to the top of the neighbors’ fence to block any distracting views. Outside, take some time to remove rubbish bins, toys, and accessories. Don’t stress too much if there’s outdated furniture around the pool, photos are usually taken from a wide-angle and they won’t be the feature.
Shooting The House
Whether you’re the one actually taking the photo or not, these tips will help ensure a great outcome from the shoot.
To create a sense of space, keep the doors wide open and shoot at eye level, sometimes this won’t be possible but it’s a great way to give perspective. Don’t be afraid to shoot from multiple angles to give options during editing and work from front to back of the home so you know where you’re up to.
Turn the flash on (except when shooting the bathroom) and shoot brackets to get multiple exposures of the one shoot. We have a blog on bracketing here if you’re unfamiliar with how to do this in a property.
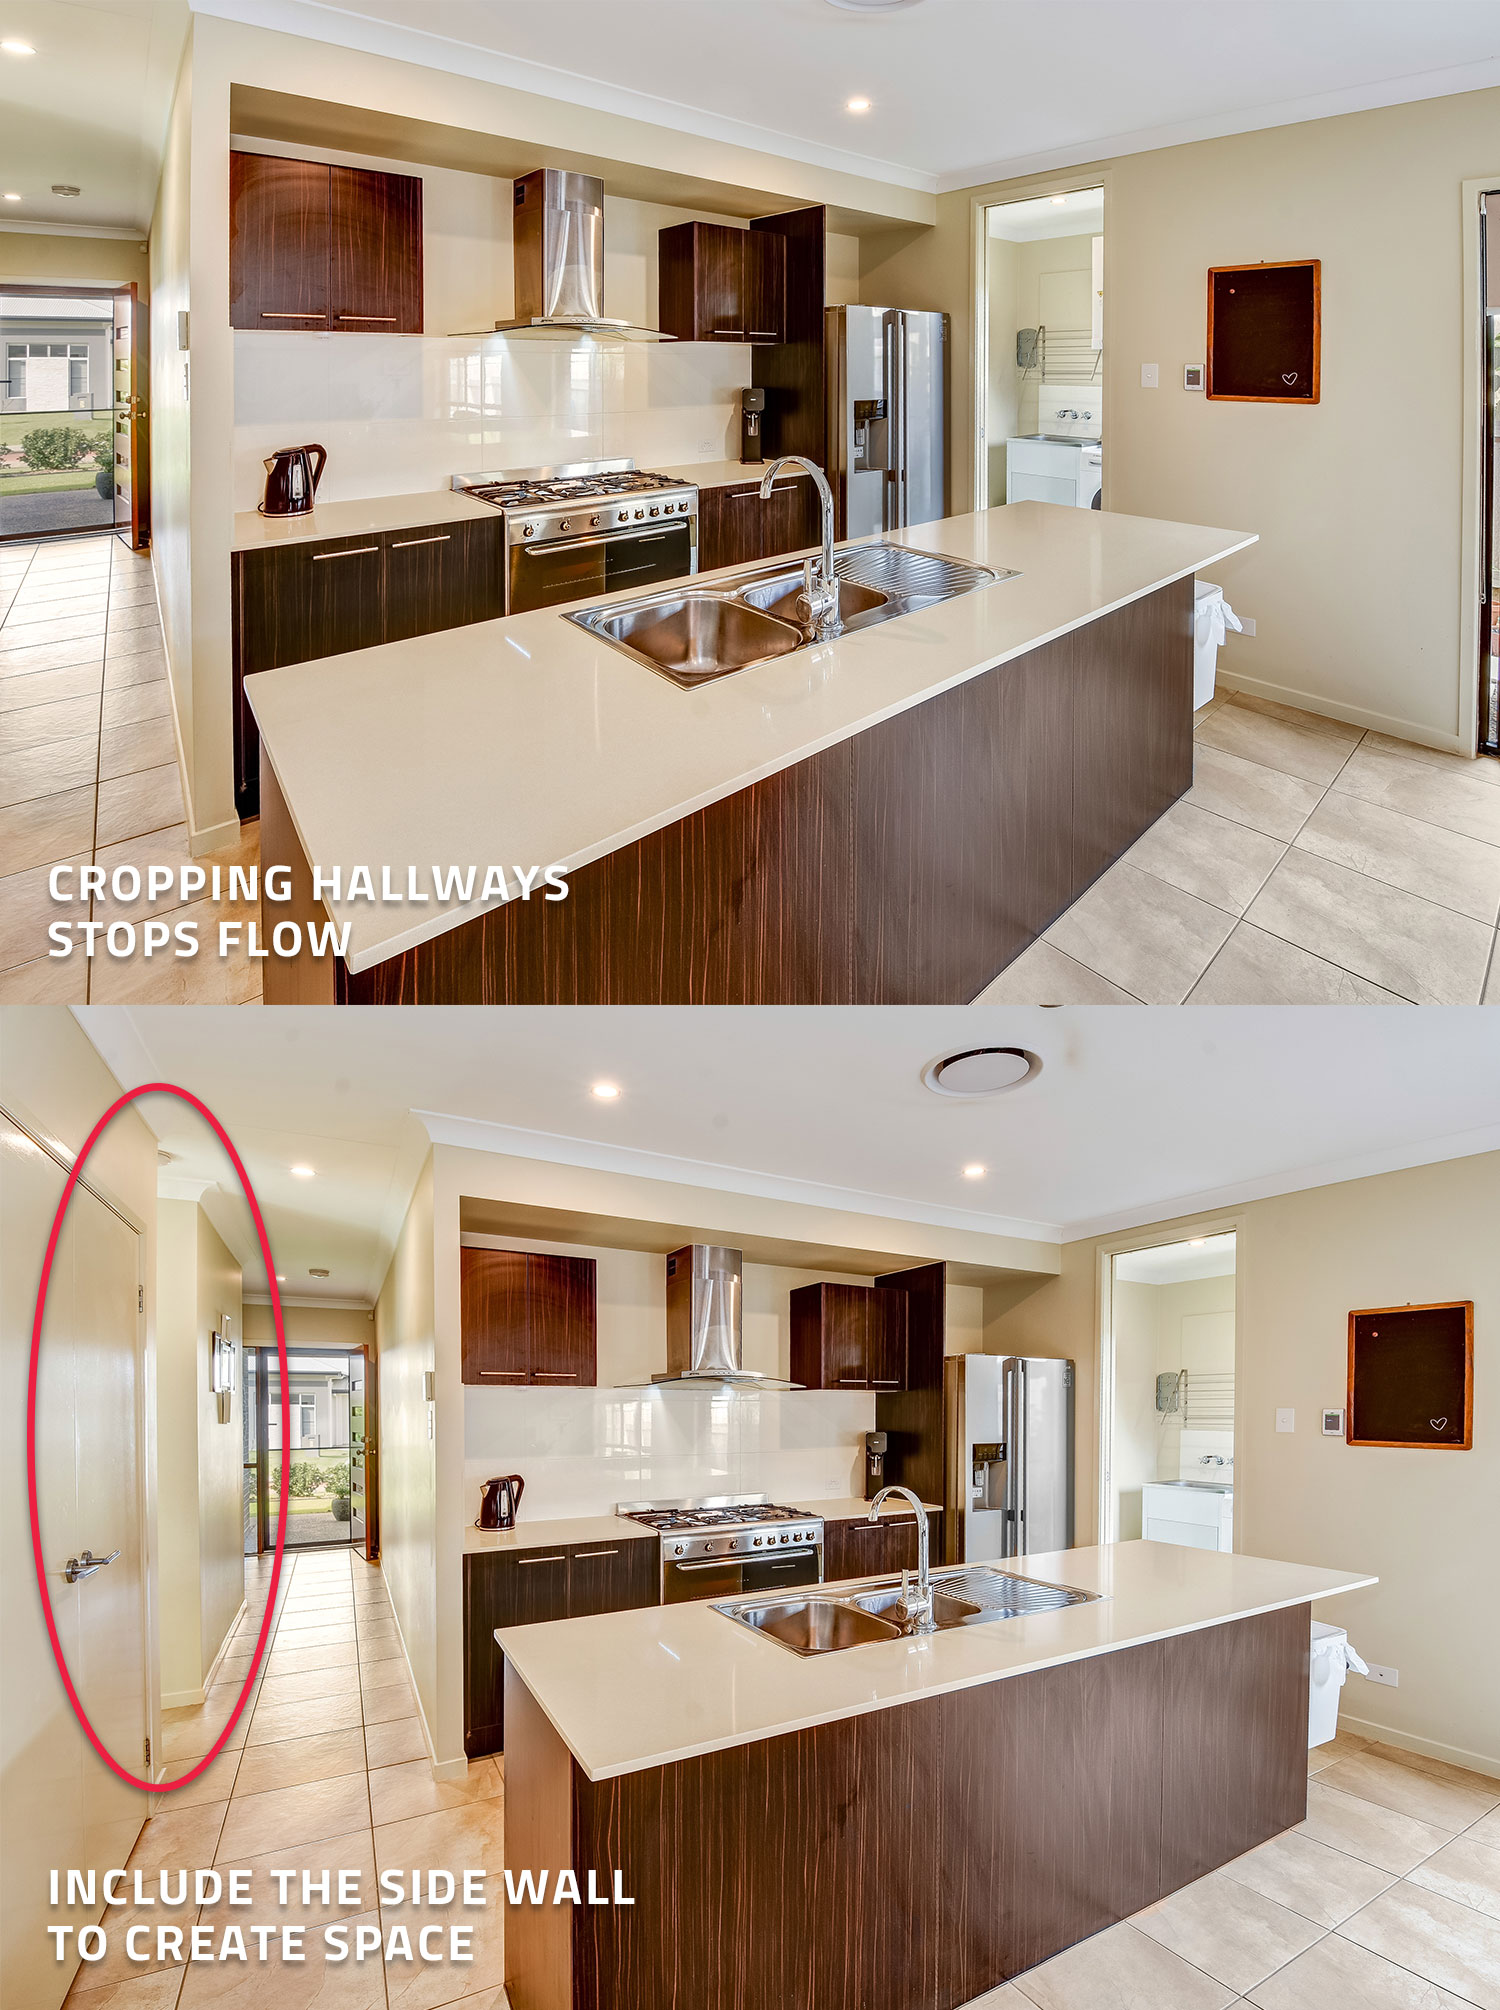
It’s a great idea to include part of the front door when shooting the entryway to better frame the shot and try to include as many areas as possible in one shot to allow buyers to see more from fewer images.
There’s no doubt clutter-free is best, however, we can remove unwanted items using our Item Removal edit.
For that amazing hero exterior shot, use your hand for shade if the sun is out to ensure the light doesn’t affect the image. And before you leave, do one last walk-through to check you captured everything.
“Bracketing is your best friend in real estate photography,” Brad Filliponi.
Conclusion
Presentation is everything when it comes to perfectly capturing the magic of your listing. It’s the little details that make all the difference. Take the time to make the small changes and your marketing will soar to a whole new level.
If you have any questions about preparing or shooting a property, contact us and we can provide tips to get you where you need to be.
RELATED ARTICLES

Selling a home with a breathtaking view but struggling to capture the window detail in your 360 virtual tour? In this tutorial, we will walk you through the shoot process step-by-step and show you just how easy it is to showcase your listing in the best possible light and capture the attention of your potential buyers.
READ MORE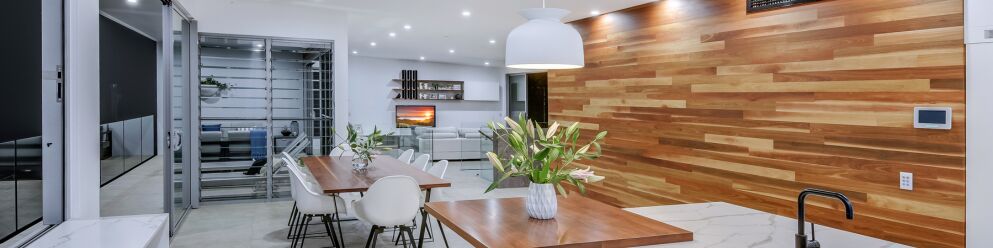
When it comes to real estate photography, there are many things to consider to ensure that the property looks its best, and one of the most important things to keep in mind is lighting. Should you turn the lights on or keep them off when shooting a property? Read this blog to find out.
READ MORE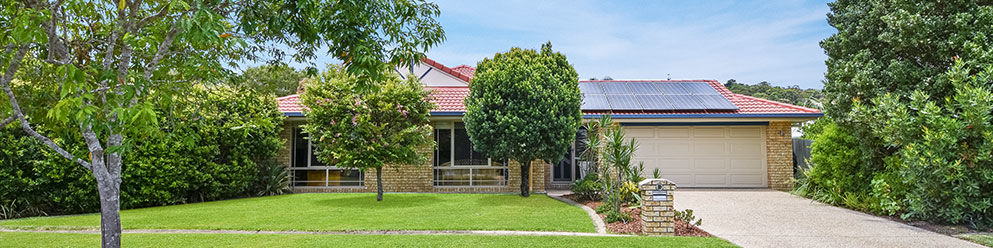
Want to learn how to take amazing real estate photos that attract more buyers? Well you’ve come to the right place! In this article, world class real estate photographer Brad Filliponi shares some of his tips and tricks on how to make your property images stand out.
READ MORE
Discover how Tom Lyons and his team are transforming property marketing in Belleville, Ontario, with SnapSnapSnap. By capturing stunning HDR images directly from a phone, they’re saving time, reducing costs, and delivering exceptional service. Read now!
READ MORE
Getting those high-quality aerial shots of your property can be a crucial factor when it comes to selling your listing to prospective buyers. However, real estate aerial photography can be daunting at a glance, especially if you’ve never flown a drone before! In this article, our founder, Brad Filliponi, is going to show you how easy it can be.
READ MORE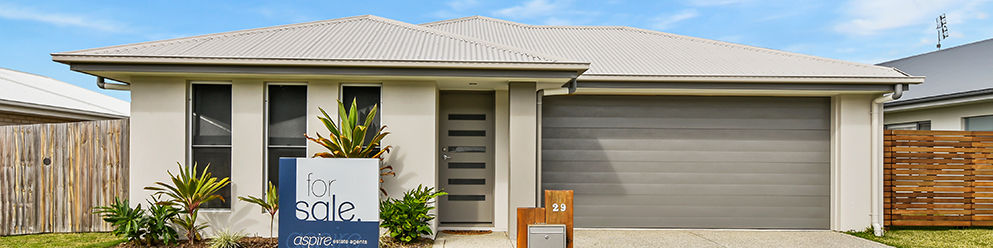
Using a house currently on the market, our Co-founder Brad Filliponi is going to demonstrate how to shoot a property using his key tips to help sell a home quicker.
READ MORE