HOW TO MARKET YOUR LISTING WHEN YOU CAN'T ACCESS THE PROPERTY
Introduction
With the current Coronavirus situation, you maybe experiencing significant restrictions when it comes to accessing (and thus marketing) your property. In particular, if you and your photographer are unable to visit your property to photograph, then you'll need to turn to your next best option. This is to have the homeowner (or even tenant) to shoot the property on your behalf.
In this blog, we are going to share our top 10 tips to help your homeowner or tenant take quality real estate photos whether they’re using a DSLR camera or a smartphone.
Tip 1 – Take Advantage of Our Pre-Photography Checklist
We have compiled this simple document as the ultimate tool to help prepare any property for photography. The document is very informative and is easy to use with a basic tick-box system that ensures your budding photographer can work through the property at their own pace and avoid any simple mistakes along the way.
Click here to download our FREE Pre-Photography Checklist.
Tip 2 – Use the Best Quality Camera You Have Access To
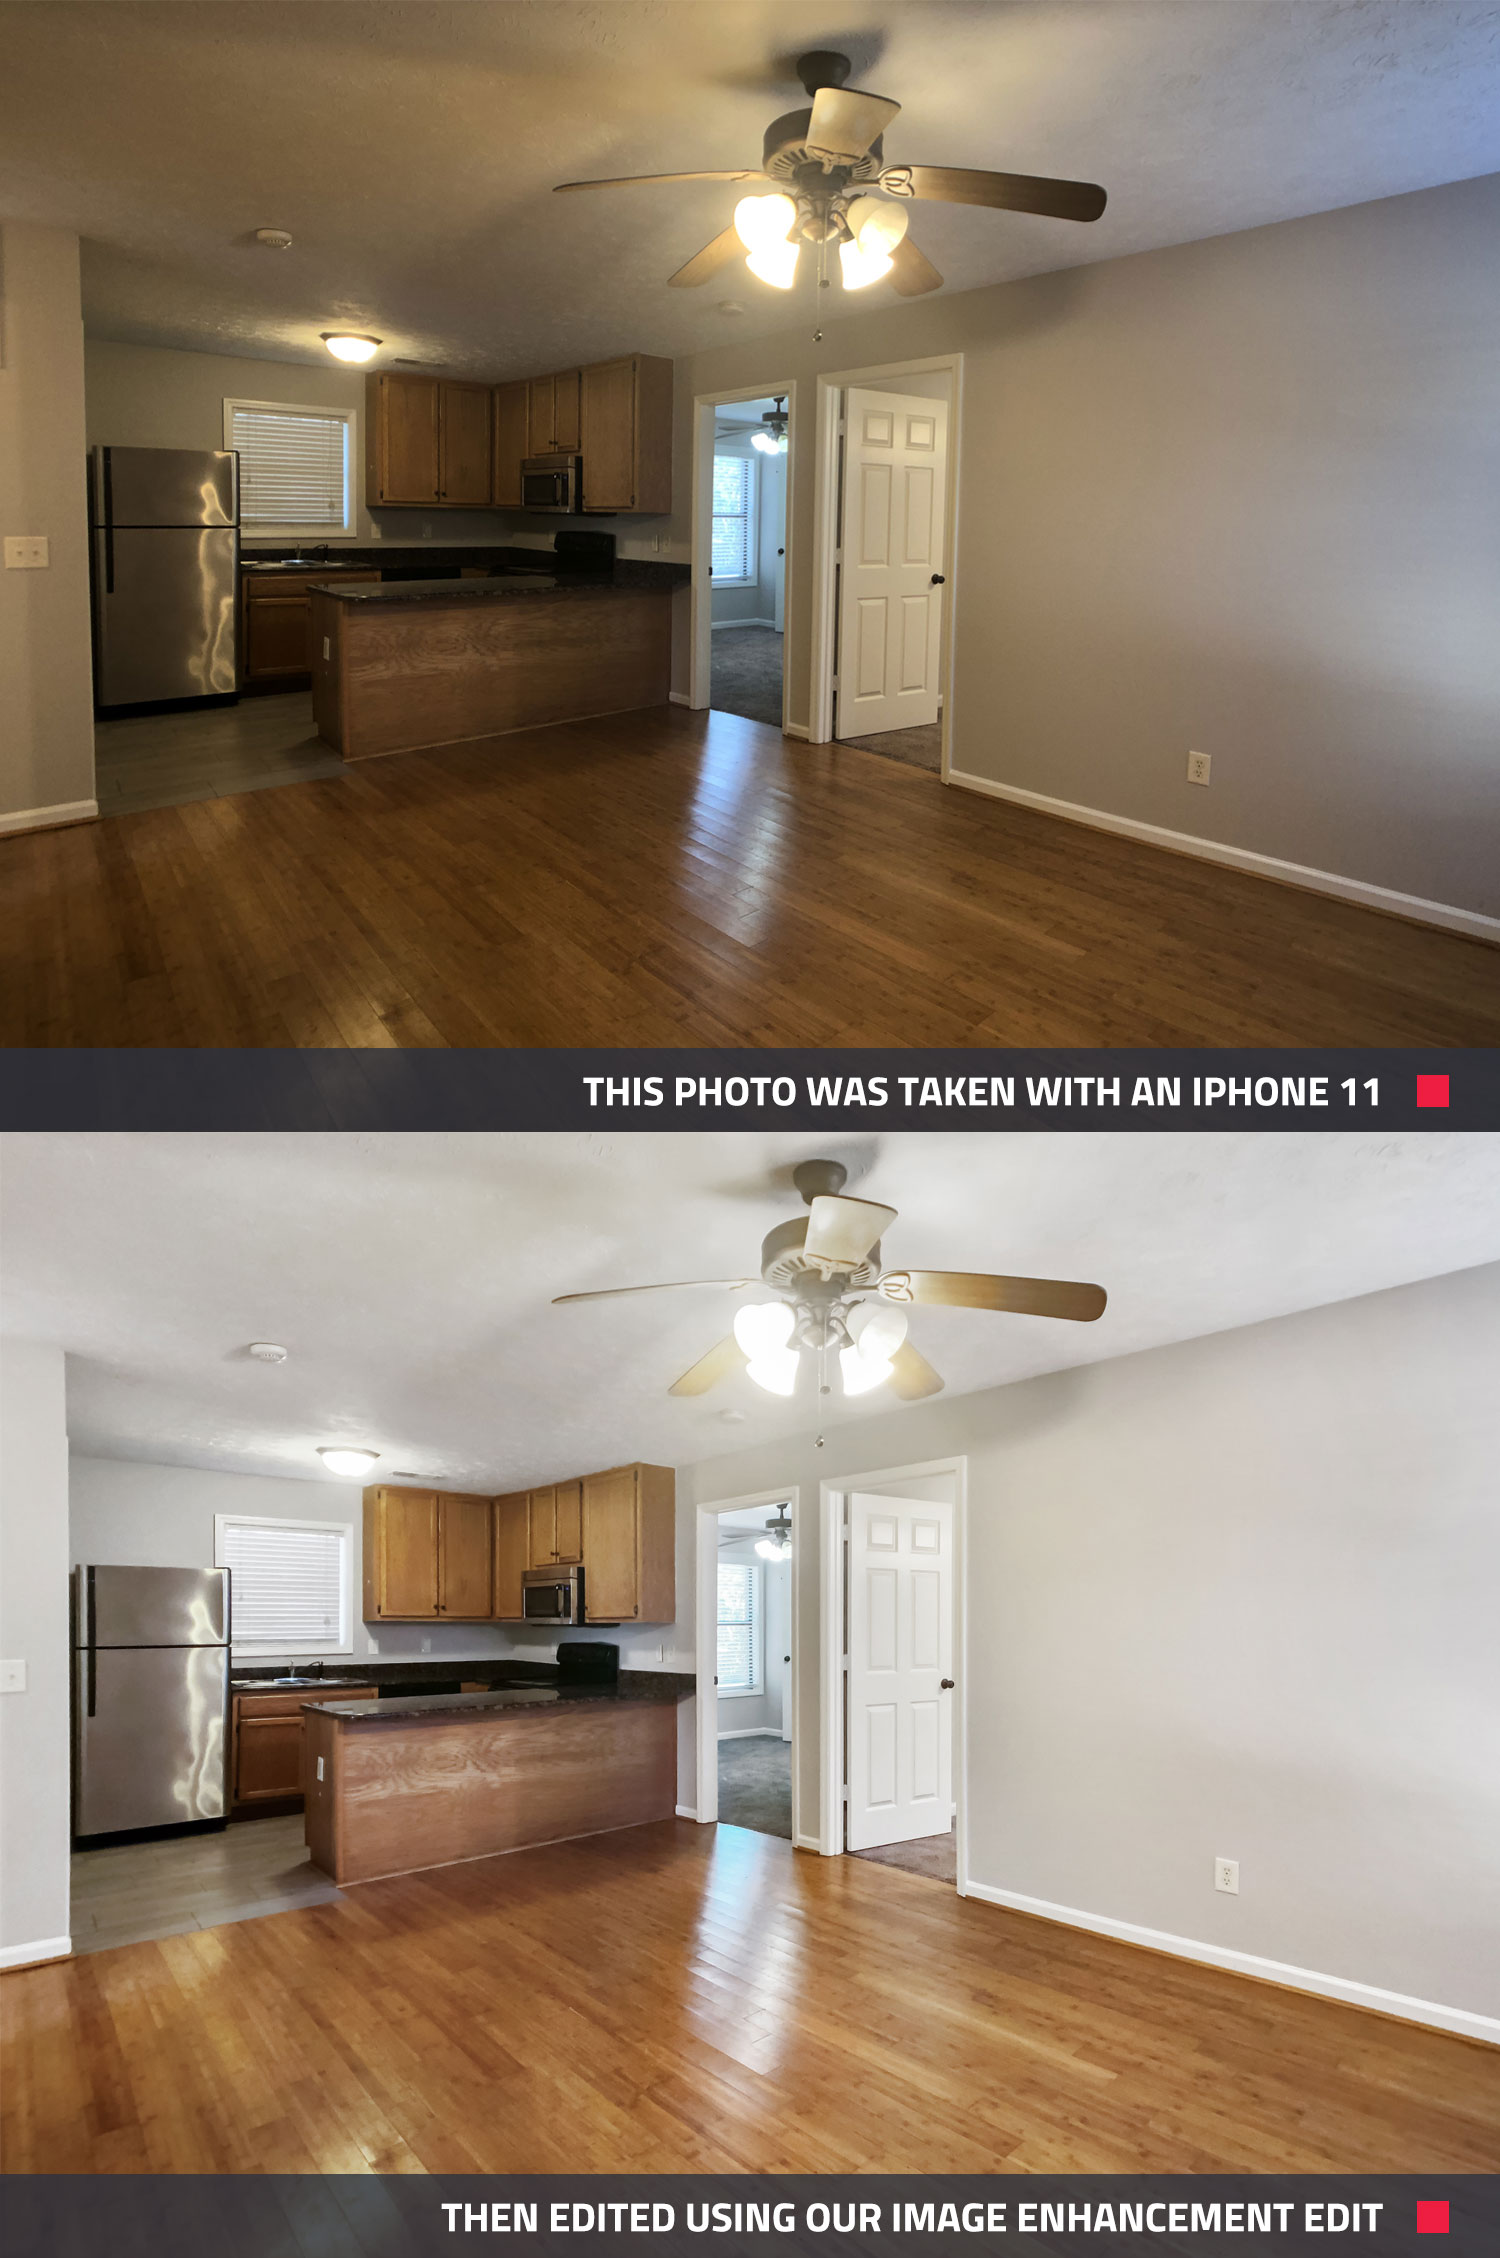
Of course, it’d be fantastic if every homeowner or tenant had access to the top-of-the-line digital camera with a wide-angle lens but obviously this is not the case. Luckily, the next best thing is sitting right in your pocket.
If your stand-in photographer can get access to a late-model smartphone, like the iPhone 11, they will be able to take advantage of the built-in wide-angle feature. We have shown in previous blogs that the finished product from both the iPhone 11 and a Nikon DSLR are extremely comparable, proving you really can use a smartphone effectively and produce magazine-quality results.
If you’d like to read more about how we did this comparison or learn some handy tips to get the most out of your smartphone, check out our blog New Smartphone Hack to Sell Properties Faster.
Or just check out the picture below which was taken with an iPhone 11.
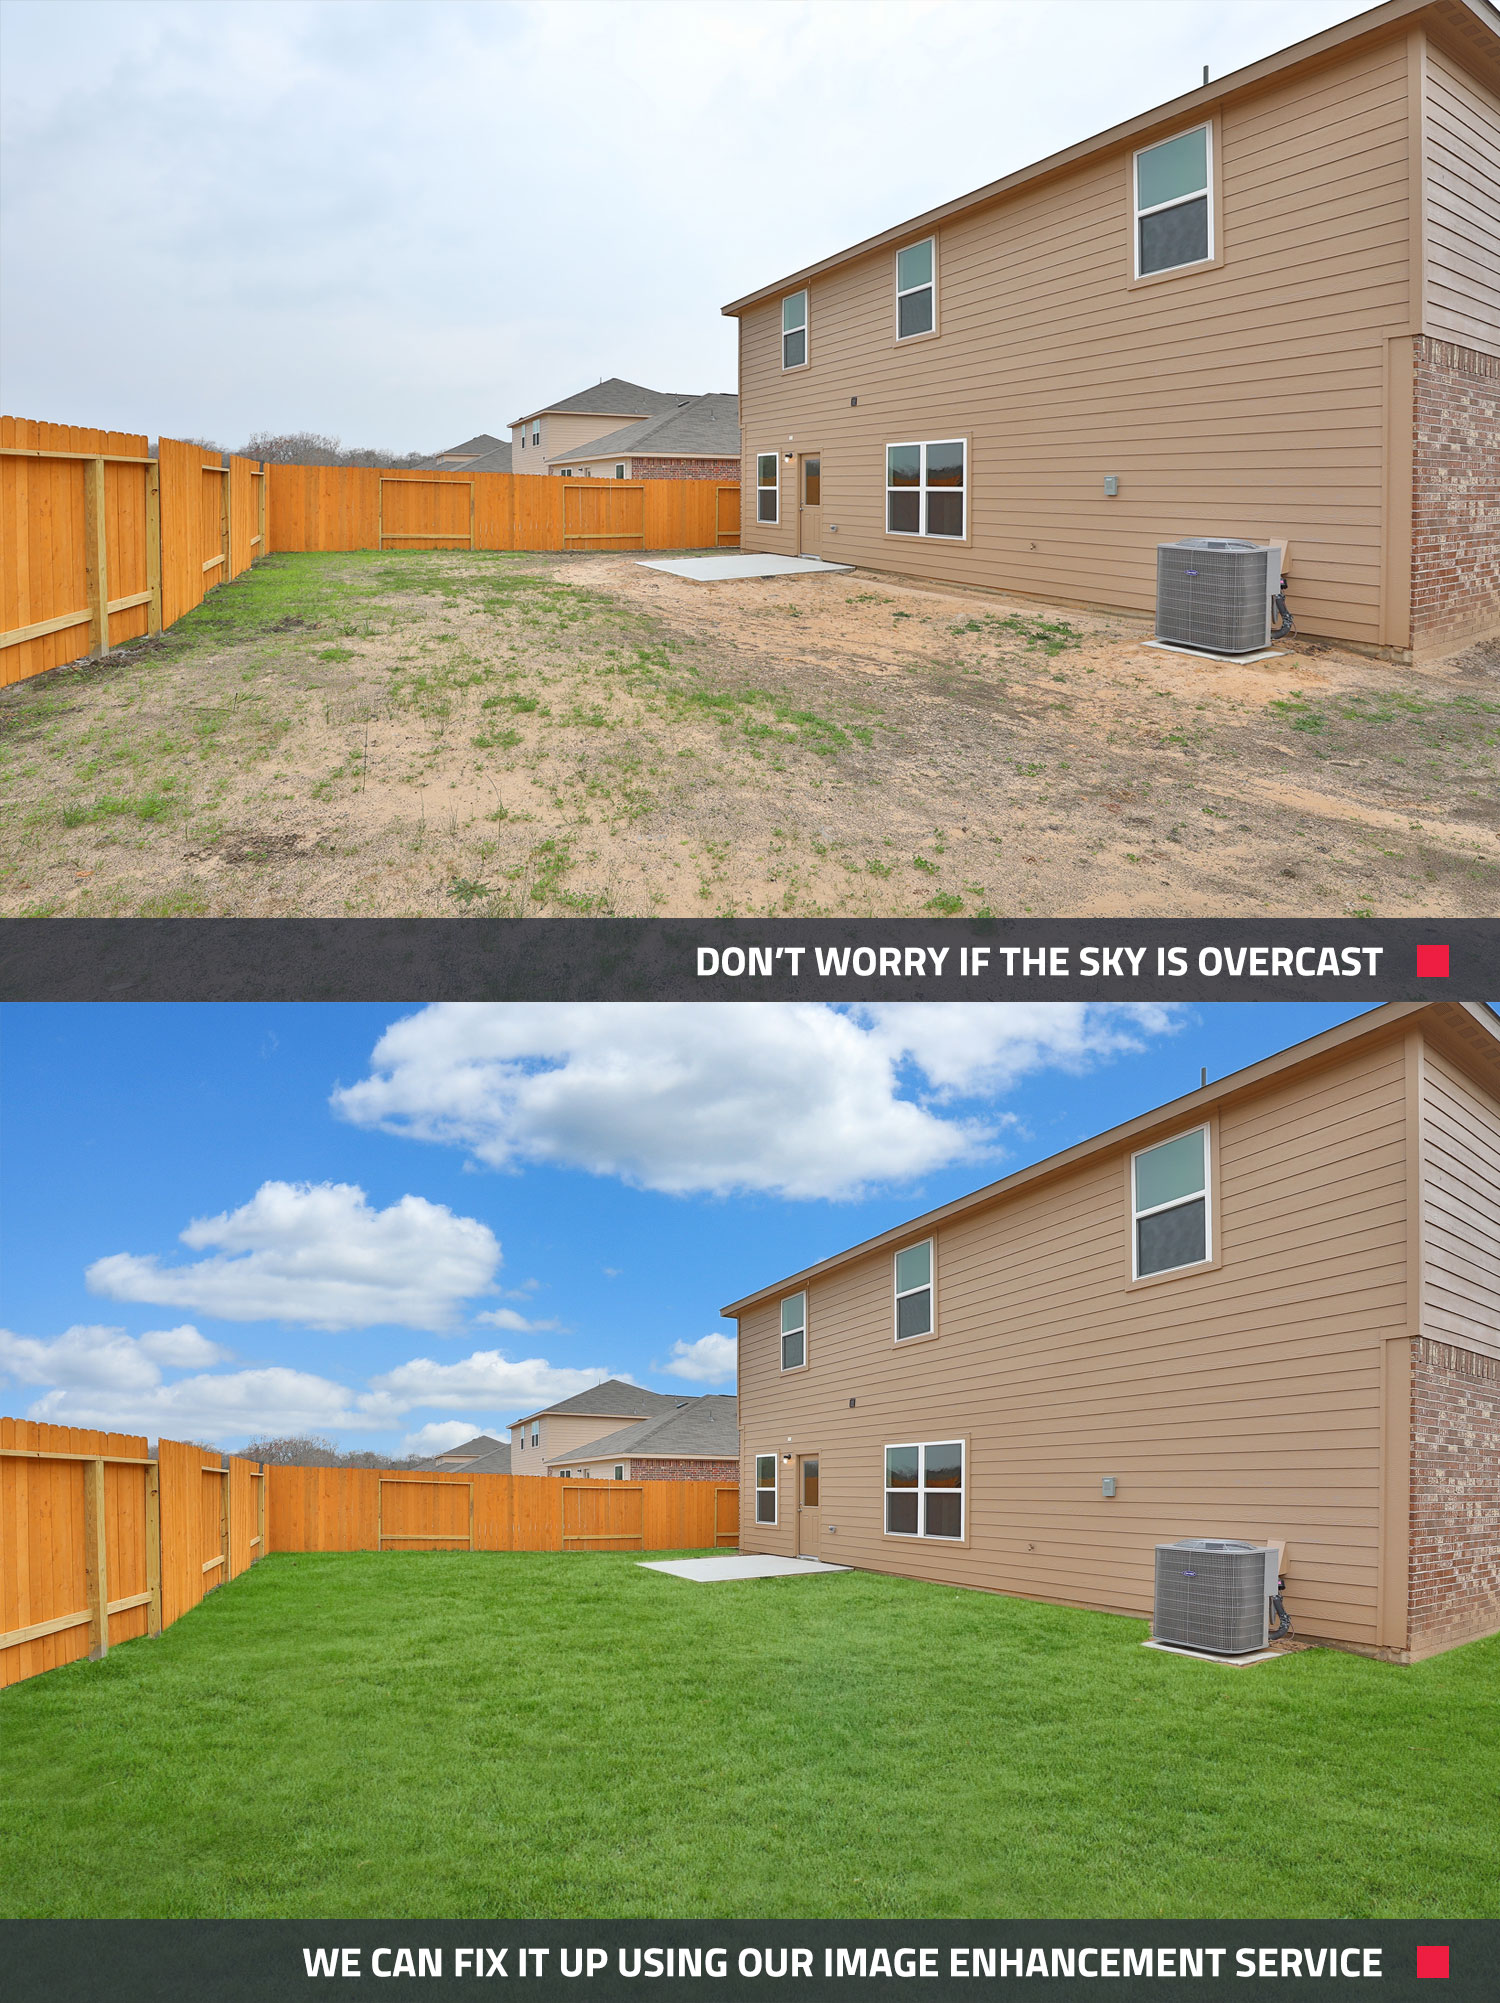
Tip 3 – Don’t Worry If It’s Overcast
Our Image Enhancement Edit is your best friend when it comes to turning bleak, overcast days into bright and sunny skies. Our team of professional editors are experts when it comes to a range of enhancements for your property photos from adding blue skies to enhancing the grass or even replacing it if needed.
From only $1.60USD, you can transform an unappealing image into a show-stopping hero shot. If you’d like to give our Image Enhancement Edit a try, you can find out more here.
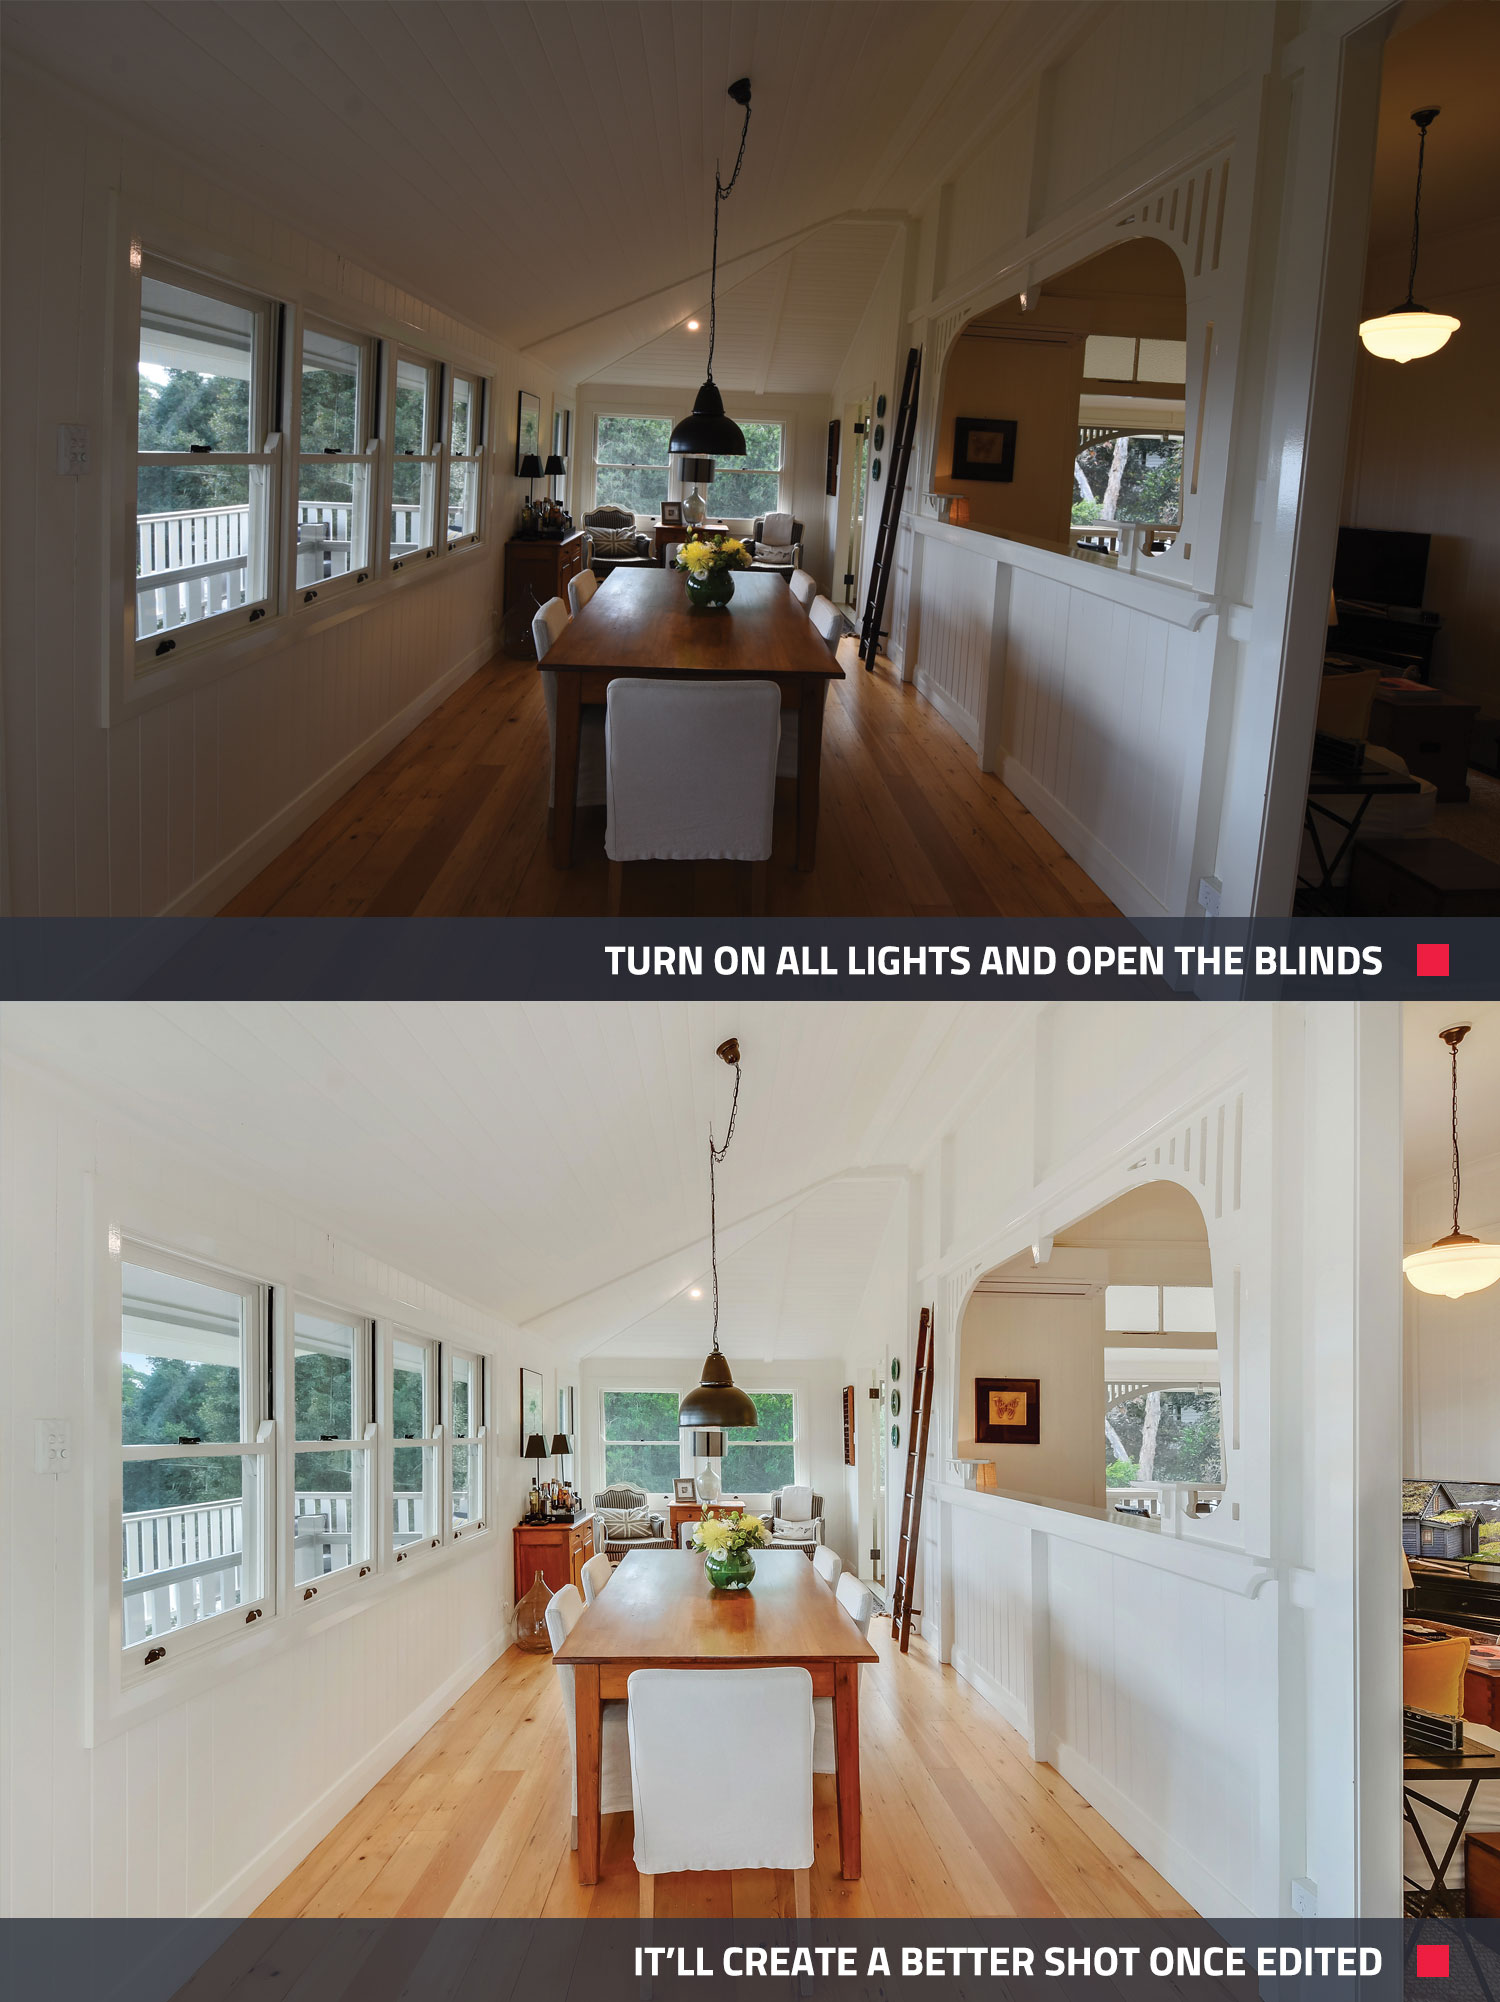
 Tip 4 – Turn On All the Lights and Open All the Blinds
This super simple adjustment can make all the difference in the final image. Opening the blinds creates depth while turning on the lights brings a sense of warmth to the home and ensures the property feels inviting.
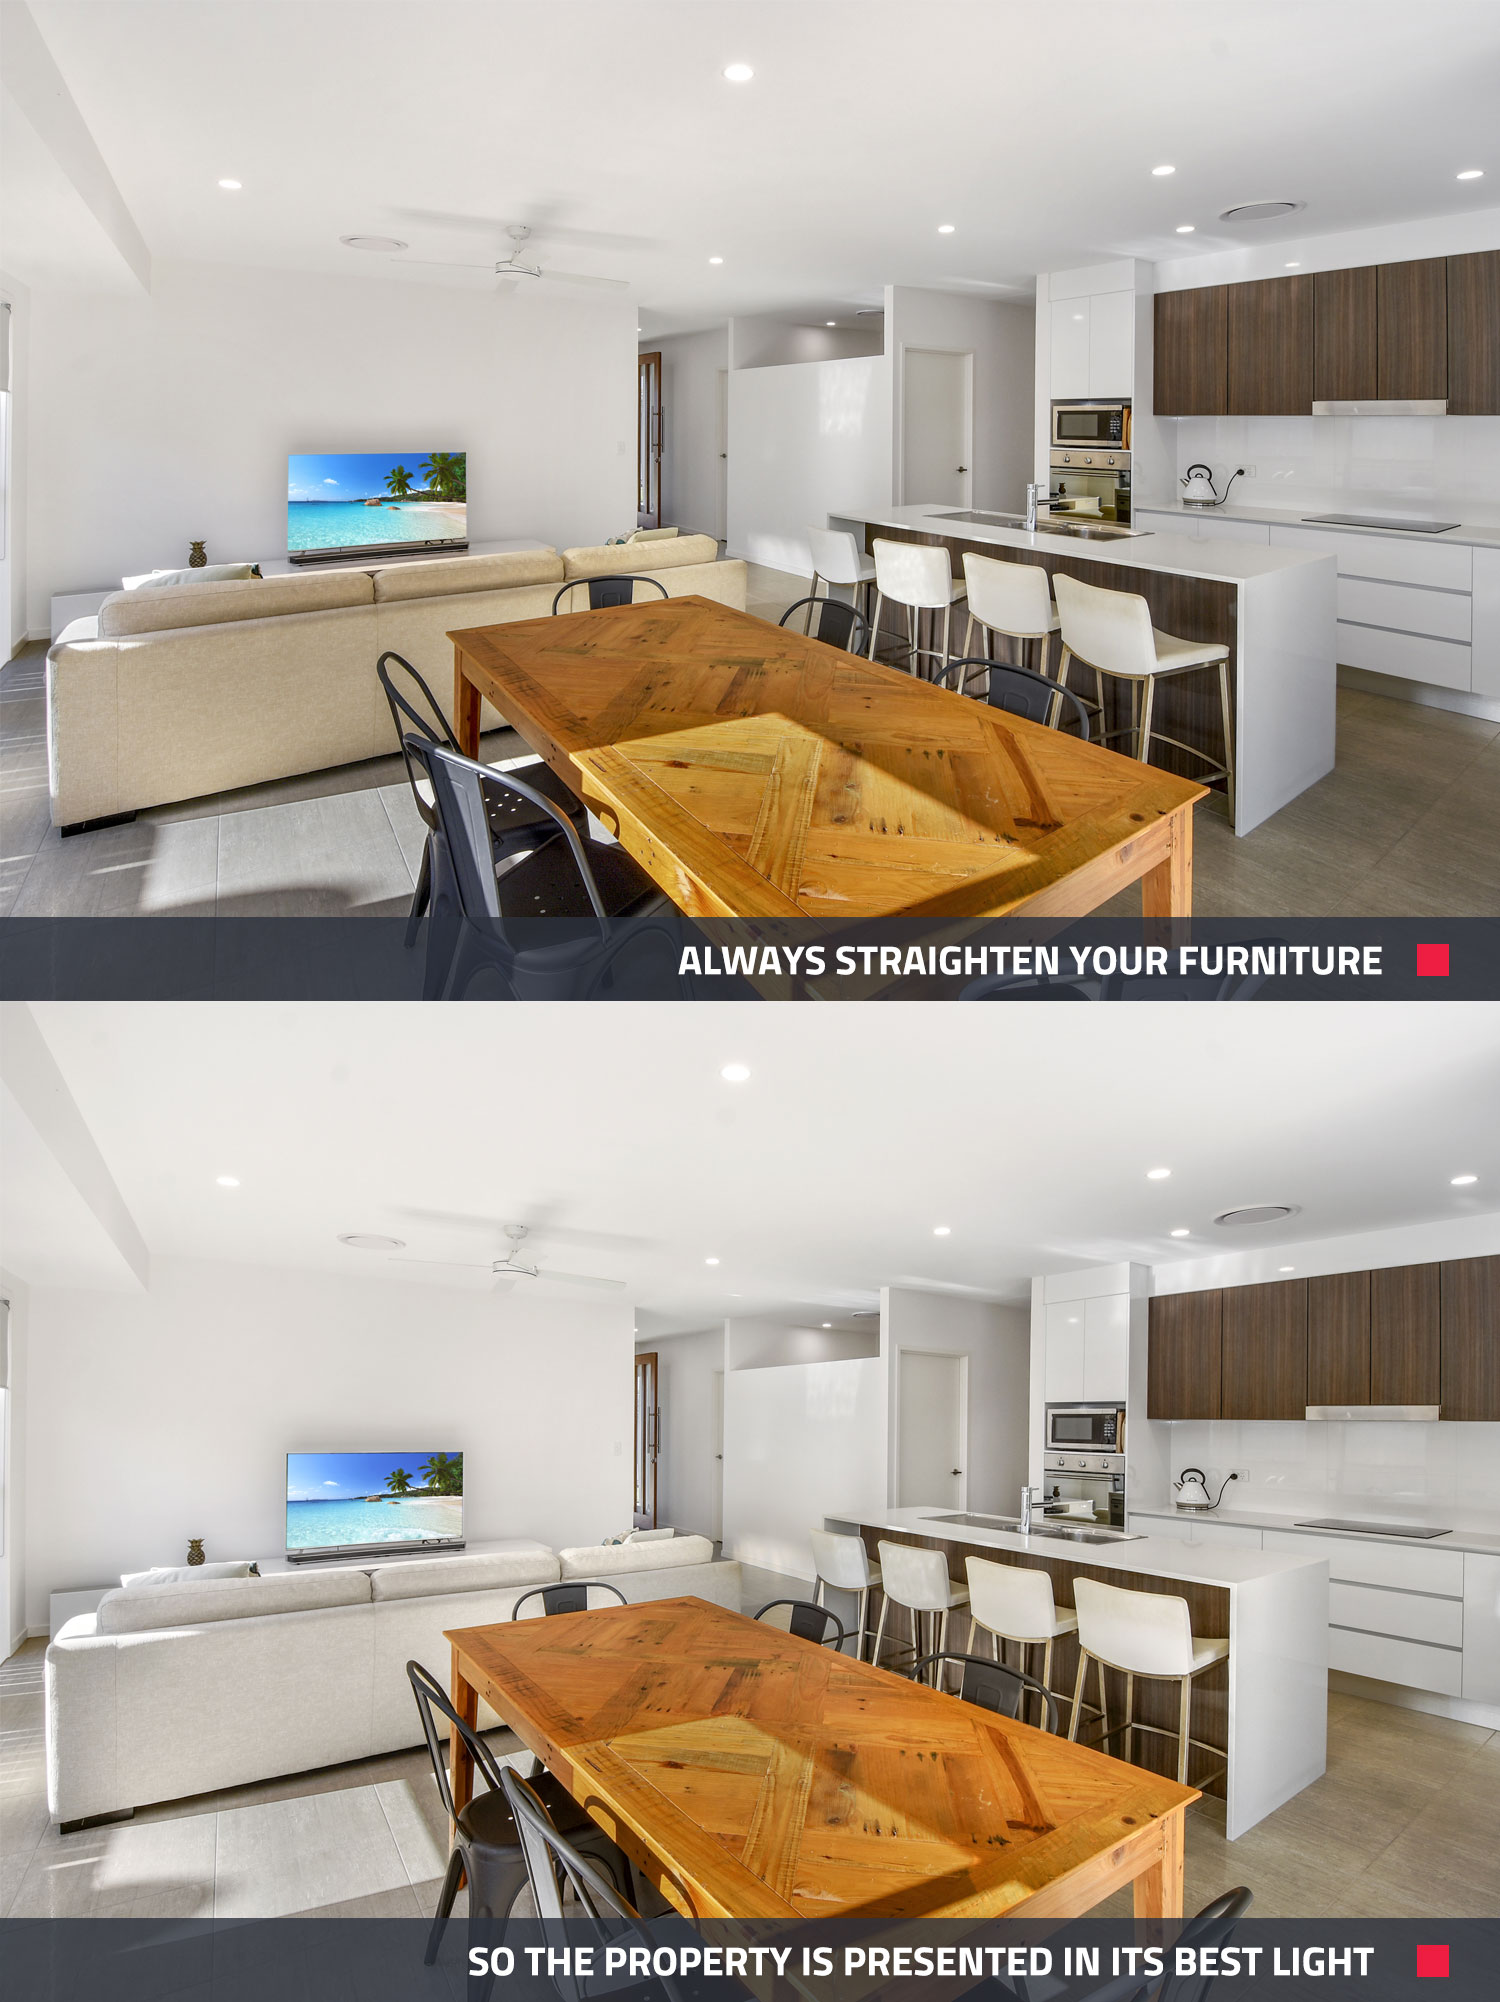
Tip 5 – Straighten the Furniture
Again, this might seem like a simple point but the difference is incredible. Ensuring all the chairs are pushed in, straight and spread evenly can enhance the appeal of the home while also limiting any distractions for the potential buyer.
This point is also important for bed linen, pillows, kitchen stools and curtains – a few small adjustments now can make all the difference later.
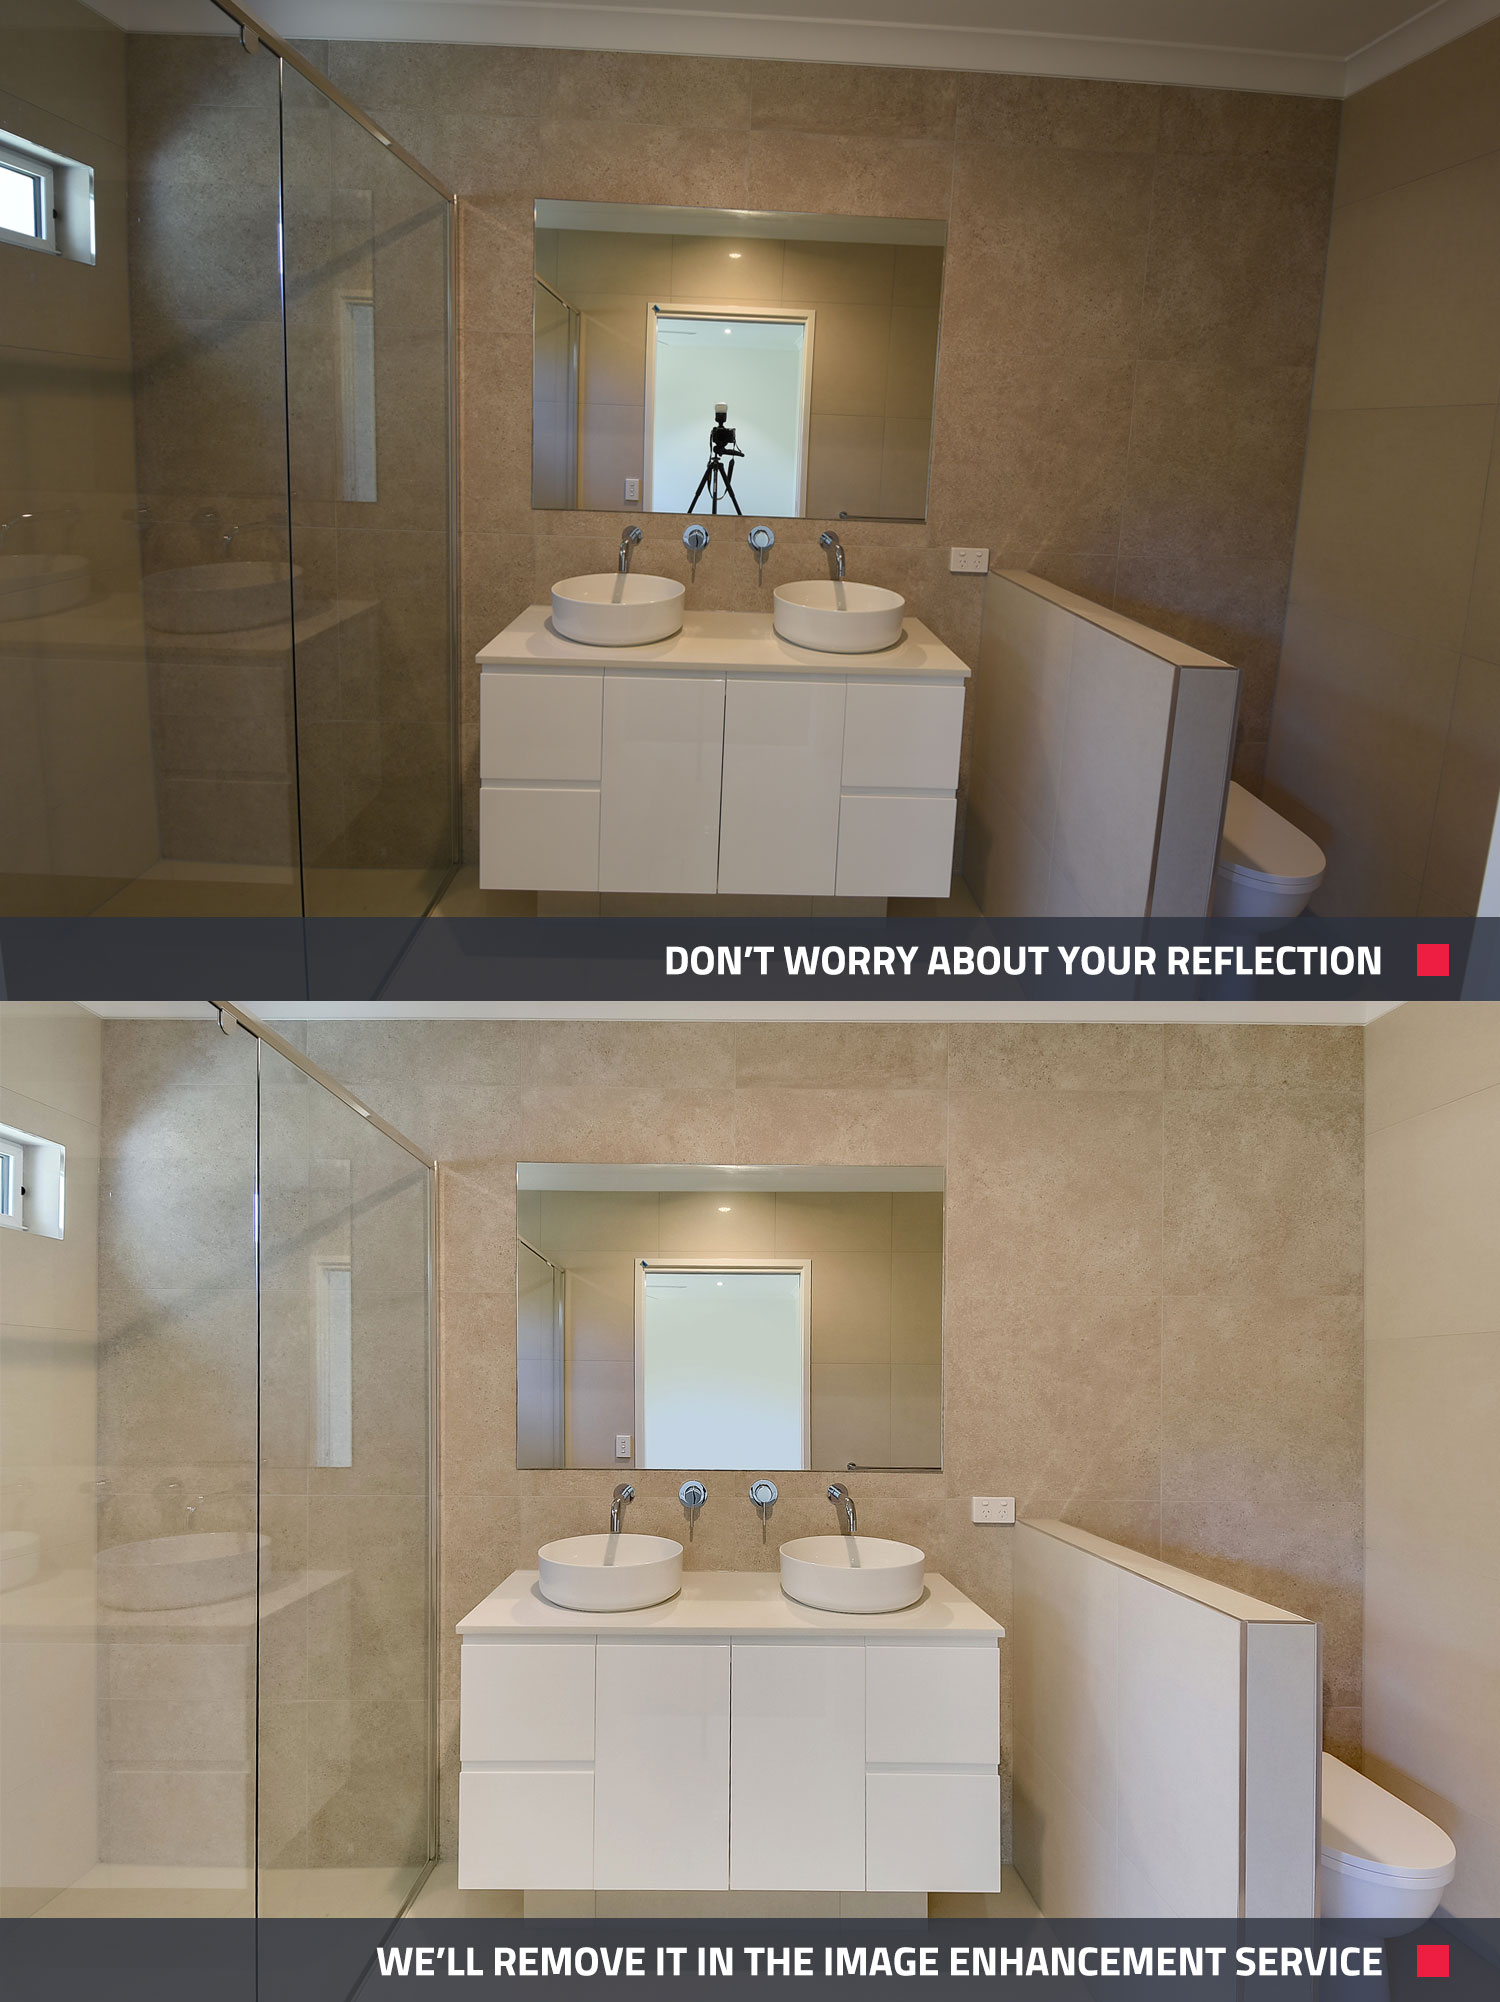
 Tip 6 – Don’t Worry About Your Reflection
This is a particular sticking point for photographers shooting bathrooms and kitchens or anywhere with a reflective surface. Our standard Image Enhancement Edit can remove your reflection or the tripod itself from the image ensuring a clutter-free finished product for your marketing campaign.
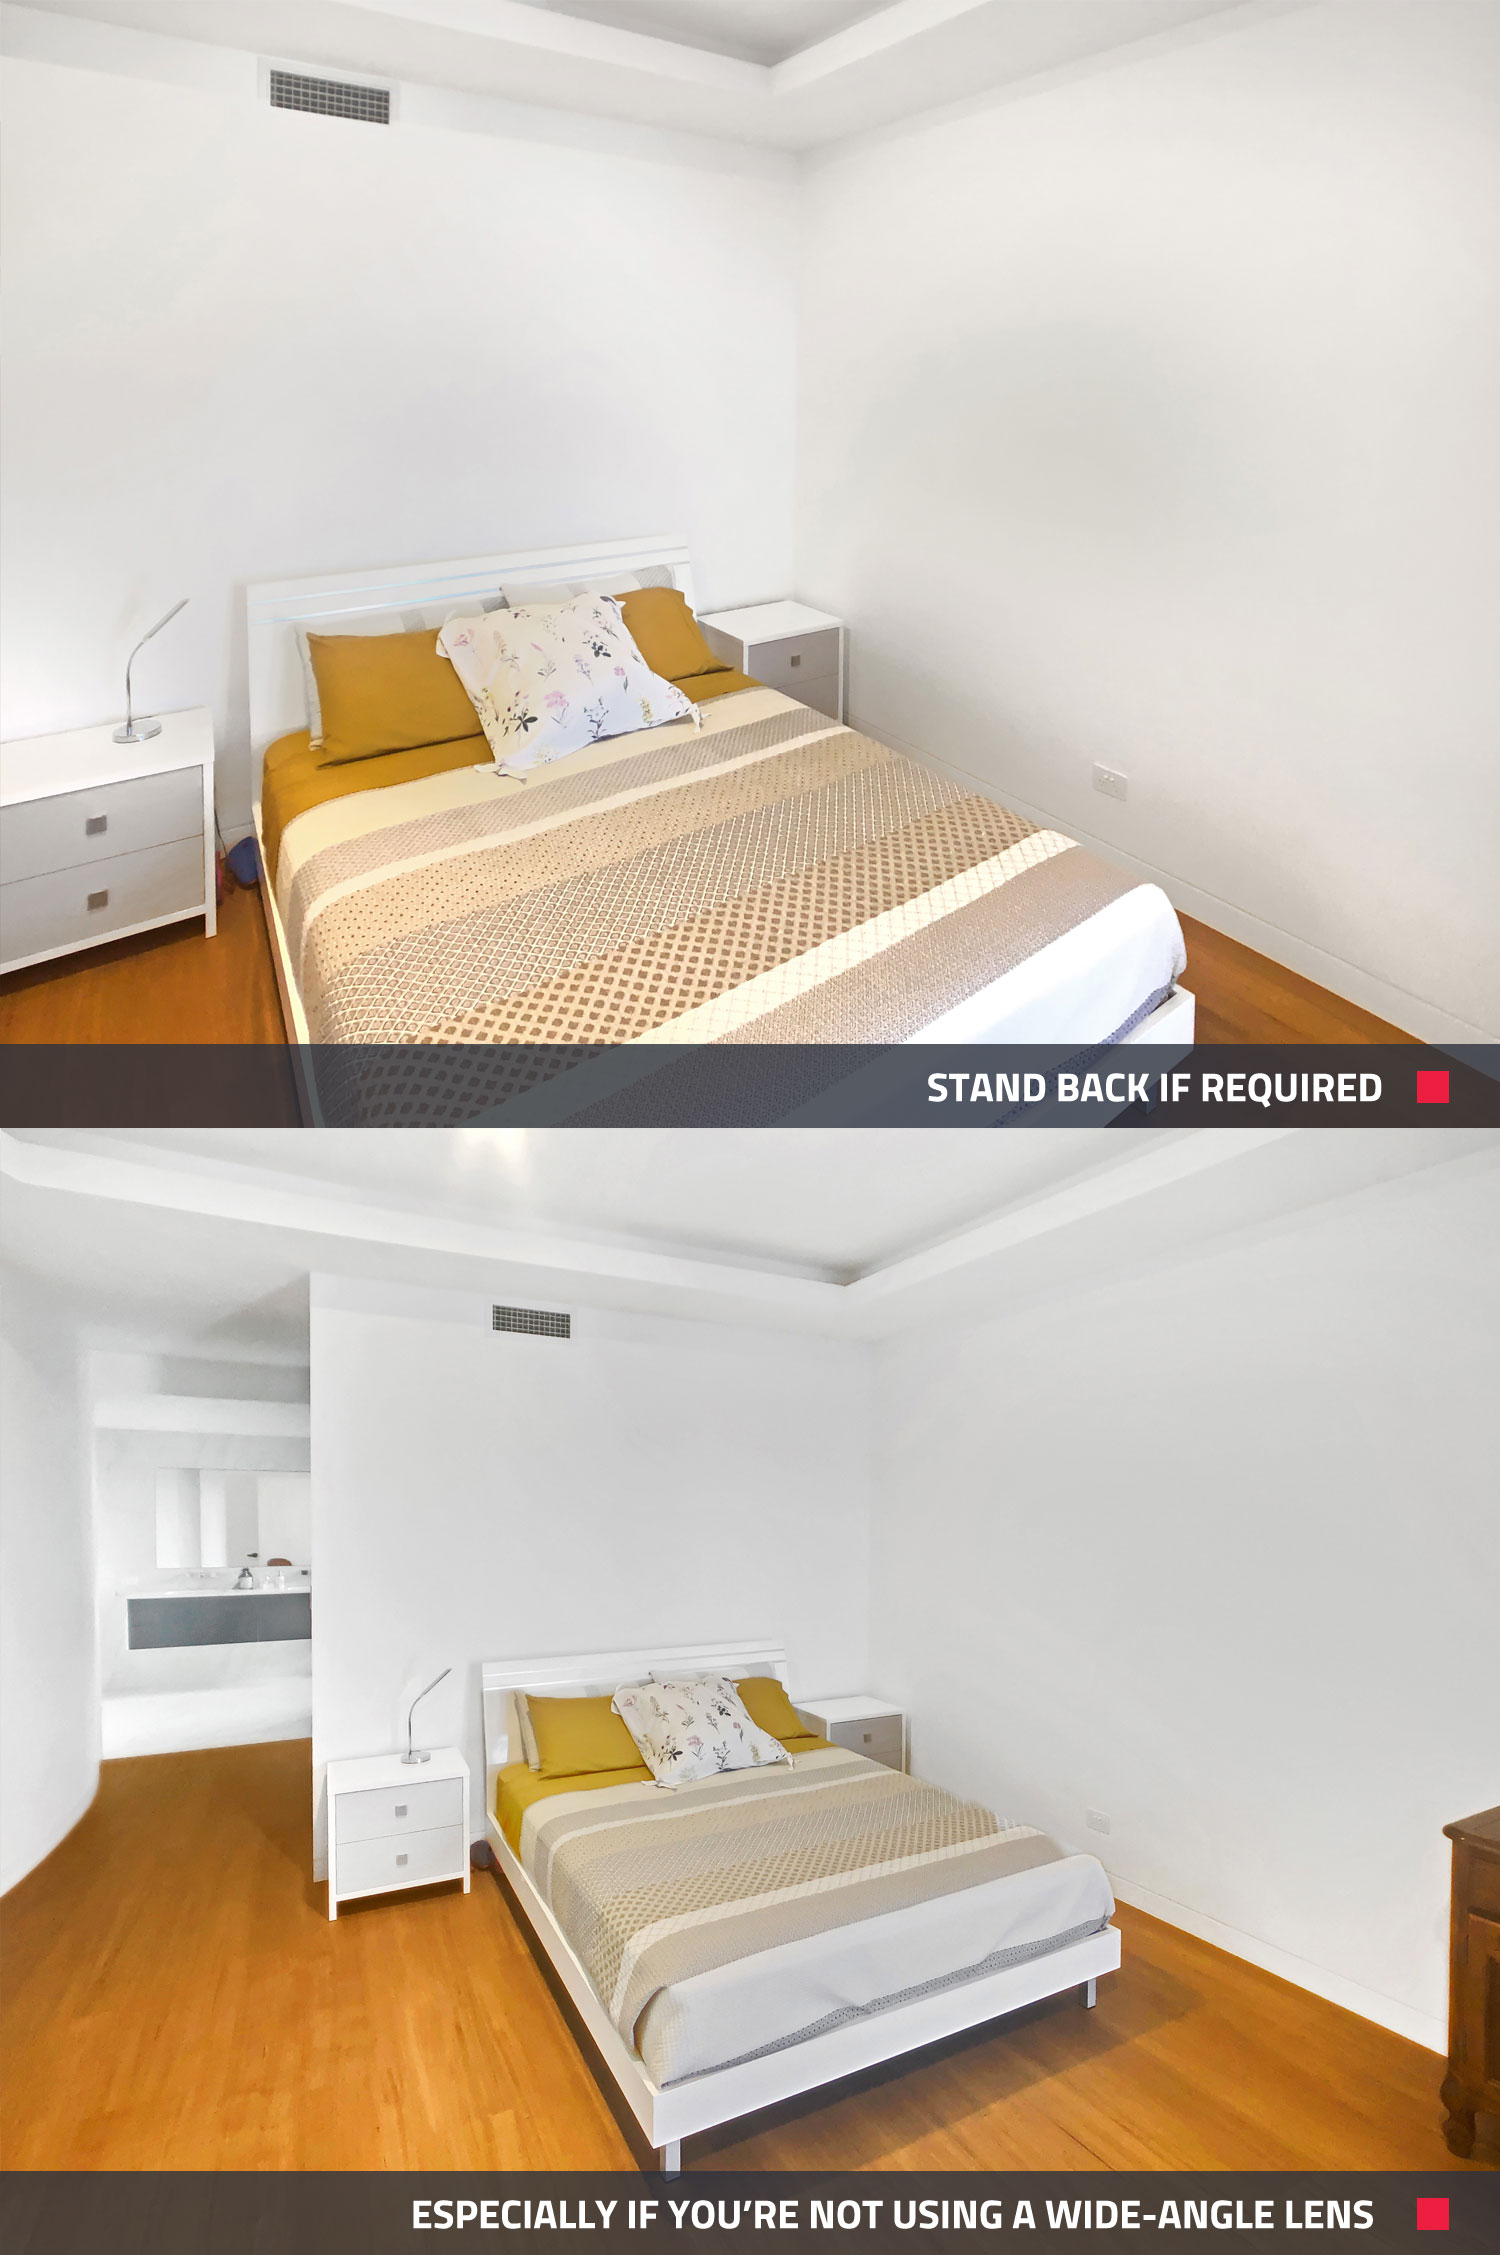
 Tip 7 – Stand Back If Required
This is a particularly important point for those stand-in photographers who are using a camera without a wide-angle lens. By standing back as far as possible, you can give yourself the best chance to capture all the important details in the frame while also making the room feel as large as possible.
The photos below were shot with an iPhone X.
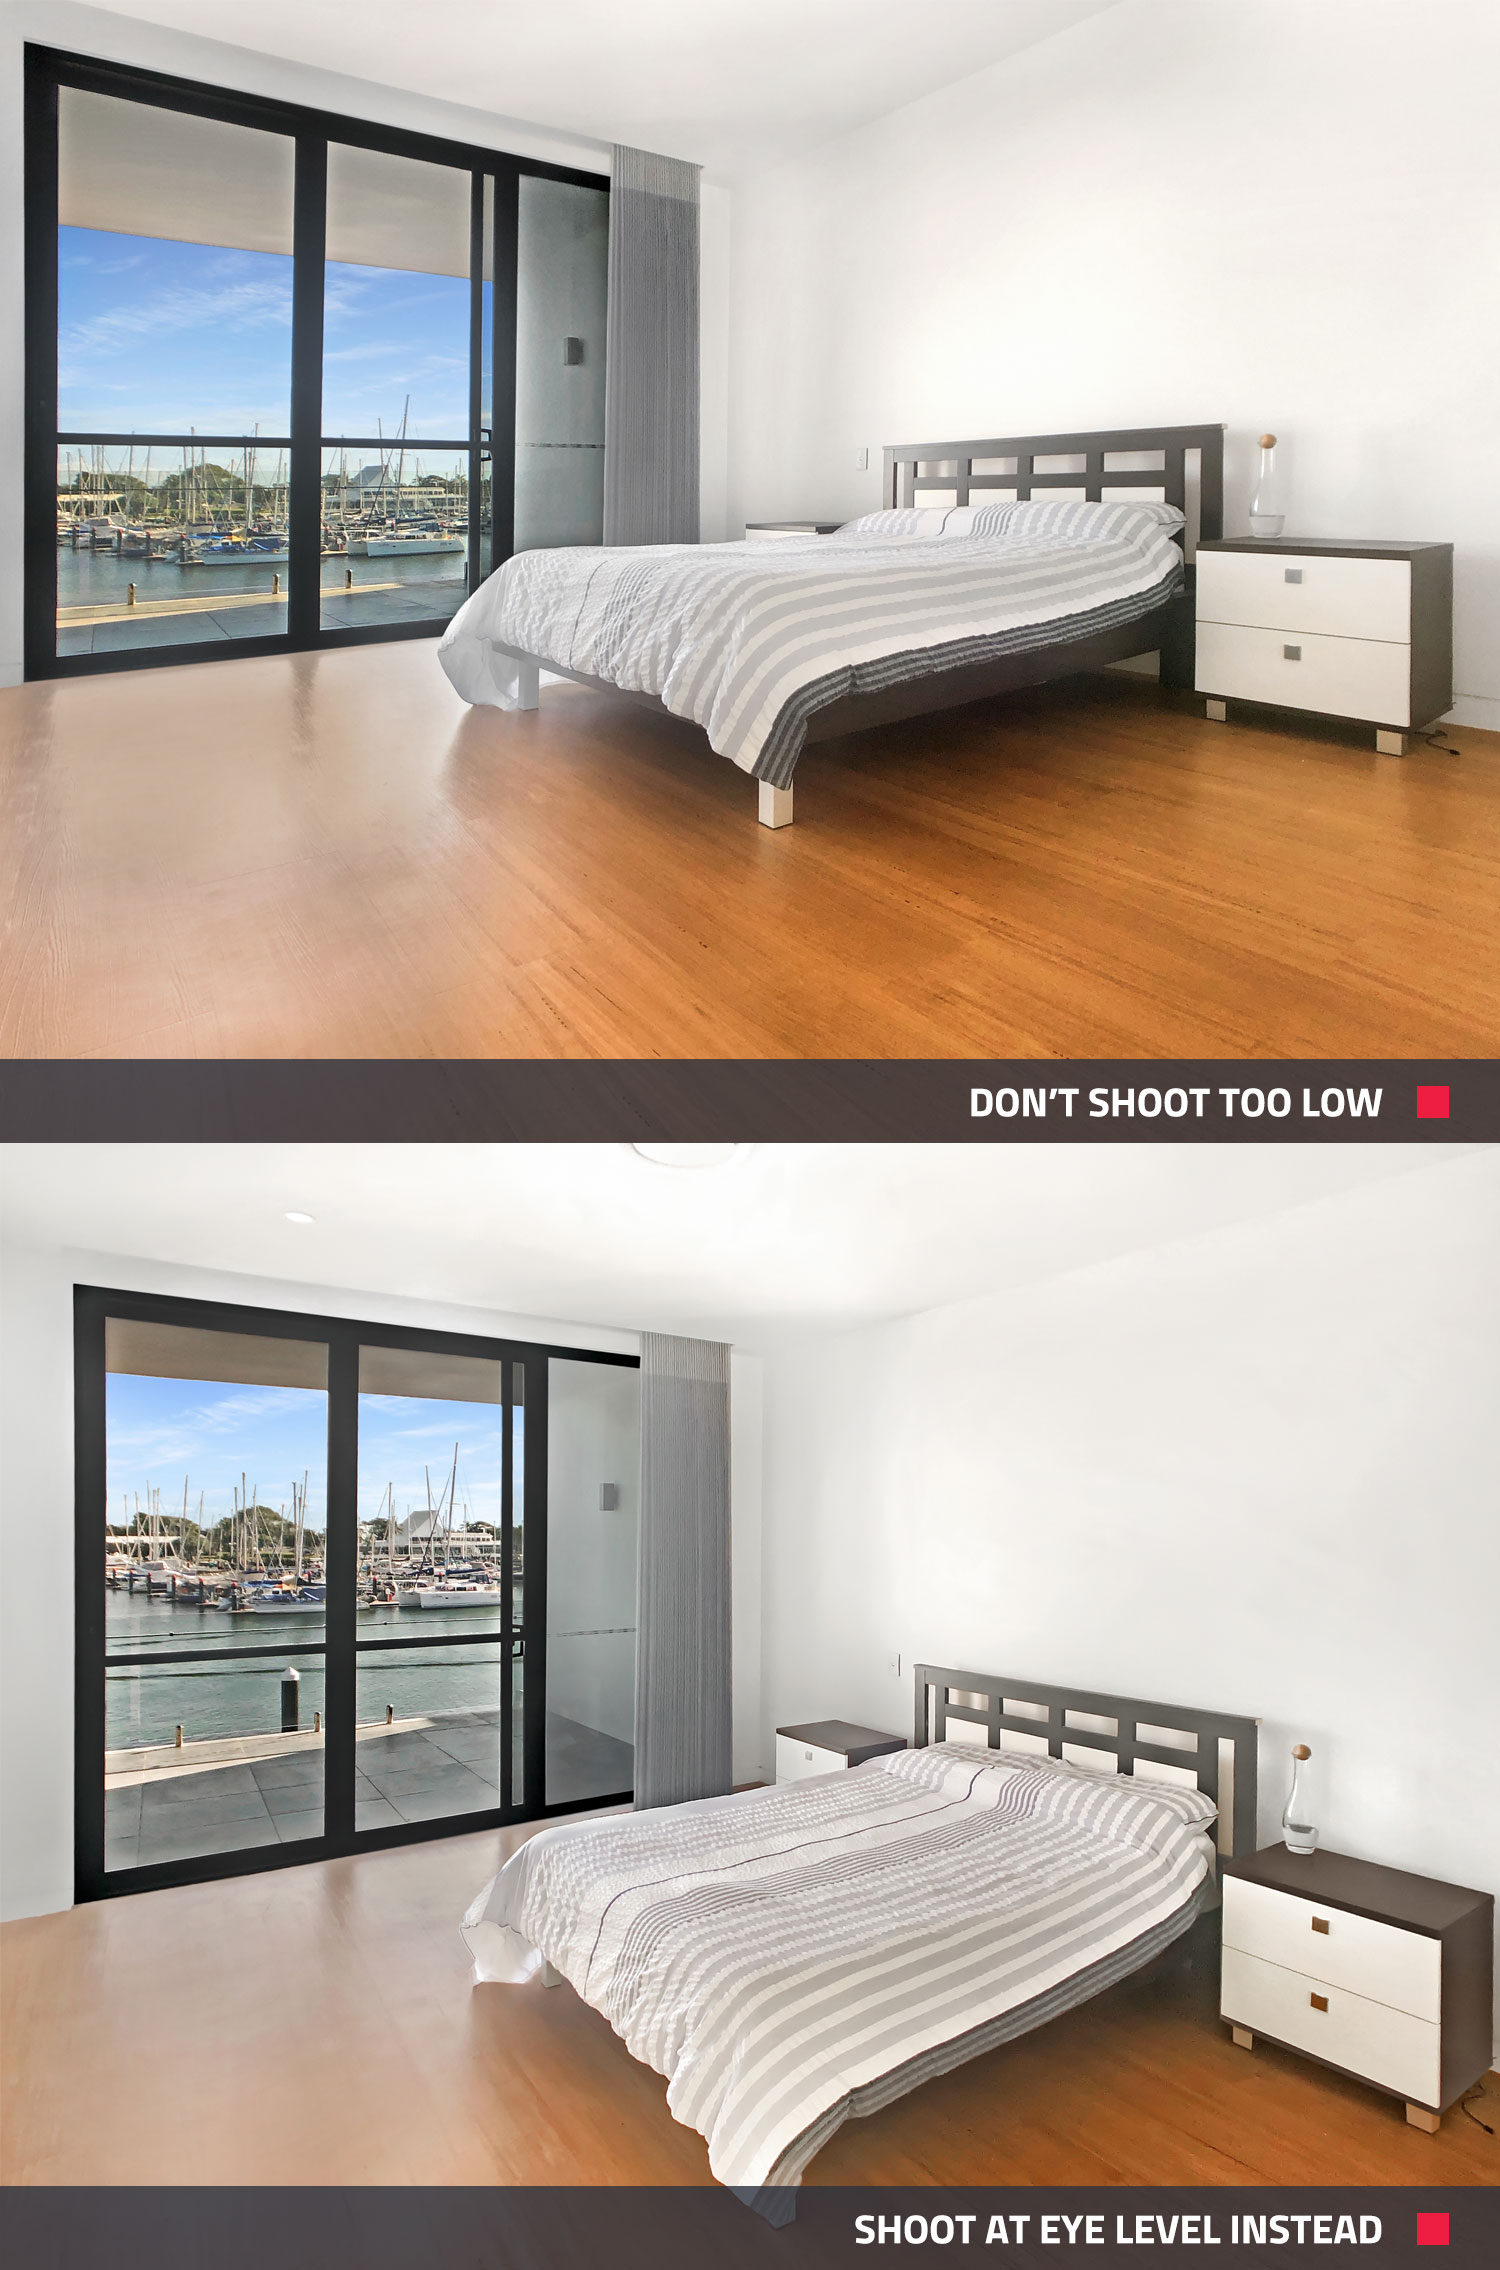
 Tip 8 – Shoot at Eye Level
Whenever you are shooting a property, you want to ensure the potential buyer gets a realistic feel for the home and the best way to do this is to shoot at eye level. Whether they are viewing the home online or in person, it’s important they have the same experience and by taking the images at eye level, you can help convey the true scale and perspective of the room itself.
The photos below were shot with an iPhone X.
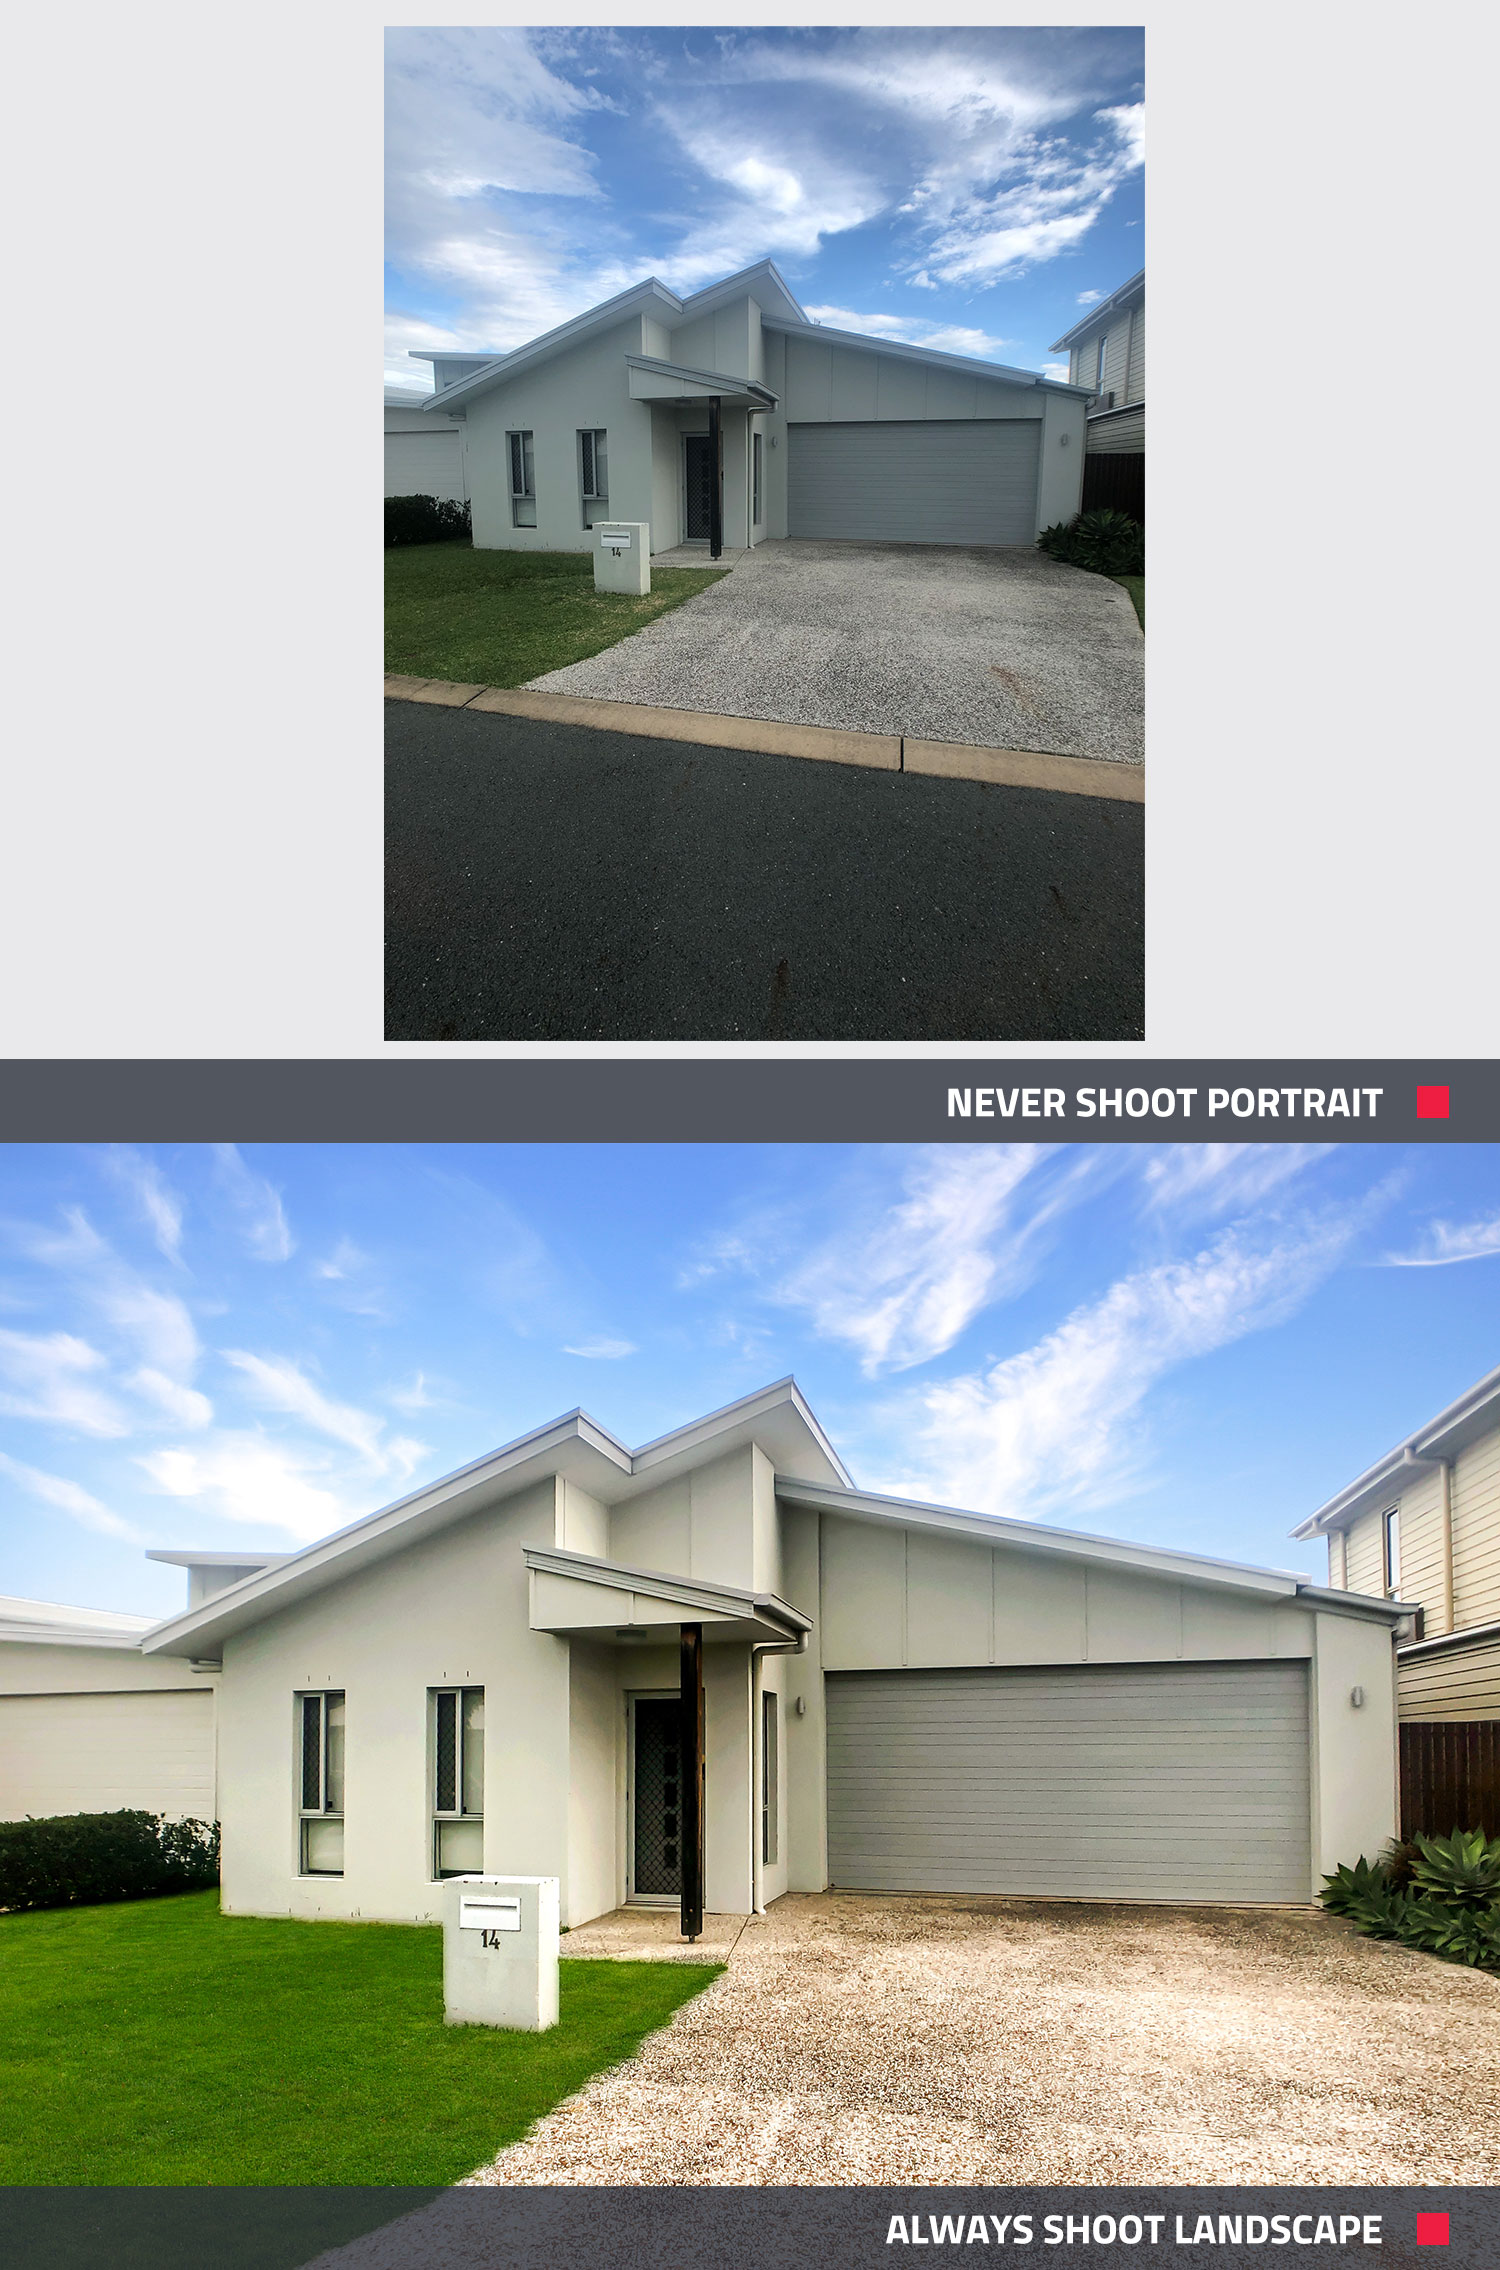
Tip 9 – Shoot Landscape Not Portrait
Shooting your property in landscape format is incredibly important and will help ensure you capture as much detail in the frame as possible. This will also help when creating an image that can be used across a range of different formats and mediums while also limiting the amount of cropping needed.
The other important tip here is to maintain a very steady hand if you are not using a tripod. A crisp final result is an absolute must when it comes to property photography and the last thing buyers want to be looking at are blurry or unclear photos.
Tip 10 – Ensure Your Photos Are in Focus
There’s no doubt about it, our team of professional editors can do some pretty amazing things in the editing room but one thing they can’t do is fix blurry images. If you’re using a smartphone, you can simply tap the screen prior to taking the photo which will help focus the image on the important focal point.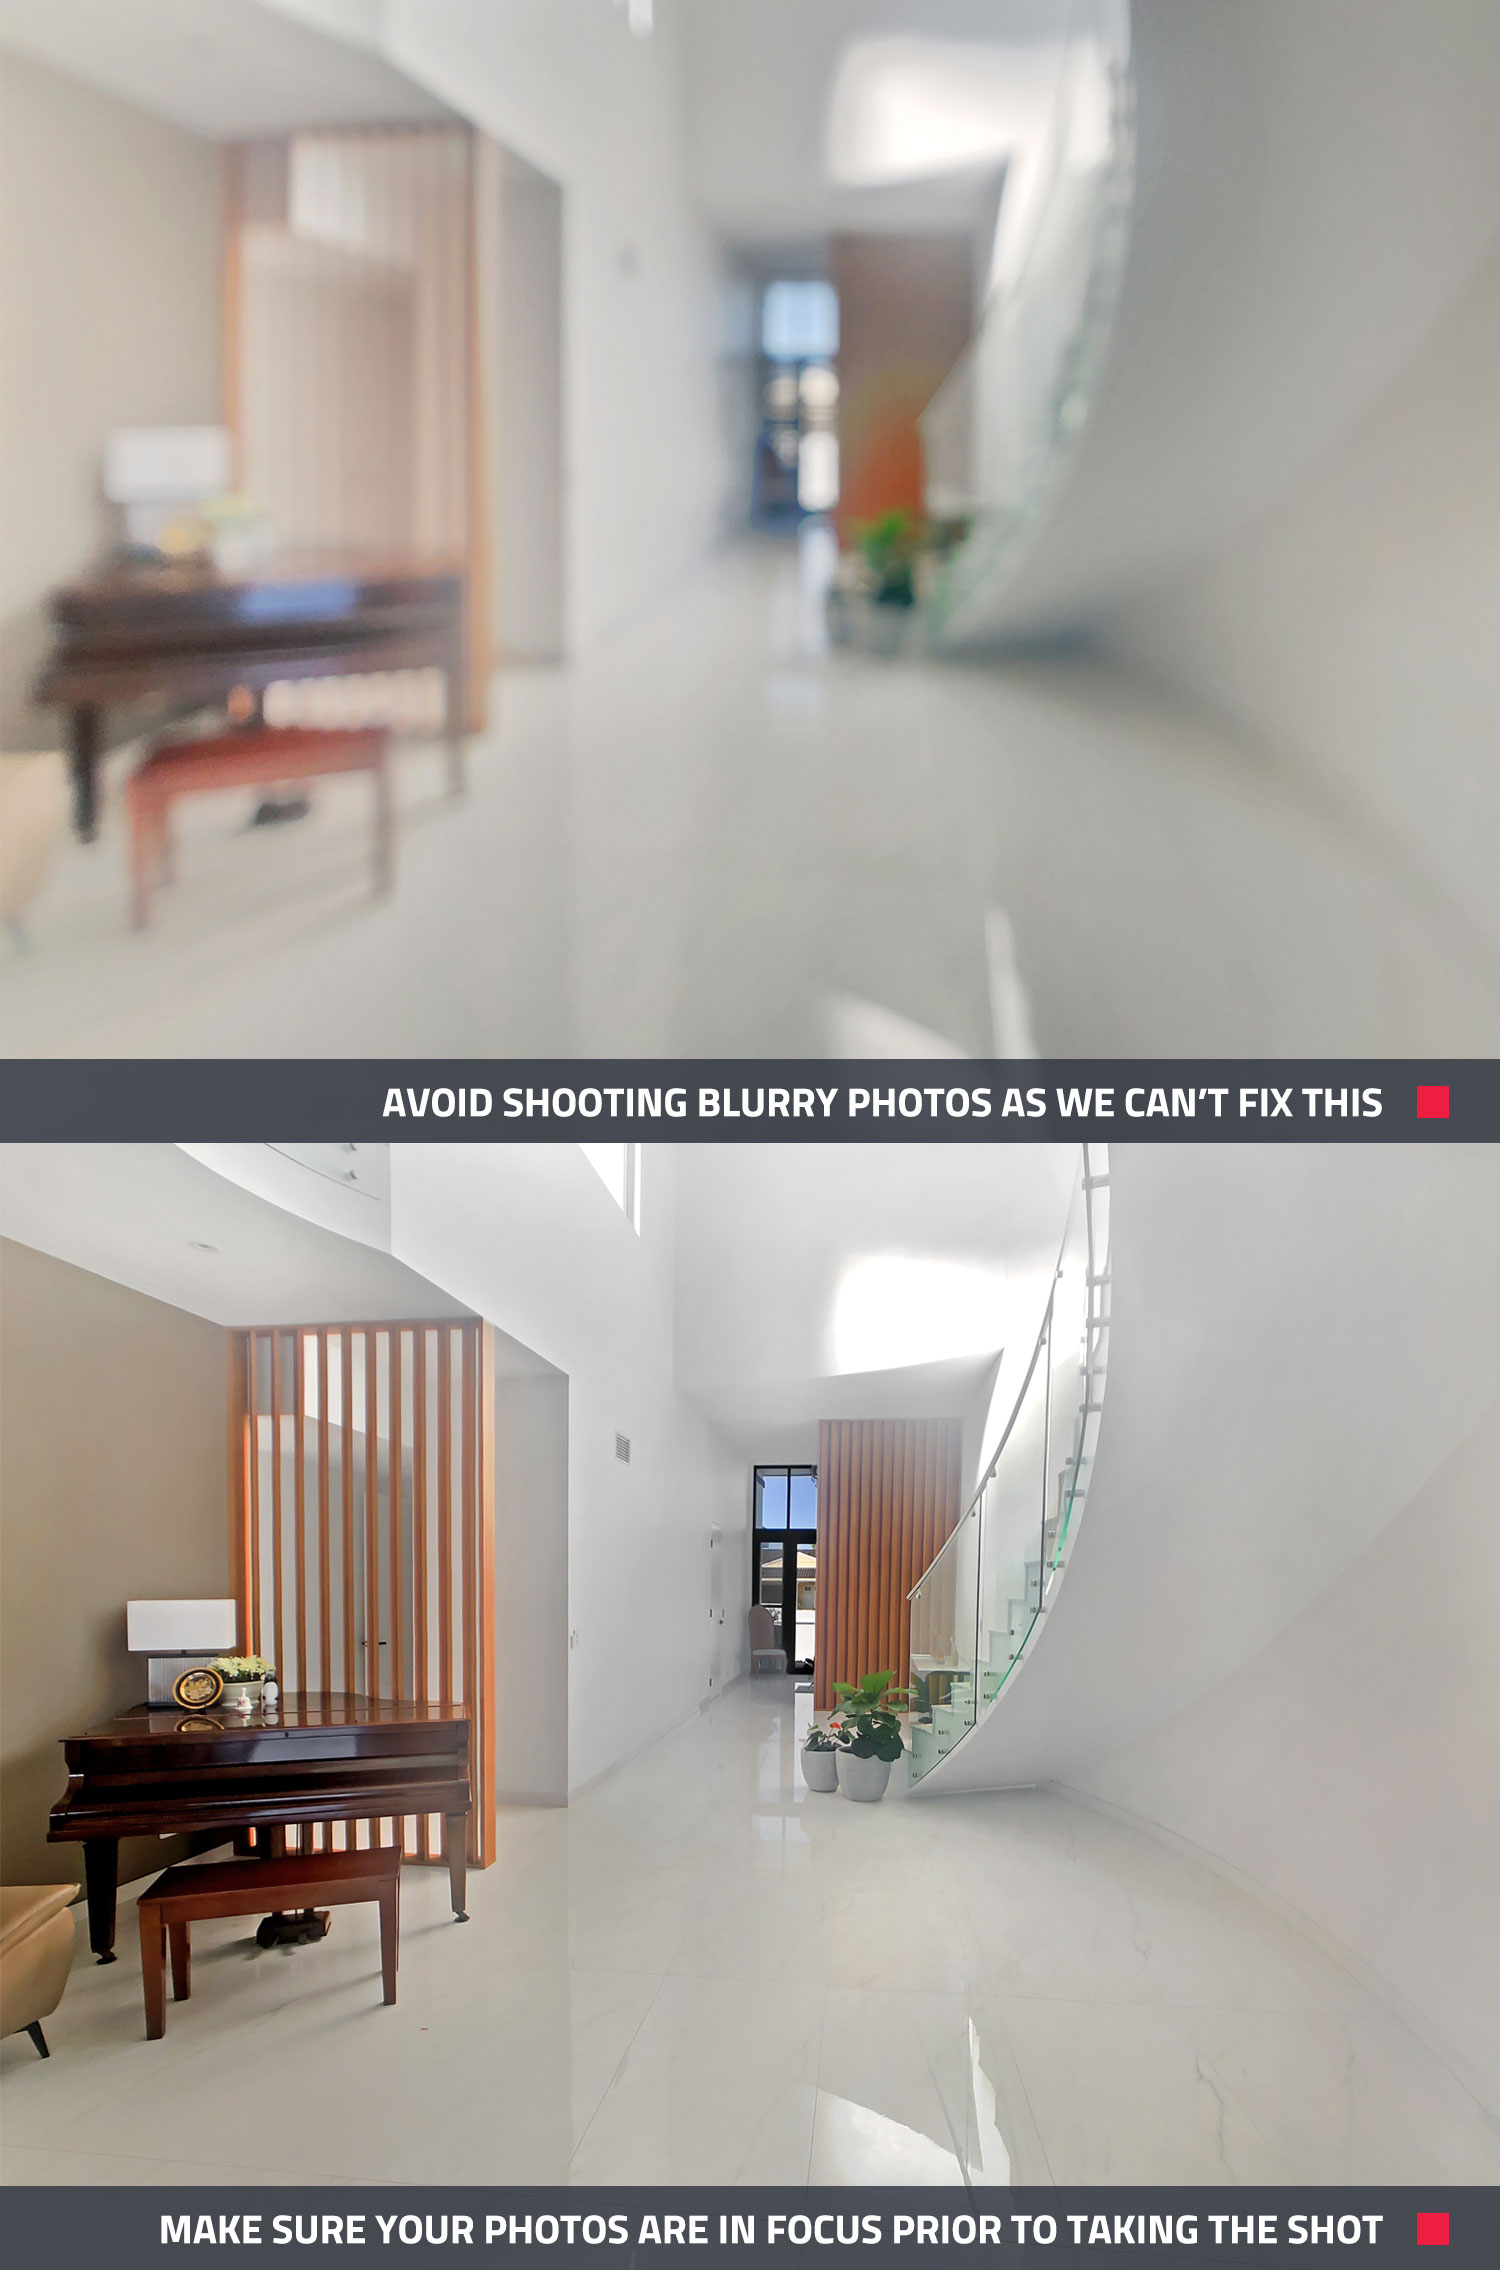
Conclusion
Once you’ve got your hands on the images from the homeowner or tenant, it’s as simple as accessing the BoxBrownie.com dashboard and selecting the type of edit you would like completed. This can be done with just a few clicks by uploading your original image and answering a few questions to ensure you get the optimal result you’re looking for and it really is as simple as that.
As you can see, with the help of BoxBrownie.com, we really can continue to produce magazine-quality images through this tough time even without being able to access the property ourselves.
RELATED ARTICLES

With this simple real estate photography tip, you can learn how to level up your photos, so that every property you shoot will look open and inviting.
READ MORE
Got a listing with an outdoor area that has potential, but the photos don’t show it? Or maybe it just needs a quick tidying or revamp? Whichever it is, you can hit refresh with these 5 photo edits that will instantly elevate any outdoor area and increase the property appeal dramatically.
READ MORE
The do's and don'ts of real estate photography! In this article, we explore what sets apart a good shot from a bad shot and what measures you can take to improve your real estate photography.
READ MORE
Join our free Make the Switch webinar, and discover how to take high-quality property photos with ease. Learn pro tips, master SnapSnapSnap, and enhance your photography skills to transform your listings and boost results!
READ MORE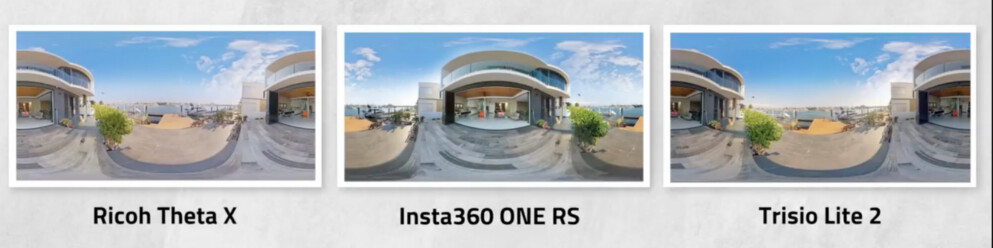
It’s a 360° camera shoot-out! Read to find out how three 360° cameras rank when it comes to shooting panoramic property images and decide which one is the best for your real estate photography needs.
READ MORE
Our co-founder and professional photographer Brad Filliponi will answer all your photography questions. Discover expert tips, tricks, and techniques to enhance your real estate photography skills and capture stunning images.
READ MORE