5 MISTAKES REAL ESTATE PROFESSIONALS MAKE WHEN TAKING PROPERTY PHOTOS
Photos are often the first impression that a buyer has of a property, but unfortunately, sometimes the first impression isn’t perfect.
In our latest video, our co-founder Brad Filliponi outlines the five common mistakes that real estate professionals make when taking property photos.
Let's explore these missteps and how to avoid them to ensure your listings always include impeccable images.
5 Common Photography Mistakes Real Estate Professionals Make
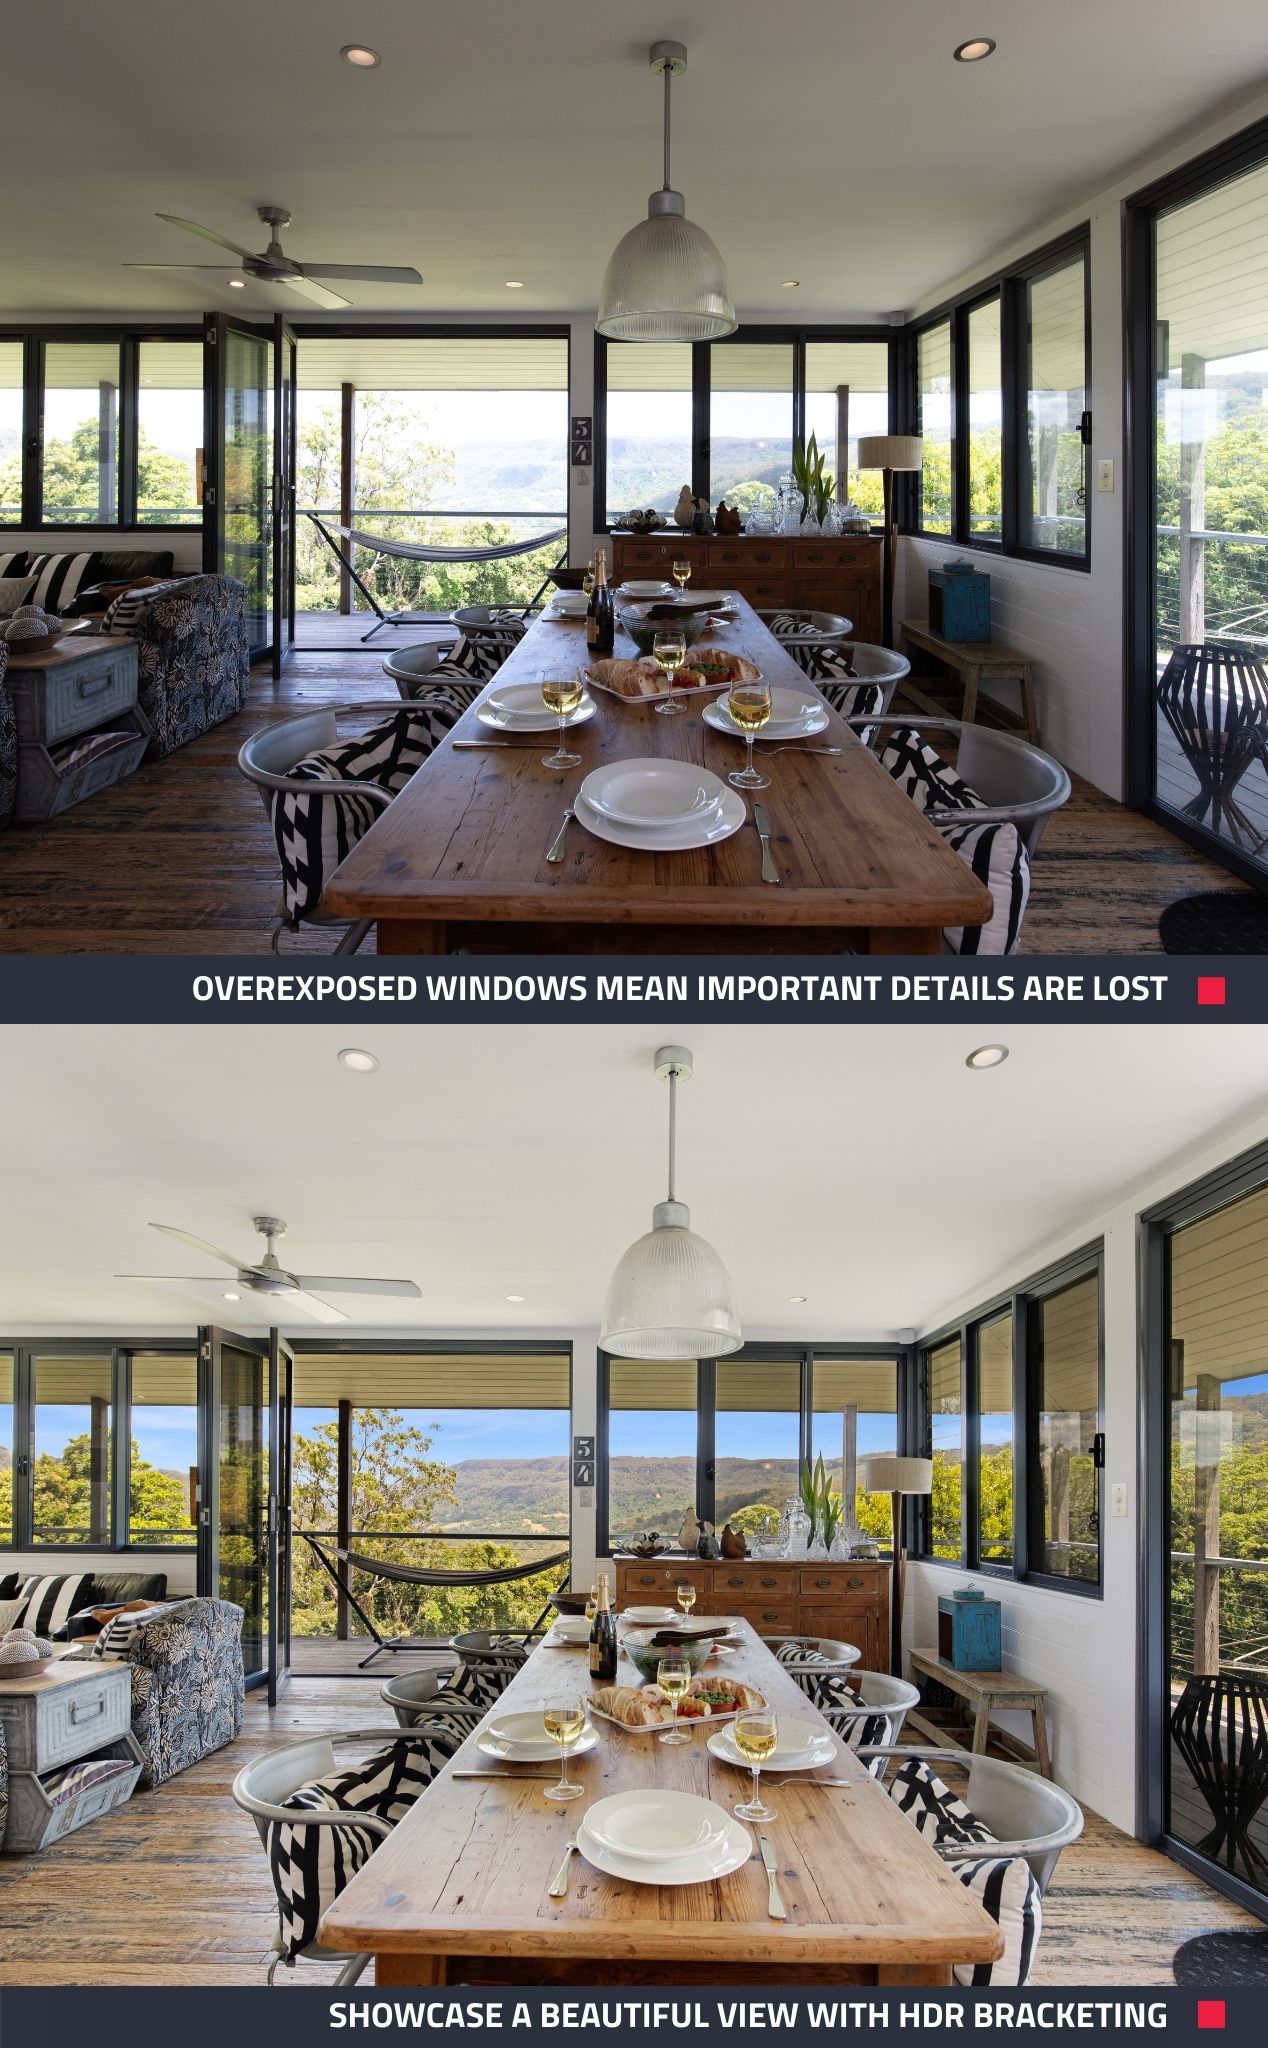
1. Not Using the HDR Bracketing Technique
HDR Bracketing is an important photography technique that many real estate agents overlook. It involves taking multiple shots of the same scene at different exposures and later blending them to create an evenly exposed image. Without it, detail in windows can be lost, which can be problematic, especially if one main selling point is a beautiful view.
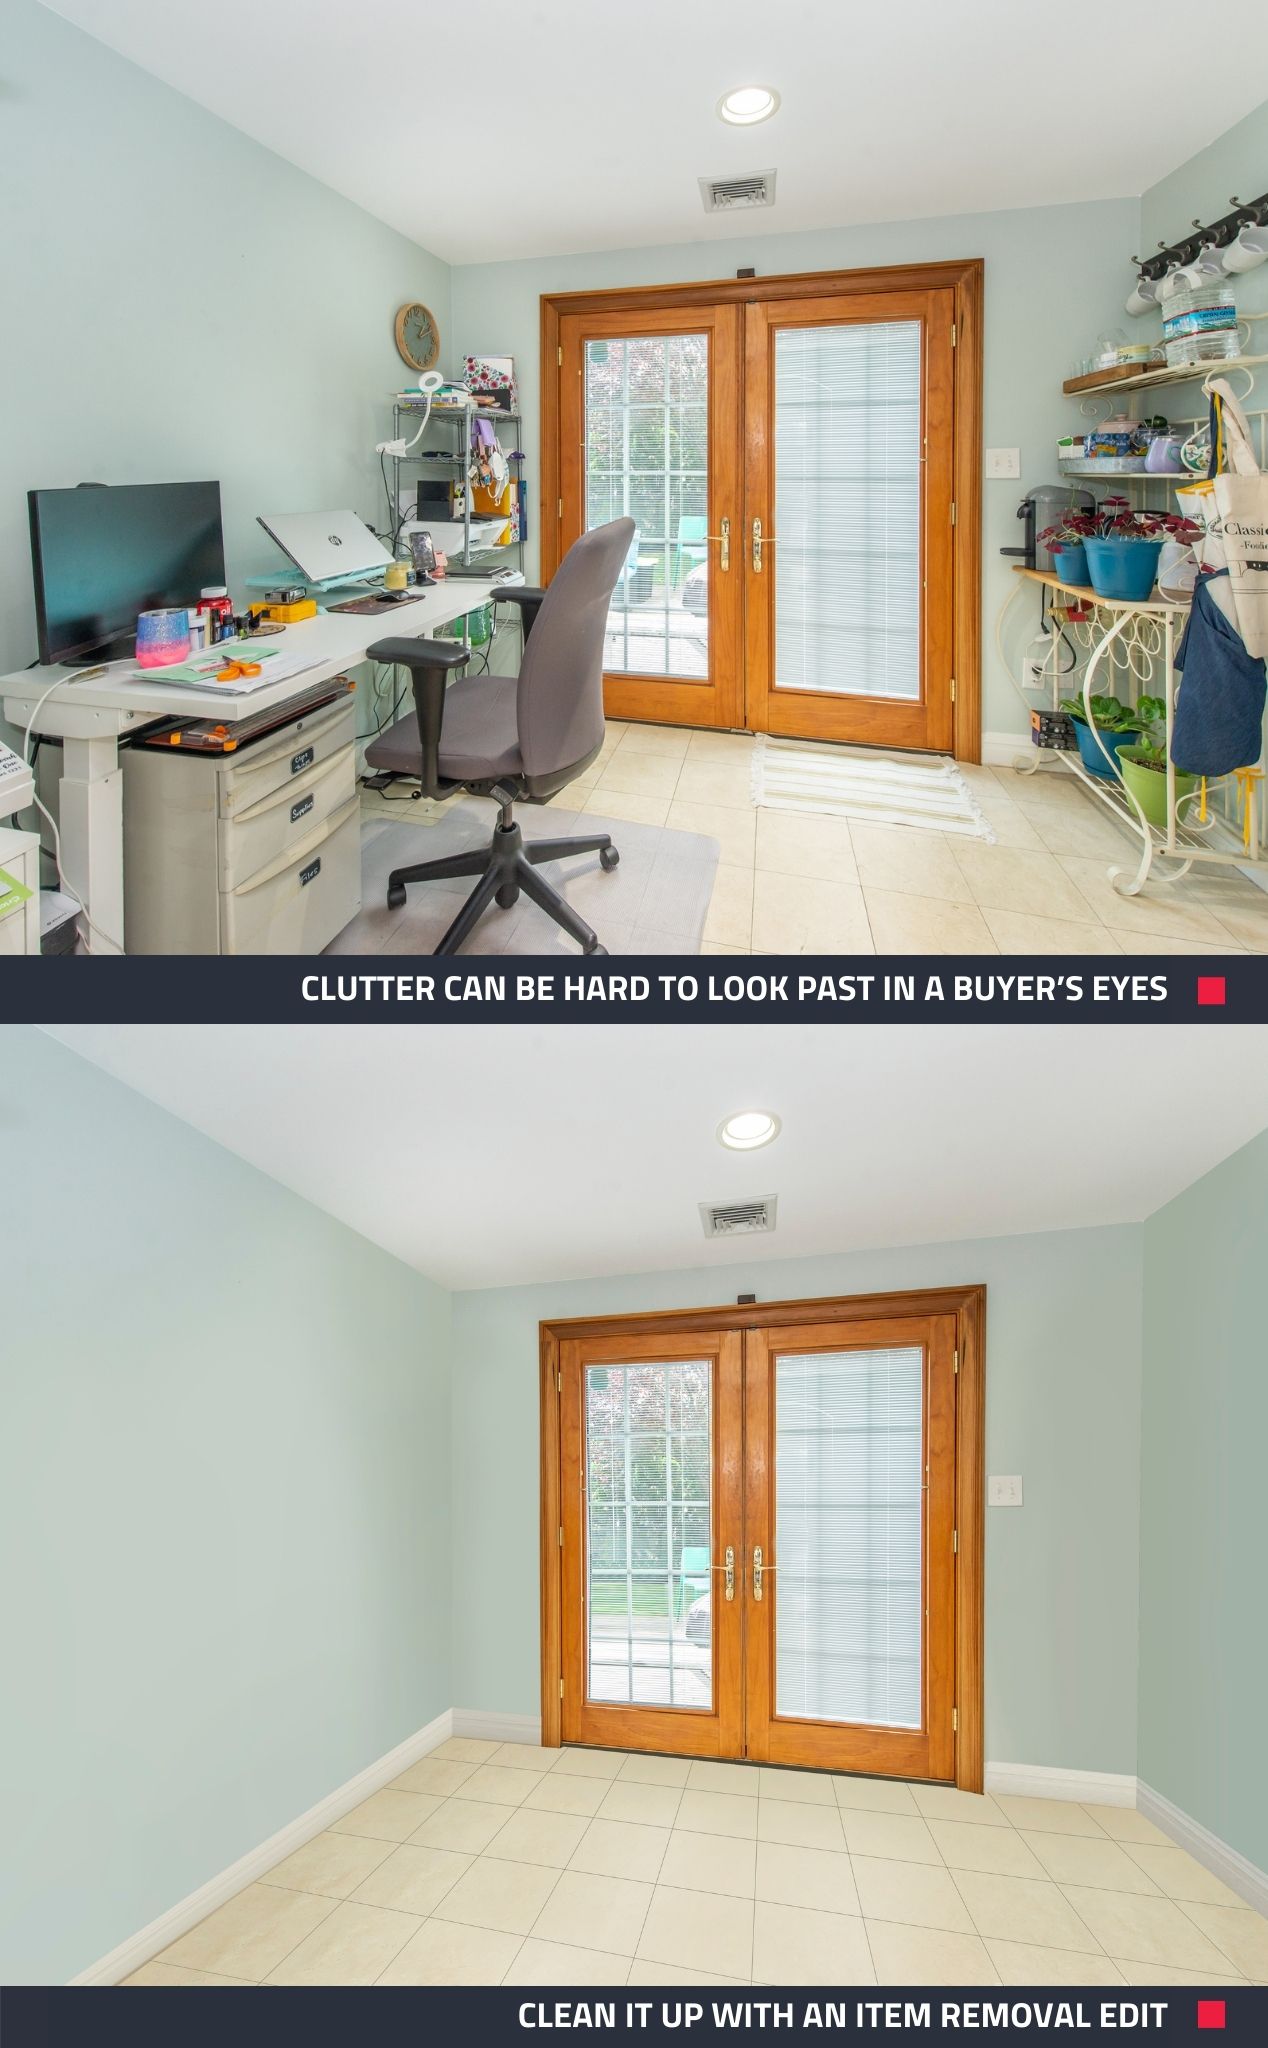
2. Capturing Cluttered Spaces
Let’s face it, clutter can be a turn-off for potential buyers and prevent them from seeing the property’s potential. Make sure you remove anything distracting from the shot, or if you forget, simply get it digitally removed from the final image.
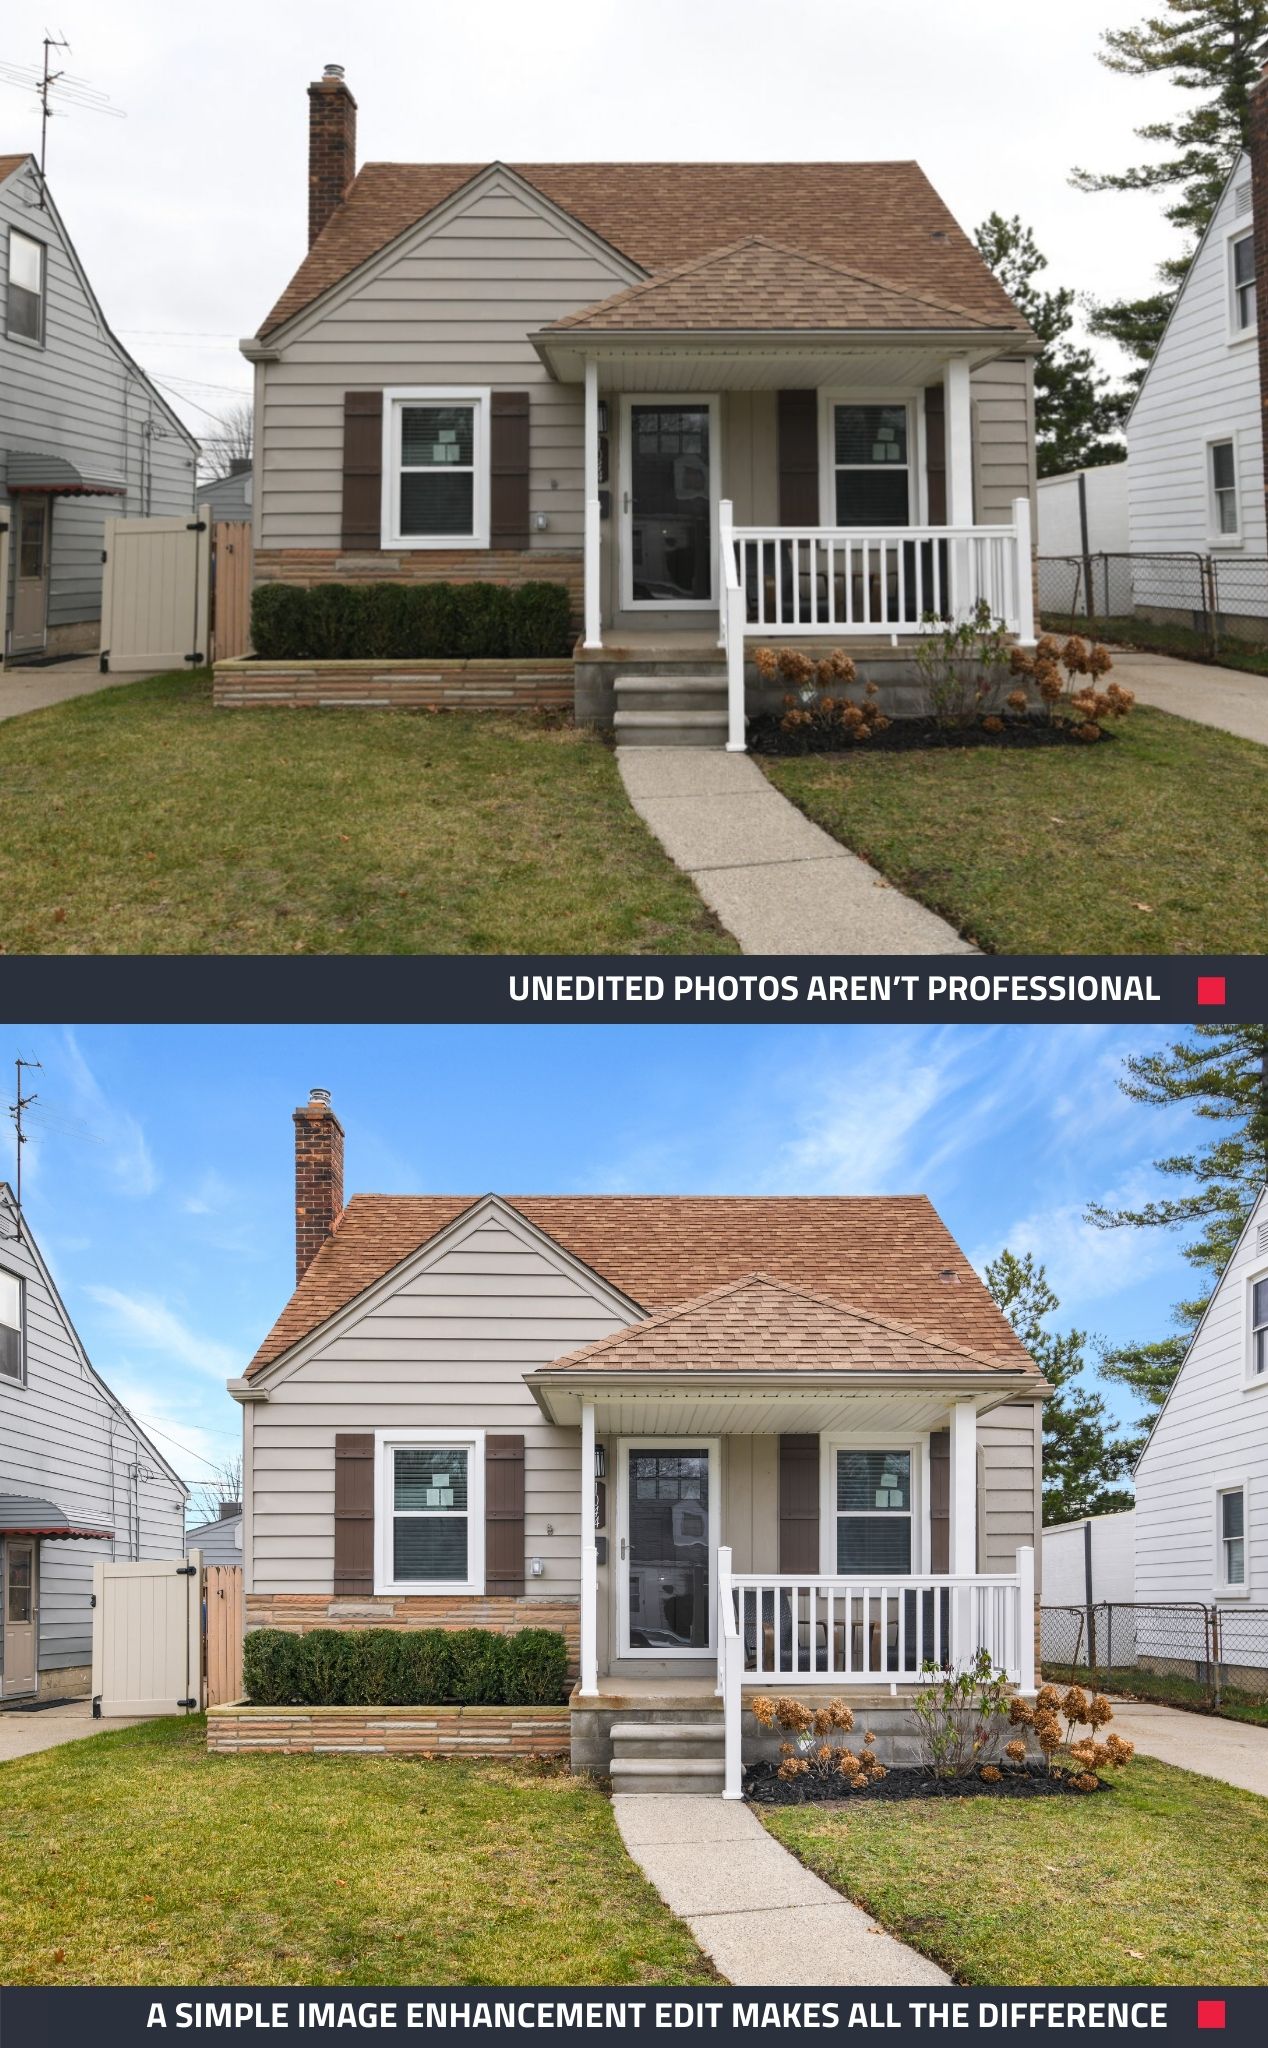
3. Not Getting the Photos Professionally Edited
It's impossible to achieve a polished, professional look without editing your photos. Plus, editing boosts accuracy in listings and ensures properties are portrayed as close as possible to how they look in real life.
4. Not Using a Wide-Angle Lens
Wide-angle lenses are essential for real estate; they capture more of a room in a single shot, providing a comprehensive view of the space. Wide-angle lenses can be purchased for DSLR cameras, but if you're using a late iPhone model to take your photos, chances are it's equipped with a built-in wide-angle lens.
5. Taking Too Few Photos
When taking property photos, more is often better than less. Having a surplus of photos allows you to select the best shots for each listing, ensuring you emphasize the property's features and create a captivating listing. It’s easier to take more photos when shooting rather than returning to the property later to reshoot.
New to BoxBrownie.com? Sign up now to receive 3 Image Enhancement edits, 1 Day to Dusk edit, and 10 AI-written listing descriptions, all for free! No credit card is required.
RELATED ARTICLES
Our expert real estate photographer Brad Filliponi is going to show how easy it can be shoot HDR bracketed images. Take your property images to the next level with these simple tricks for that flawless finish.
READ MORE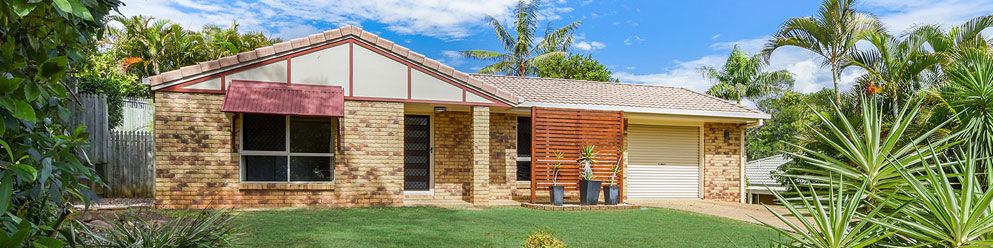
Want to learn how to shoot real estate like a pro? What about learning how to shoot a property in under 7 minutes? In this article, world class real estate photographer Brad Filliponi shares some of his tips on how to help shoot and sell property faster!
READ MORE
Elevate your real estate game with Virtual Staging using your iPhone and the SnapSnapSnap app. Brad, our co-founder and photography pro, shares his top tips for setting up, capturing, and editing stunning visuals that will make your listings irresistible to buyers.
READ MORE
When property listings fail to convert buyers, it is not always price or presentation. It is clarity. Buyers need to instantly understand how the space actually works. Floor plans are key to attracting more qualified buyers and renters. Learn how they make a difference.
READ MORE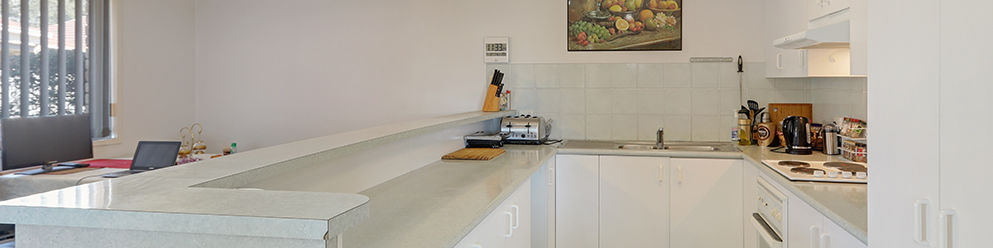
In this video, Brad covers all the key tips to take your marketing to the next level. Giving you the key tips to present your listing and get you and your client the best result.
READ MORE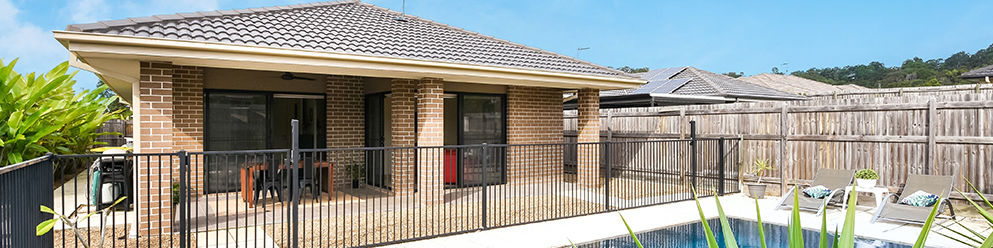
As an expert in real estate photography, Brad Filliponi is going to share his key tips for preparing and shooting a property from start to finish.
READ MORE