HOW TO SHOOT A VIRTUAL TOUR USING THE RICOH X
Introduction
Virtual tours are a powerful marketing tool when it comes to selling real estate. They provide potential buyers with the ability to view a property anytime, anywhere, and have a range of other important features that can enhance your marketing. If you’re unsure of how to start creating a virtual tour or are just after some tips and tricks when shooting it, this latest video is for you.
Our Co-founder Brad Filliponi demonstrates just how easy it is to shoot a professional virtual tour of a property interior using a 360° camera. Easily capture the footage you need to create an immersive virtual tour that beautifully showcases a property.
Brad said even if you have never shot a virtual tour before, you will be able to after watching this video.
“We’ll be shooting with the relatively new Ricoh Theta X which is a professional 360° camera,” he said
“The beauty of these Theta cameras is that they’re so quick to shoot on-site and, of course, they’re just a beautiful quality camera.”
In this photo shoot, we take 14 shots with a 360° camera:
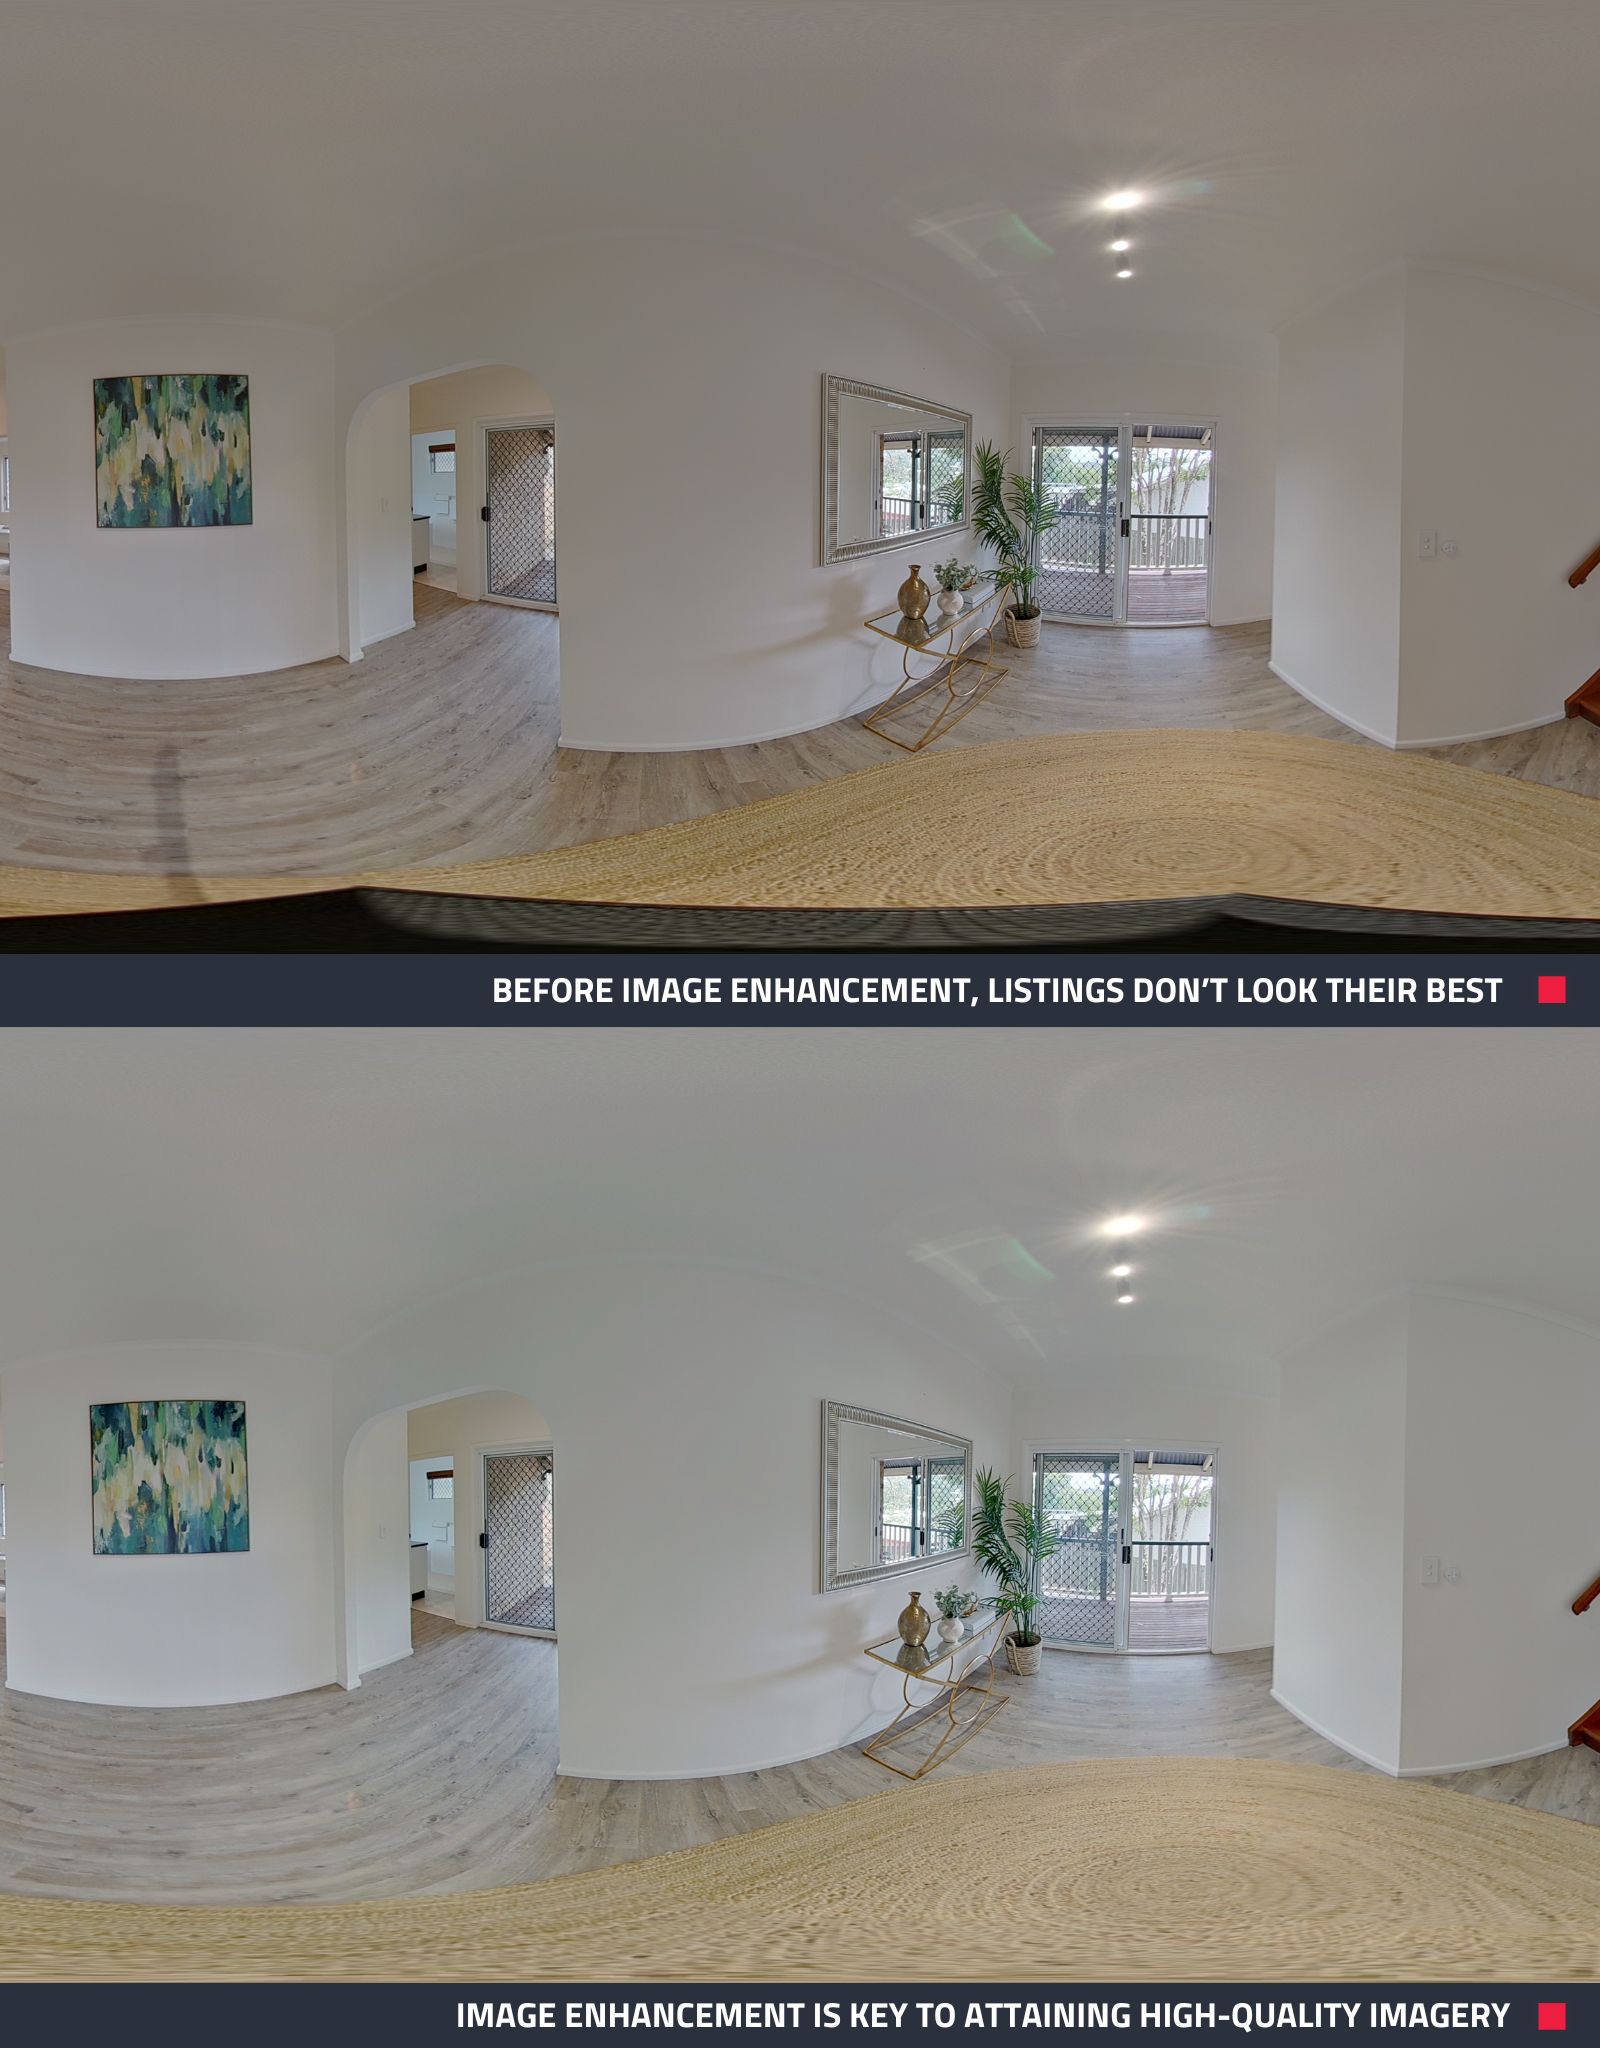
All 14 360° images are edited with Image Enhancement
All images are stitched together by our expert editors to create a 360° Virtual Tour
Equipment:
Ricoh Theta X
Apple iPhone 14 Pro
Camera Settings:
Exposure Value (EV): 0.0
White Balance: Automatic
Option Setting: HDR Rendering
Get A Professional Virtual Tour In 14 Shots
In this shoot, Brad captures an interior virtual tour in 14 shots. He runs you through the key things to remember when it comes to using a 360° camera and the must-dos when shooting real estate. He also shows us how to keep our photos to a minimum to keep it cost-effective.
Key Points To Remember:
- Ensure you’re out of the frame and preview any images before you shoot them.
- Always place the 360° camera as close to the middle of the room as you can.
- Because of the Ricoh camera’s dual lenses, it doesn’t matter which way you put the camera down.
- It’s very important to shoot hallways and stairs because this is the space that links up the shots and creates a seamless flow.
- For professional quality, an Image Enhancement edit on all photos is a must.
- Turn all lights and lamps on, and open doors.
- Take an extra shot for safety.
The Result Speaks For Itself
If you have watched the video and want to see the final result of the photo shoot, you can take a 360° Virtual Tour of the property. Virtual tours are an immersive and engaging way to showcase a property and are not only a popular feature to include in a listing but a powerful one.
New to BoxBrownie.com? Sign up now and receive 4 free edits. No credit card required.
RELATED ARTICLES

Want more Airbnb bookings without breaking the bank? Our latest video reveals how to capture stunning listing photos using just your phone and create professional floor plans. With expert tips from Brad, marketing your Airbnb is now easier than ever.
READ MORE
Ready to stand out and get more leads? Explore five free BoxBrownie.com resources designed to help you capture better photos, streamline your workflow, and create standout listings that drive faster results.
READ MORE
Got an empty or even partially empty property and the 360° Virtual Tour is just not doing it justice? 360° Virtual Staging is the answer. Get a step-by-step guide on how to virtually stage a house in a 360° Virtual Tour and start generating buyer interest quickly.
READ MORE
Pictures are worth a thousand words – and a whole lot of trust. Read to discover the ways real estate professionals can leverage photography to establish and strengthen client trust.
READ MORE
Looking to boost your property marketing? Discover the easiest way to create a Virtual Tour for real estate listings with this step-by-step video guide. From selecting the best 360° camera to editing your photos and creating an interactive experience, Brad covers everything you need to know.
READ MORE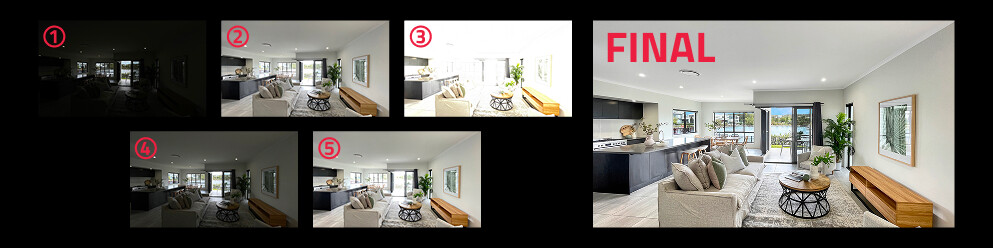
Confused by HDR? Discover what it is, why it can dramatically improve your property photos, and how we make creating stunning, balanced images effortless.
READ MORE