HOW TO TAKE PROFESSIONAL PHOTOS ON YOUR IPHONE OR ANDROID PHONE
Introduction
Want to market your property like a professional but can’t find (or get access to) a good photographer? Or maybe you’re simply looking for an innovative way to take real estate photos yourself and save a few dollars… Well, get excited cause today, we’re going to teach you how to shoot real estate like a professional using only your smartphone!
In this article, you’re going to learn:
• Why you need to be shooting bracketed photos for real estate
• How to easily set up bracketing on your iPhone and Android
• How to have your photos edited professionally (for only US$1.60 per photo!)
Why You Need To Be Shooting Bracketed Photos For Real Estate
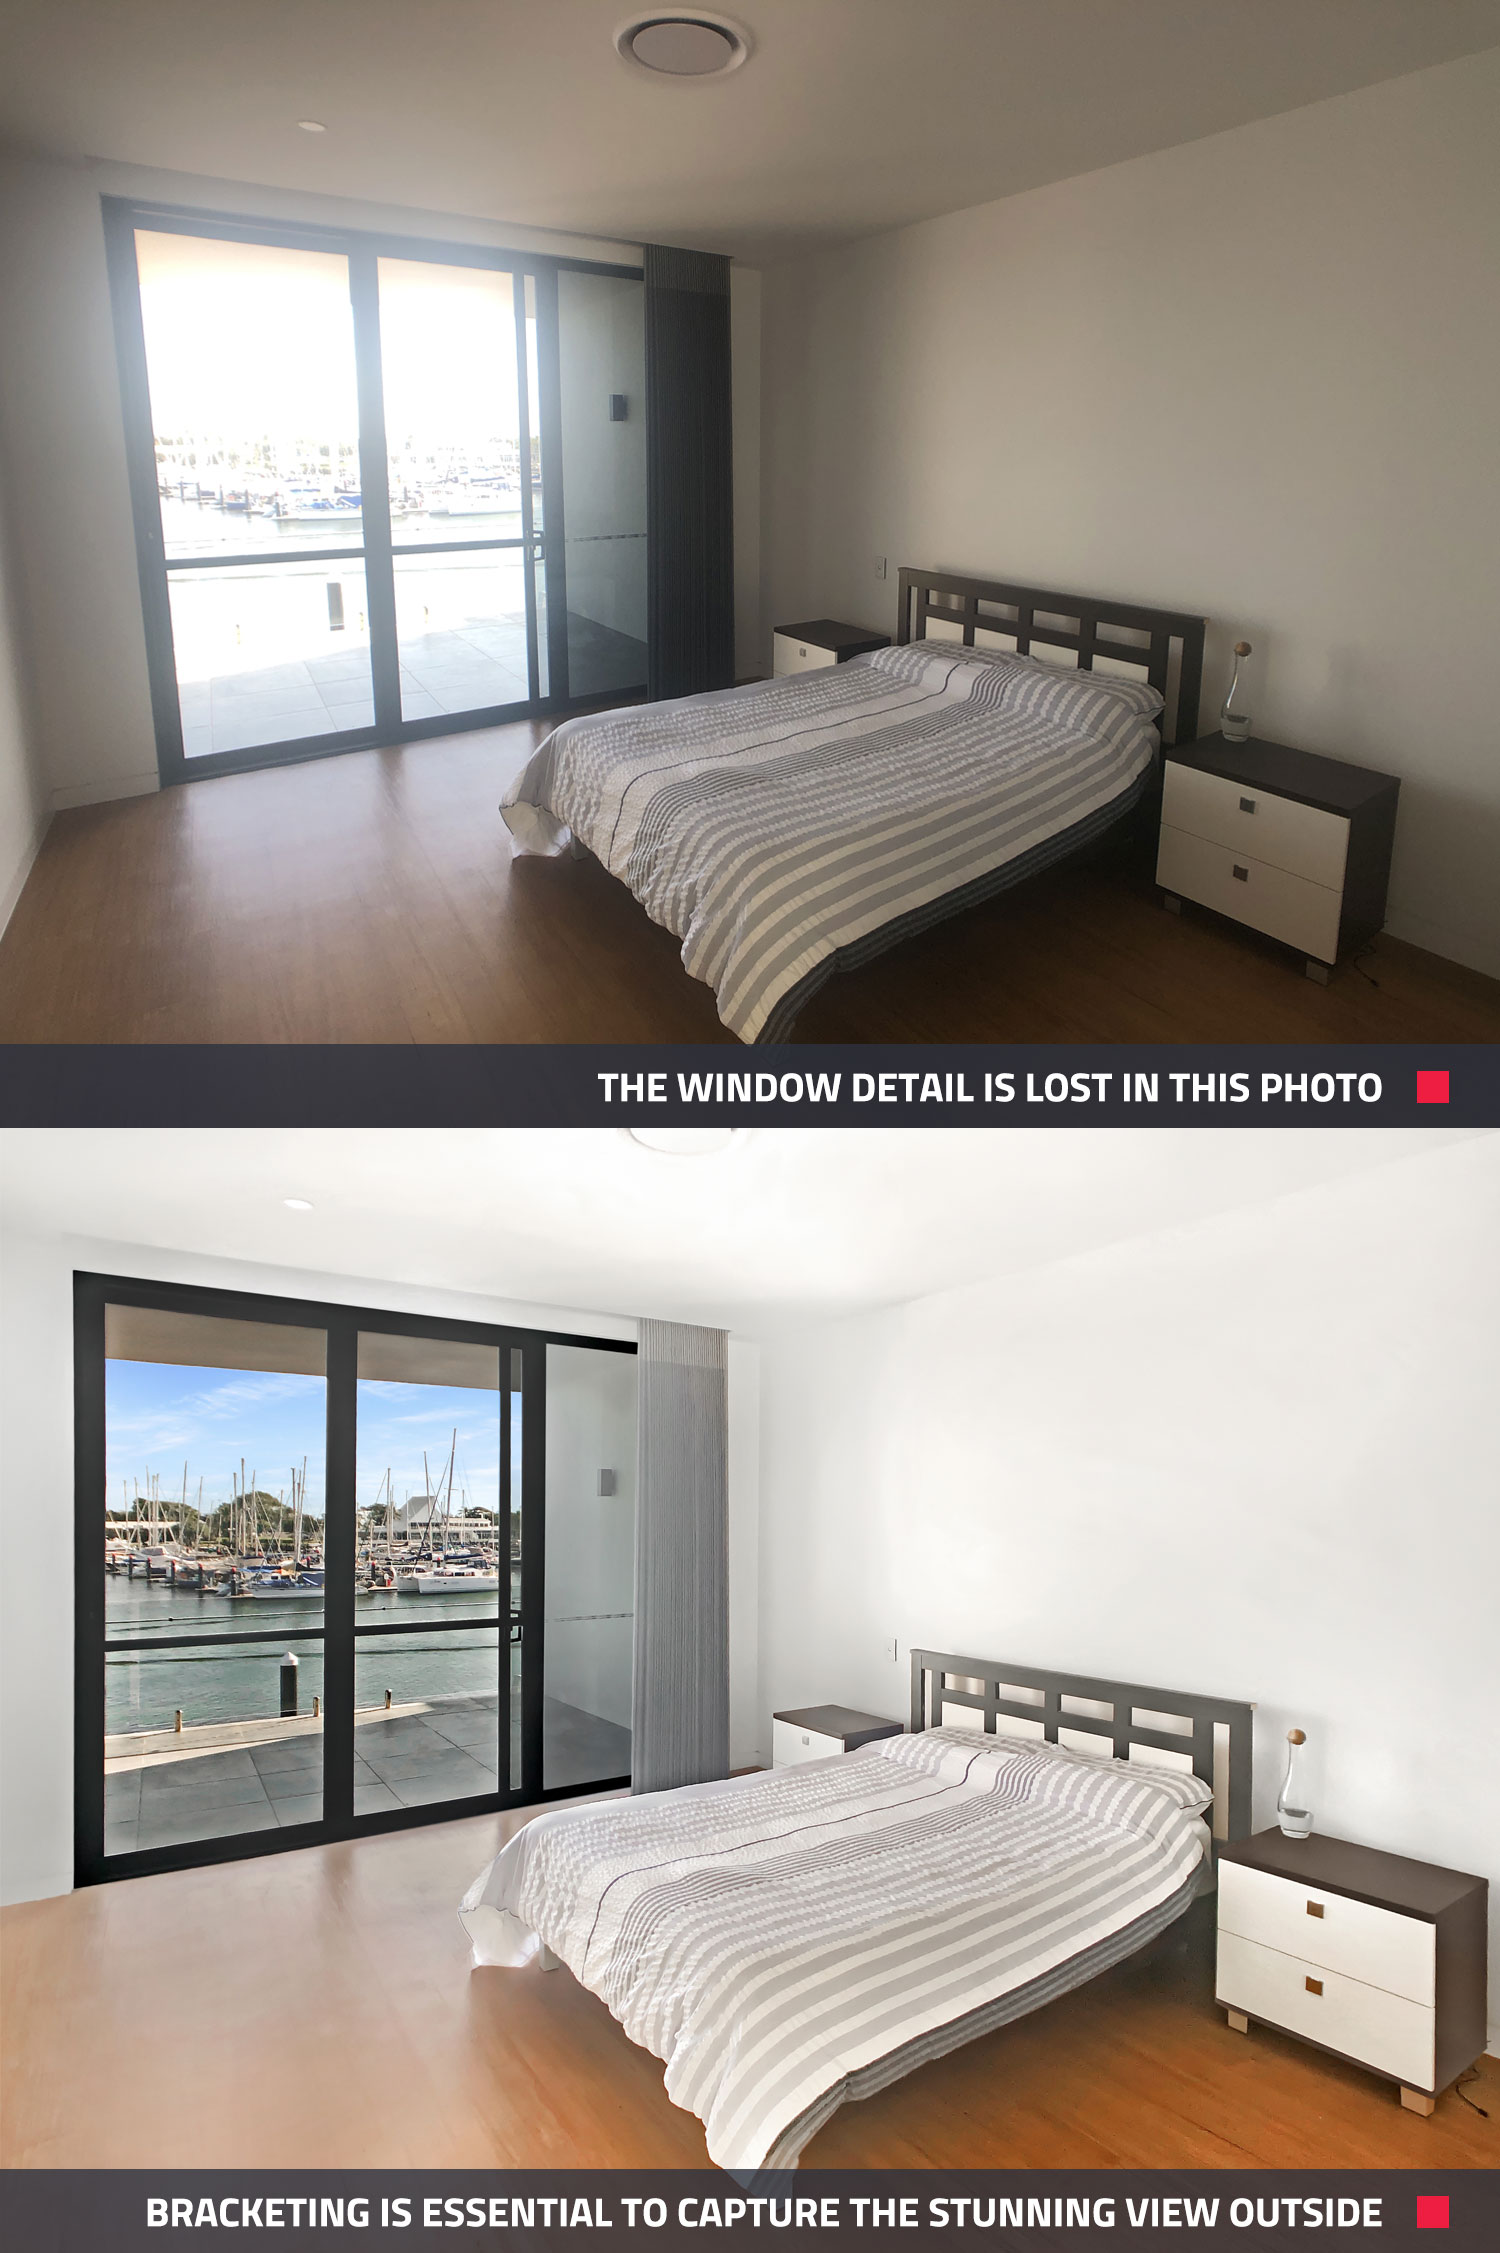
Bracketing is essentially where you take multiple photos from the same angle at various exposures. The photos are then blended to create a final shot that looks true to the eye. This is essential when marketing real estate as it’s the only way to represent your property correctly.
To illustrate this point, let’s say you’re marketing a property that has a beautiful view outside. If you don’t use bracketing, the window detail will be blown out in your photo which will retract from a major selling point of the property. By using bracketing, you’ll essentially capture all of the detail required and once blended, the result will be a stunning photo true to the eye which showcases the stunning view outside.
How To Easily Set Up Bracketing On Your iPhone
To set up bracketing on your iPhone, you'll need to download an app called CameraPixels PRO (which costs $10) on the App Store. There is a free version called CameraPixels Lite but we don’t recommend it as it has limited functionality. After downloading CameraPixels PRO, you’ll need to enter the settings below:
1) Open up CameraPixels PRO
• Click On ISO and set to 20 (this is very important)
• Click on Mode
• Click on Bracketing
• Click on Set
2) Under "Image"
• Resolution: 12.2MP x 4032 x 3024
• Crop: 4:3
• Quality: 100%
• Stabilisation: On
3) Under "Bracket"
• Type: Exposure
• Image Count: 7 Images
• EV Step: 1.0 F-Stop
• Flash: Off
4) Under "Intervalometer"
• Timer: 1 Sec
• Image Count: Single
• Lapse: 1 Sec
• Click Save As Preset
• Give the Preset a name
Now when you take a photo, it’ll shoot 7 shots automatically! Just make sure you always use a tripod when bracketing as all the exposures need to align up perfectly.
iPhones Models We Recommend
• iPhone 11
• iPhone X (with Moment wide-angle lens)

How To Easily Set Up Bracketing On Your Android
You’ll need to download an app called “Manual Cam” on Google Play.
The free version is fine to use. Below are instructions on how to setup Manual Cam on your Android phone.
1) Open Manual Cam
2) At the top left. Click On “RAW” or “JPG” symbol. Set it for JPG.
3) At the top right. Click on the “Clock” symbol. Set for 3 seconds.
4) At the bottom left. Click on the “AW” symbol. Set White Balance to Auto.
5) At the bottom middle. Click on the “AF” symbol. Ensure it is set for Auto Focus.
6) At the bottom right. Click on the “- +” symbol. Set ISO for 40.
7) At the bottom right. Click on the “mountain” icon. Set to BRK.
- Set exposure bracketing to 5F and 3.0
8) At bottom right. Click on the “Cog” symbol.
- Image quality is 100%
- Timer - 1 second
- Image Count – Single
- Lapse – OFF
Now when you take a photo, the phone will automatically shoot 5 brackets at various exposures! Just keep in mind when shooting, you must always use a tripod to ensure all the brackets align up perfectly.
Android Phones We Recommend
• Samsung Galaxy S20
• Samsung Galaxy S10
• Samsung Galaxy S9 (with wide-angle Moment lens)
Note: At the time of writing this article, there are no apps available on Android (including Manual Cam) that will allow you to shoot bracketed whilst utilizing the phone's wide-angle lens.
How To Have Your Photos Edited Professionally
Once you’ve taken your shots, you’ll need to get them edited and blended professionally. To do this, you’ll need to use our Image Enhancement (HDR Bracketed Images) edit which only costs US$1.60 per photo edited.
After transferring the photos from your phone to your computer, you’ll need to:
1) Sign in to BoxBrownie.com
2) On the Dashboard, click on Image Enhancement
3) Under Image Enhancement: HDR Bracketed Images, click on Add New Job
4) Enter in your Job Title, Number Of Outputs and Additional Information
5) Select which of the 16 steps you would like applied to your images
6) Upload your images then click Next
7) Submit your job
Within 24 hours, you’ll receive an email containing a link to your completed photos.
Conclusion
Marketing a property professionally is now extremely affordable and accessible. All you need is a late model smartphone and a bracketing app to unlock this insane functionality. Bracketing combined with our Image Enhancement (HDR Bracketed Images) edit is essential to produce a final shot that looks true to the eye. Every real estate professional needs to be using this technique to ensure their listing is represented correctly.
RELATED ARTICLES

How do you prepare and photograph a new listing when you may also be experiencing significant difficulties simply gaining access to the home? In this blog, we take a look at our top 10 tips for shooting a property when you can’t access the home yourself to help you combat these difficult times.
READ MORE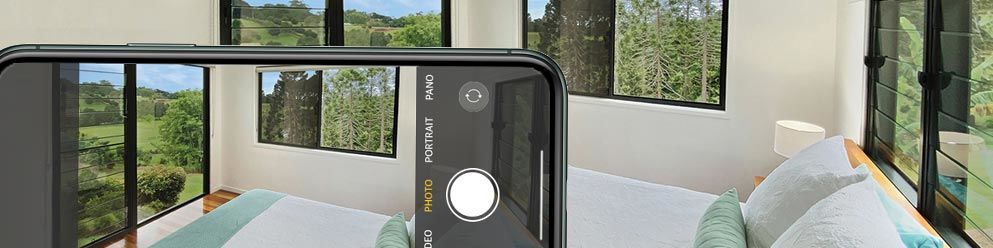
Looking for an innovative way to take your property marketing to the next level without breaking the bank? The new iPhone 11 is amazing and in this blog we are going to show you our top tips to professionally shoot your next real estate listing without the need for bulky and expensive camera equipment.
READ MORE
The list that keeps on giving. Our enormously popular Pre-Photography checklist is intended to be used with every new house a photographer must shoot. Here we’ll show you how it can save bundles of time and pave the way to much stronger marketing materials. Discover why the checklist has become our most downloaded document.
READ MORE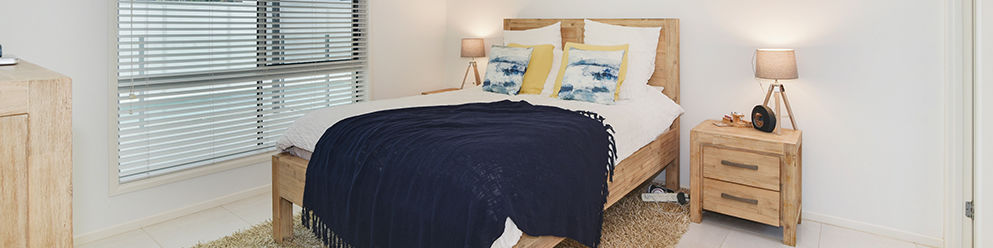
We are sharing our secret tips on how to take professional images for bedrooms. These might be the key tricks to getting your next listing sold faster!
READ MORE
Capture buyers’ and renters' attention and make your property unforgettable with seasonal décor and smart styling. These touches keep your listing fresh, inviting, and irresistible all year round.
READ MORE
The rise of the smartphone and the universal acceptance of virtual property marketing are the two top real estate stories of 2021.
READ MORE