THE BEST WAY TO SHOOT A PROPERTY AT DUSK SO IT SELLS FOR TOP DOLLAR
Introduction:
Shooting at dusk can initially be a daunting process, especially when you are running on a tight time frame to take all the photos required. In this blog, our co-founder Brad Filliponi will be walking through an entire shoot and giving step-by-step instructions on how to shoot a property at dusk.
The property featured on today’s blog is a stunning two-million-dollar home located in the Hinterland on the Sunshine Coast in Queensland.
The 6 most important points to take out of this video are:
1. Ensure the property is prepped
As the sun sets quickly, timing is key to getting all your shots taken. This means the better the property is prepared, the less work you will need to do on the day. To ensure you are ready to shoot, you can find our photography checklist here.
2. Remember to shoot quickly as the light is dropping
We suggest shooting all areas of the home that include the external view of the property first. This way you can ensure you haven’t missed taking those all-important external dusk images before the sun sets.
Once completed, you can then move onto the interior of the home as you can continue to shoot these after the sun has gone down.
3. It is ideal to shoot bracketed images
For those that haven’t worked with bracketed images before, this is where one shot is taken multiple times in different exposures. For more information on how to shoot bracketed images, you can find one of our past blogs here.
For experienced photographers, you understand the importance of shooting this way as the more information we have, the better editing output we can achieve.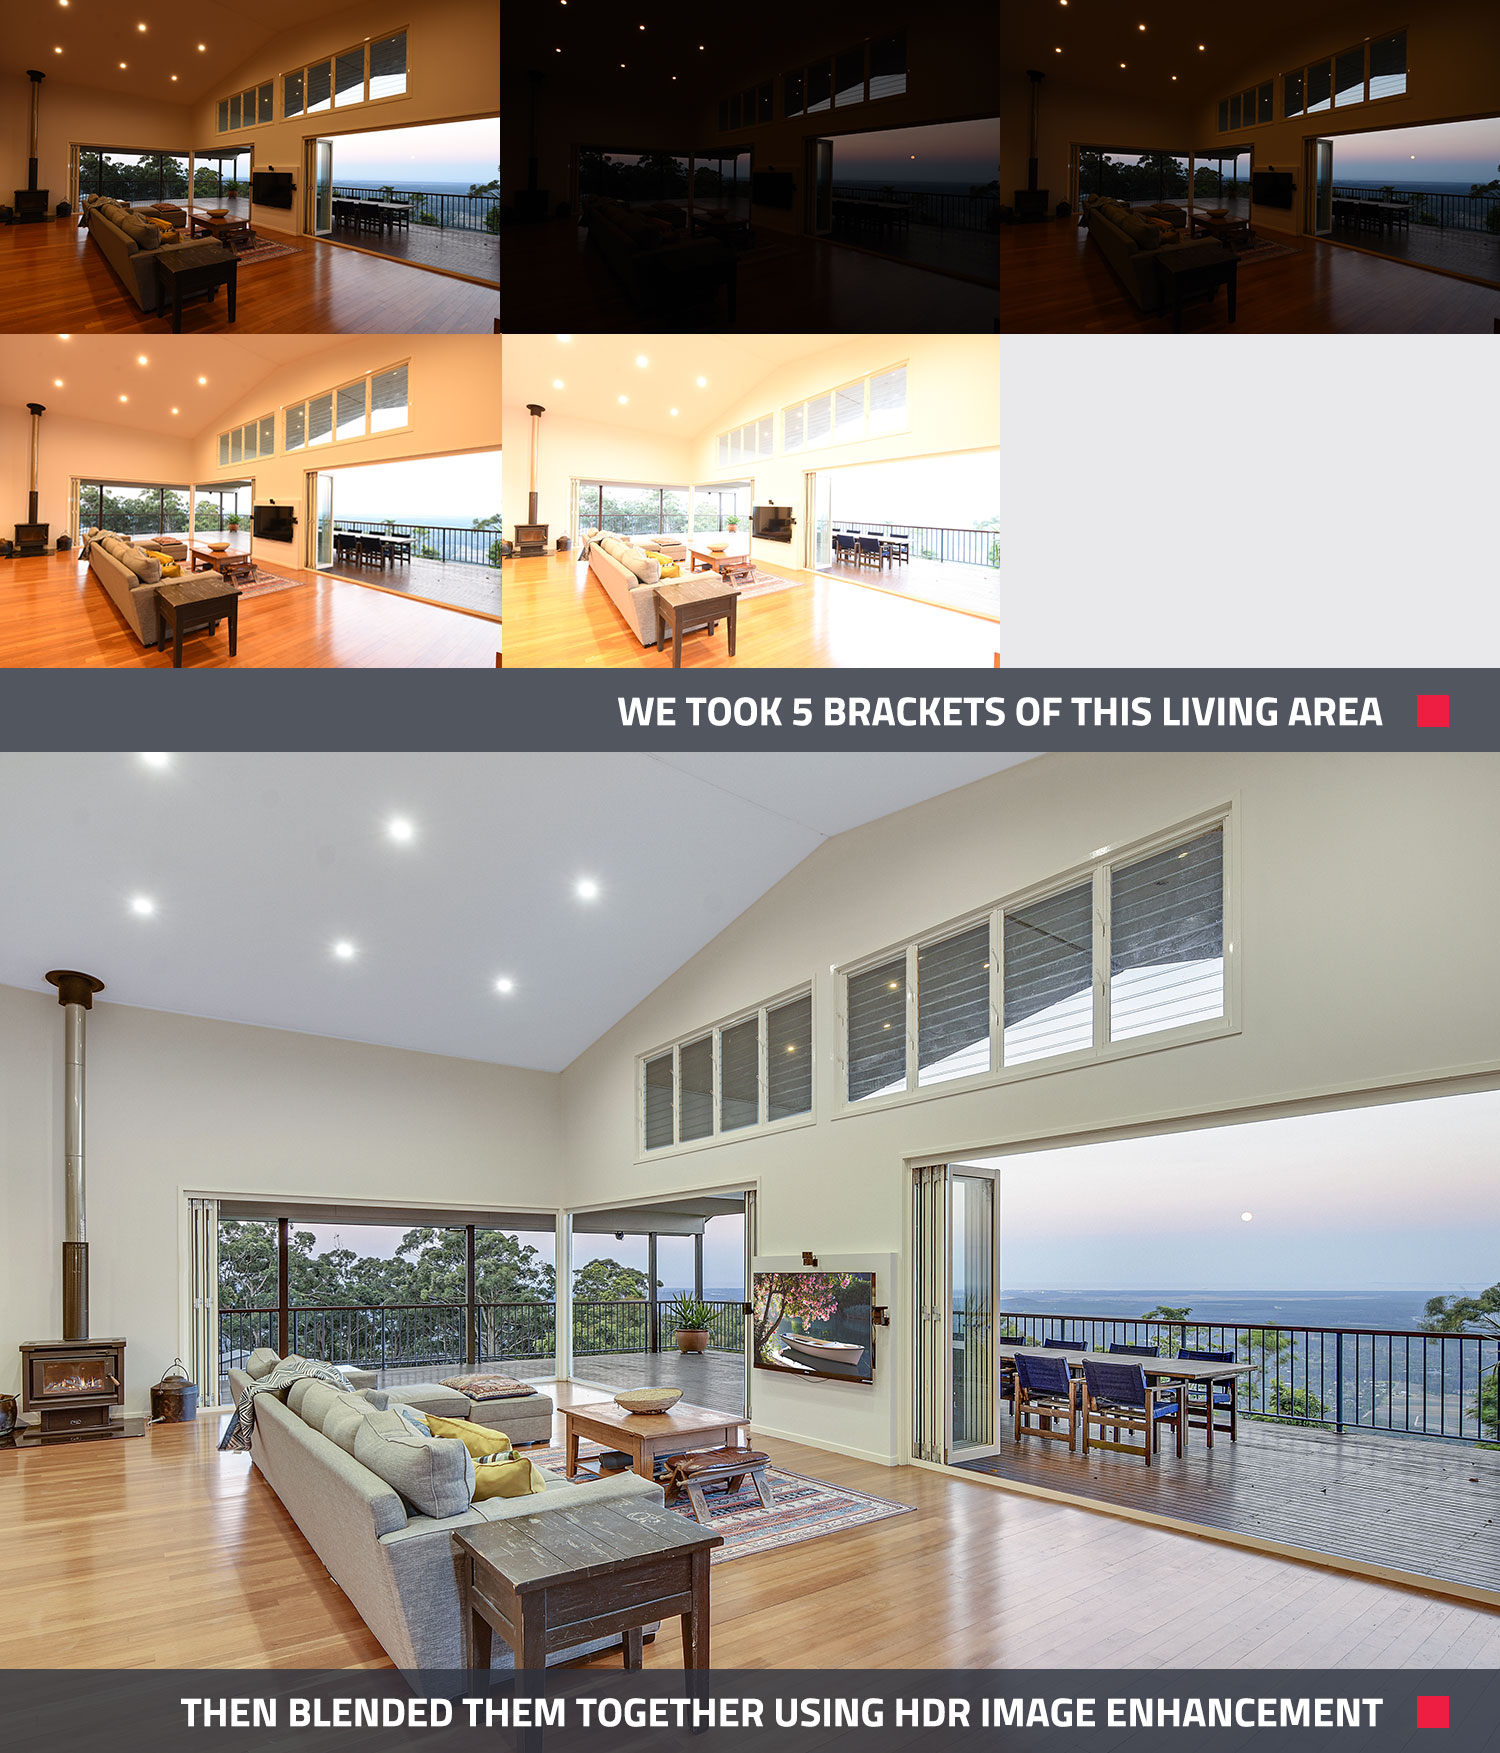 4. When it becomes darker, shoot with fewer brackets
As the sun starts to set, you have to move fast. We suggest shooting with 2-3 brackets with great light gradient or flick to manual mode. This will ensure you can shoot more of the property in a smaller time frame.
Tip: It is a personal preference to have the flash on for external shots at this point, however, we recommend the flash be used on all internal shots.
5. Have your images professionally edited
Once you have completed your shoot, you can head to your dashboard at BoxBrownie.com and submit your images through our Image Enhancement section.
Tip: When submitting your job through our Image Enhancement section, ensure you scroll down and select ‘Image Enhancement: HDR Bracketed Images’. That way we can ensure your photos are blended into one high-quality professional image.
6. Shooting from the rear of the property is often the hero shot
These stunning shots often become the hero shot with the spectacular sunset behind the home, so we recommend shooting this side of the property first.
Tip: It is ideal to shoot at eye level so potential buyers have a great understanding of the property which can easily continue when they inspect the property in person.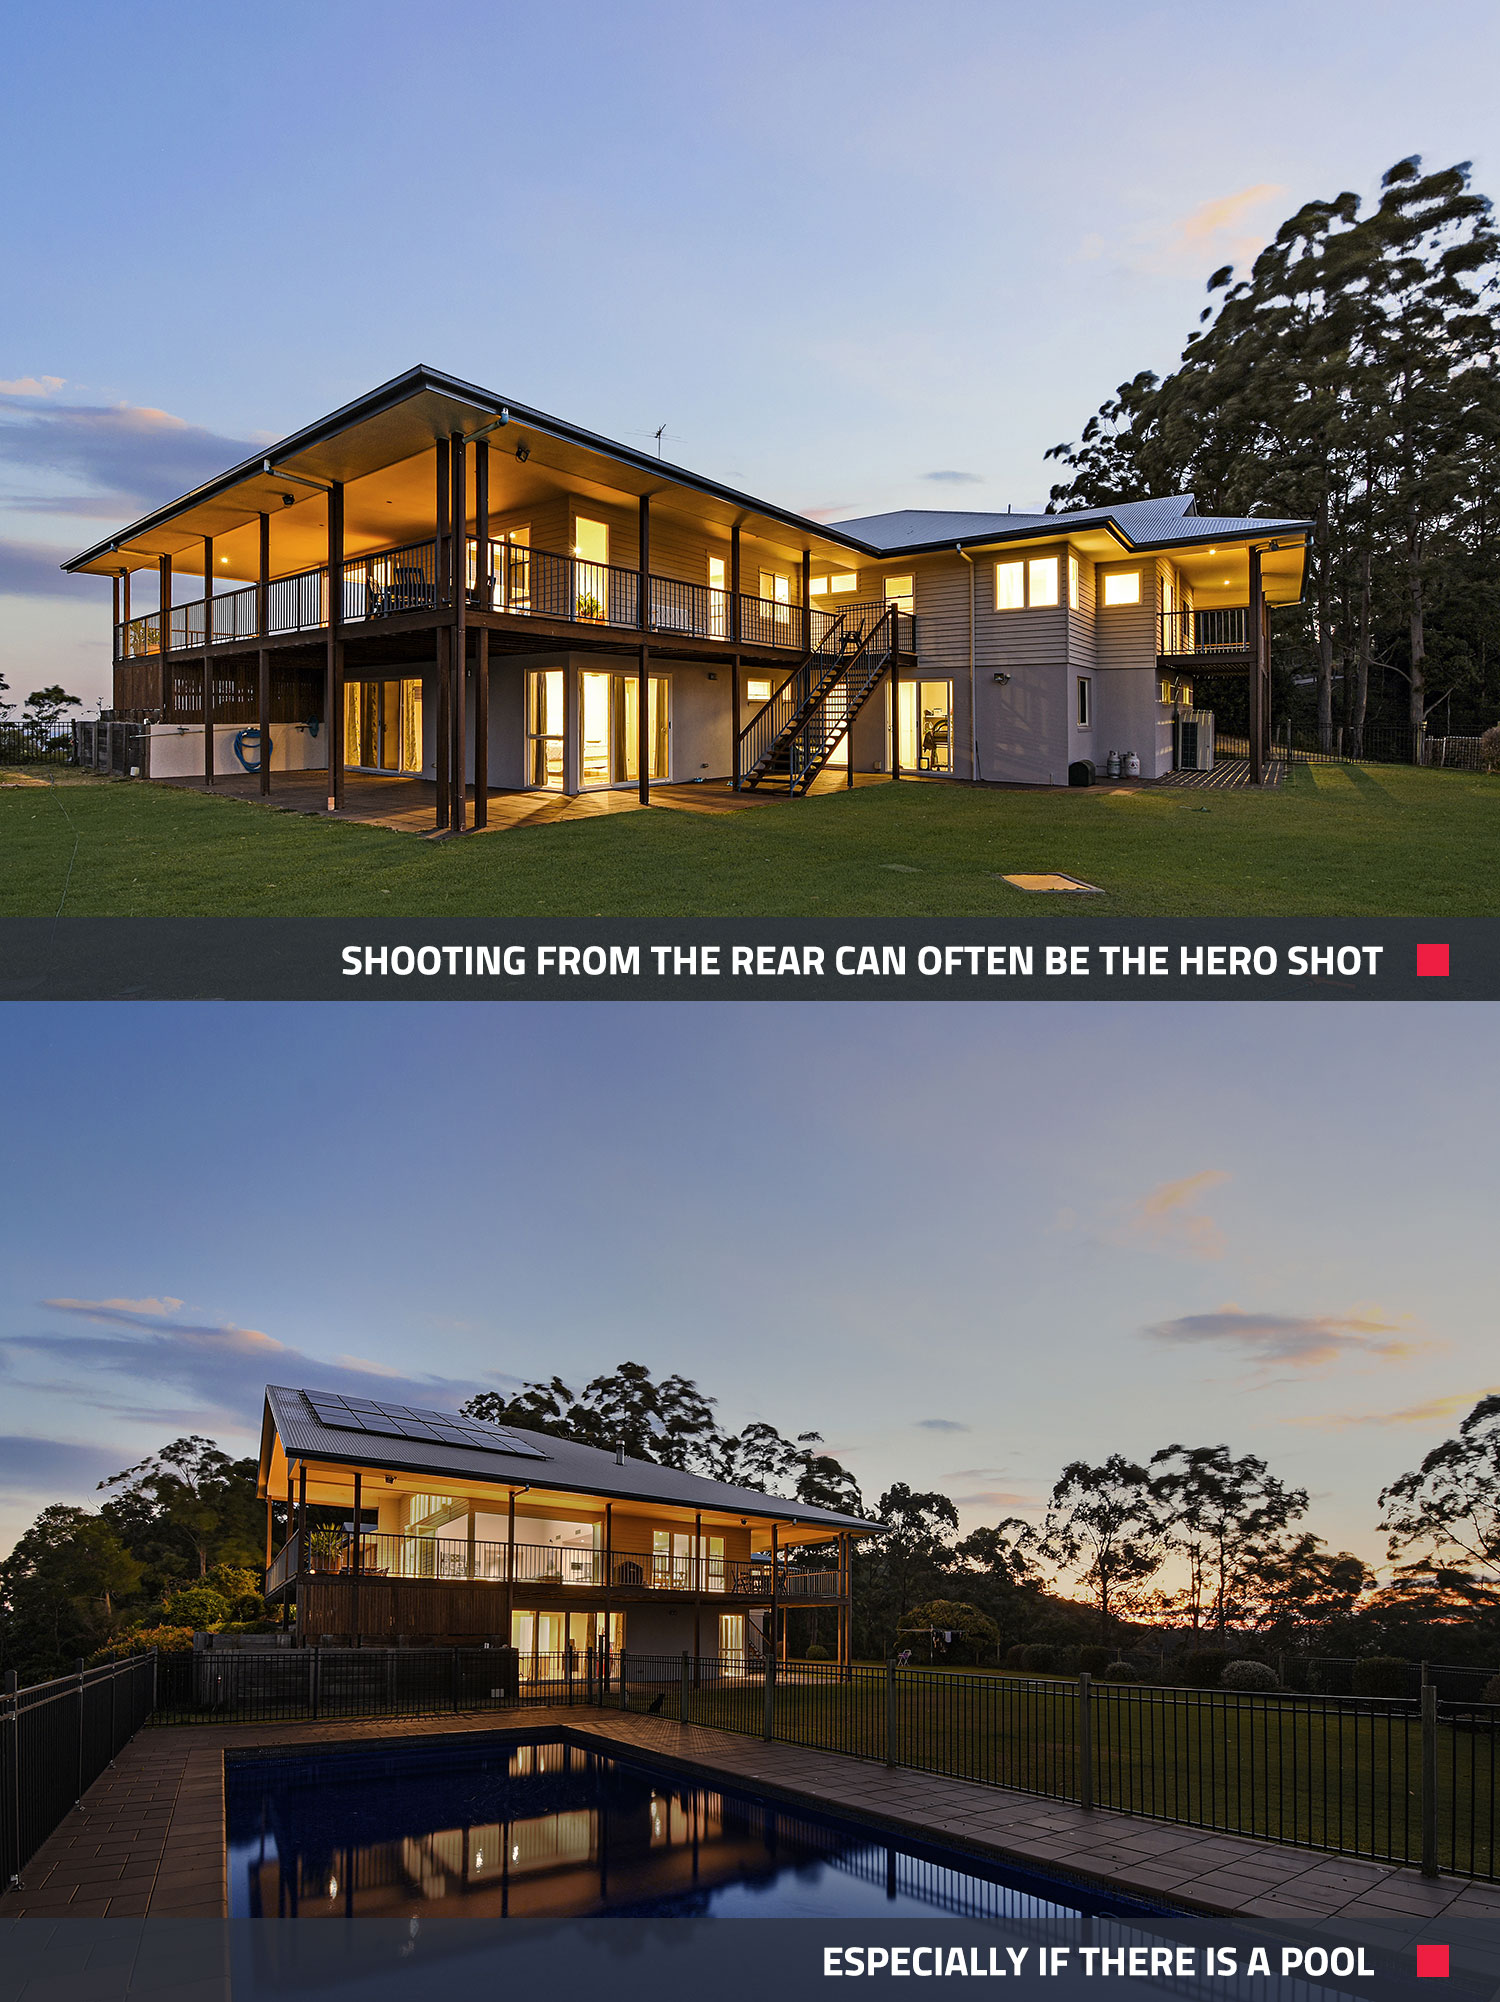
Conclusion:
We hope you find our video valuable and if you have feedback, questions or suggestions on what you would like more information about, please contact us.
RELATED ARTICLES

Selling a home with a breathtaking view but struggling to capture the window detail in your 360 virtual tour? In this tutorial, we will walk you through the shoot process step-by-step and show you just how easy it is to showcase your listing in the best possible light and capture the attention of your potential buyers.
READ MORE
Real estate listings with aerial photos sell faster than those without, and 73% of sellers would rather list with agents who use aerial photos. It's really a no-brainer, aerial pics can be a lifesaver!
READ MORE
Want to market your property like a professional but can’t find (or get access to) a good photographer? Or maybe you're looking for an innovative way to take real estate photos whilst saving a few dollars... Well, get excited cause today, we’re going to teach you how to shoot real estate like a professional using only your smartphone!
READ MORE
If you have a listing that has been lingering on the market, it may be time to hit refresh and use these top tips to rent a property fast and reduce the time between vacancies.
READ MORE
Looking for an innovative way to take your property marketing to the next level without breaking the bank? The new iPhone 11 is amazing and in this blog we are going to show you our top tips to professionally shoot your next real estate listing without the need for bulky and expensive camera equipment.
READ MORE
Want to secure more business? Wow sellers at listing presentations with our winning strategy! And for prospecting, use the same tools to generate leads with a marketing strategy personalized for each potential client.
READ MORE