HOW TO SHOOT REAL ESTATE WITH ONLY AN IPHONE 11
Since publishing this blog, we've released our groundbreaking iPhone app called SnapSnapSnap. It's the easiest and most cost-effective way to capture stunning real estate photos right from your iPhone. For the most seamless and efficient shooting experience, we encourage you to leverage the power of SnapSnapSnap and check out this blog on how to shoot a property with SnapSnapSnap.
Introduction:
It’s no secret that as real estate agents or property managers, we are always trying to get ahead of the pack. Elevating your marketing above the rest could be the difference between securing your next sale or missing out to your competitor down the street.
In this blog, we are going to prove you really can shoot real estate using just the iPhone 11. This latest release from Apple features an awesome wide-angle lens that is simply insane and, when paired with the CameraPixels PRO app and our HDR Image Enhancement, it can really help set your property marketing apart from the rest.
What Is Bracketing?
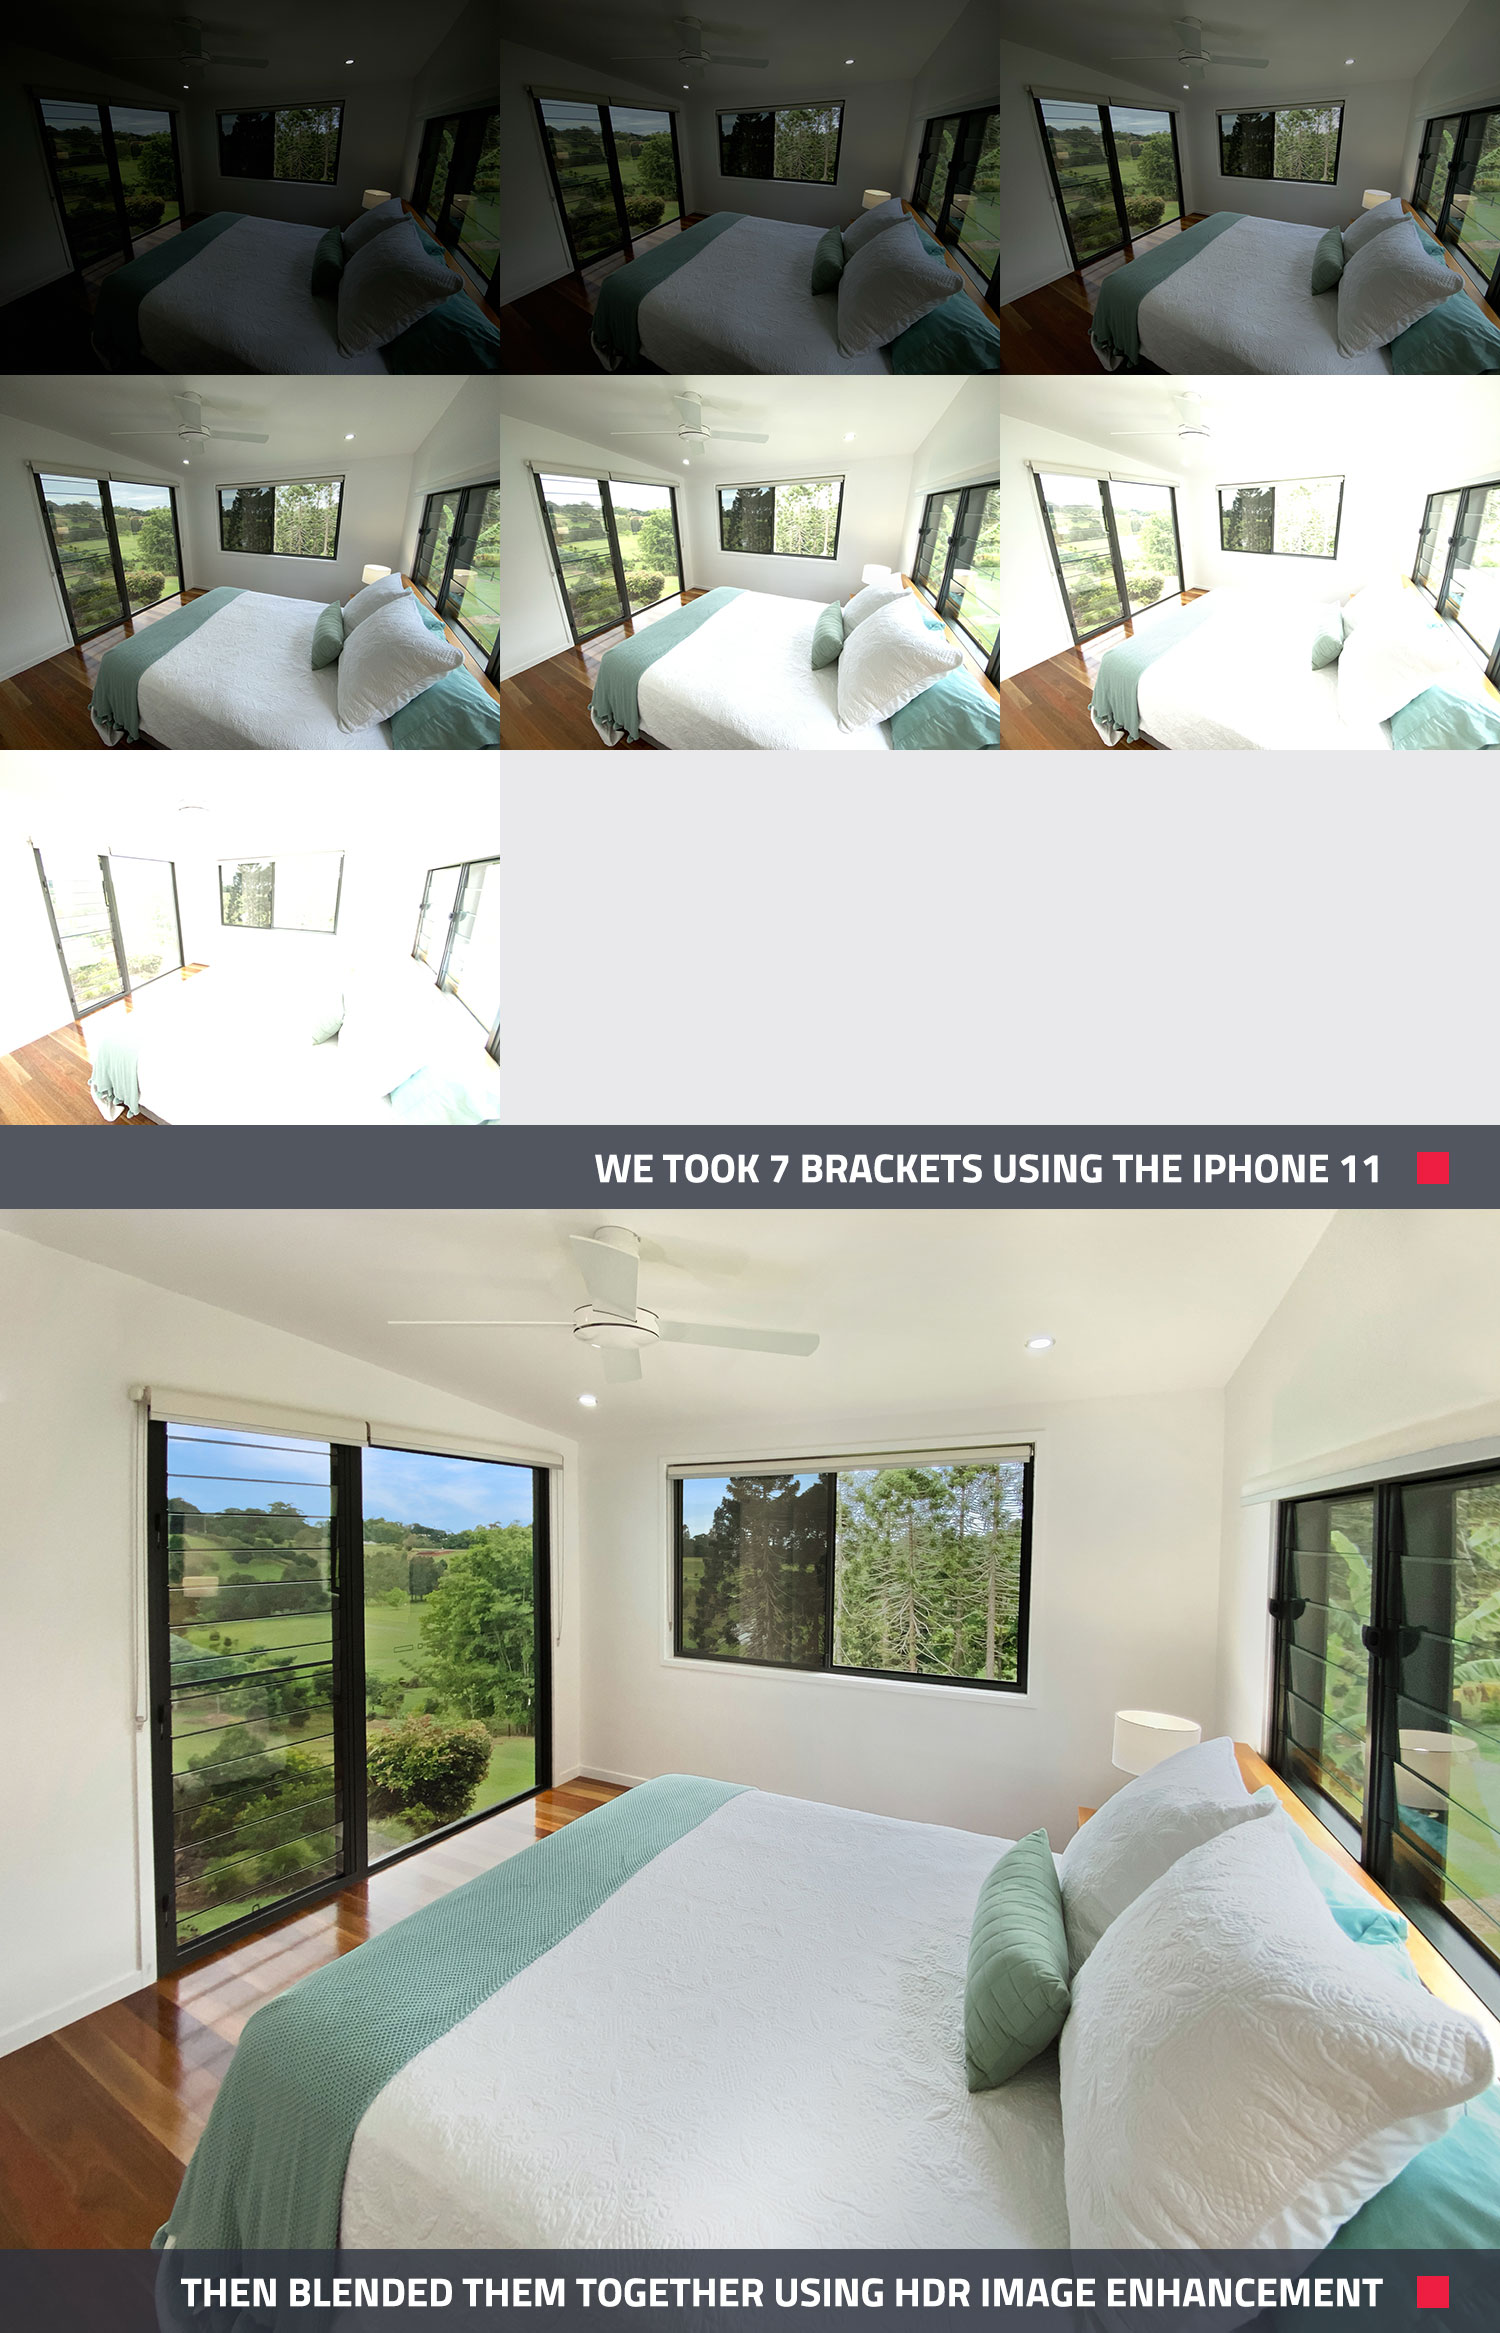
Bracketing is used by photographers to take multiple shots of the same image at different exposures which can then be combined into the finished product. This process produces an HDR image or a High Dynamic Range image that can highlight important details of the property you’re shooting, particularly homes with a fantastic outlook or view that you want to capture.
Typically, the photographer will shoot approximately 7 images at different exposures which can then be uploaded to BoxBrownie.com using our Image Enhancement edit. Our team of expert editors will then combine these shots into one image to create a fantastic professional finished product.
You can find out more about how HDR bracketing works in this previous blog.
How To Bracket On The iPhone
To set up bracketing on your iPhone, you will need to download an app from the App Store called CameraPixels Pro. There is a free version of the app however, the functionality is limited and we recommend you download CameraPixels PRO (approximately $10) and enter the below settings:
1. Open up the CameraPixels PRO app
- Click on ISO and set to 20 (or the lowest number it can go). This is an important step.
- Click on Mode
- Click on Bracketing
- Click on Set
2. Under ‘Image’
- Resolution: 12.2MP x 4032 x 3024
- Crop: 4:3
- Quality: 100%
- Stabilization: On
3. Under ‘Bracket’
- Type: Exposure
- Image Count: 7 Images
- EV Step: 1.5 F-Stop
- Flash: Off
4. Under ‘Intervalometer’
- Timer: 1 Sec
- Image Count: Single
- Lapse: 1 Sec
- Click Save As Preset
- Give the Preset a name
Once these settings have been programmed, it’s just a matter of preparing and shooting the property as you normally would. For some handy tips on preparing the home for photography, check out our FREE Pre-Photography Checklist.
Each time you take a photo using the CameraPixels PRO app, the phone will automatically take 7 shots. The most important tip is to make sure you always use a tripod when taking bracketed images as all the exposure images must align perfectly to produce a professional result.
Comparing The Finished Results
These examples below highlight the before and after results from shooting bracketed images using the iPhone 11 via the CameraPixels PRO app and then uploading those images to our Image Enhancement edit.
Kitchen Before And After
This is a spectacular property and it has been beautifully prepared however the before image of the kitchen still appears quite dull and lifeless. This is in stark contrast to the bracketed and enhanced finished shot which truly showcasing just how special this home is and is sure to attract the attention of potential buyers.

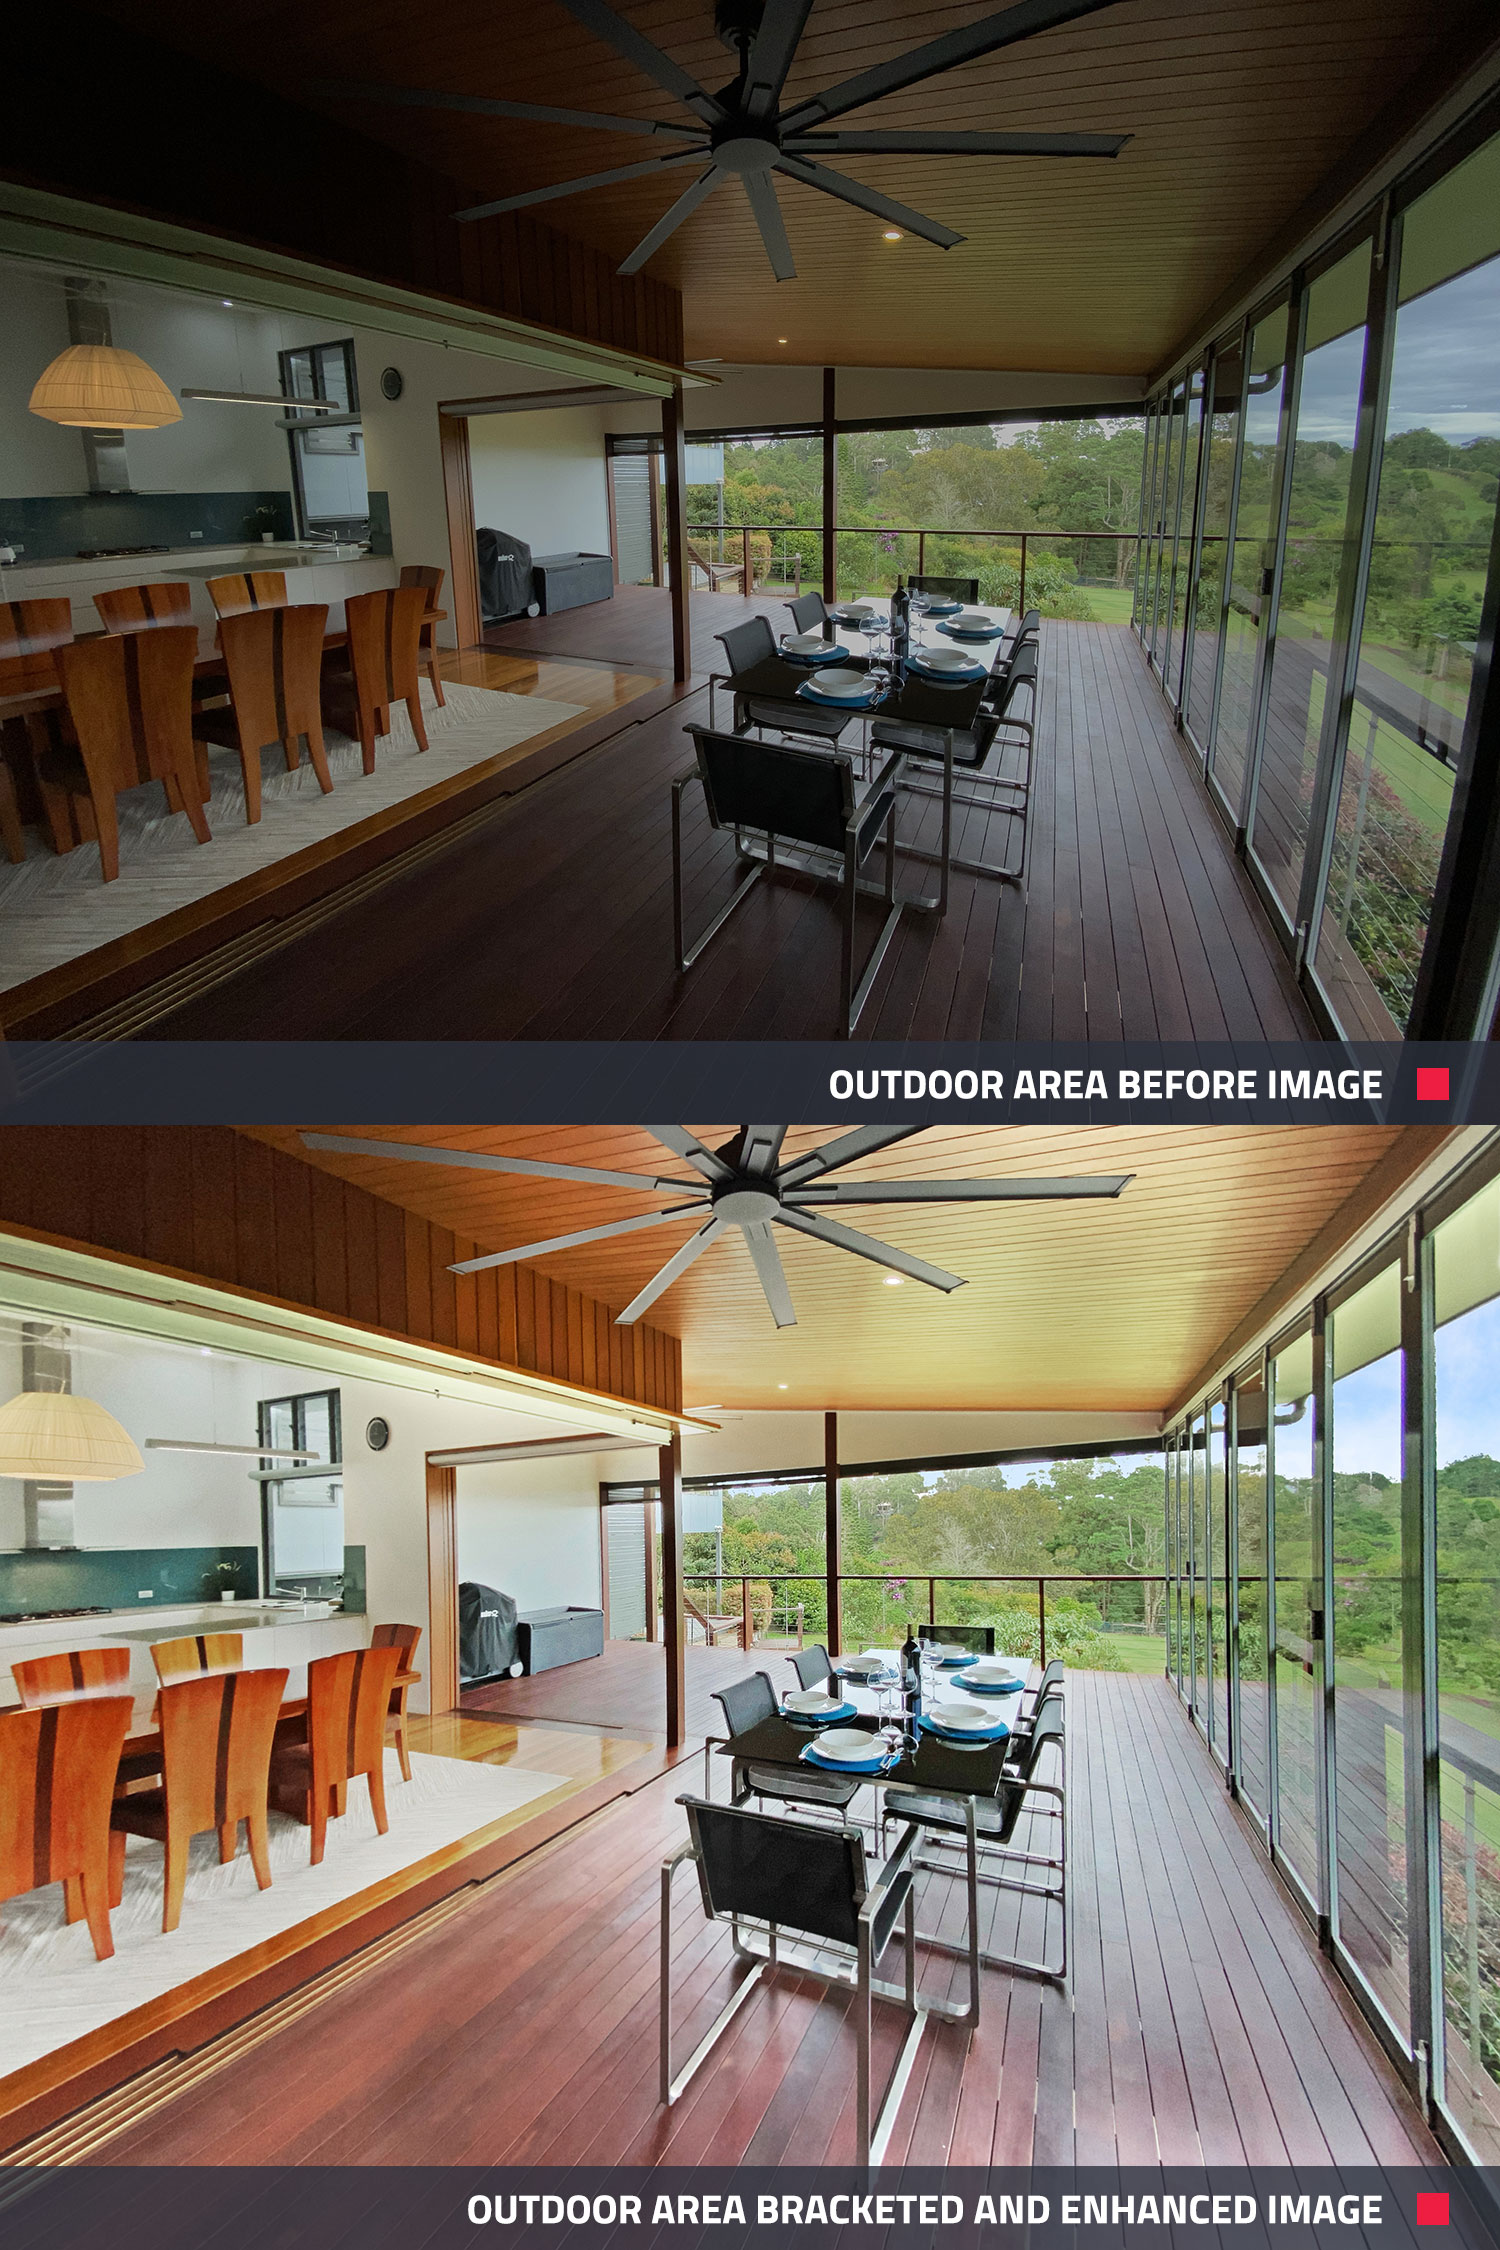
Outdoor Living Area Before And After
This is a great example of how impressive the wide-angle lens feature is on the iPhone 11. The amount of detail we are able to capture in frame is simply remarkable for a smartphone and when edited using our Image Enhancement edit, you really can produce a magazine-quality result.
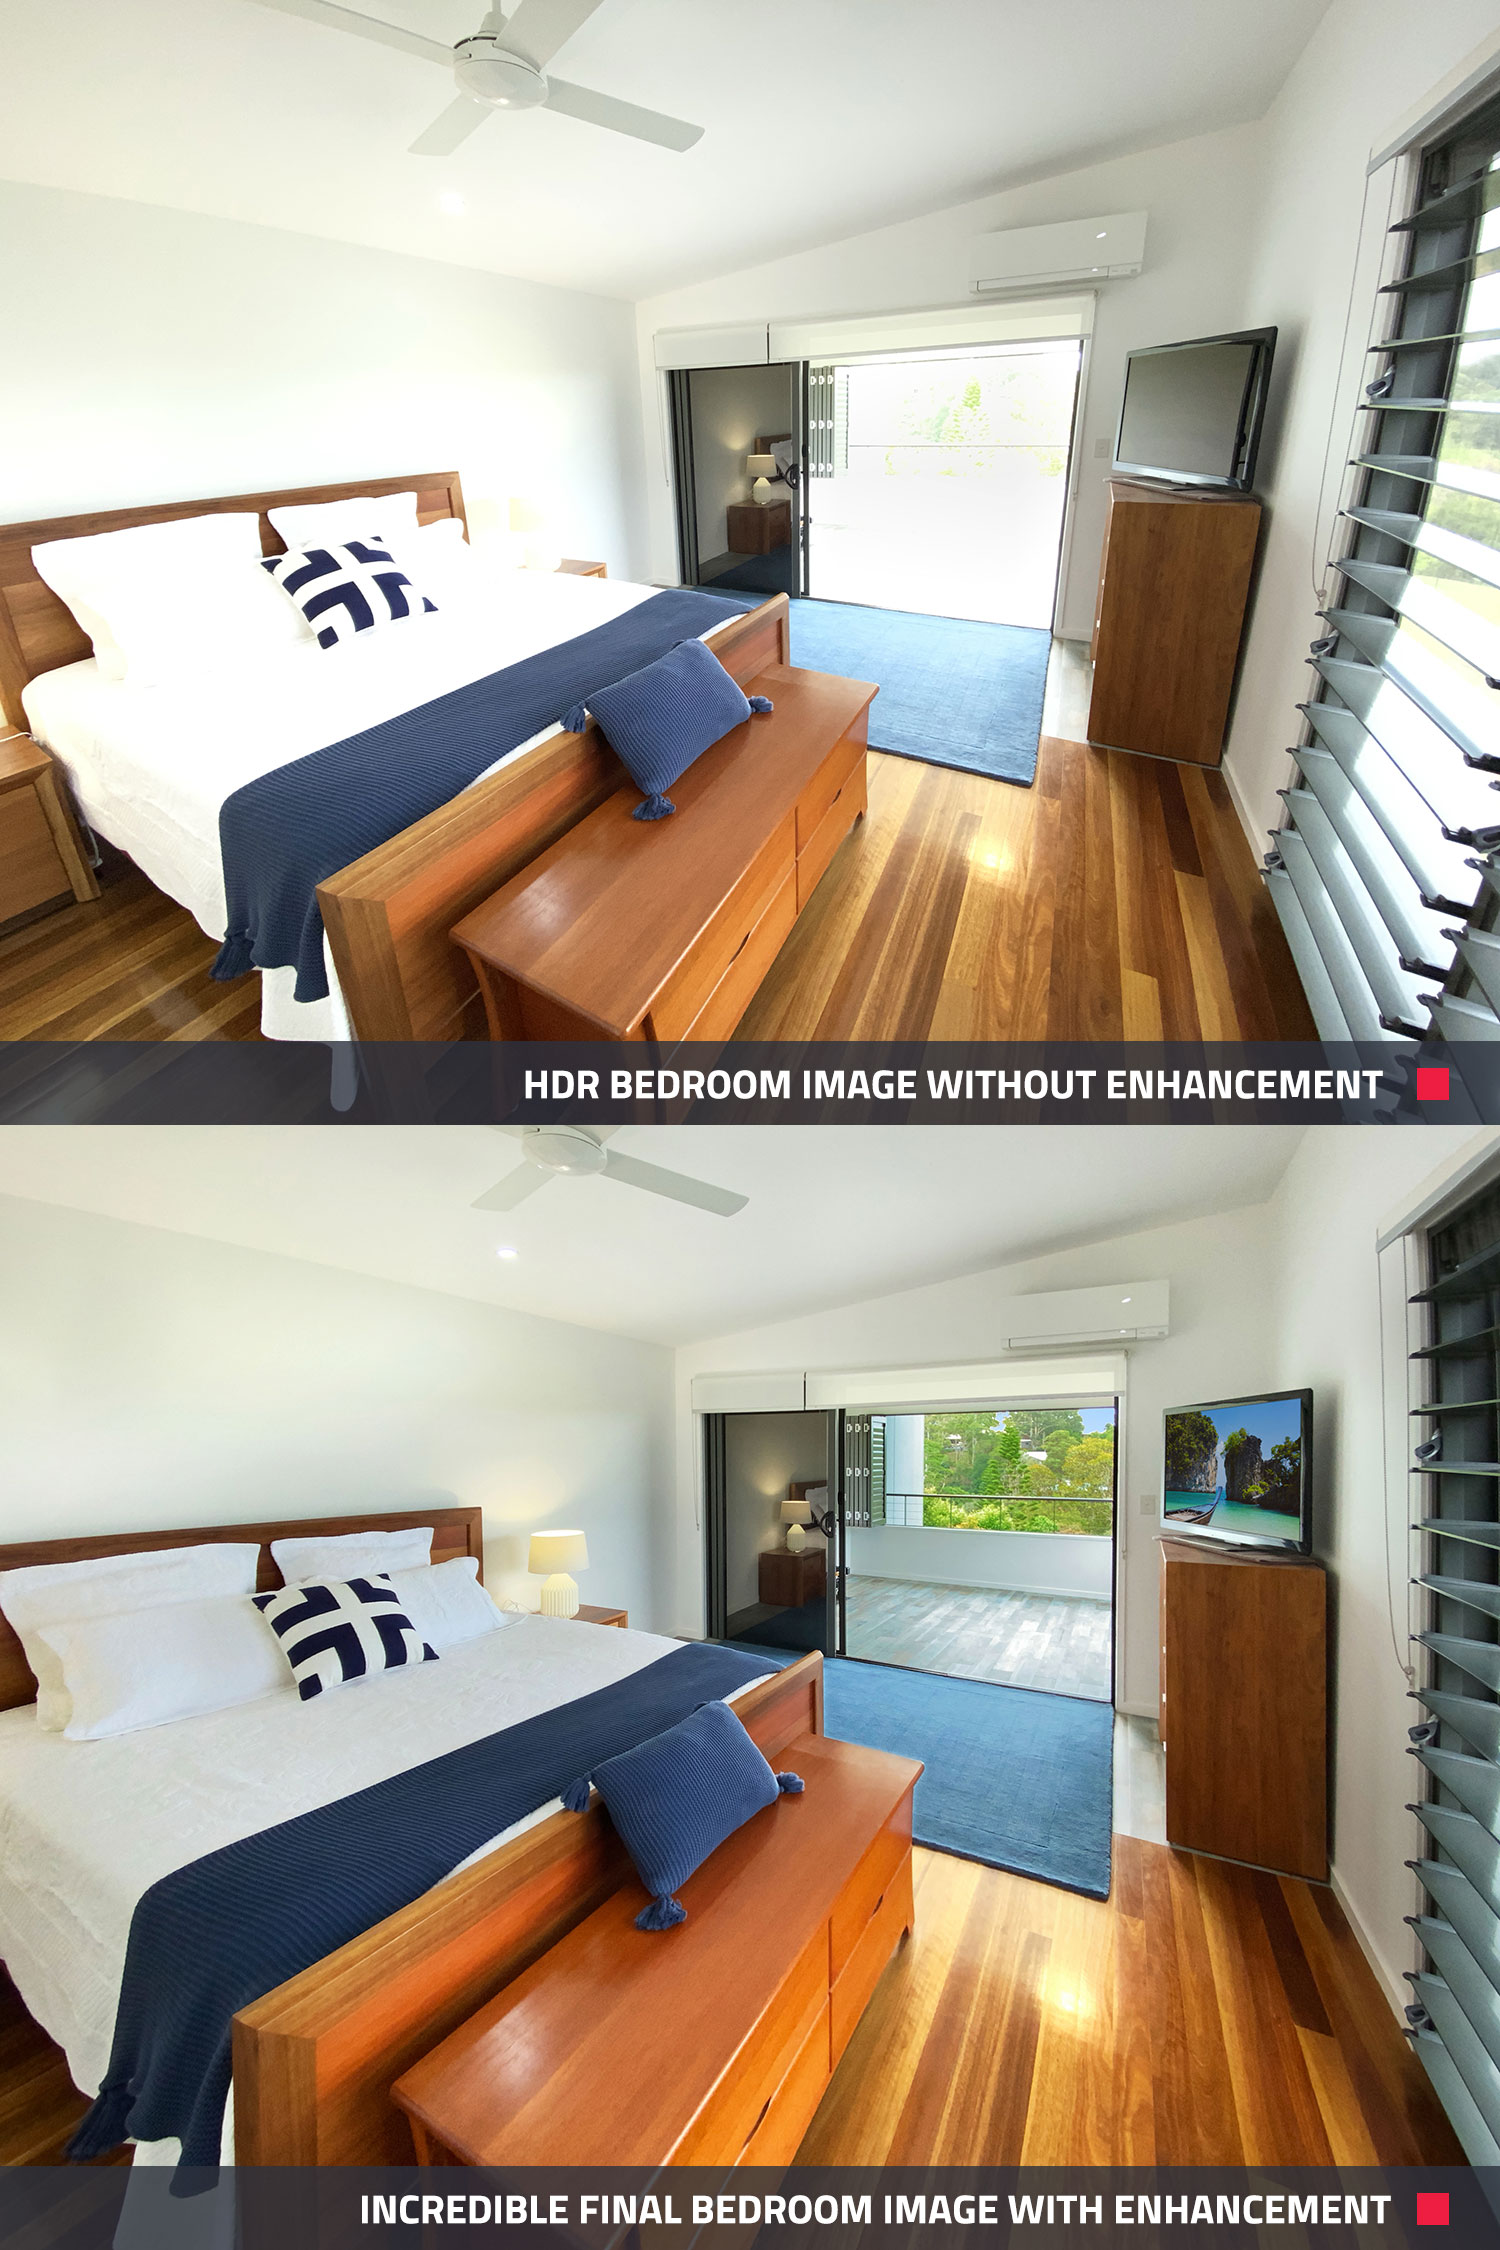
Bedroom Before And After
As you can see with the final bedroom image, the detail is very clear and crisp not only internally but also with the view outside. This is a great way to highlight the flow of the home and draw the viewer’s attention to the amazing outlook.
Conclusion
There’s no doubt about it, with a few simple tips you really can produce a professional result using the iPhone 11 with the wide-angle lens feature for your real estate photography. As we have shown you in this blog, by using the CameraPixels PRO app and our HDR Image Enhancement you can elevate your property marketing heads and shoulders above the competition.
If you’d like to give our Image Enhancement edit a try for yourself, click here or sign up for FREE at BoxBrownie.com today.
RELATED ARTICLES
Welcome to BoxBrownie.com. Get set up quickly for professional property photo edits with 4 free trials. Access your dashboard, how-to videos, photography app, and expert resources to save time and elevate listings.
READ MORE
Need to get a property listed but your photographer isn’t available? We have the tips on shooting a property with a smartphone when your limited on time.
READ MORE
Prepare, position, and polish your short-stay property photos with pro tips from Brad. He’ll guide you in making the most of natural light, mastering steady framing, applying strategic editing, and more to present every room at its best—drawing in more guests effortlessly.
READ MORE
Using a house currently on the market, our Co-founder Brad Filliponi is going to demonstrate how to shoot a property using his key tips to help sell a home quicker.
READ MORE
Discover how Tom Lyons and his team are transforming property marketing in Belleville, Ontario, with SnapSnapSnap. By capturing stunning HDR images directly from a phone, they’re saving time, reducing costs, and delivering exceptional service. Read now!
READ MORE
In our latest video, Brad shares essential photography tips while reviewing images taken by real estate agents with SnapSnapSnap. Find out what works and what can be improved. With Brad’s insights – you can maximize every shot you take!
READ MORE