HOW TO MARKET A HOME FOR UNDER $20... ON A SMARTPHONE!
Introduction
Marketing a property can get really expensive… especially if you’re having to pay for it out of your own pocket!
There’s online listing fees, print advertising fees, signboard fees, property floor plans fees, photography fees…
The list can go on and on!
To help reduce the expensive sting of marketing a property, our co-founder Brad Filliponi took the challenge to see if he could take professional imagery of a property for less than $20.
Sounds impossible? Well to do this, we are going to use some of our most popular edits here at BoxBrownie.com including:
• 9 x Image Enhancement edits at just $1.60 each and
• 1 x Day To Dusk edit at only $4.
Grand Total = US$18.40
A question we often get asked from real estate agents is, “do you need a big expensive DSLR camera to take magazine quality images?” So, to make this challenge even more exciting, we will be taking all these shots using an iPhone X smartphone with the Moment Lens attachment and Moment Case. As a control, we’ll also be taking comparison shots using a Nikon D7200 (DSLR), the very camera Brad used as a professional real estate photographer for 16 years.
Here’s a breakdown of the gear we’ll be using to complete this challenge:
The Smartphone Setup
• iPhone X
• An 18mm Moment Wide Lens (costs $120)
• CameraPixels App (costs $10 on the AppStore)
• A Moment Phone Case that fits the iPhone X (costs $30)
You can use the codeword BOXBROWNIE.COM at www.shopmoment.com to receive 10% off.
The DSLR Camera Setup
• Nikon D7200
• Nikon DX AF-S 10-24mm f3.5 lens
• Nikon Speedlight SB-910 with a diffuser
The Importance of Bracketing
If you want to achieve magazine quality professional real estate images, you need to be using the same techniques as professionals. This is where bracketing comes in.
Essentially, bracketing is the process of taking multiple exposures of the one-shot which are then blended together using the BoxBrownie.com Image Enhancement edit to create one complete image.
This works particularly well for properties with a view and is also how we get interior window detail into the final image. As a standard, we recommend taking five exposures of the same shot to allow for the maximum amount of detail to be included in the image and to produce a high-quality professional photo.
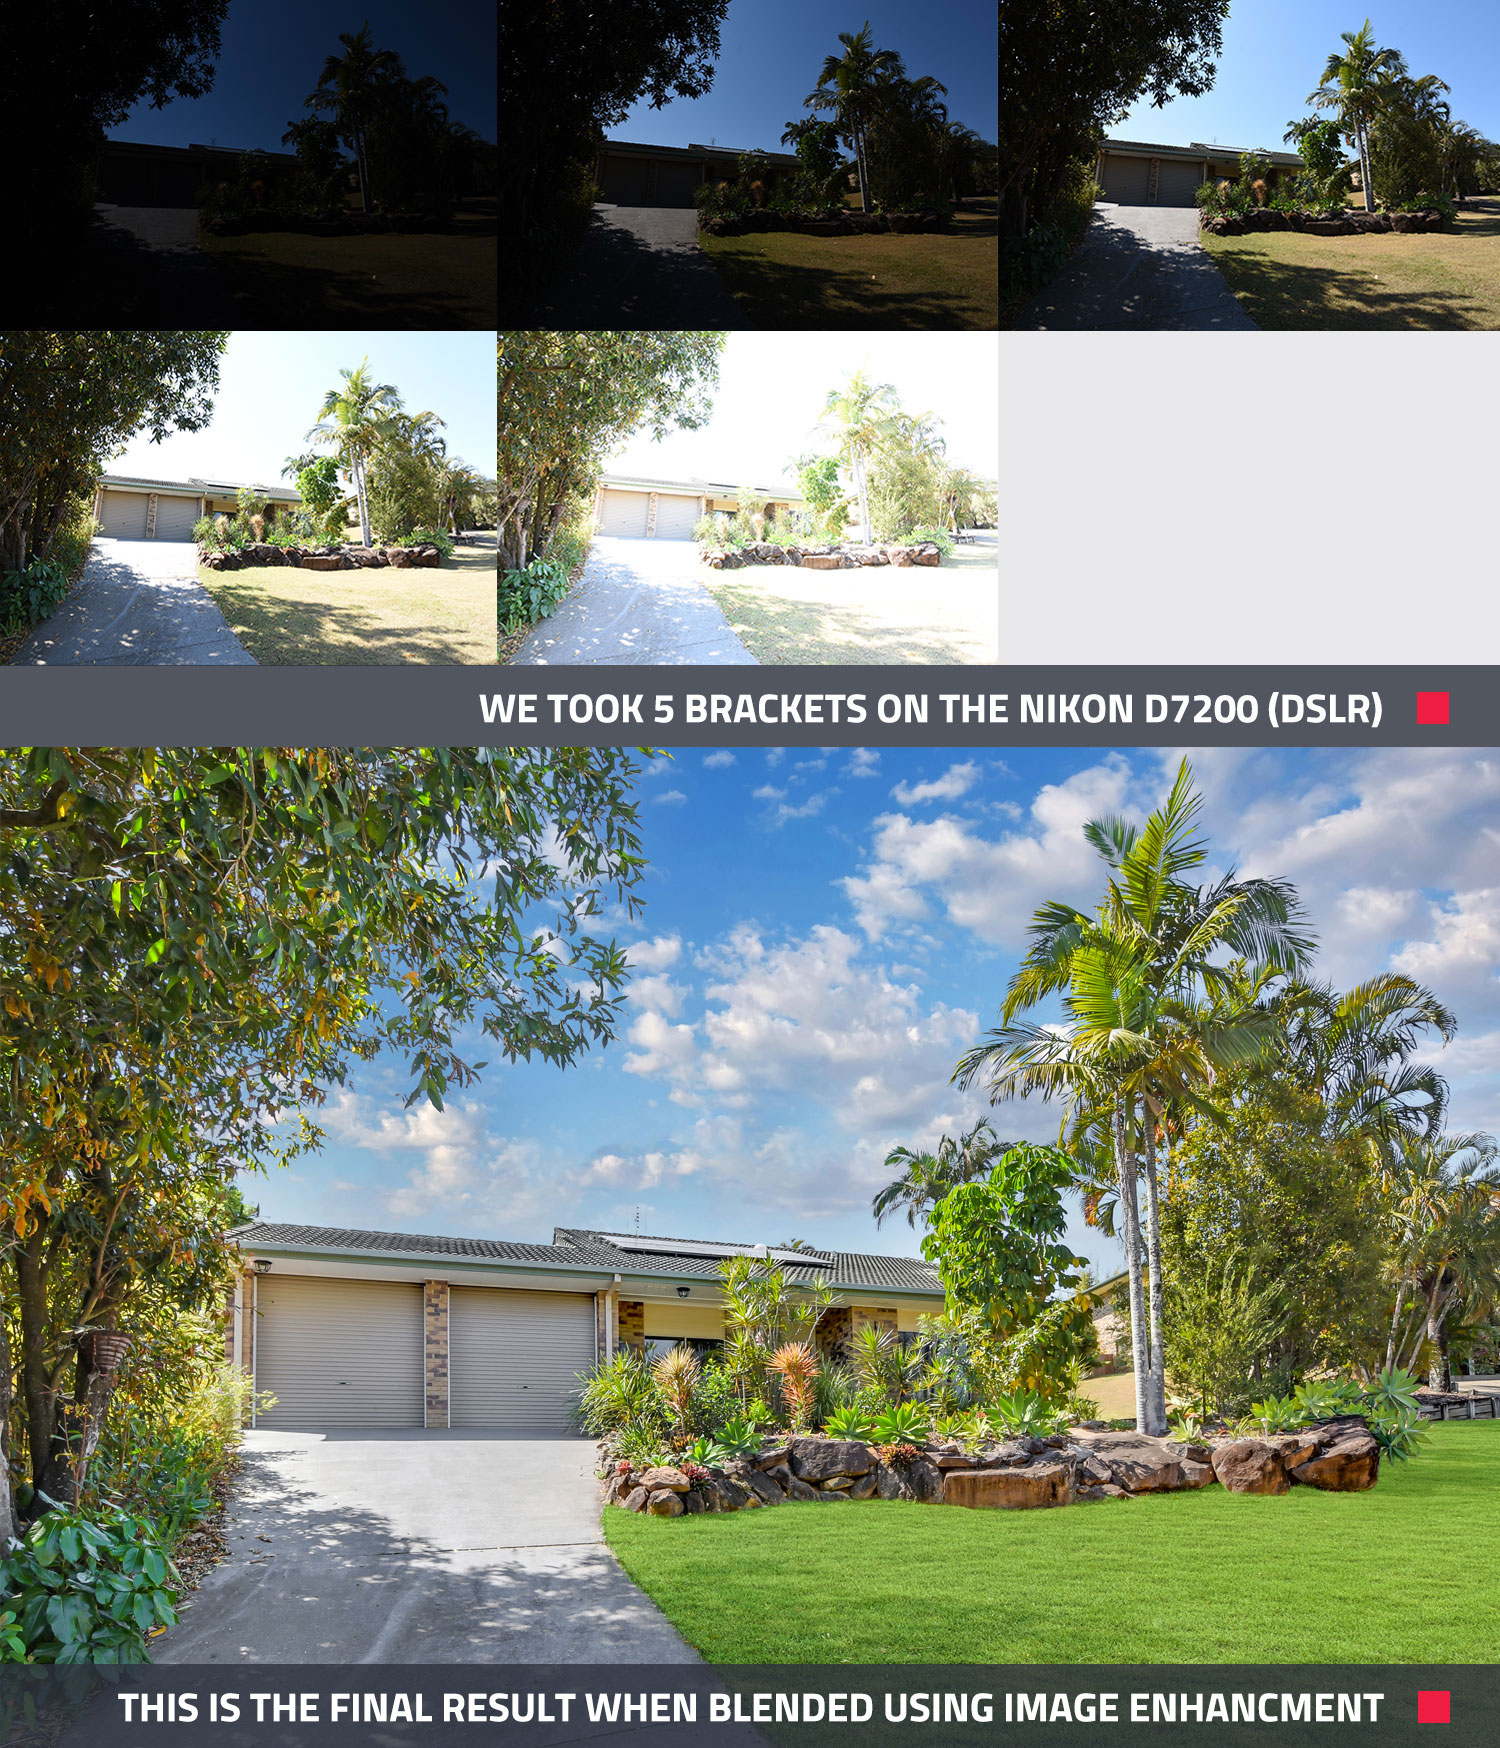
Bracketing with the DSLR Nikon D7200
As we mentioned, for these images we are taking five exposures to allow our editors to blend them together and create one complete image. As you can see in the image below, each DSLR bracketed image highlights different details of the total image and, once blended into one, ensures a fantastic finished result.
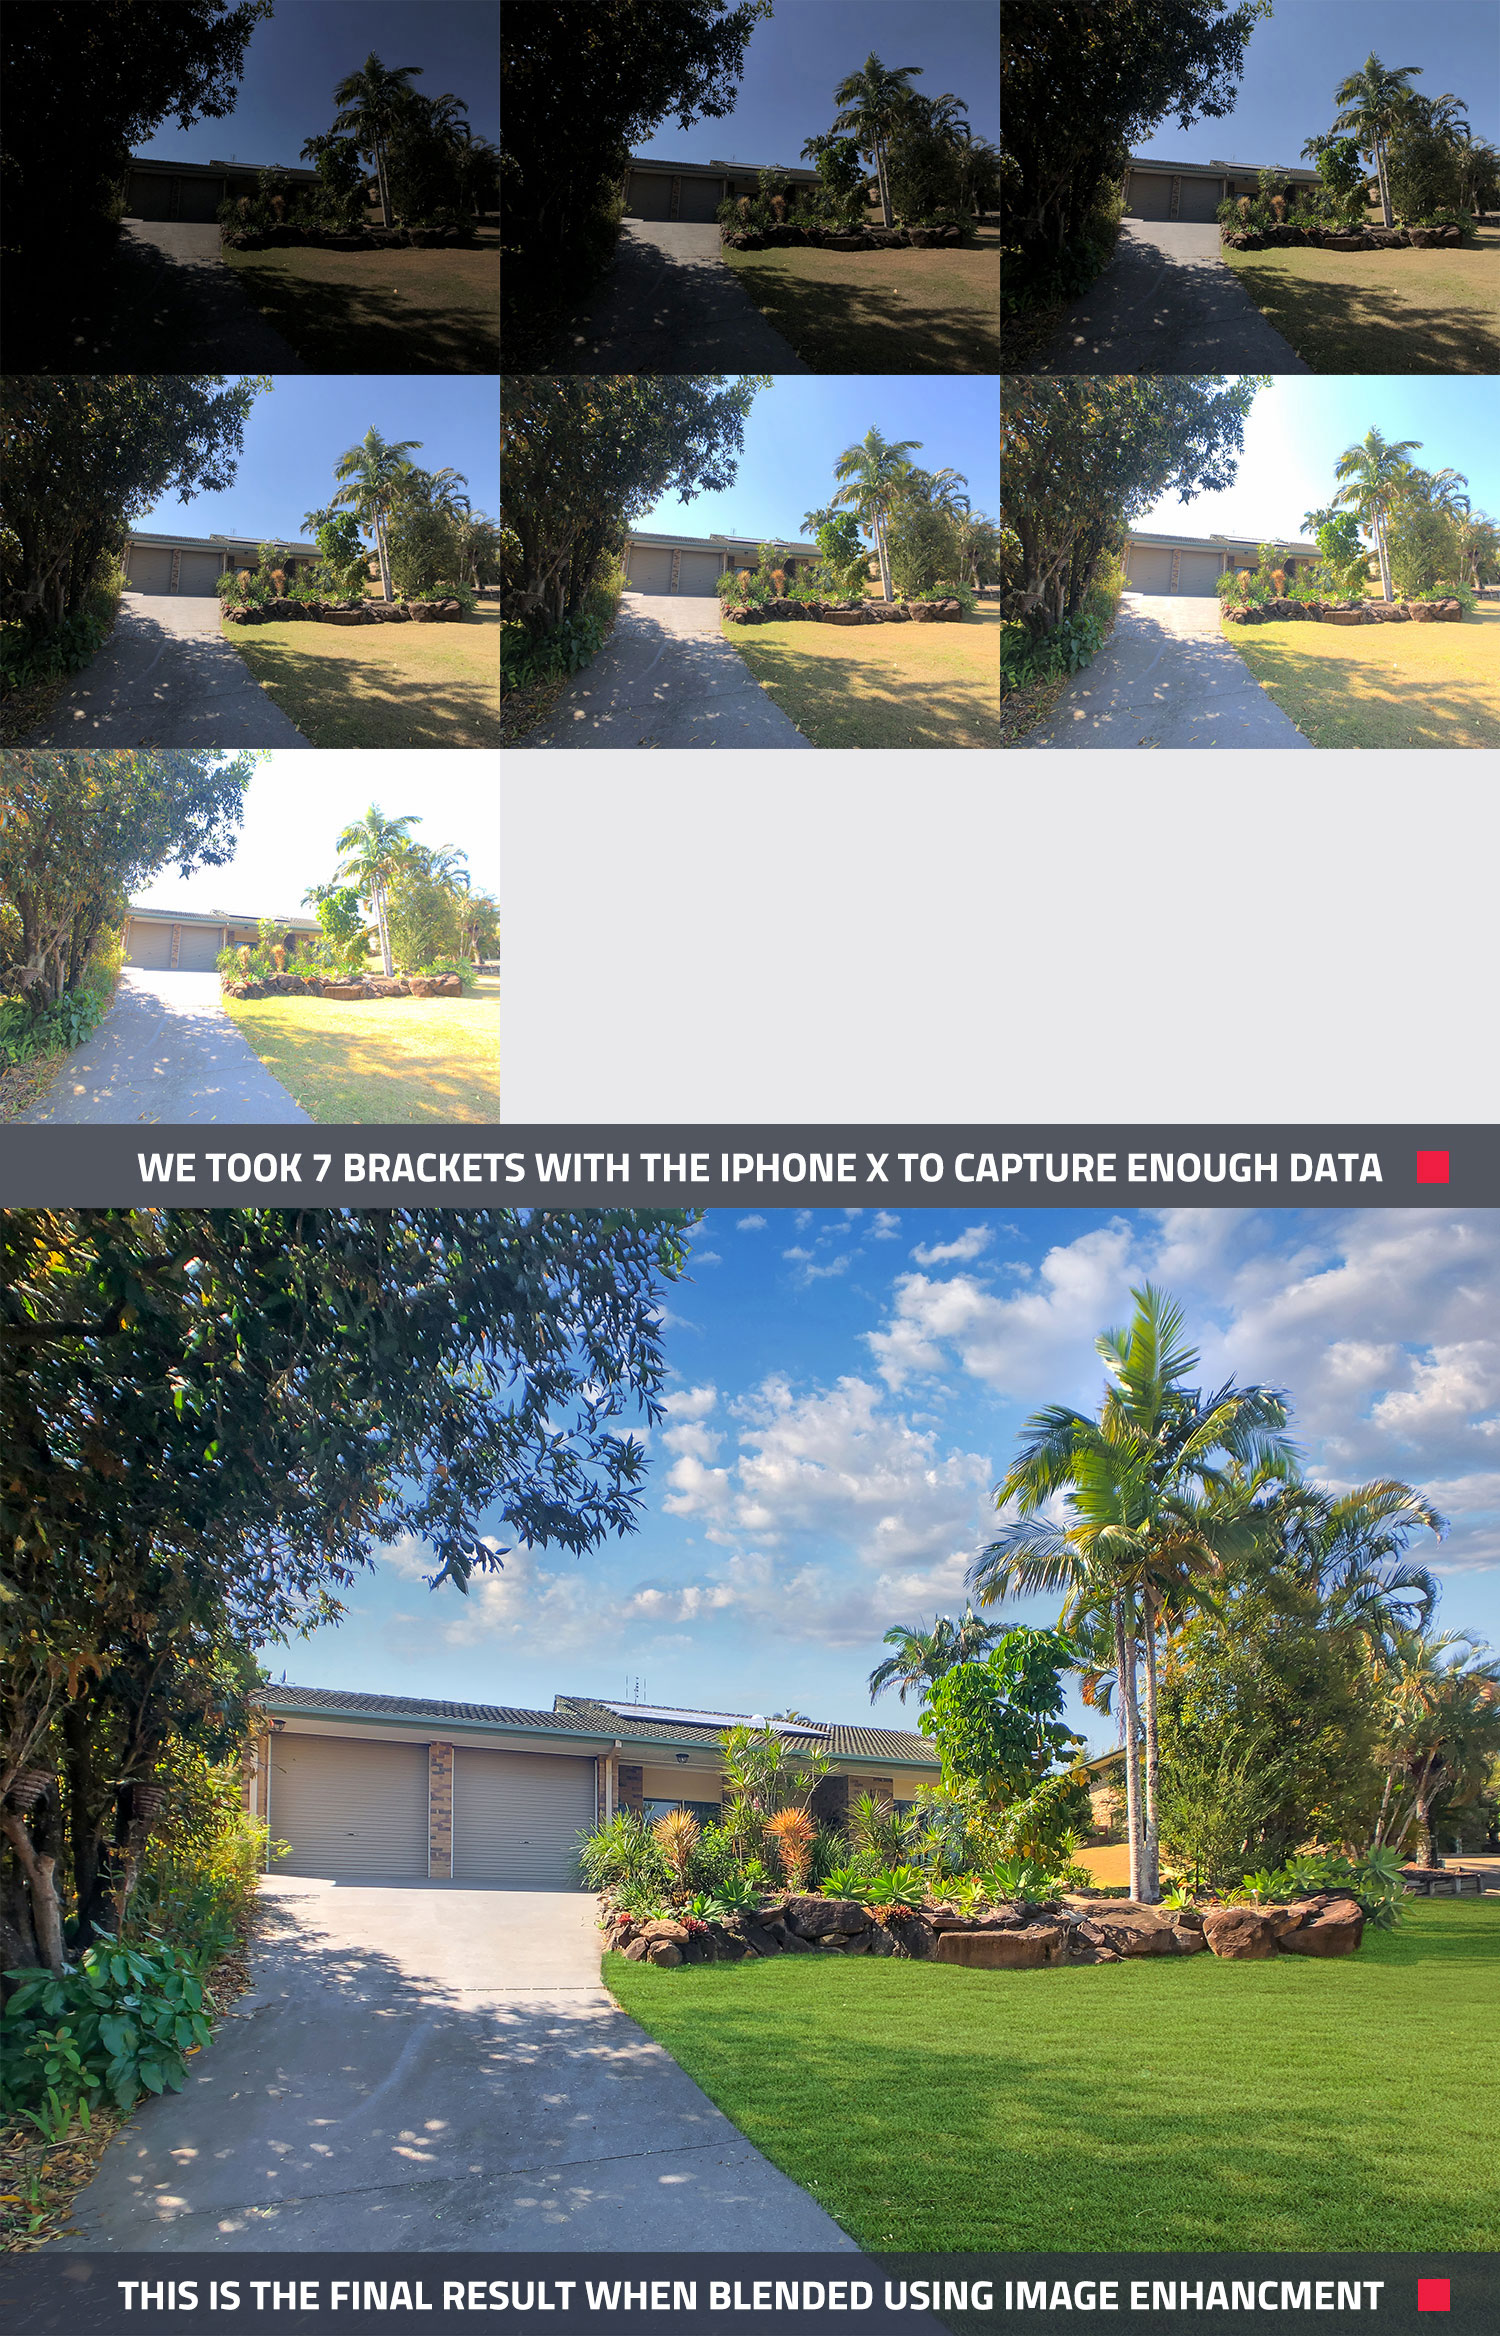
 Bracketing On The iPhone X
Unfortunately as standard, the bracketing function isn’t currently available on the iPhone X. However, by installing the CameraPixels app you can unlock this amazing feature which previously was reserved for DSLR cameras only. You can also enjoy the added convenience of only having to carry around a smartphone in your pocket.
Through some experimentation, we found it was best to take 7 exposures using the CameraPixels app to ensure you can capture enough data, especially in low-light conditions. If you are shooting with the DSLR camera, five exposures should be sufficient.
 Setting Up Bracketing On The iPhone X
As mentioned above, you'll need an app called CameraPixels to provide bracketing functionality on your iPhone. The full version of the app costs $10 and is available on the App Store. Below is a quick breakdown of the settings we used to help you get CameraPixels up and running:
• Click on Mode
• Click on Bracketing
• Click on Set
Under "Image"
• Resolution: 12.2MP x 4032 x 3024
• Crop: None
• Quality: 100%
• Stabilisation: Off
Under "Bracket"
• Type: Exposure
• Image Count: 7 Images
• EV Step: 1.0 F-Stop
Under "Intervalometer"
• Timer: 1 Sec
• Image Count: Single
• Lapse: Off
• Click Save As Preset
• Give the Preset a name
Return To The Mainscreen Of CameraPixels
• Click On ISO and set to 20
Once you have completed these steps, each time you use the CameraPixels app, you will shoot 7 brackets. The added advantage of shooting on the iPhone X is the electronic shutter which will shoot all 7 images in less than a second, which is much faster than using a traditional DSLR camera.
Lastly, it’s incredibly important to use a tripod when shooting using your iPhone as with the DSLR. This ensures camera shake will not occur when the brackets are being taken as each image must align perfectly to be blended seamlessly together during the editing process. The image at the start of this blog shows the results of the bracketed images using the iPhone X with the Moment Wide Lens.
Shooting The Internal Images
When shooting the interior of a property, it’s important to remember some key tips to allow you to showcase the home in the best light. You always want to be taking interior photos with the lights on and always remember to turn the ceiling fans off.
If you can have the property prepared before starting the shoot with any clutter removed, beds made and curtains, blinds and windows adjusted to the appropriate positions, it will make the shooting process much more smooth. You can check out our blog Tips To Present Your Listing In The Best Light if you’d like a more detailed rundown of an entire property shoot and what to look out for.
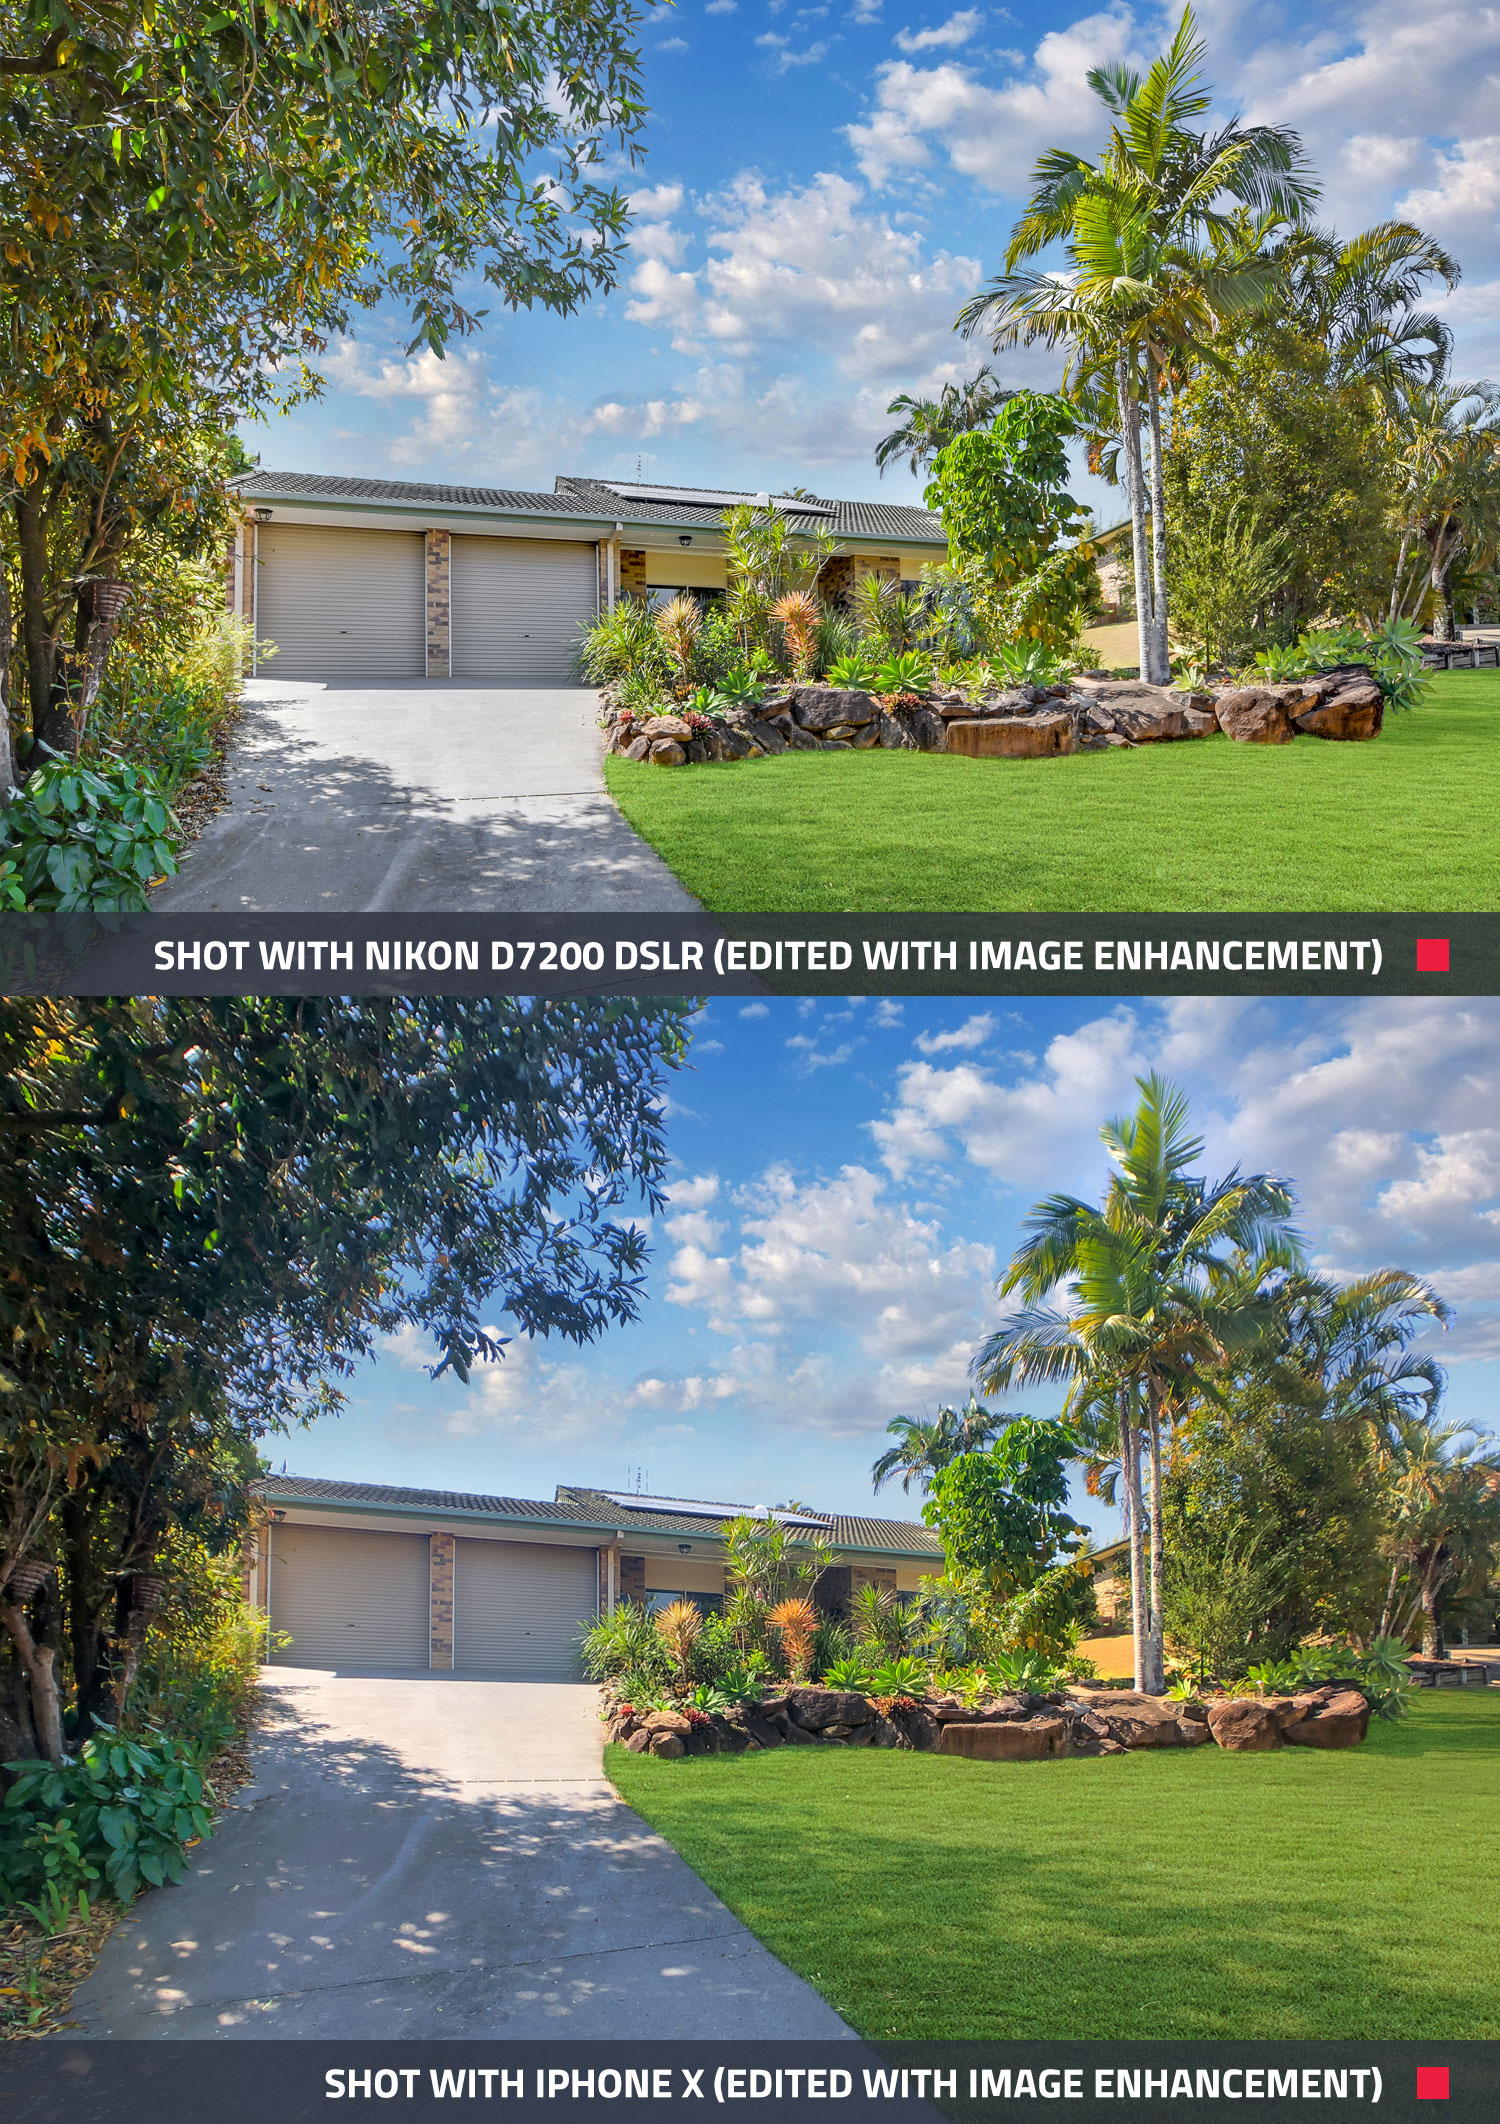
Comparing The External Images
The finished and edited image for both the DSLR camera and the iPhone X are extremely similar and highlight just how effective shooting bracketed images on a smartphone can be. If we really wanted to pick it apart, the sharpness of the DSLR was slightly better than the iPhone X which is evident around the tree leaves.
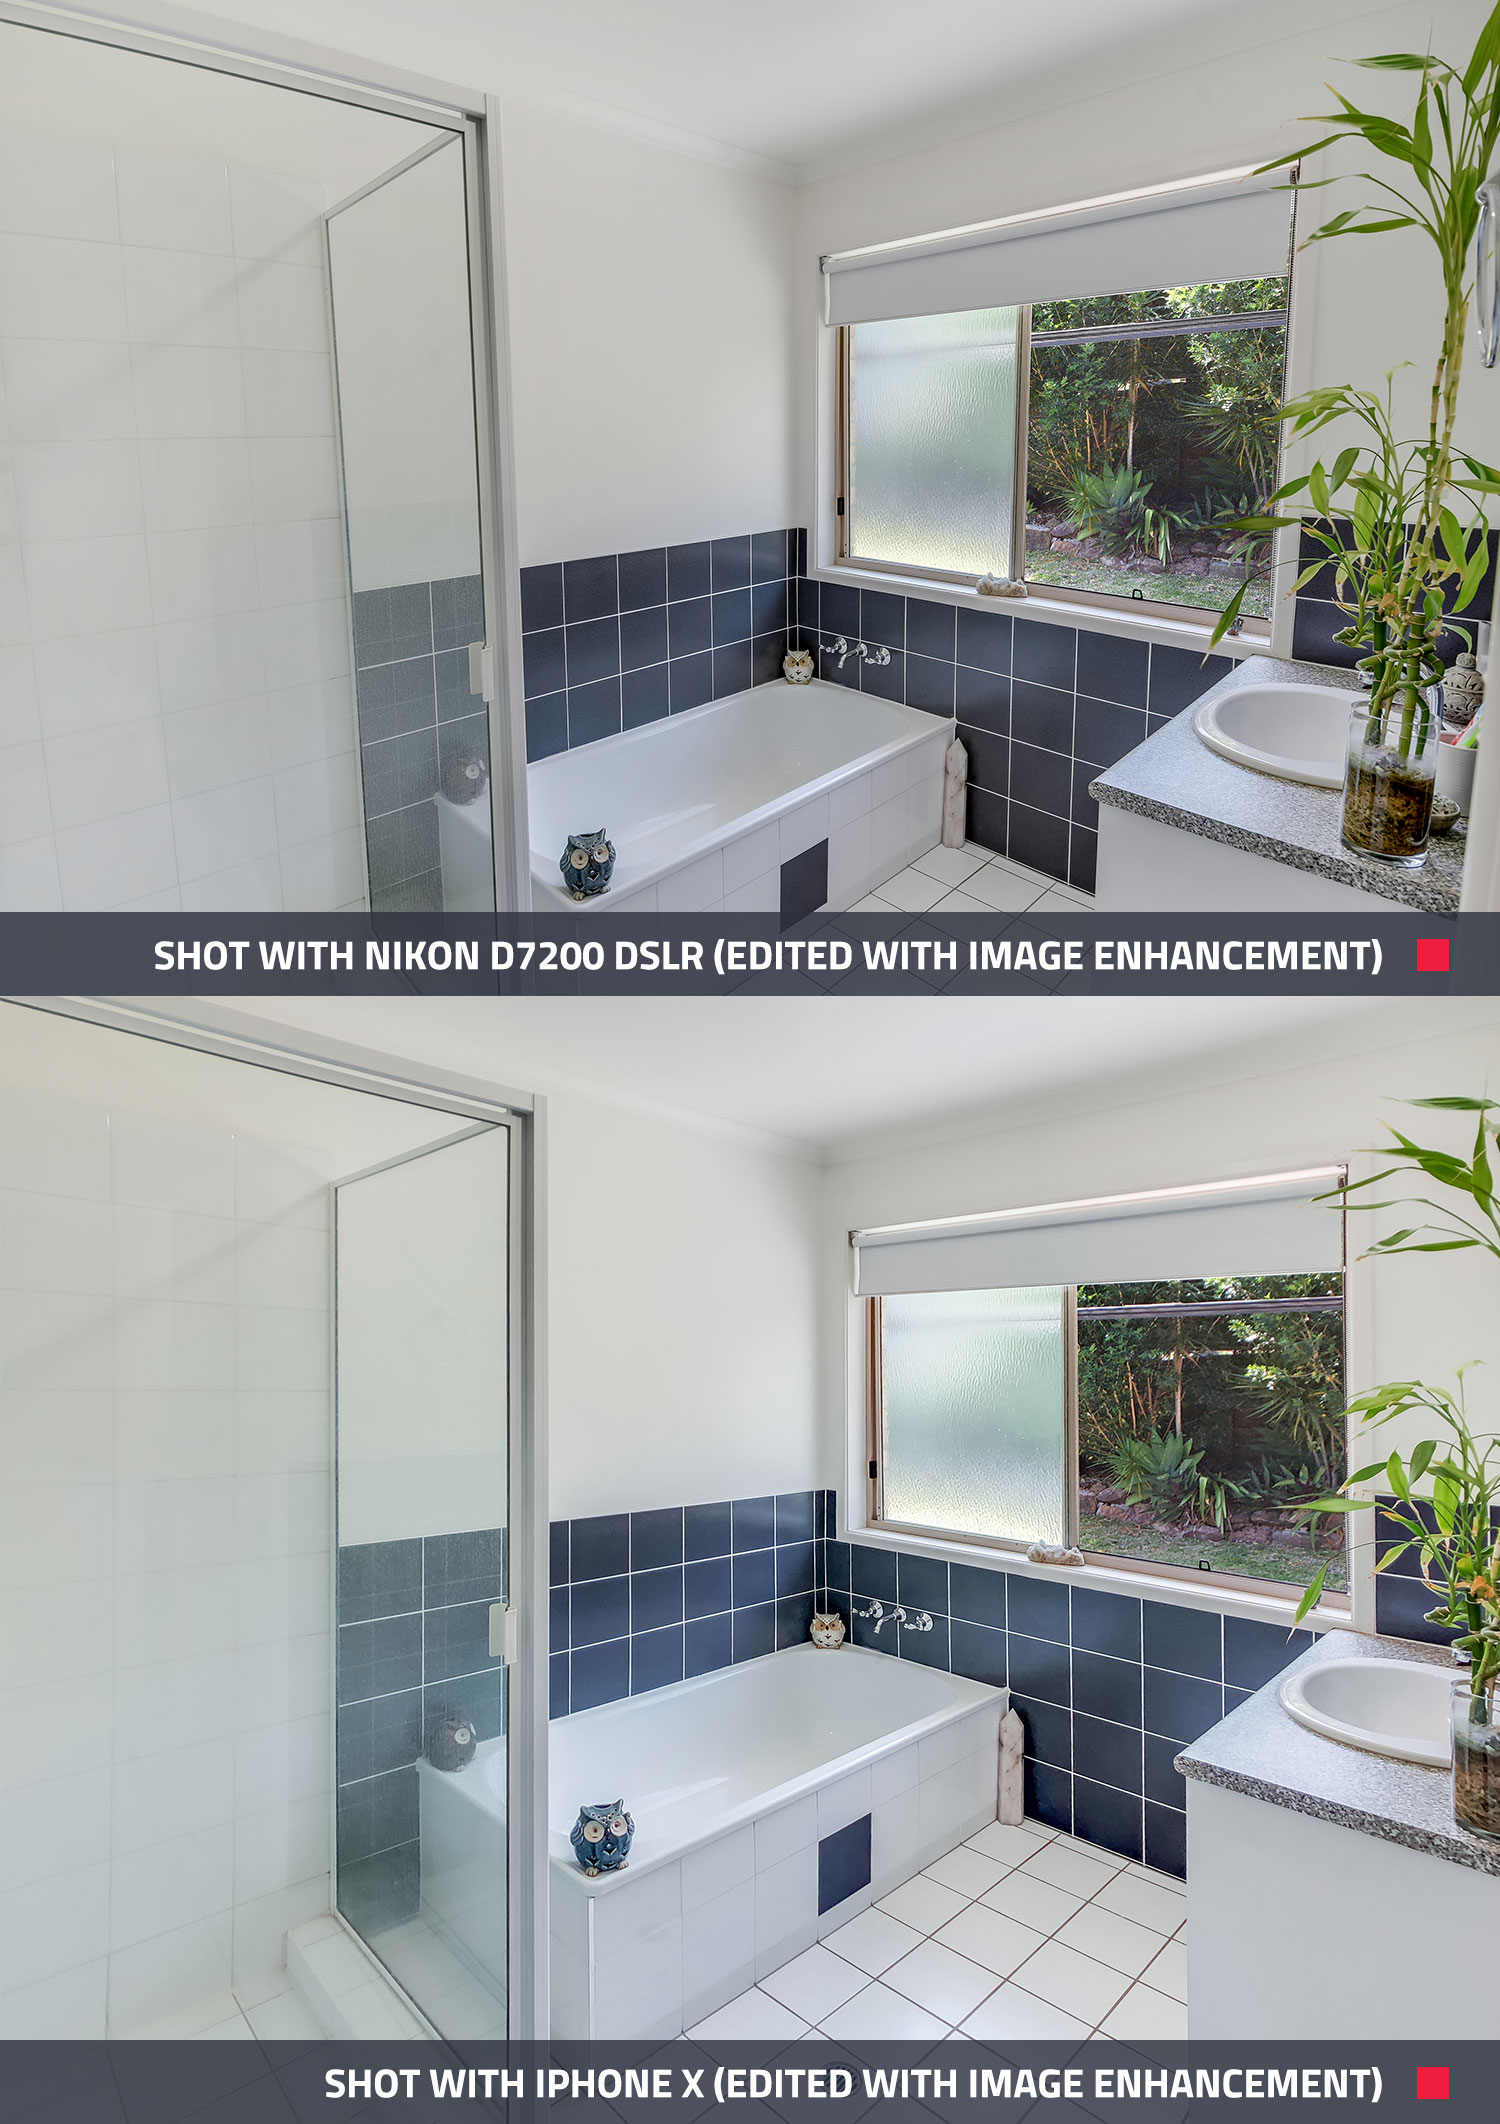
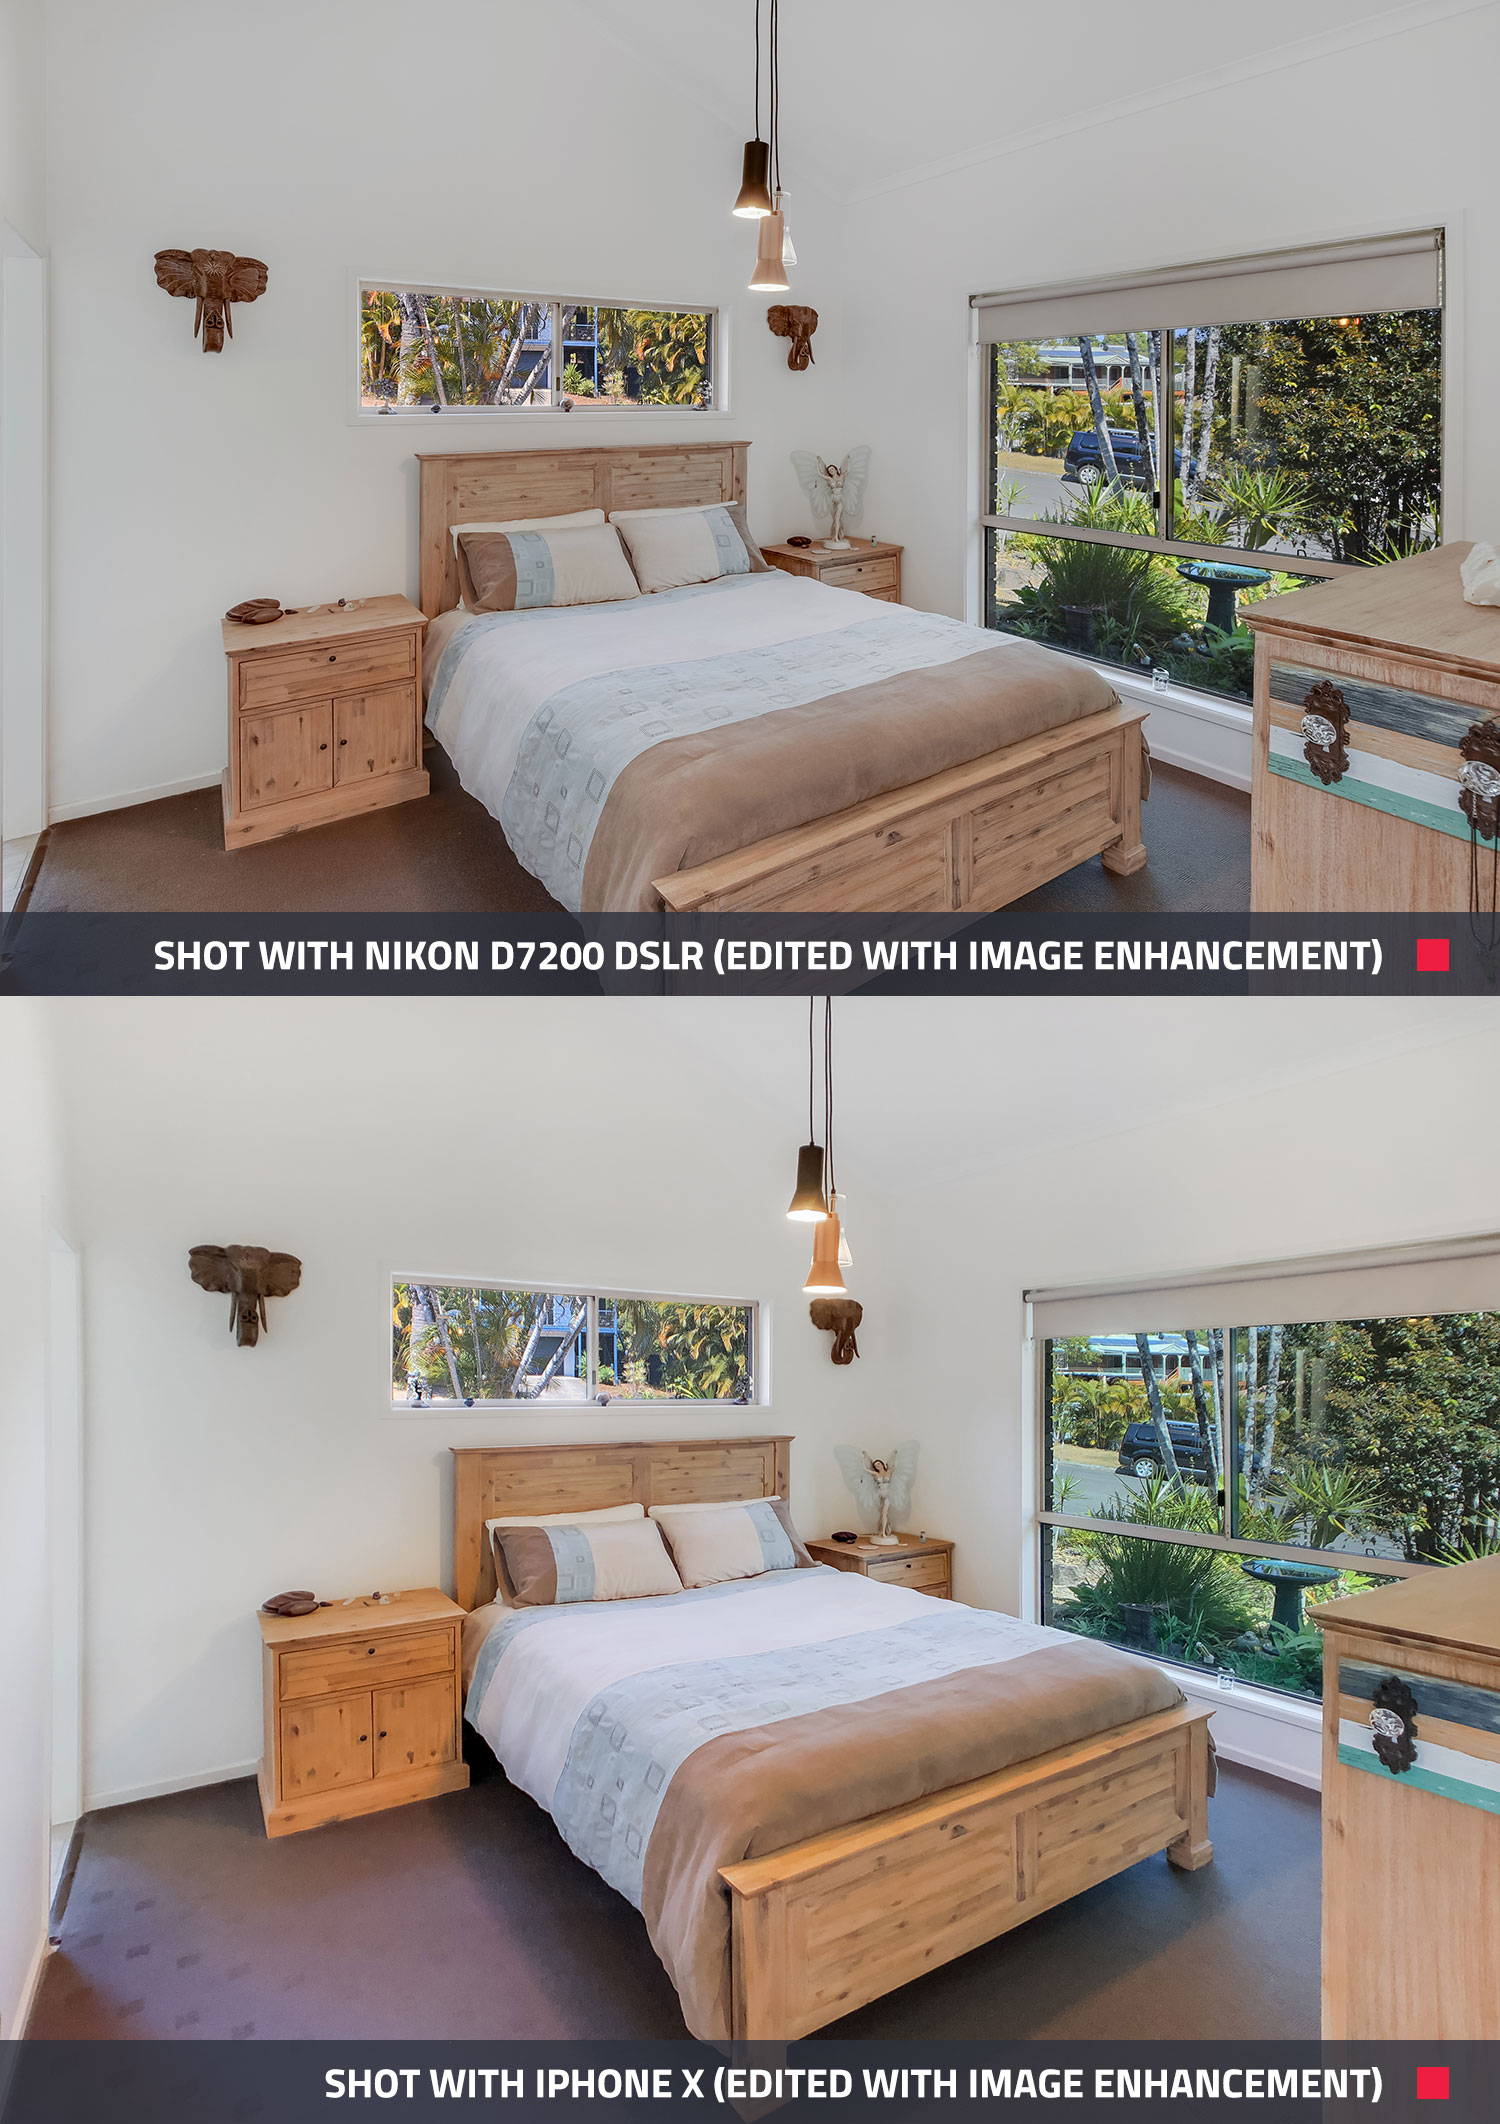
 Comparing The Internal Images
Again, as you can see in the below-edited images of both the bathroom and bedroom, the finished result is very similar between the DSLR camera and the iPhone X. The window detail is present in the internal images for both which is absolutely essential when marketing a property. The iPhone X with the Moment Wide-Angle Lens attachment is so wide that it is suitable for shooting tight spaces like a bathroom.
Bathroom - Internal Shot
 Bedroom - Internal Shot
 The Hero Shot (Day To Dusk Edit)
The hero shot is the first shot that showcases your entire listing. It should always be your best shot in order to attract more online clicks from potential buyers. A great way to create a more attractive hero shot (that generates up to 400% more clicks) is to use a dusk shot. However, getting a dusk shot isn’t always practical and because this photoshoot was taken during the day, we edited our hero shot using our Day To Dusk edit instead.
Below you can see the side-by-side comparison of both the DSLR camera and the iPhone X when it came to the edited hero shot. As with both the internal and external image comparisons, the results are very similar and either one would be a fantastic addition to this property’s marketing campaign.
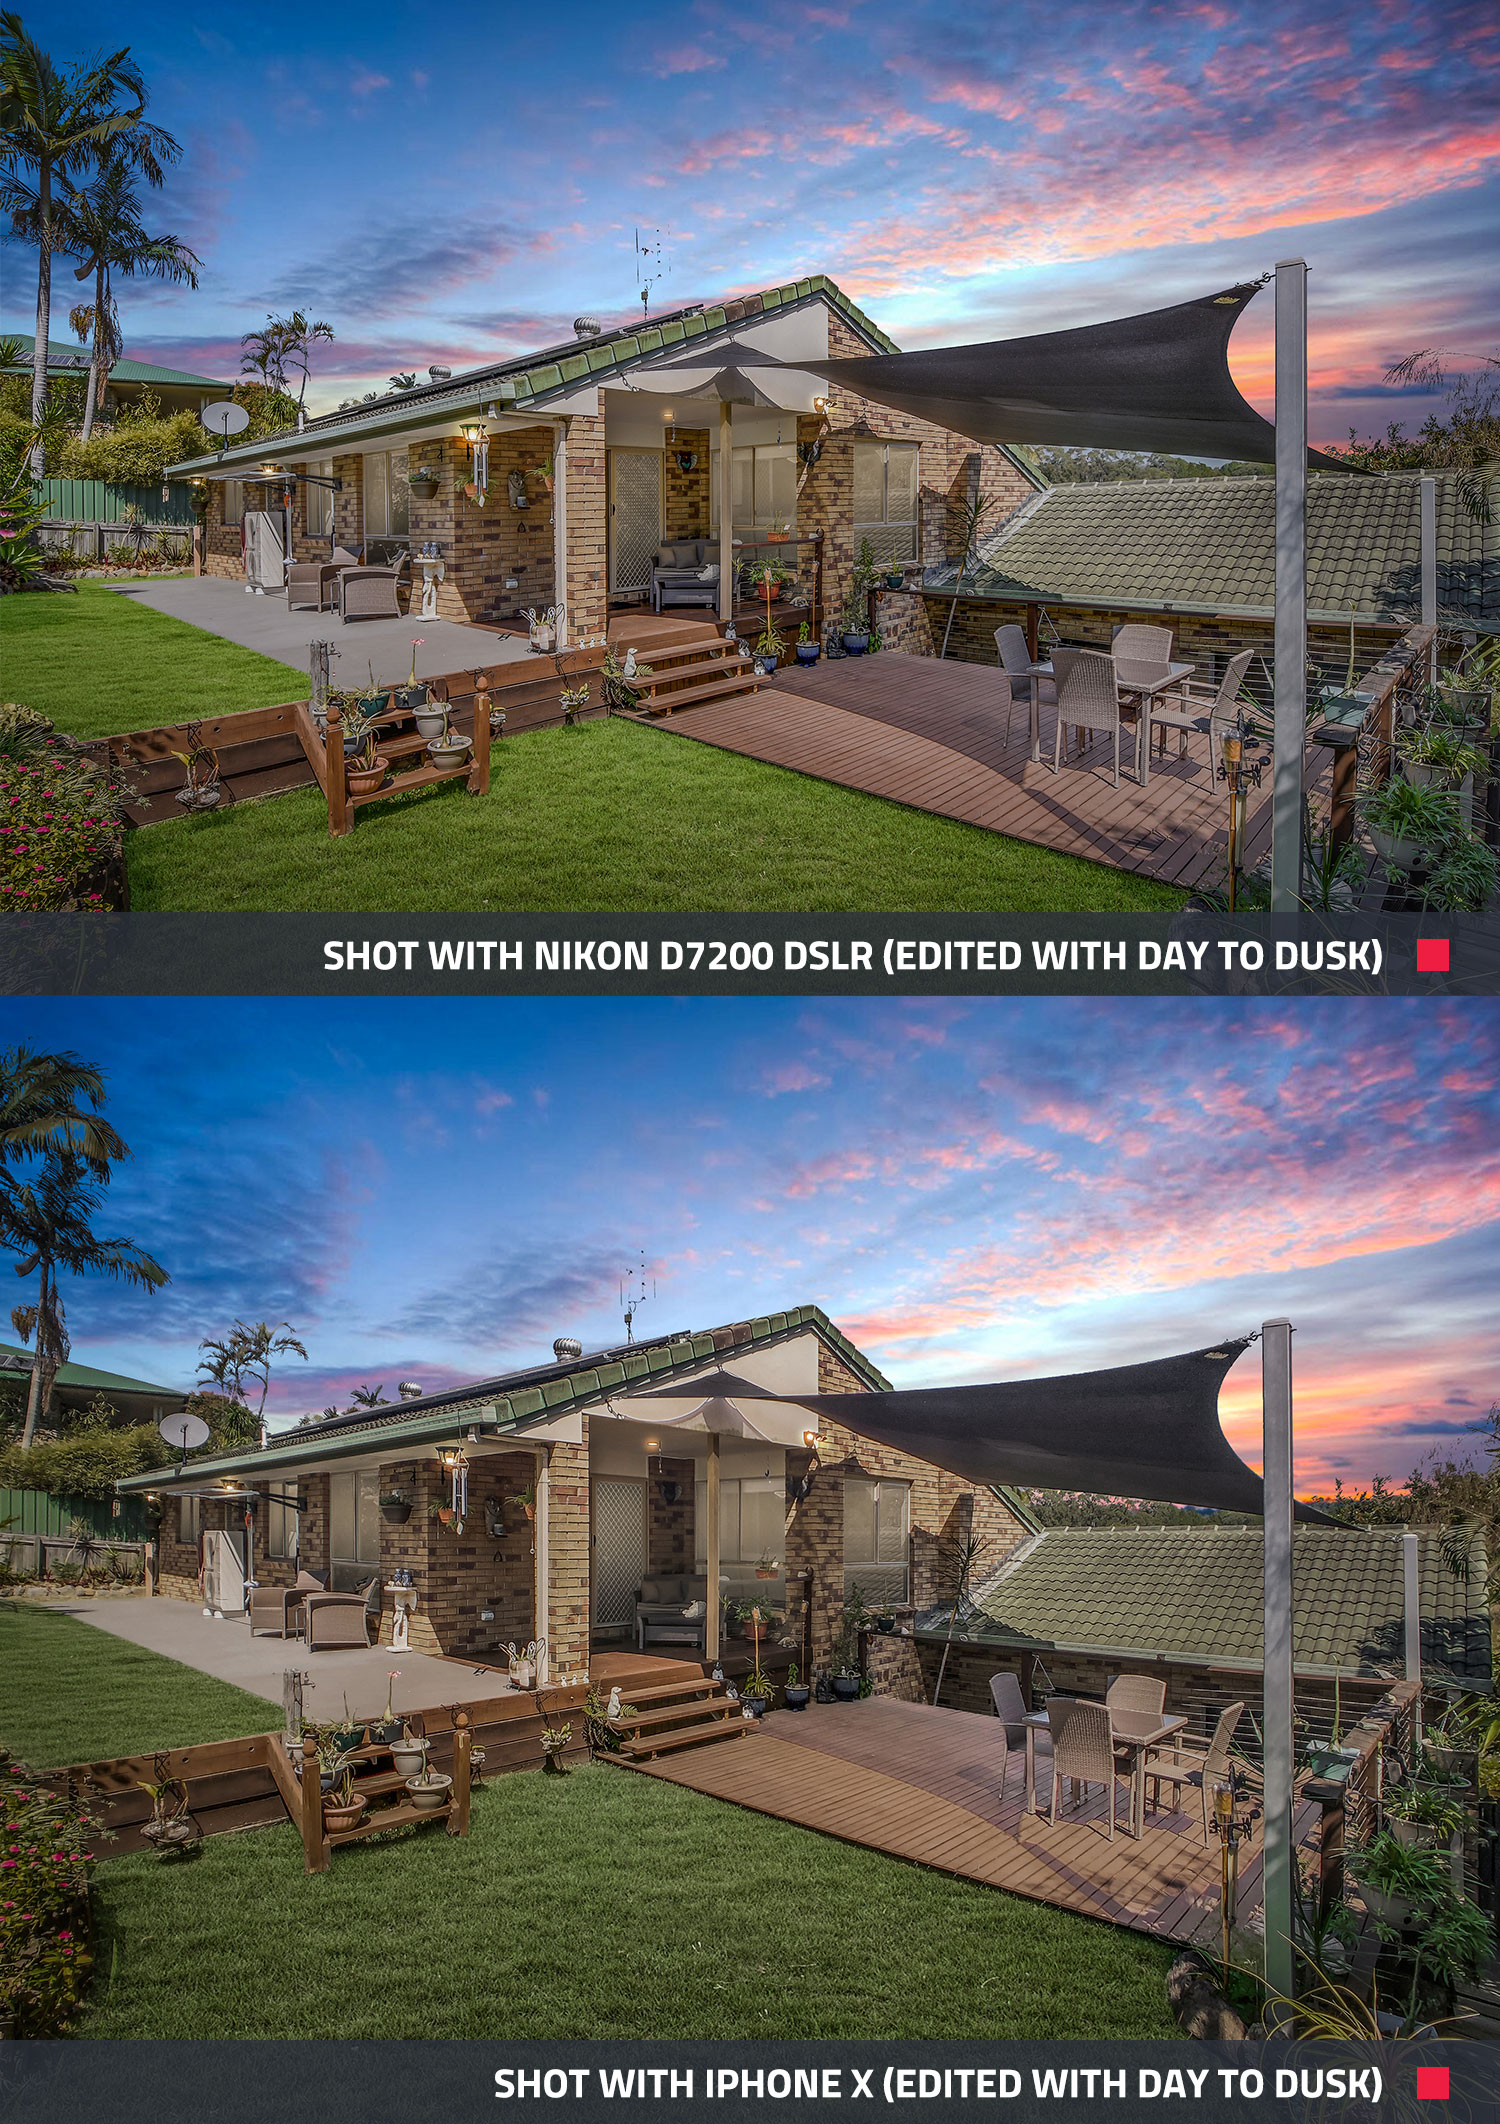 By using the Day To Dusk edit, we essentially saved ourselves having to wait for the perfect sunset. We simply took the shot during the day, submitted the image through the BoxBrownie.com system, and let our team of professional editors transform the image (using 23 photo editing steps) into a stunning one that sells!
Conclusion
In total, we took 10 shots combining both internal and external images and found the results for both the DSLR camera and the iPhone X with the Moment Wide Lens to be very comparable.
It’s incredible how far smartphone cameras have come and just goes to show that if you use professional techniques combined with a simple wide-angle lens attachment, you really can achieve a great result.
It’s also important to note that the Nikon D7200 used in this challenge is an older model and in a future test, we will be comparing a new top-of-the-line DSLR camera to the iPhone X with the Moment Lens to see if the results differ.
Keen to work with BoxBrownie.com and take your property marketing to the next level? Sign up for free today and receive 4 free edits on us.
RELATED ARTICLES

He shoots … he scores. Jesse Peters tells us how glad he is that he decided to lesson-up on his smartphone and start shooting all his real estate pics himself.
READ MORE
In this blog, we are going to go through a listing for a rental property and make suggestions on how you can take your marketing to the next level.
READ MORE
Learn how photo enhancement improves accuracy in property marketing by correcting camera limitations. Create true-to-life images that build trust, attract buyers, and elevate your listings.
READ MORE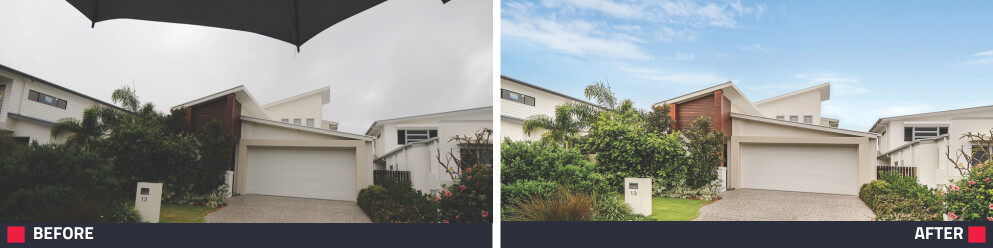
Don’t let a little precipitation stop your shoot! Rainy days don’t have to mean gloomy photos. Whether you’re racing the clock or stuck under stormy skies, we’ve got the pro tips and editing tricks to make your property pics shine—no matter the forecast.
READ MORE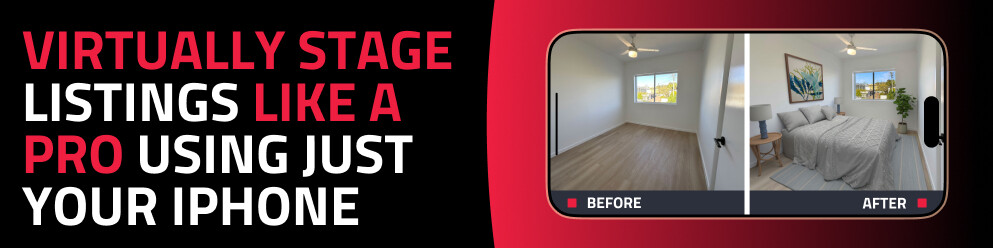
Discover how to virtually stage any property using just your phone with the SnapSnapSnap app. Capture, enhance, and transform empty rooms into beautifully styled spaces in minutes — no expensive equipment or experience required.
READ MORE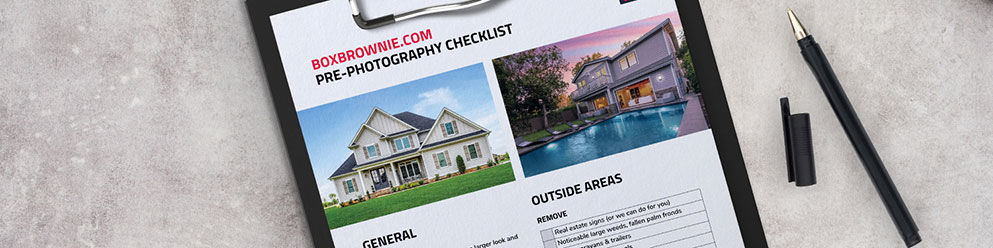
The list that keeps on giving. Our enormously popular Pre-Photography checklist is intended to be used with every new house a photographer must shoot. Here we’ll show you how it can save bundles of time and pave the way to much stronger marketing materials. Discover why the checklist has become our most downloaded document.
READ MORE