HOW TO SHOOT A COMMERCIAL PROPERTY USING A SMARTPHONE
Introduction
Smartphone cameras are getting really good these days… but can they take photos good enough for real estate photography? Well, what better way to put it to the test than by shooting a $4.2 million dollar commercial property with a smartphone!
Now before we start, I just want to state that it’s always best to use a high-quality DSLR when shooting real estate, however, we all know that this isn’t an option for some listings.
The End Result (What you'll learn from this tutorial)
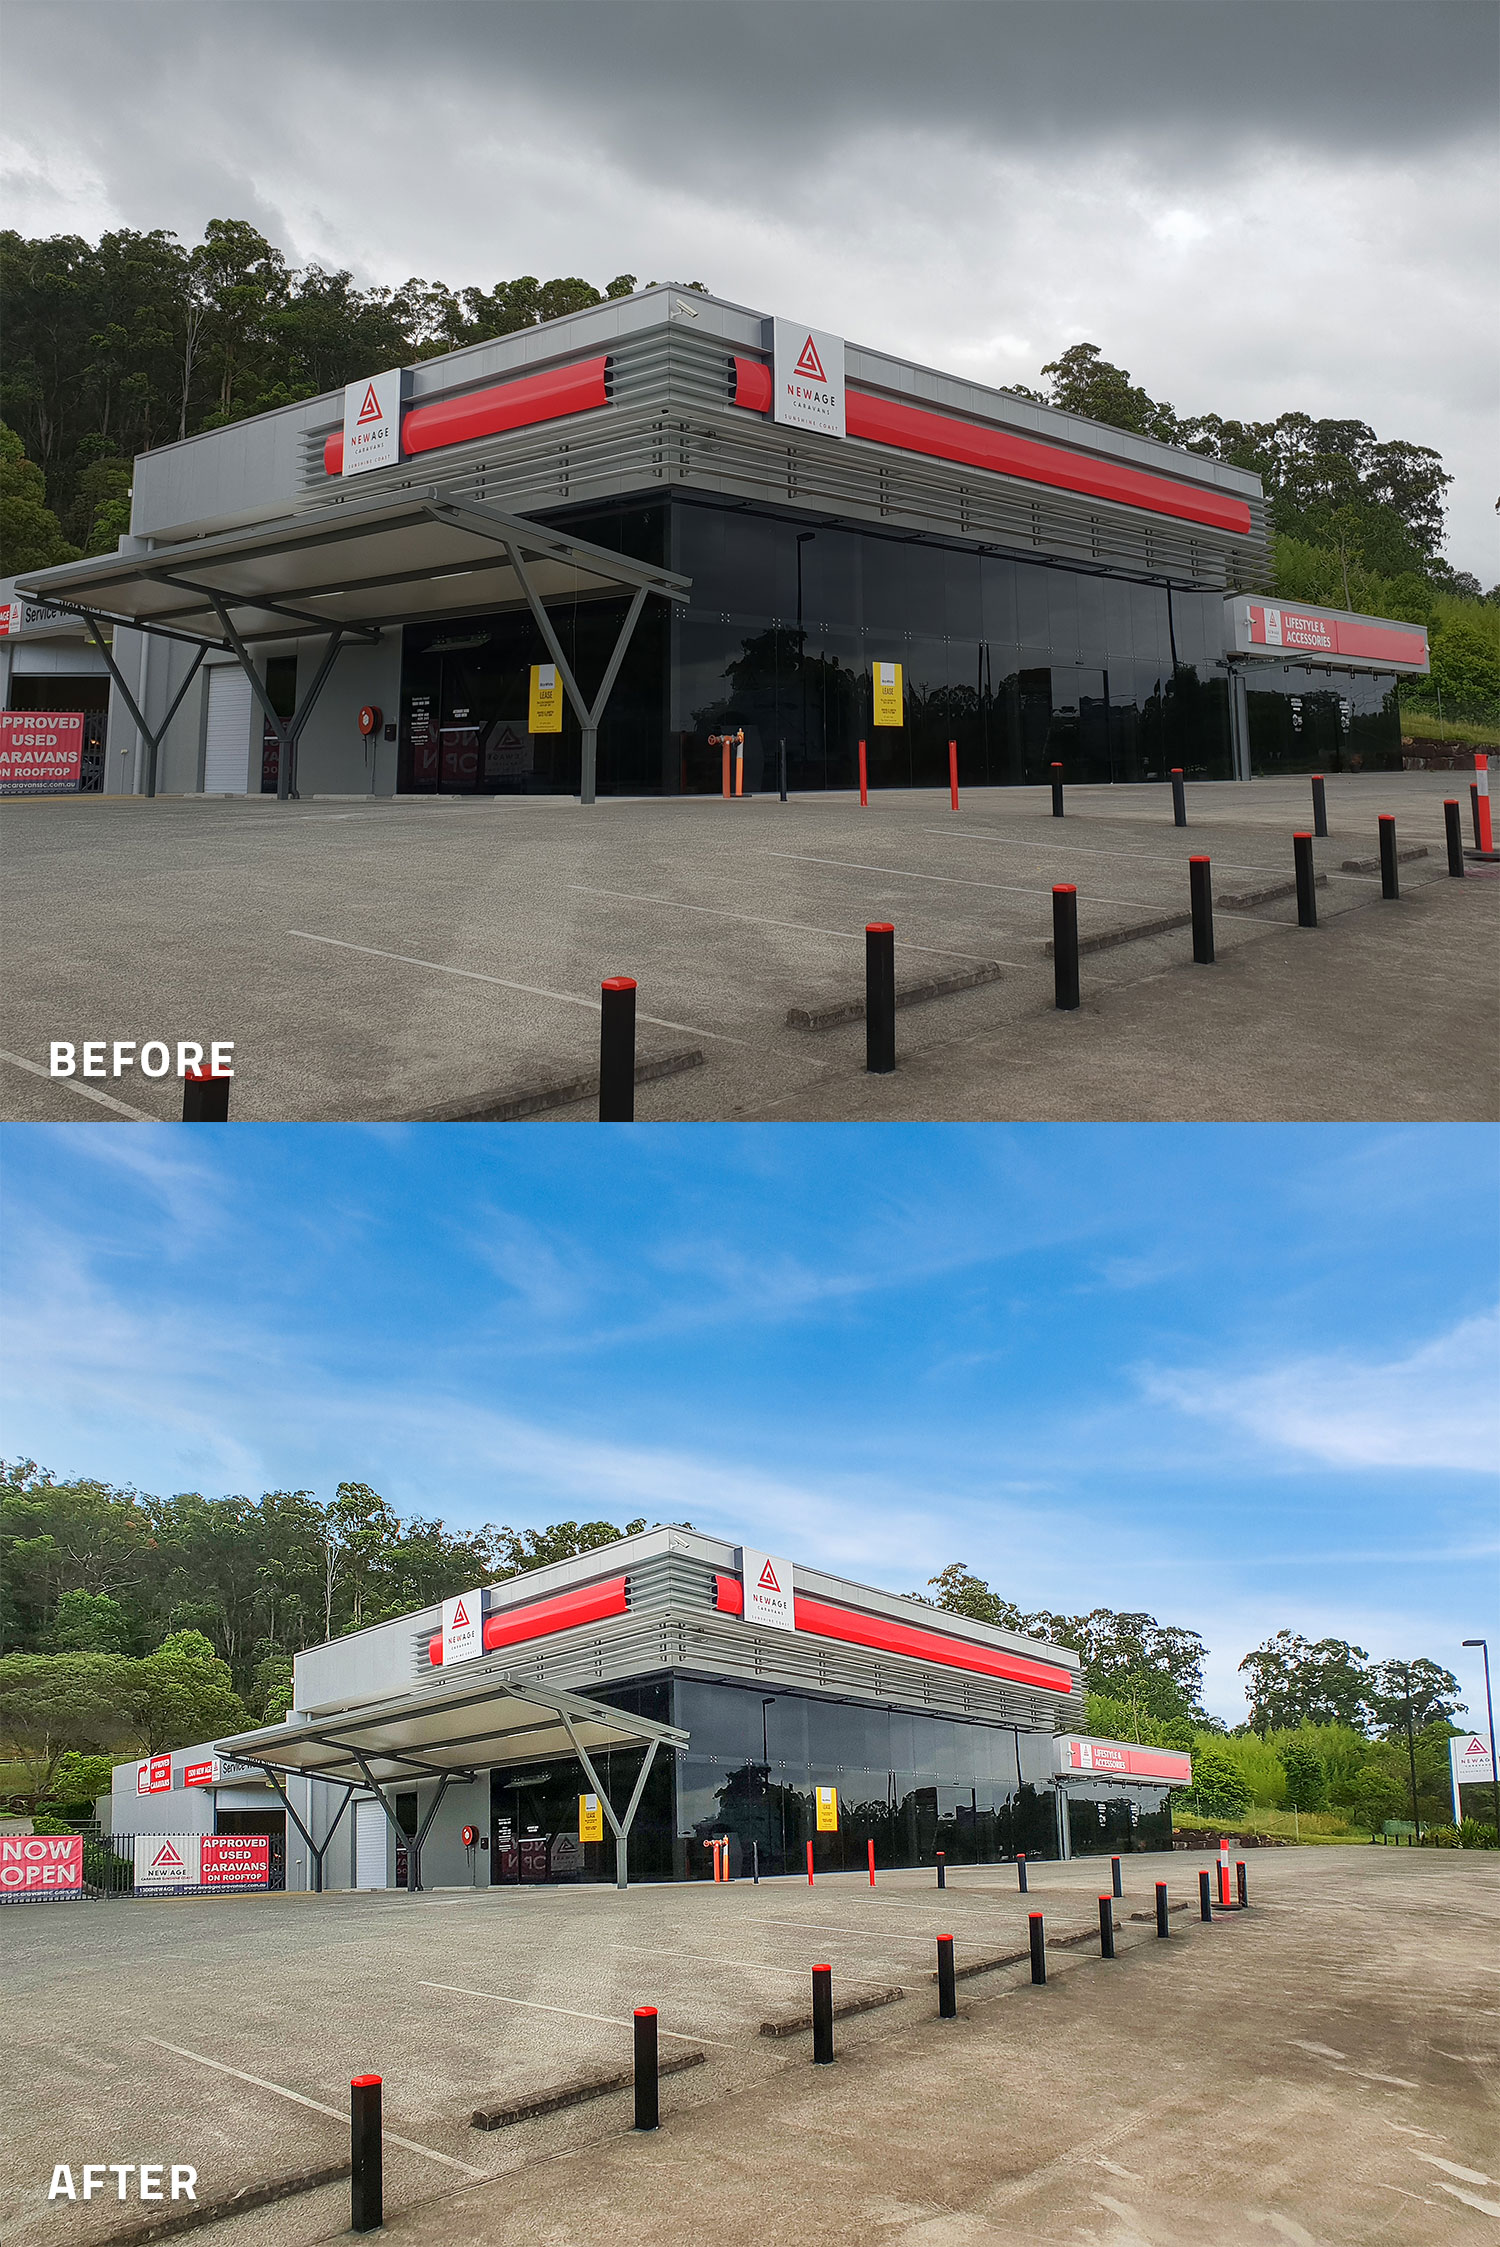
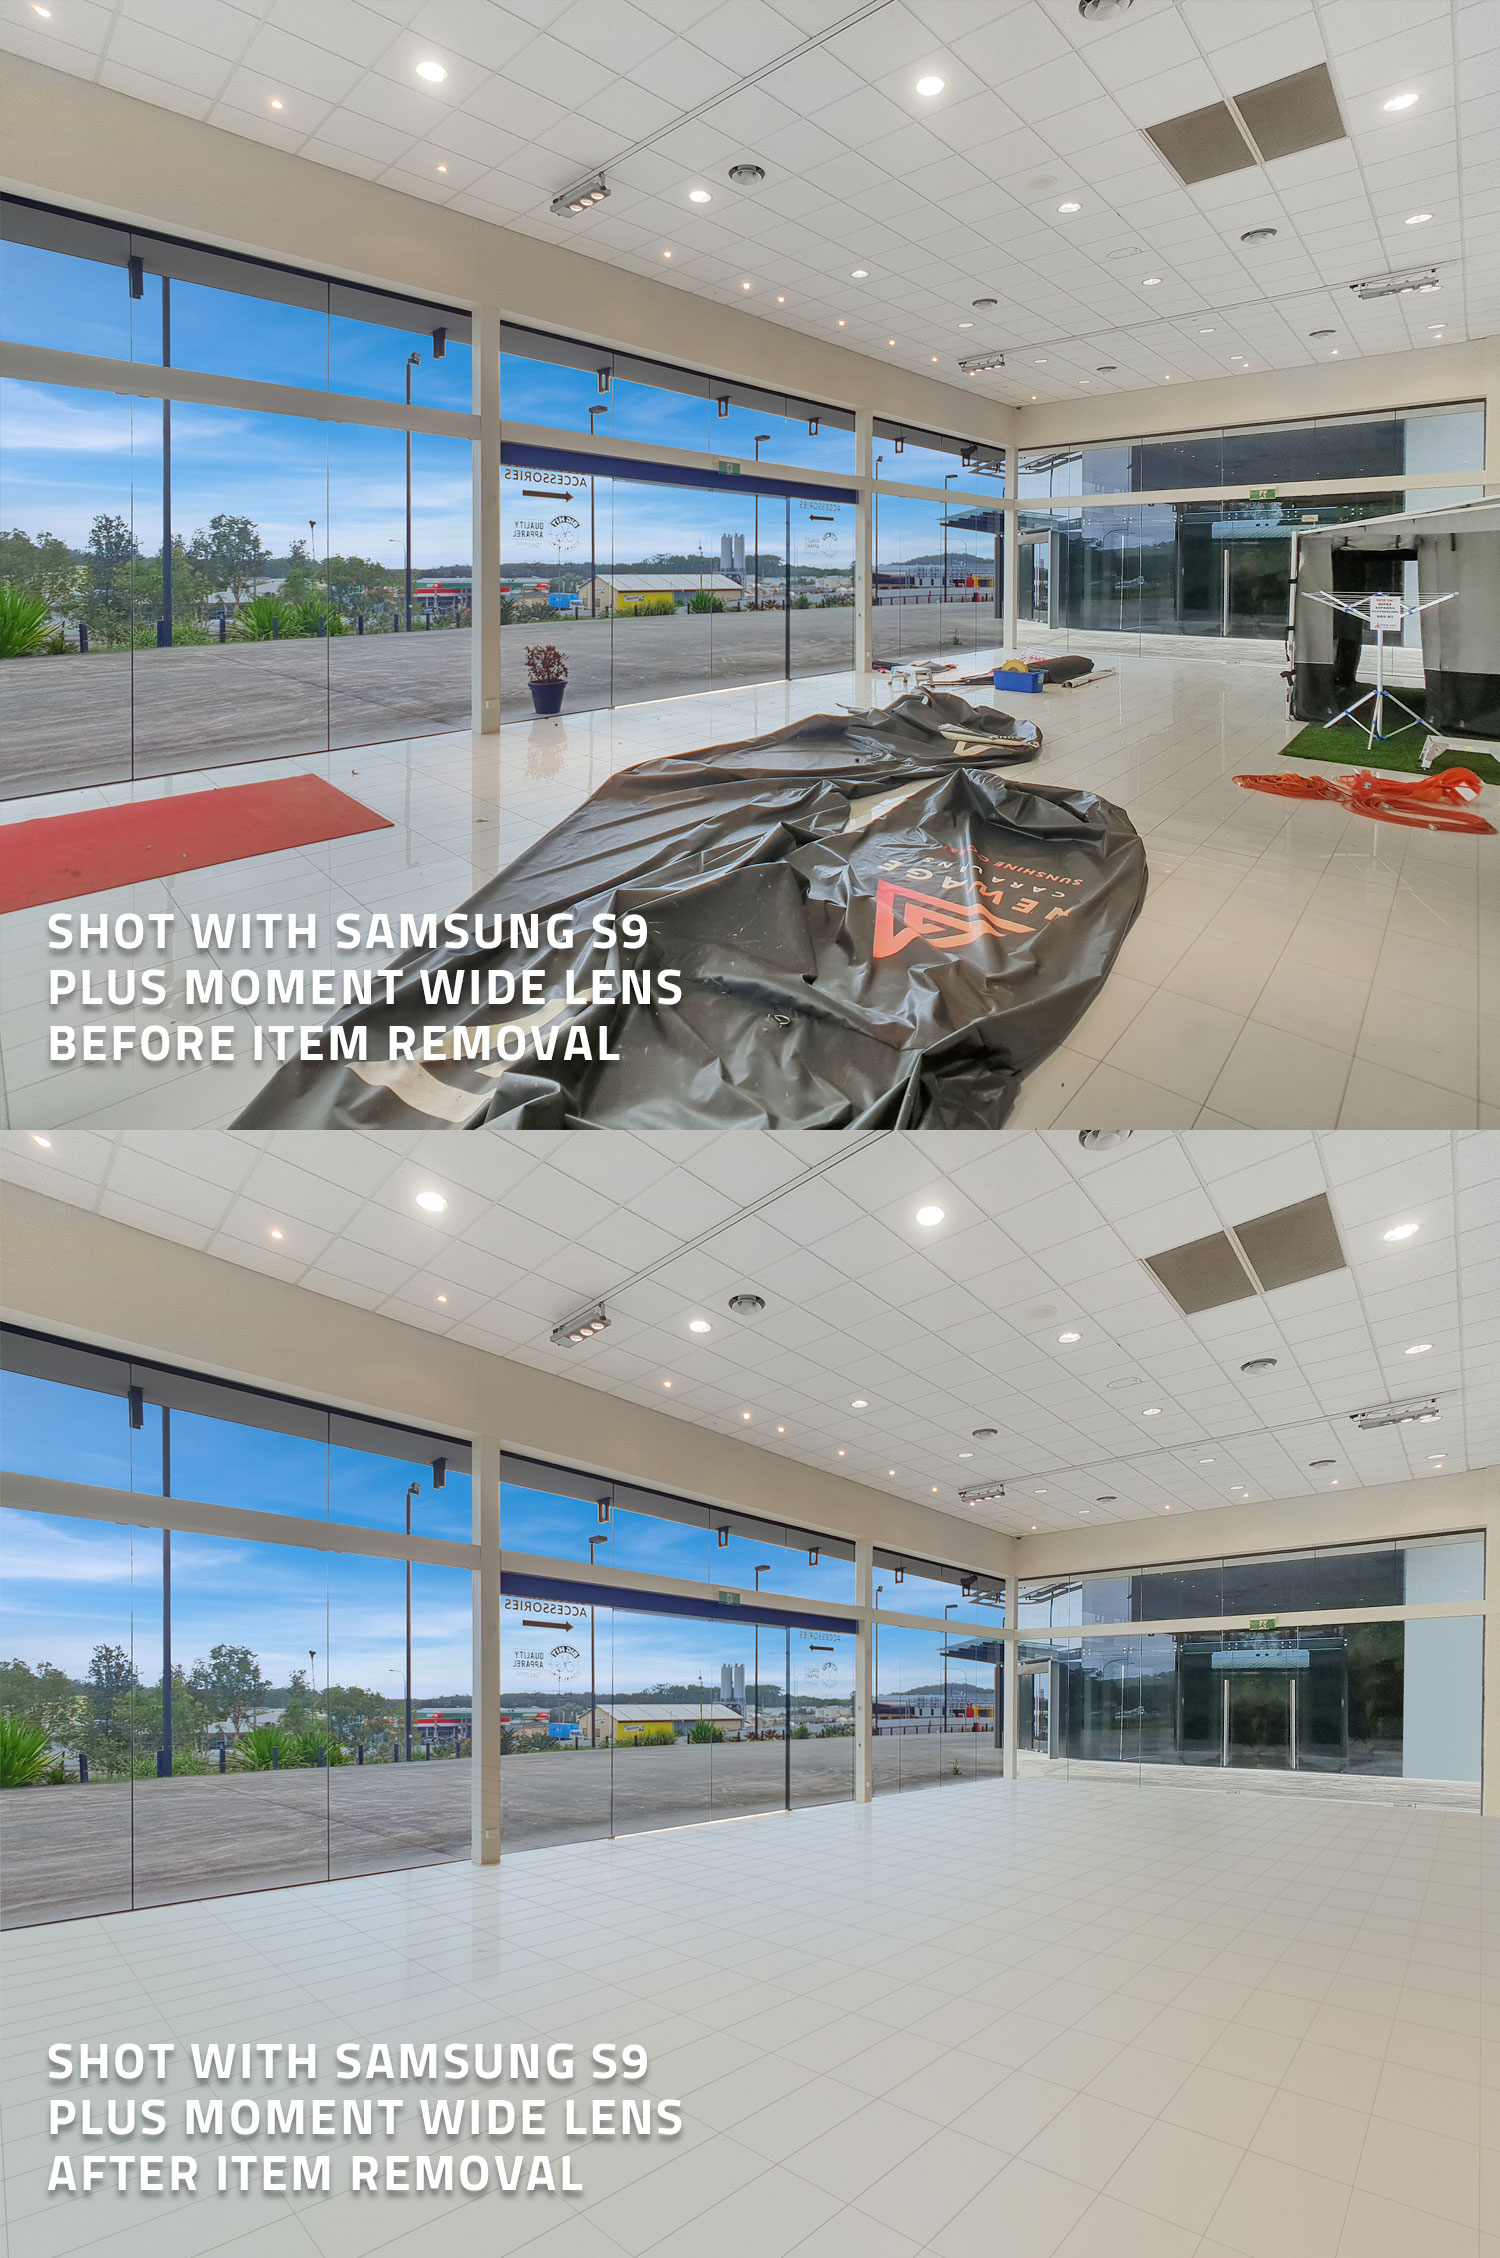
So below is a before and after shot of a commercial property that we've taken with a Samsung S9 smartphone.
The before
The after
The Setup
Okay, to produce the shot like the one above, you’re going to need the following setup.
• A relatively new smartphone - We suggest an iPhone 7 (or higher), Google Pixel or a Samsung Galaxy S8/8 (or higher).
• An 18mm Moment Wide Angle lens (costs $120) – Allows you to take beautiful wide angled shots.
• A Moment Phone Case (costs $30) – This will allow you to mount the lens onto your phone.

Shooting A Commercial Property With And Without A Moment Wide Lens
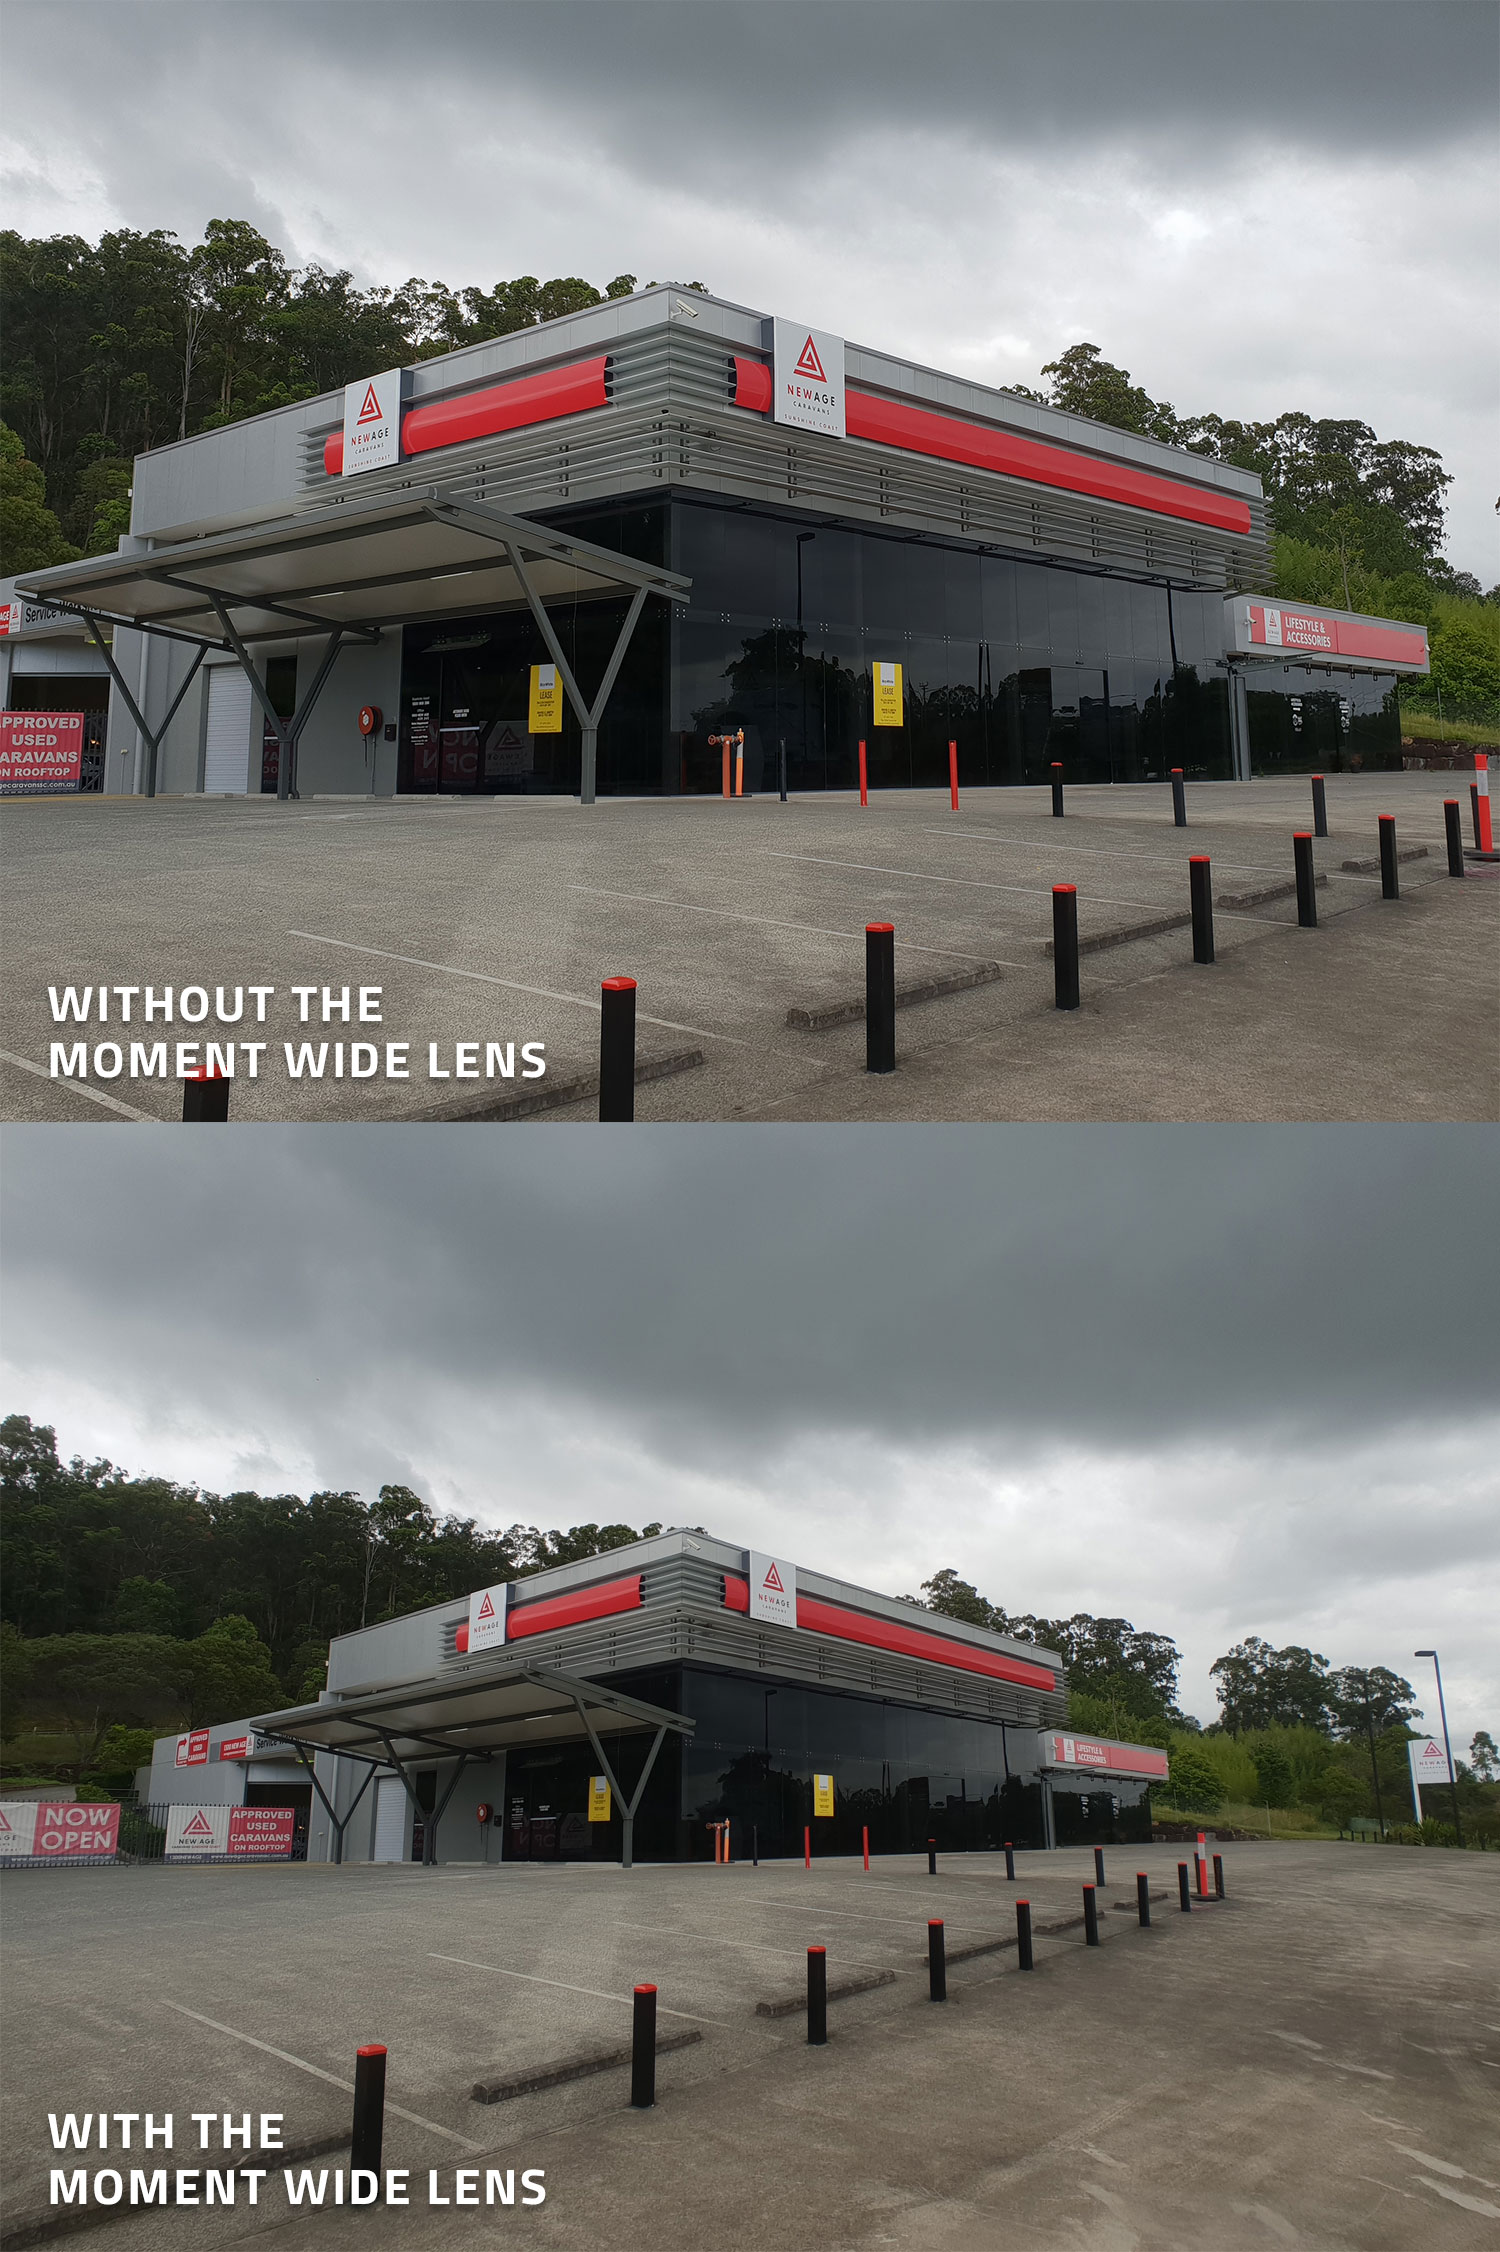
The 18mm Moment Wide lens makes such a big difference when attached to your smartphone. As the name suggests, this lens allows your phone to shoot wider which is preferential when it comes to real estate photography.
Conversely, without the Moment Wide Lens attachment, your shots are going to look cropped in which is an unprofessional look.
To illustrate this point, we took 2 pictures of
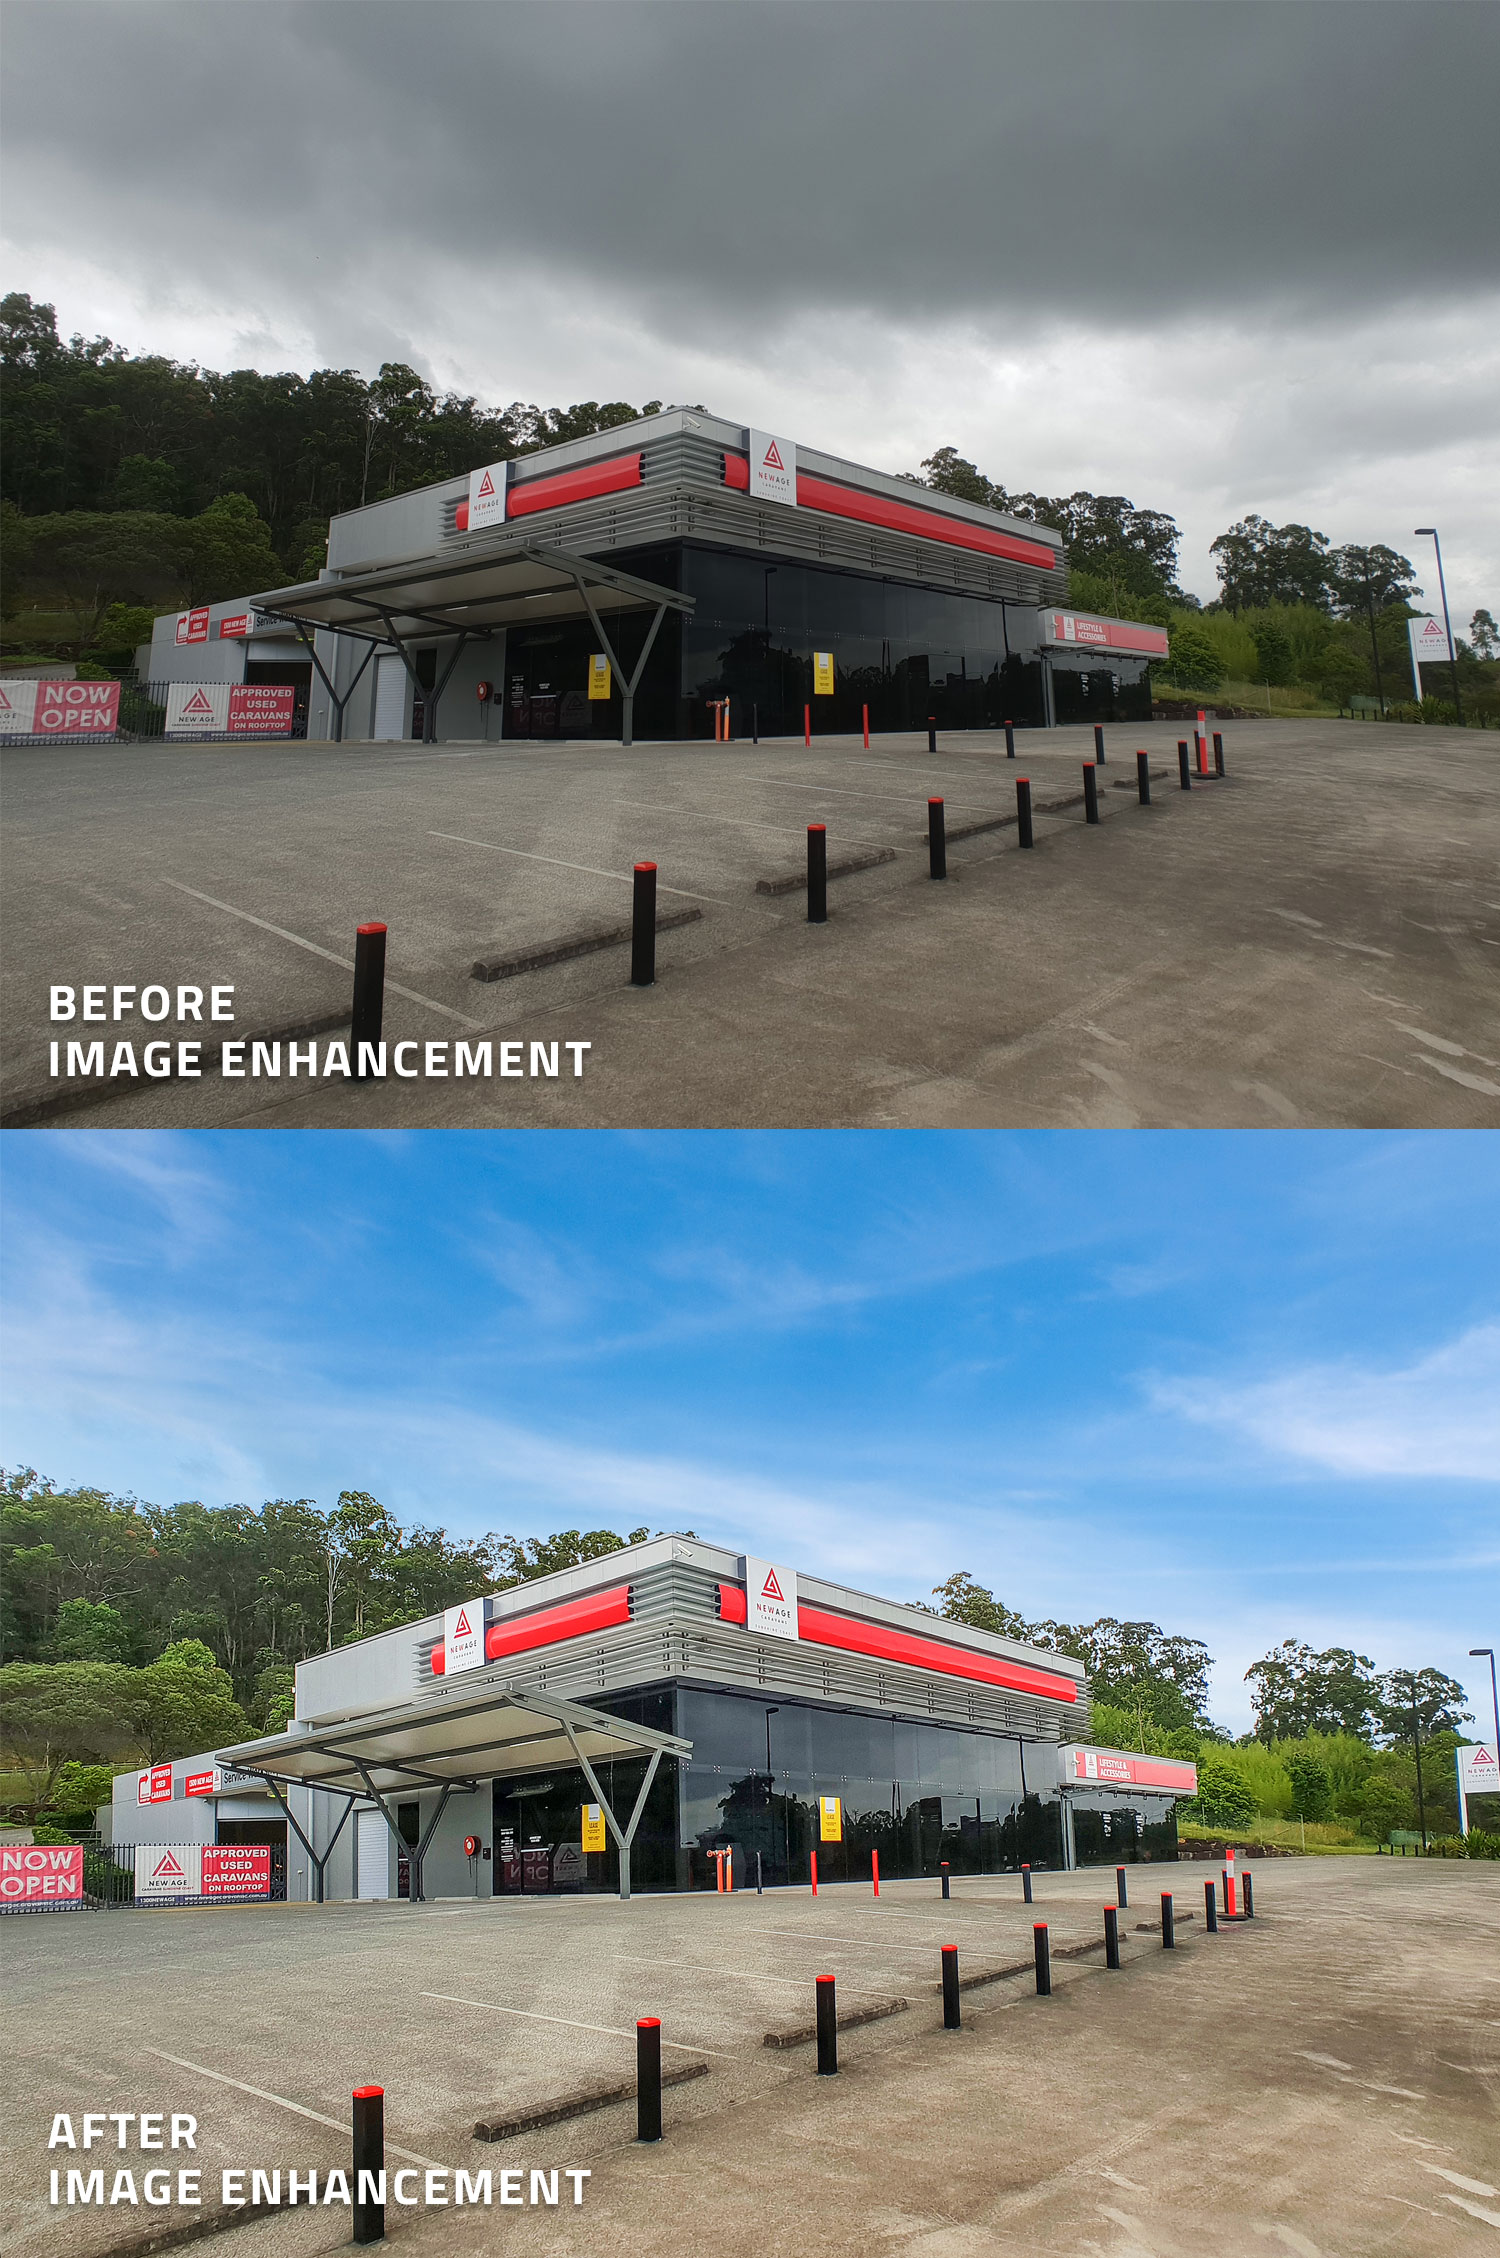
Using Image Enhancement To Make Your Shots Pop!
This is where our Image Enhancement edit comes into play. Image Enhancement is our most popular service where we apply 16 edits to your photos to make them pop! It’s super affordable (only $1.60 per photo) with a 24-hour turn around time.
The 16 steps include…
01. White balancing
02. Image sharpening
03. Vertical & horizontal straightening
04. Remove minor blemishes
05. Lens distortion removal
06. Brightness & contrast adjustment
07. Outdoor sky replacement
08. Lawn enhancement – repair or replace
09. Remove pool cleaners from water
10. Tone adjustment
11. TV screen replacement
12. Dust spot removal
13. Flash reflection removal
14. Add fire to fireplaces
15. HDR bracketing with indoor window replacement
16. Remove the photographer’s reflection
To show how much of a difference Image Enhancement makes, we applied this edit to the same shot we took before
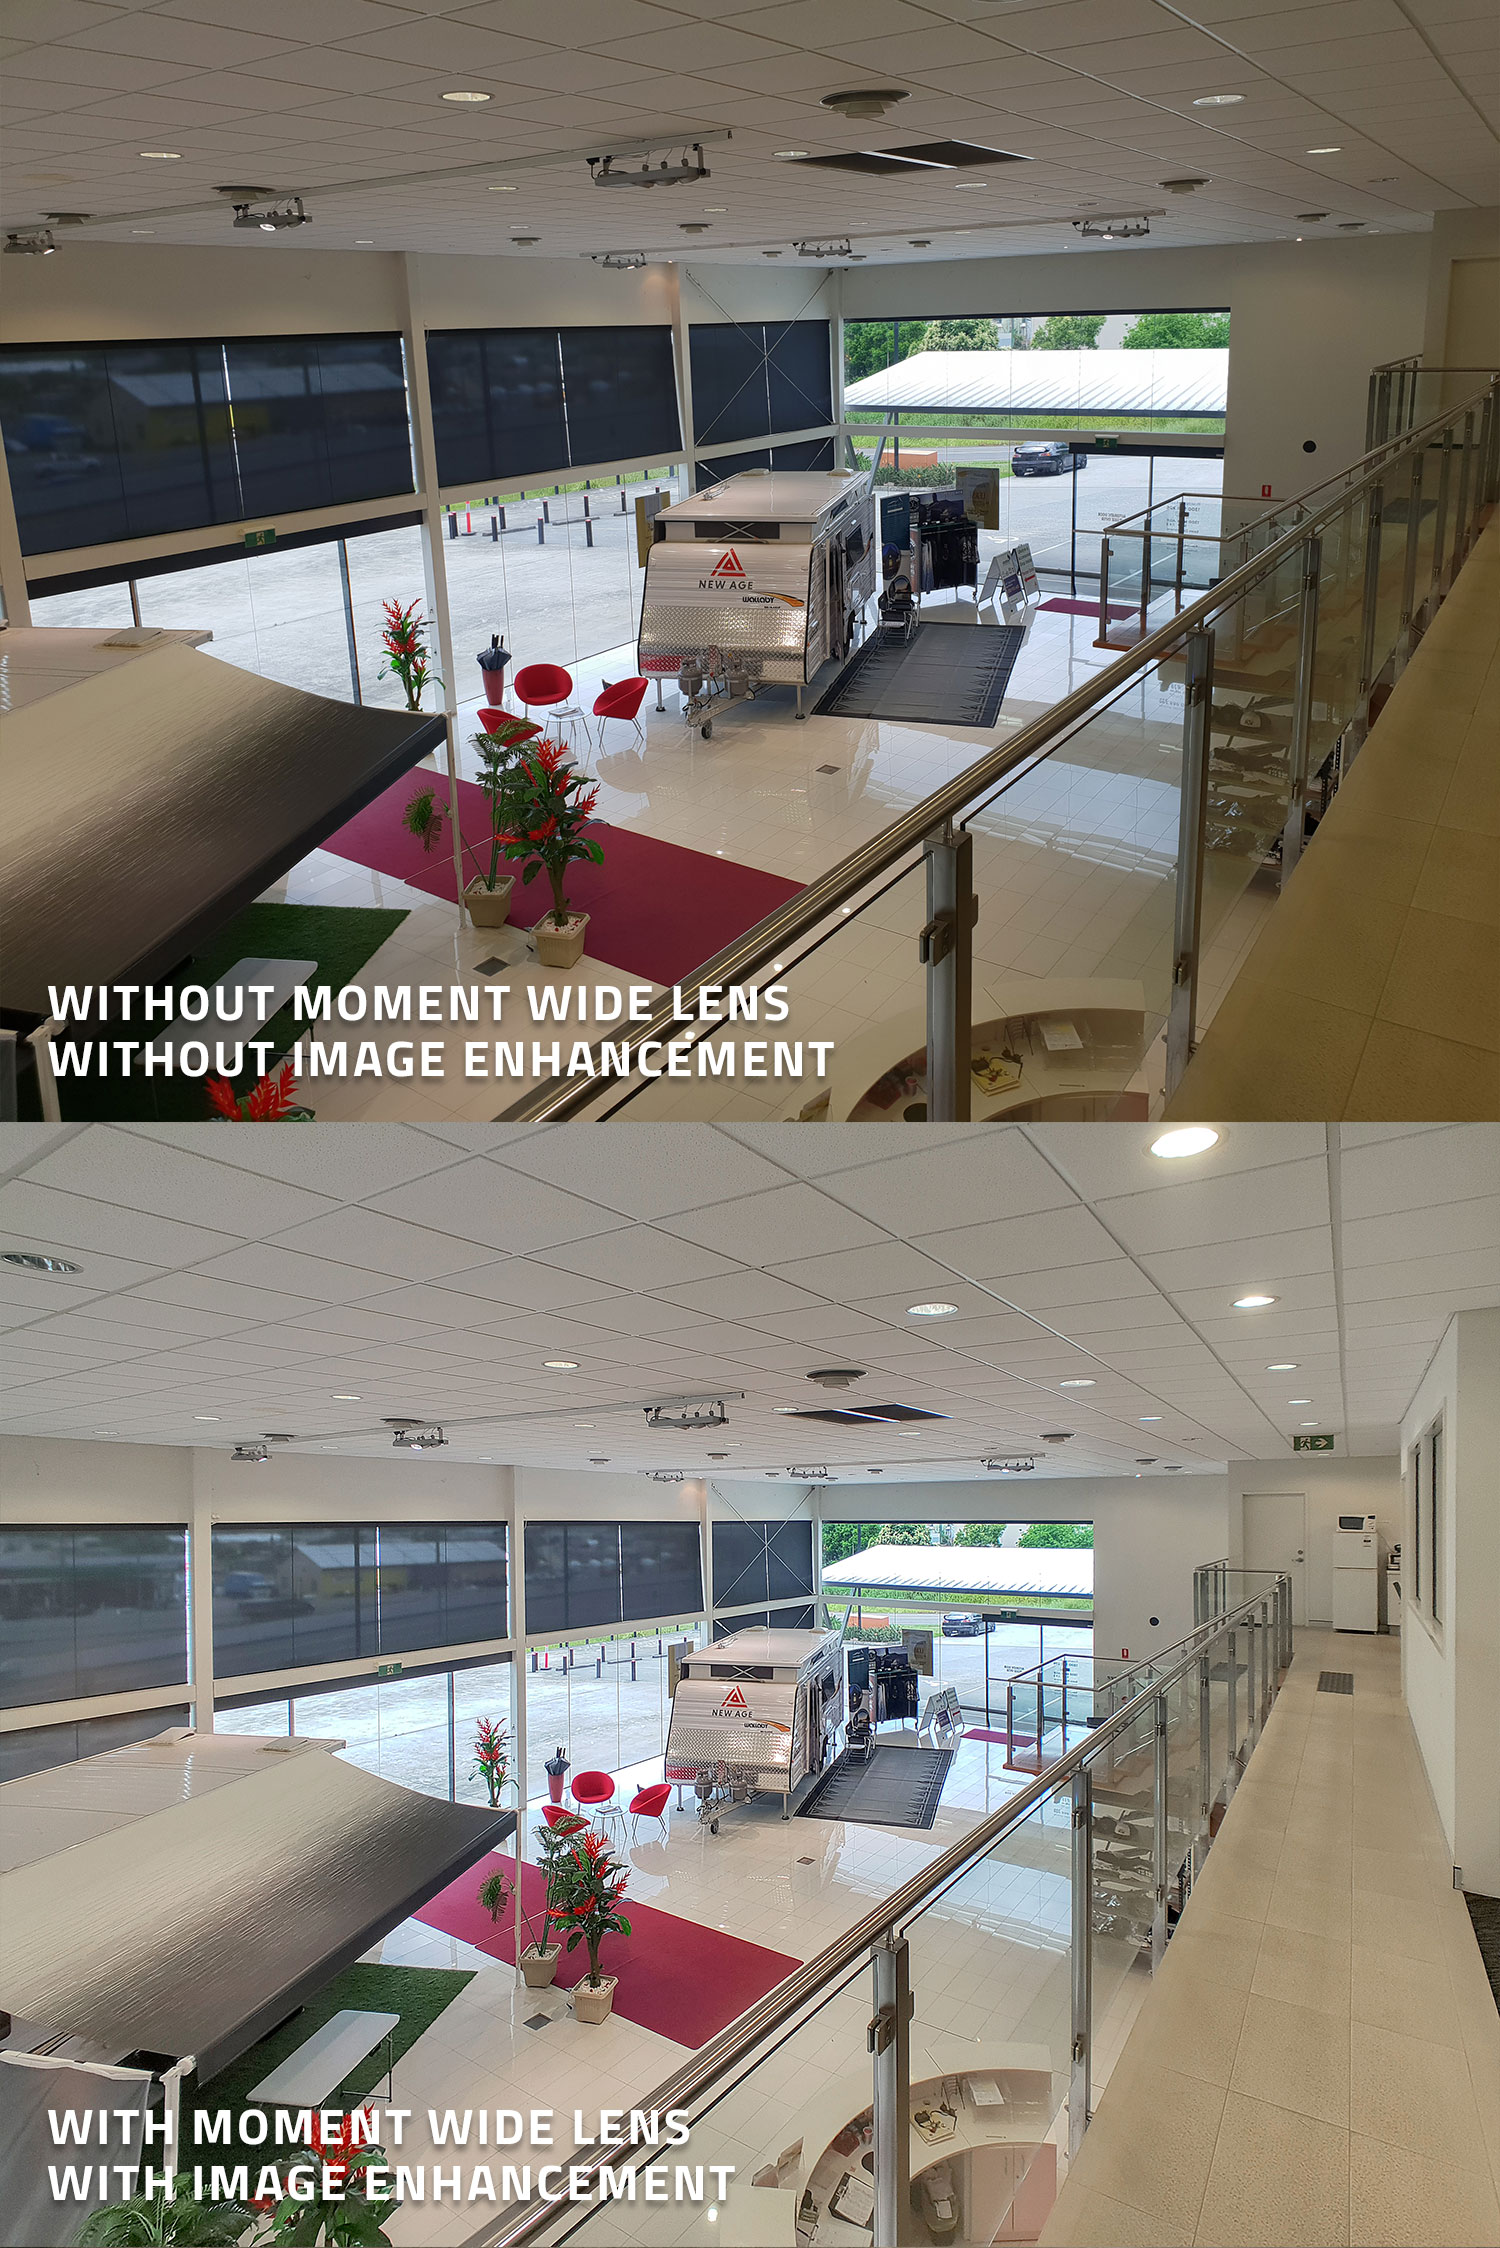
Can I Use A Smartphone To Take Interior Photos?
You bet you can! Just make sure to attach the Moment Wide Lens and then send the photos in for Image Enhancement.
Below is an interior shot that was taken using the same method as described above.
Can I Use Item Removal On Photo Taken With A Smartphone?
In the photo below, there was a lot of random clutter in one of the main showrooms which simply wasn’t practical for us to move. Instead, we simply took the shot with our smartphone setup and applied our Item Removal edit later in
Item removal costs
• $4 per photo (1-2 items to be removed)
• $8 per photo (3 or more items to be removed)
Turnaround time is 24 hours.
How Do I Upload My Photos For Image Enhancement?
Uploading images is very simple using our system.
Simply…
1 – Go to www.boxbrownie.com
2 – Create an account and login to the dashboard.
3 – Click on Image Enhancement.
4 – Enter in a “Job Title” and then upload your images. Click Next.
5 – Enter in your preferences such as what sky you would like. Click Next.
6 – Review your job and submit.
Conclusion
So there we have it! Shooting a commercial property using a smartphone is so easy if you have the right tools. Simply attach a Moment Wide Lens to your smartphone then submit any photos in for Image Enhancement so they can be professionally edited.
RELATED ARTICLES

Got a listing with an outdoor area that has potential, but the photos don’t show it? Or maybe it just needs a quick tidying or revamp? Whichever it is, you can hit refresh with these 5 photo edits that will instantly elevate any outdoor area and increase the property appeal dramatically.
READ MORE
Discover how to shoot high-quality real estate photos on a budget! Learn pro tips, the best smartphone tricks, and how SnapSnapSnap’s automatic bracketing makes editing effortless.
READ MORE
Discover seven powerful ways one simple edit can turn dull property photos into eye-catching listings. From brighter skies to greener lawns, Image Enhancement isn’t just a nice touch — it’s essential.
READ MORE
Getting those high-quality aerial shots of your property can be a crucial factor when it comes to selling your listing to prospective buyers. However, real estate aerial photography can be daunting at a glance, especially if you’ve never flown a drone before! In this article, our founder, Brad Filliponi, is going to show you how easy it can be.
READ MORE
If you’re a real estate agent, property manager, or builder using an iPhone, you’re already halfway to great listing photos. SnapSnapSnap takes you all the way — with automatic HDR, built-in framing guides, and professional editing at your fingertips. See why our app outperforms your iPhone every time for property photography.
READ MORE
Agents across the globe swear by the power of Virtual Staging, but many don't realize they can shoot these images with their own smartphone. This post walks you through just how easy it is, so you'll never be deprived of this phenomenal marketing tool.
READ MORE