BLOG
BoxBrownie.com’s team and other experts offer their best advice, insights, and how-to's. All to help you improve the presentation of your property marketing.

Our co-founder and professional photographer Brad Filliponi will answer all your photography questions. Discover expert tips, tricks, and techniques to enhance your real estate photography skills and capture stunning images.
READ MORE
When property listings fail to convert buyers, it is not always price or presentation. It is clarity. Buyers need to instantly understand how the space actually works. Floor plans are key to attracting more qualified buyers and renters. Learn how they make a difference.
READ MORE
Jon Sweeney transformed leasing across a 680-unit portfolio by upgrading listing photos. With sharper images and strategic virtual staging, even hard-to-rent units gained traction—cutting vacancy times and driving faster, more consistent leasing results.
READ MORE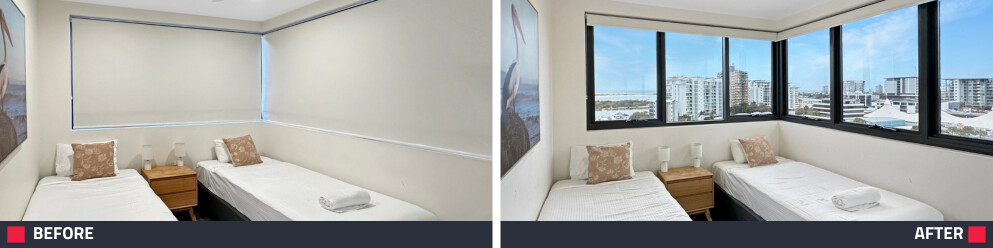
Master the simple decision that can transform your listing photos. Learn when to open blinds to maximize natural light and when to adjust them to minimize distractions, helping you create bright, focused images that attract more buyers.
READ MORE
Consistent branding across listings is a vital component of building a strong and lasting first impression with potential buyers. This blog will show you how to leverage the often-overlooked power of a branded floor plan so that your listings stand out from the crowd.
READ MORE
Tight budget? No problem. Learn 5 fast, affordable ways to create high-performing listings that stand out online, attract attention, and help you sell faster without overspending.
READ MORE
Uncertain about using virtual staging in your property marketing? Discover how to effectively manage expectations and impress buyers with virtual staging that eliminates any potential surprises during showings.
READ MORE
Learn how photo enhancement improves accuracy in property marketing by correcting camera limitations. Create true-to-life images that build trust, attract buyers, and elevate your listings.
READ MORE
Great photos drive bookings in the short-stay rental market. Discover how The Holiday Home Girls help owners style properties, capture standout images, and use SnapSnapSnap with BoxBrownie.com to create polished, booking-ready listing photos.
READ MORE
Ready to stand out and get more leads? Explore five free BoxBrownie.com resources designed to help you capture better photos, streamline your workflow, and create standout listings that drive faster results.
READ MORE
Discover how Ryan Shields replaced slow, expensive photography workflows with SnapSnapSnap and BoxBrownie.com, achieving faster turnaround times, lower costs, and consistently polished listing photos.
READ MORE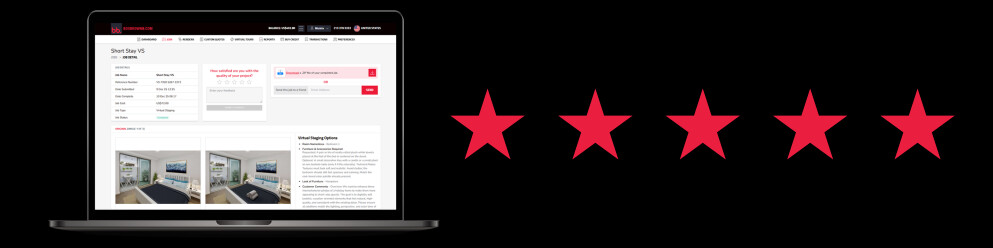
Your feedback helps us deliver better results, faster fixes, and a smoother editing experience every time. Rate your BoxBrownie.com jobs, share what worked, and remember—if something isn’t right, free reworks are always just one click away.
READ MORE
Selling a home as-is can be challenging, but virtual edits make it easier. Learn how digital staging, renovations, and photo enhancements help buyers see potential, boost interest, and improve results without costly repairs.
READ MORE
If you’re a real estate agent, property manager, or builder using an iPhone, you’re already halfway to great listing photos. SnapSnapSnap takes you all the way — with automatic HDR, built-in framing guides, and professional editing at your fingertips. See why our app outperforms your iPhone every time for property photography.
READ MORE
Get your team 2026-ready with our free property marketing training! We tailor each session to your team’s needs — from cost-effective photography that streamlines your marketing to creating listings that stop the scroll. Save time, boost results, and start January strong.
READ MORE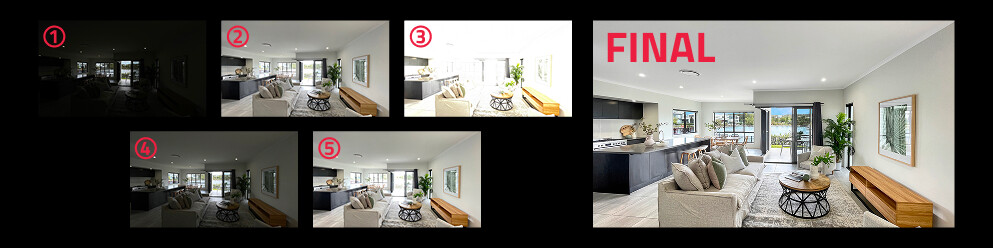
Confused by HDR? Discover what it is, why it can dramatically improve your property photos, and how we make creating stunning, balanced images effortless.
READ MOREViewing 1–16 of 370 items