YOUR BLUEPRINT TO STUNNING RENDERS: A STEP-BY-STEP GUIDE
If you’re looking for a Render that stands out with stunning detail and vibrant quality, we’re here to make it happen! At BoxBrownie.com, we specialize in transforming your architectural visions into high-quality Renders that wow your clients and capture attention.
But what’s the secret to achieving excellence? It’s all about the details—and that’s where our Render Checklist comes in. By providing the right information upfront, you’ll help us deliver a stunning Render quickly and efficiently while avoiding unnecessary delays.
Here’s your guide to what we need and how you can get started.
Why the Right Input Matters
A great Render begins with great information. When you provide clear and detailed input, you ensure:
- Accuracy: We can match every detail of your vision, from textures to finishes.
- Efficiency: A complete submission means faster turnaround times.
- Satisfaction: The final product will reflect your expectations, down to the smallest detail.
Your input helps us create a Render that meets and exceeds expectations. Let’s explore what you’ll need to provide.
What We Need to Create Your Render
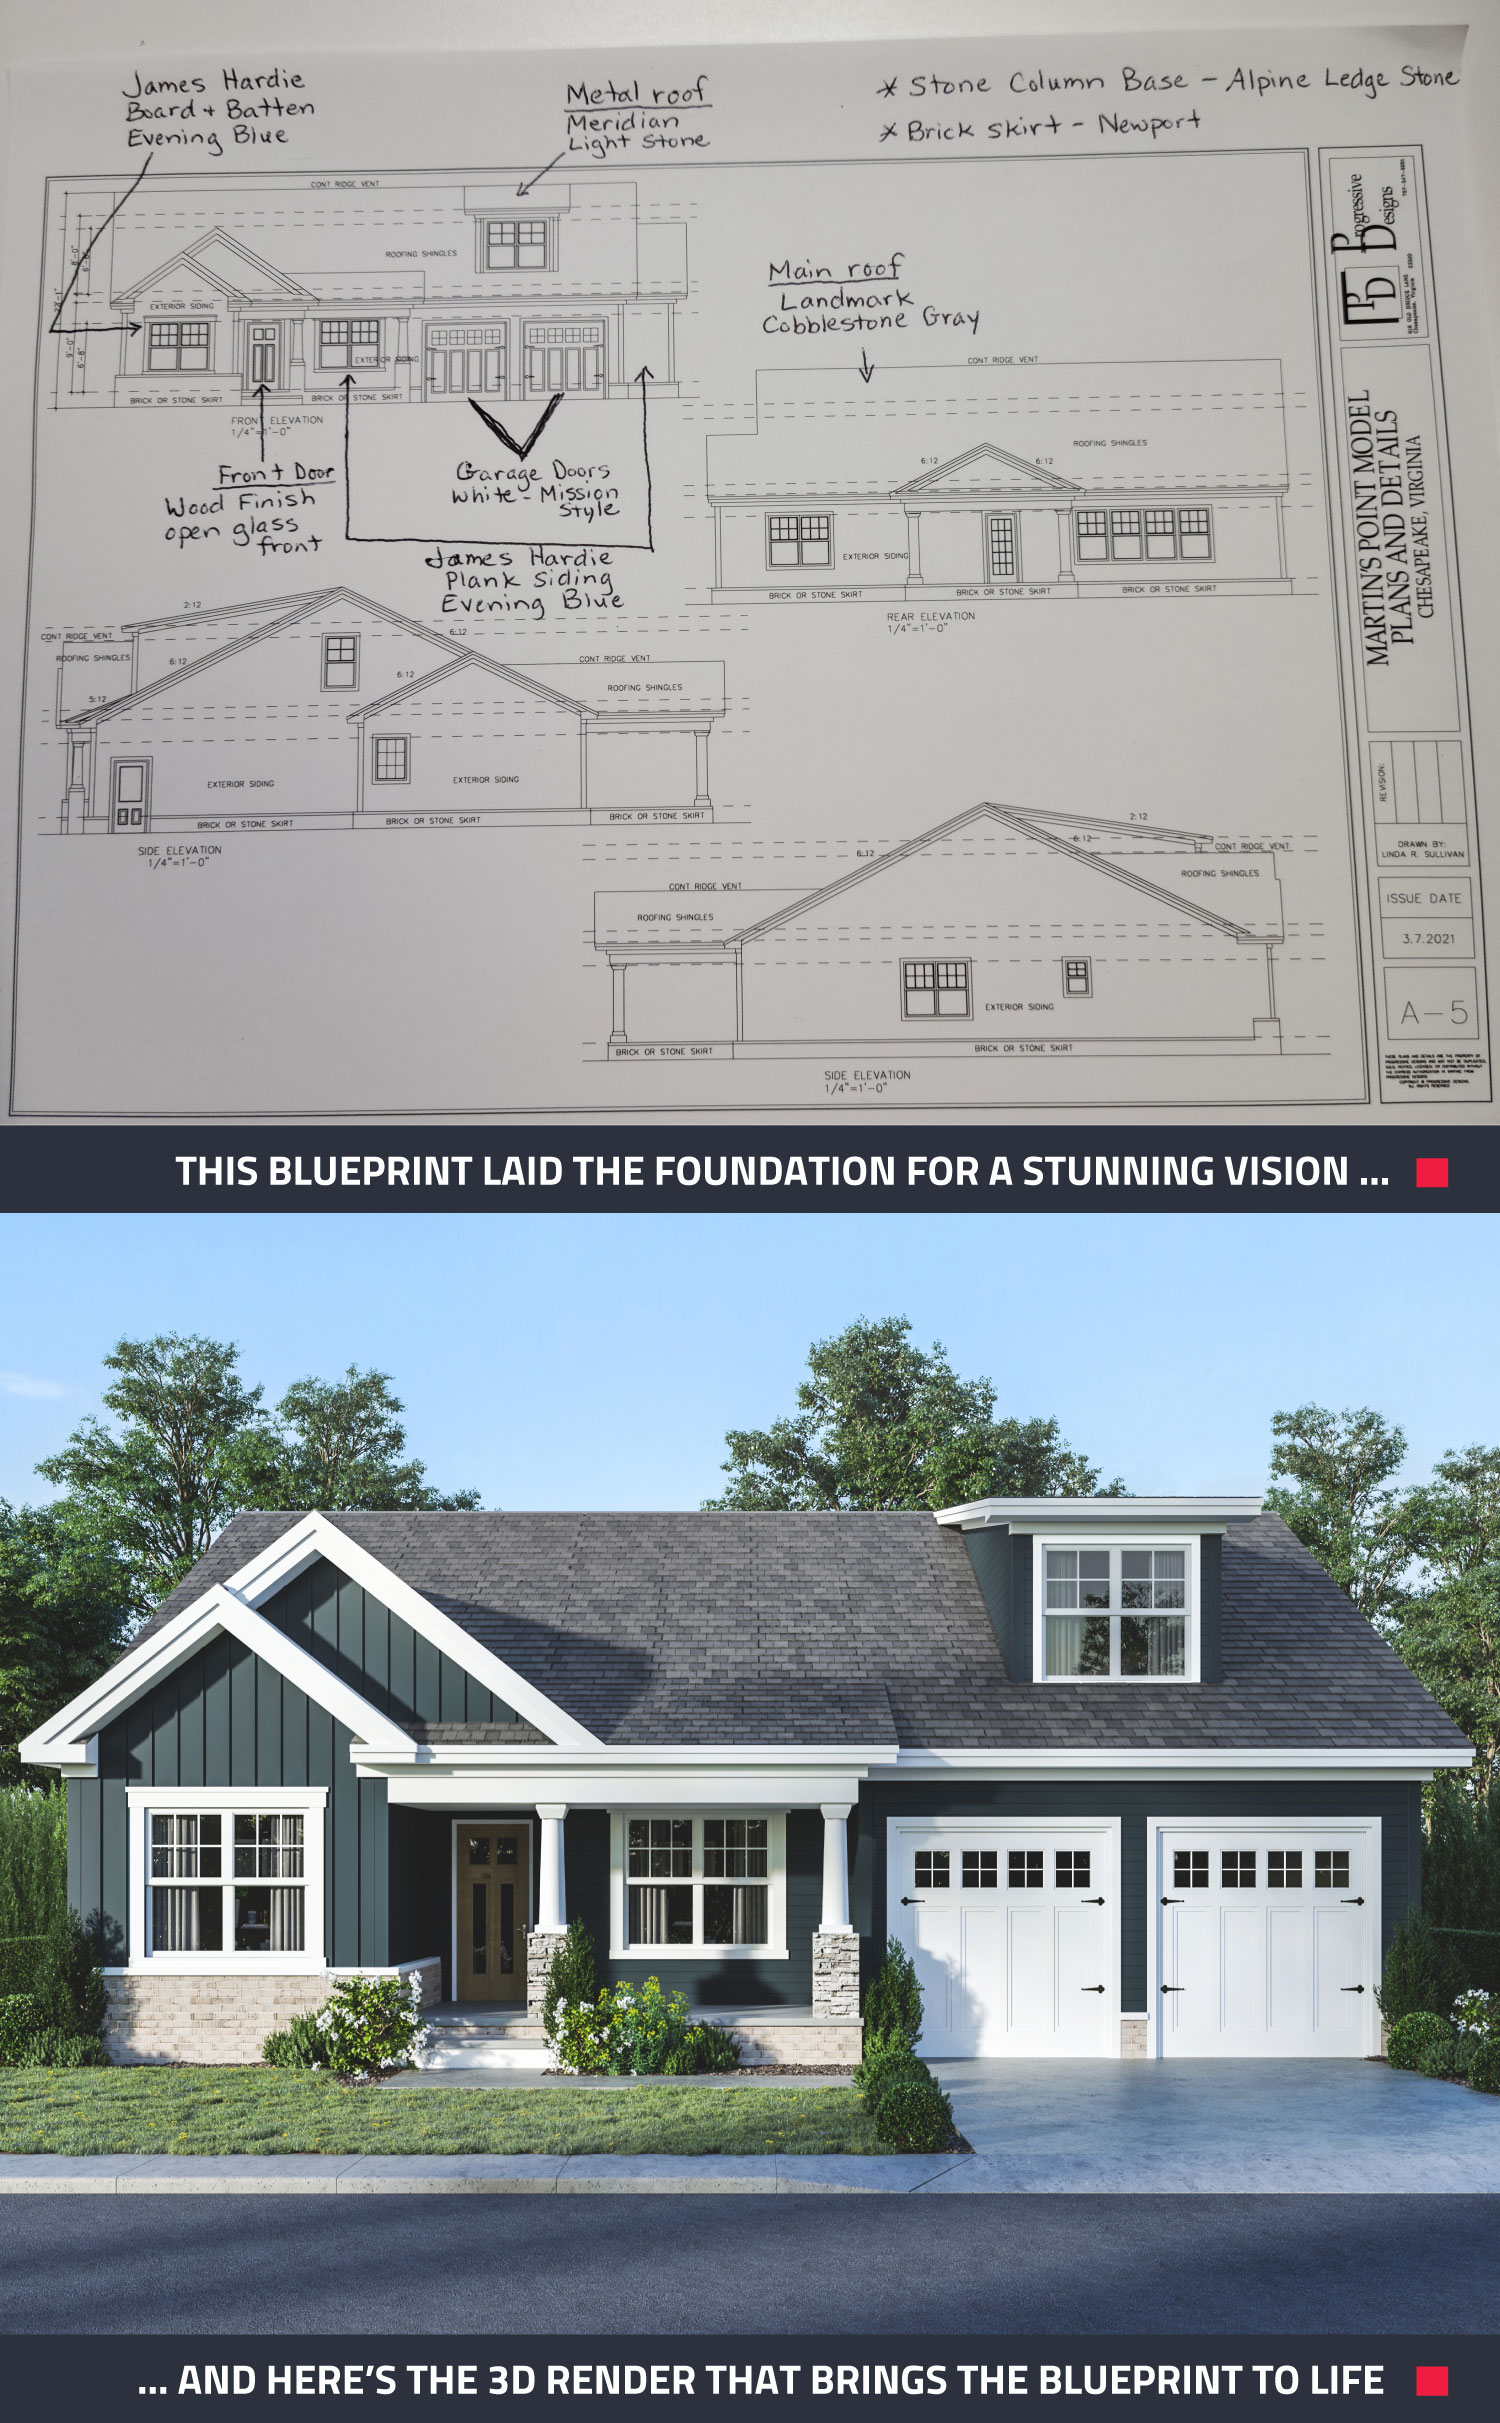
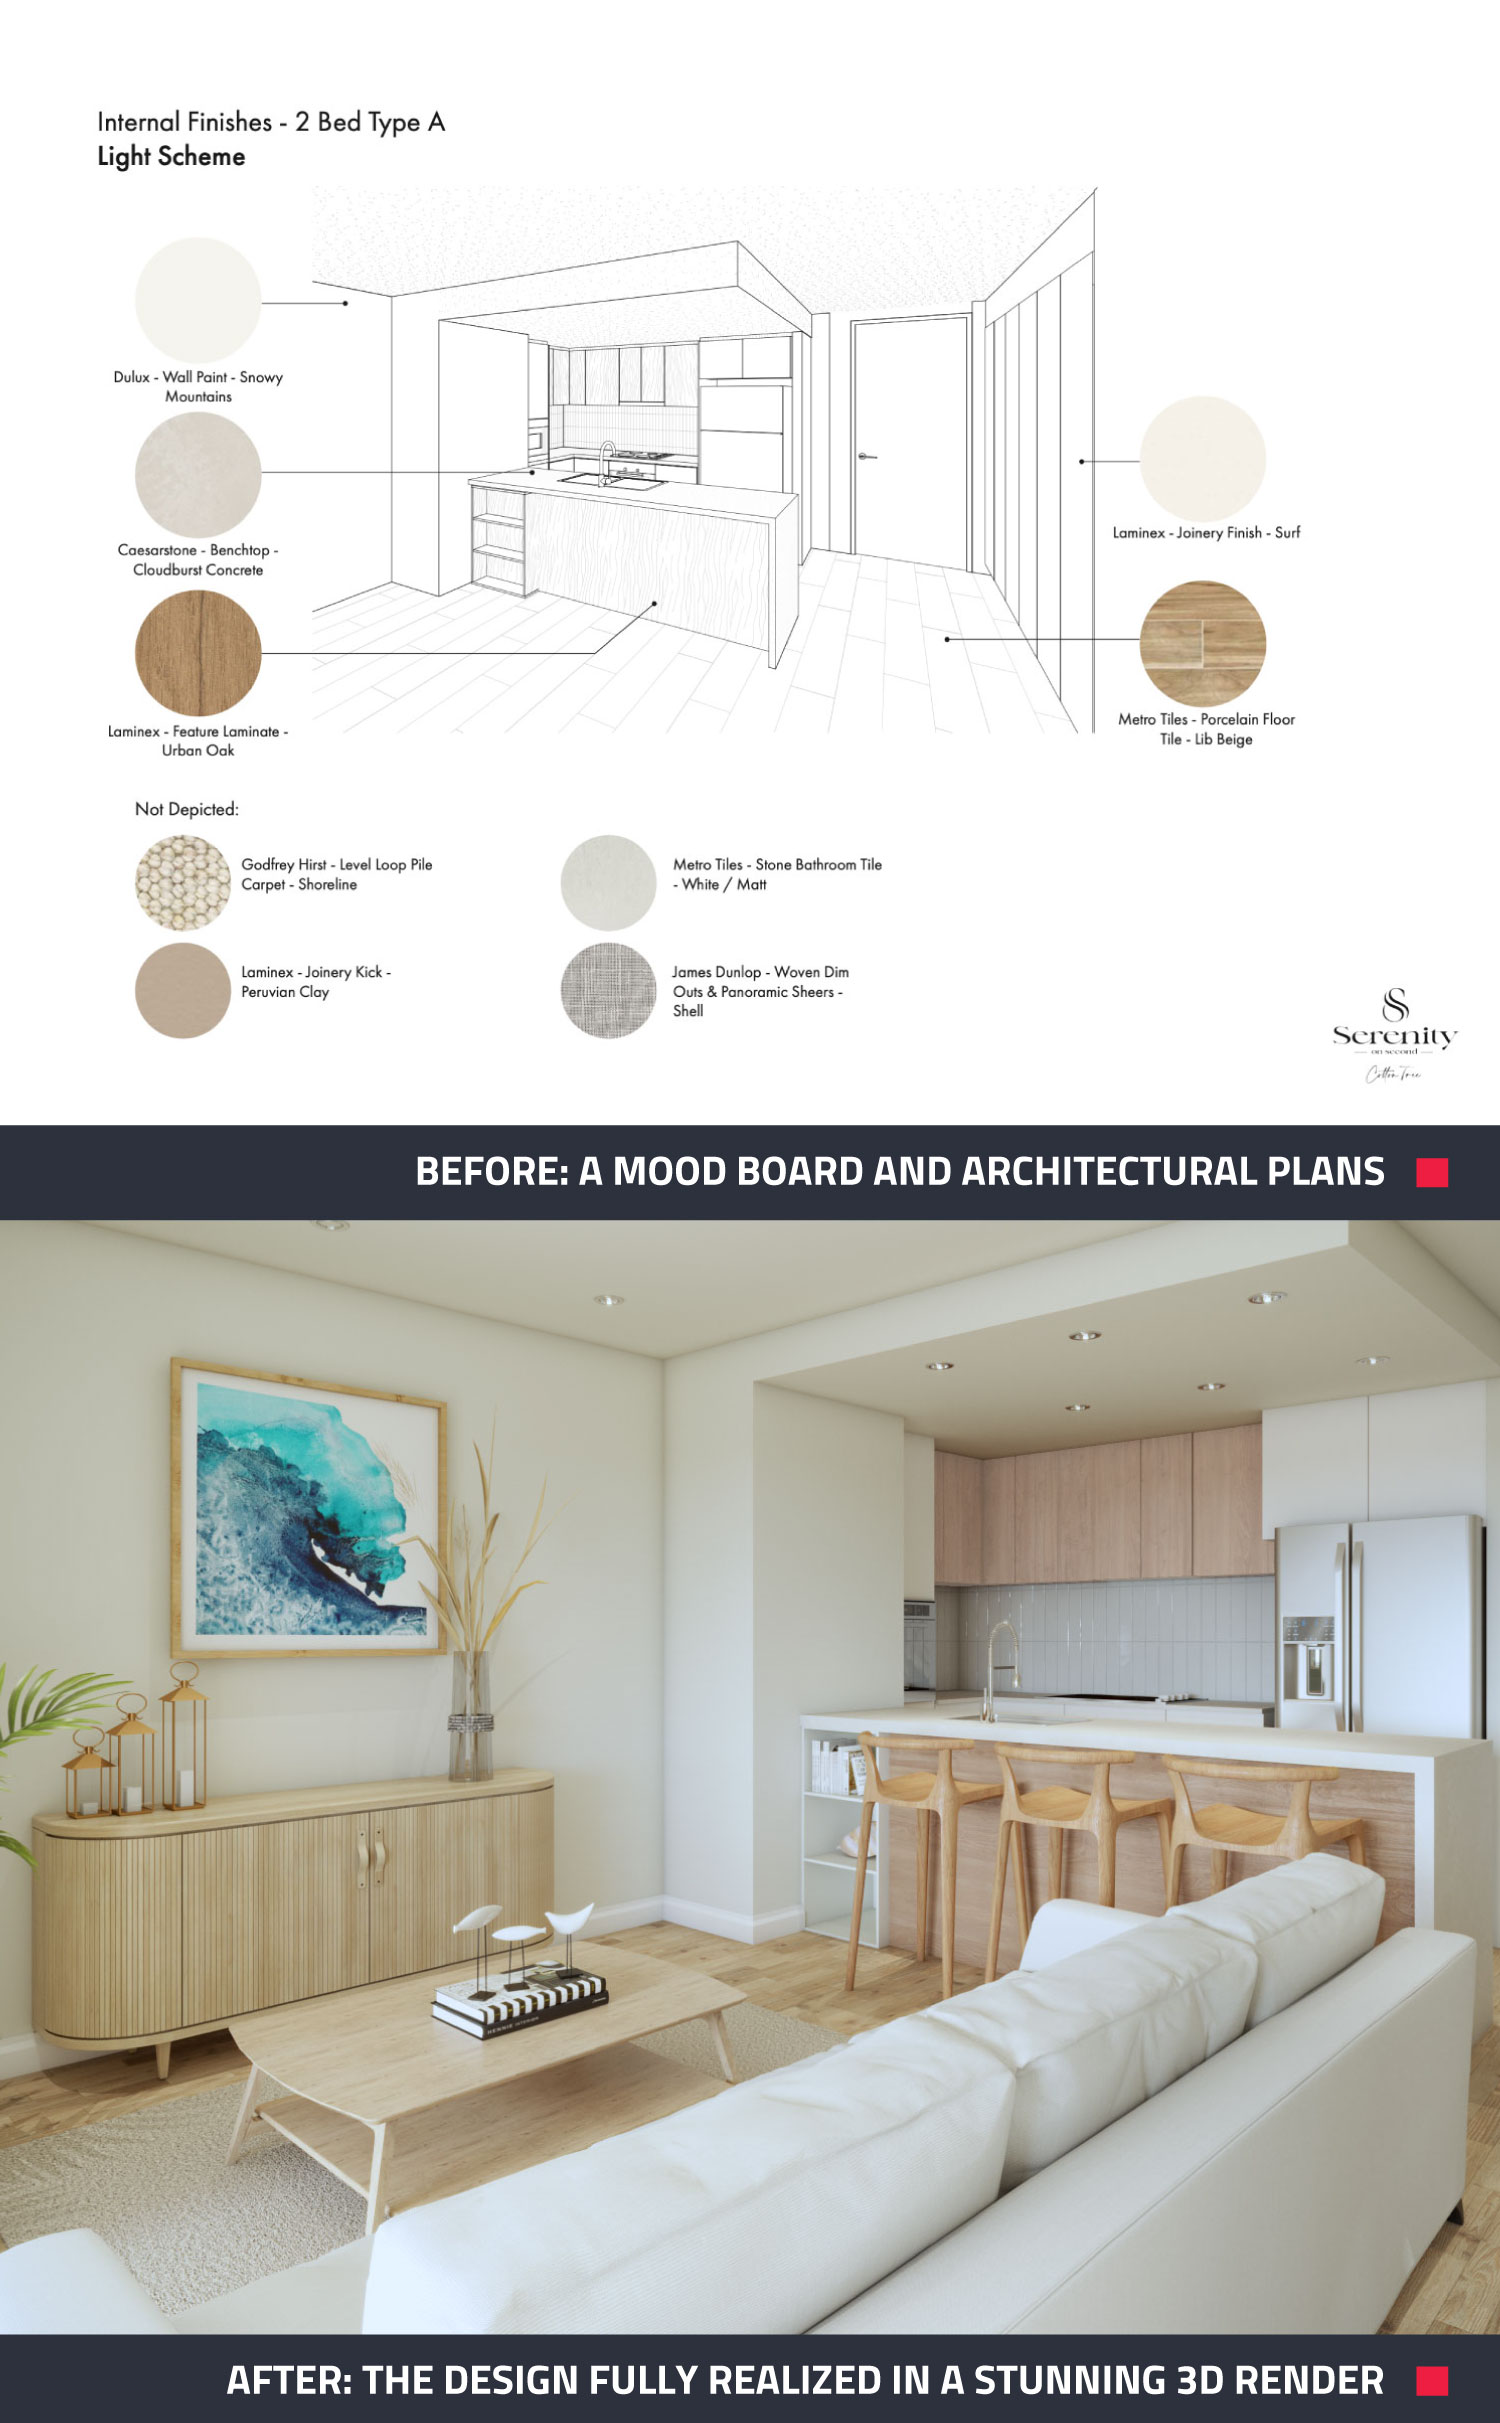
- Architectural Plans: Supply detailed floor plans and elevations in DWG, PDF, or image formats. Please note, additional charges apply for PDFs or image-based files.
- Style Preferences: Share your vision for finishes, fixtures, textures, and colors. For best results, include a mood board or reference images.
- Landscaping Details: If landscaping is part of the project, provide location-specific reference images and clear instructions to ensure accuracy.
- Supporting Materials: Include photos, links, or examples of design features you’d like us to replicate. The more specific, the better!
Steps to Submit Your Job
Getting started is easy. Log in to your BoxBrownie.com Members Dashboard and follow these simple steps:
- Name Your Project: Specify the type of Render you need and how many edits you’d like.
- Define Your Style: Select your preferred Render styles and add any additional details about your vision.
- Upload Your Files and Include All Necessary Materials: Architectural drawings, design guide, landscaping details, and any additional details.
With everything uploaded, our team will start creating your masterpiece right away.
The 4 Stages of Render Creation
Our team follows a precise process to bring your Render to life:
- Clay: Establishes the structure and camera angle.
- Color: Applies textures, colors, and finishes to your vision.
- Final: Includes your review and feedback for fine-tuning.
- High-Res: Delivers the polished, high-resolution Render ready for use.
A single Render typically takes two weeks, but timelines may vary based on complexity, the number of Renders, and feedback provided.
Your Vision, Brought to Life
Ready to create a Render that turns heads? Use this checklist as your ultimate guide and provide as much detail as possible to help us bring your vision to life. Whether it’s a single room or an entire development, we’re here to help you stand out with world-class Renders.
RELATED ARTICLES

BoxBrownie.com is thrilled to announce our new partnership with Engel & Völkers Europe! This collaboration will equip real estate professionals across Europe with the cutting-edge tools they need to excel in a competitive market. Discover more about this powerful alliance.
READ MORE
Gotta see it to believe it! Our Virtual Renovation service can transform even an old shed into a stunning Air BnB rental. If you have unused space on your property, this post can show you how to turn that emptiness into income.
READ MORE
Ready to stand out and get more leads? Explore five free BoxBrownie.com resources designed to help you capture better photos, streamline your workflow, and create standout listings that drive faster results.
READ MORE
Discover how award-winning realtor Debra Beagle has achieved unparalleled success as broker, owner and CEO of The Ashton Real Estate Group of RE/MAX Advantage. From Virtual Tours to Virtual Staging, learn how the number one RE/MAX team in the world has mastered their marketing.
READ MORE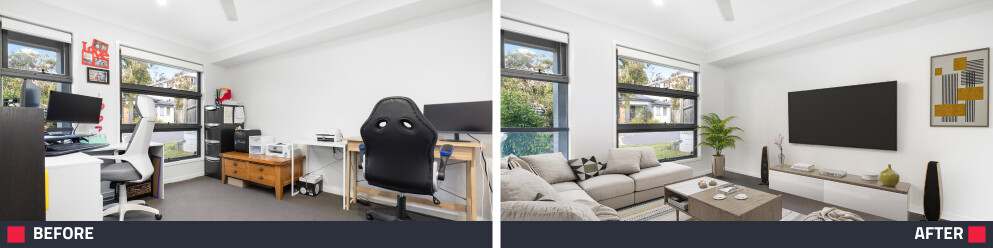
Transform furnished listings into buyer magnets with Virtual Staging. Learn step by step how to create a polished, irresistible property that grabs attention, generates more inquiries, and sells faster.
READ MORE
AI Copywriting is a game-changer for listings, but uncertainty may be holding some real estate professionals back from taking advantage of this exciting technology. Well, not anymore – this blog will break it all down for you so that you can utilize AI to deliver compelling content and stay ahead in a competitive market.
READ MORE