10 REAL ESTATE PHOTOGRAPHY MISTAKES COSTING YOU!
If you’re a real estate agent or photographer, you already know that property photos are your secret weapon. They can either reel in buyers or send them running. But are you making mistakes that could be sabotaging your listings? Brad is here to reveal the 10 biggest real estate photography mistakes—and how to fix them fast.
Avoid these pitfalls, and you’ll transform your photos into attention-grabbing, deal-closing masterpieces.
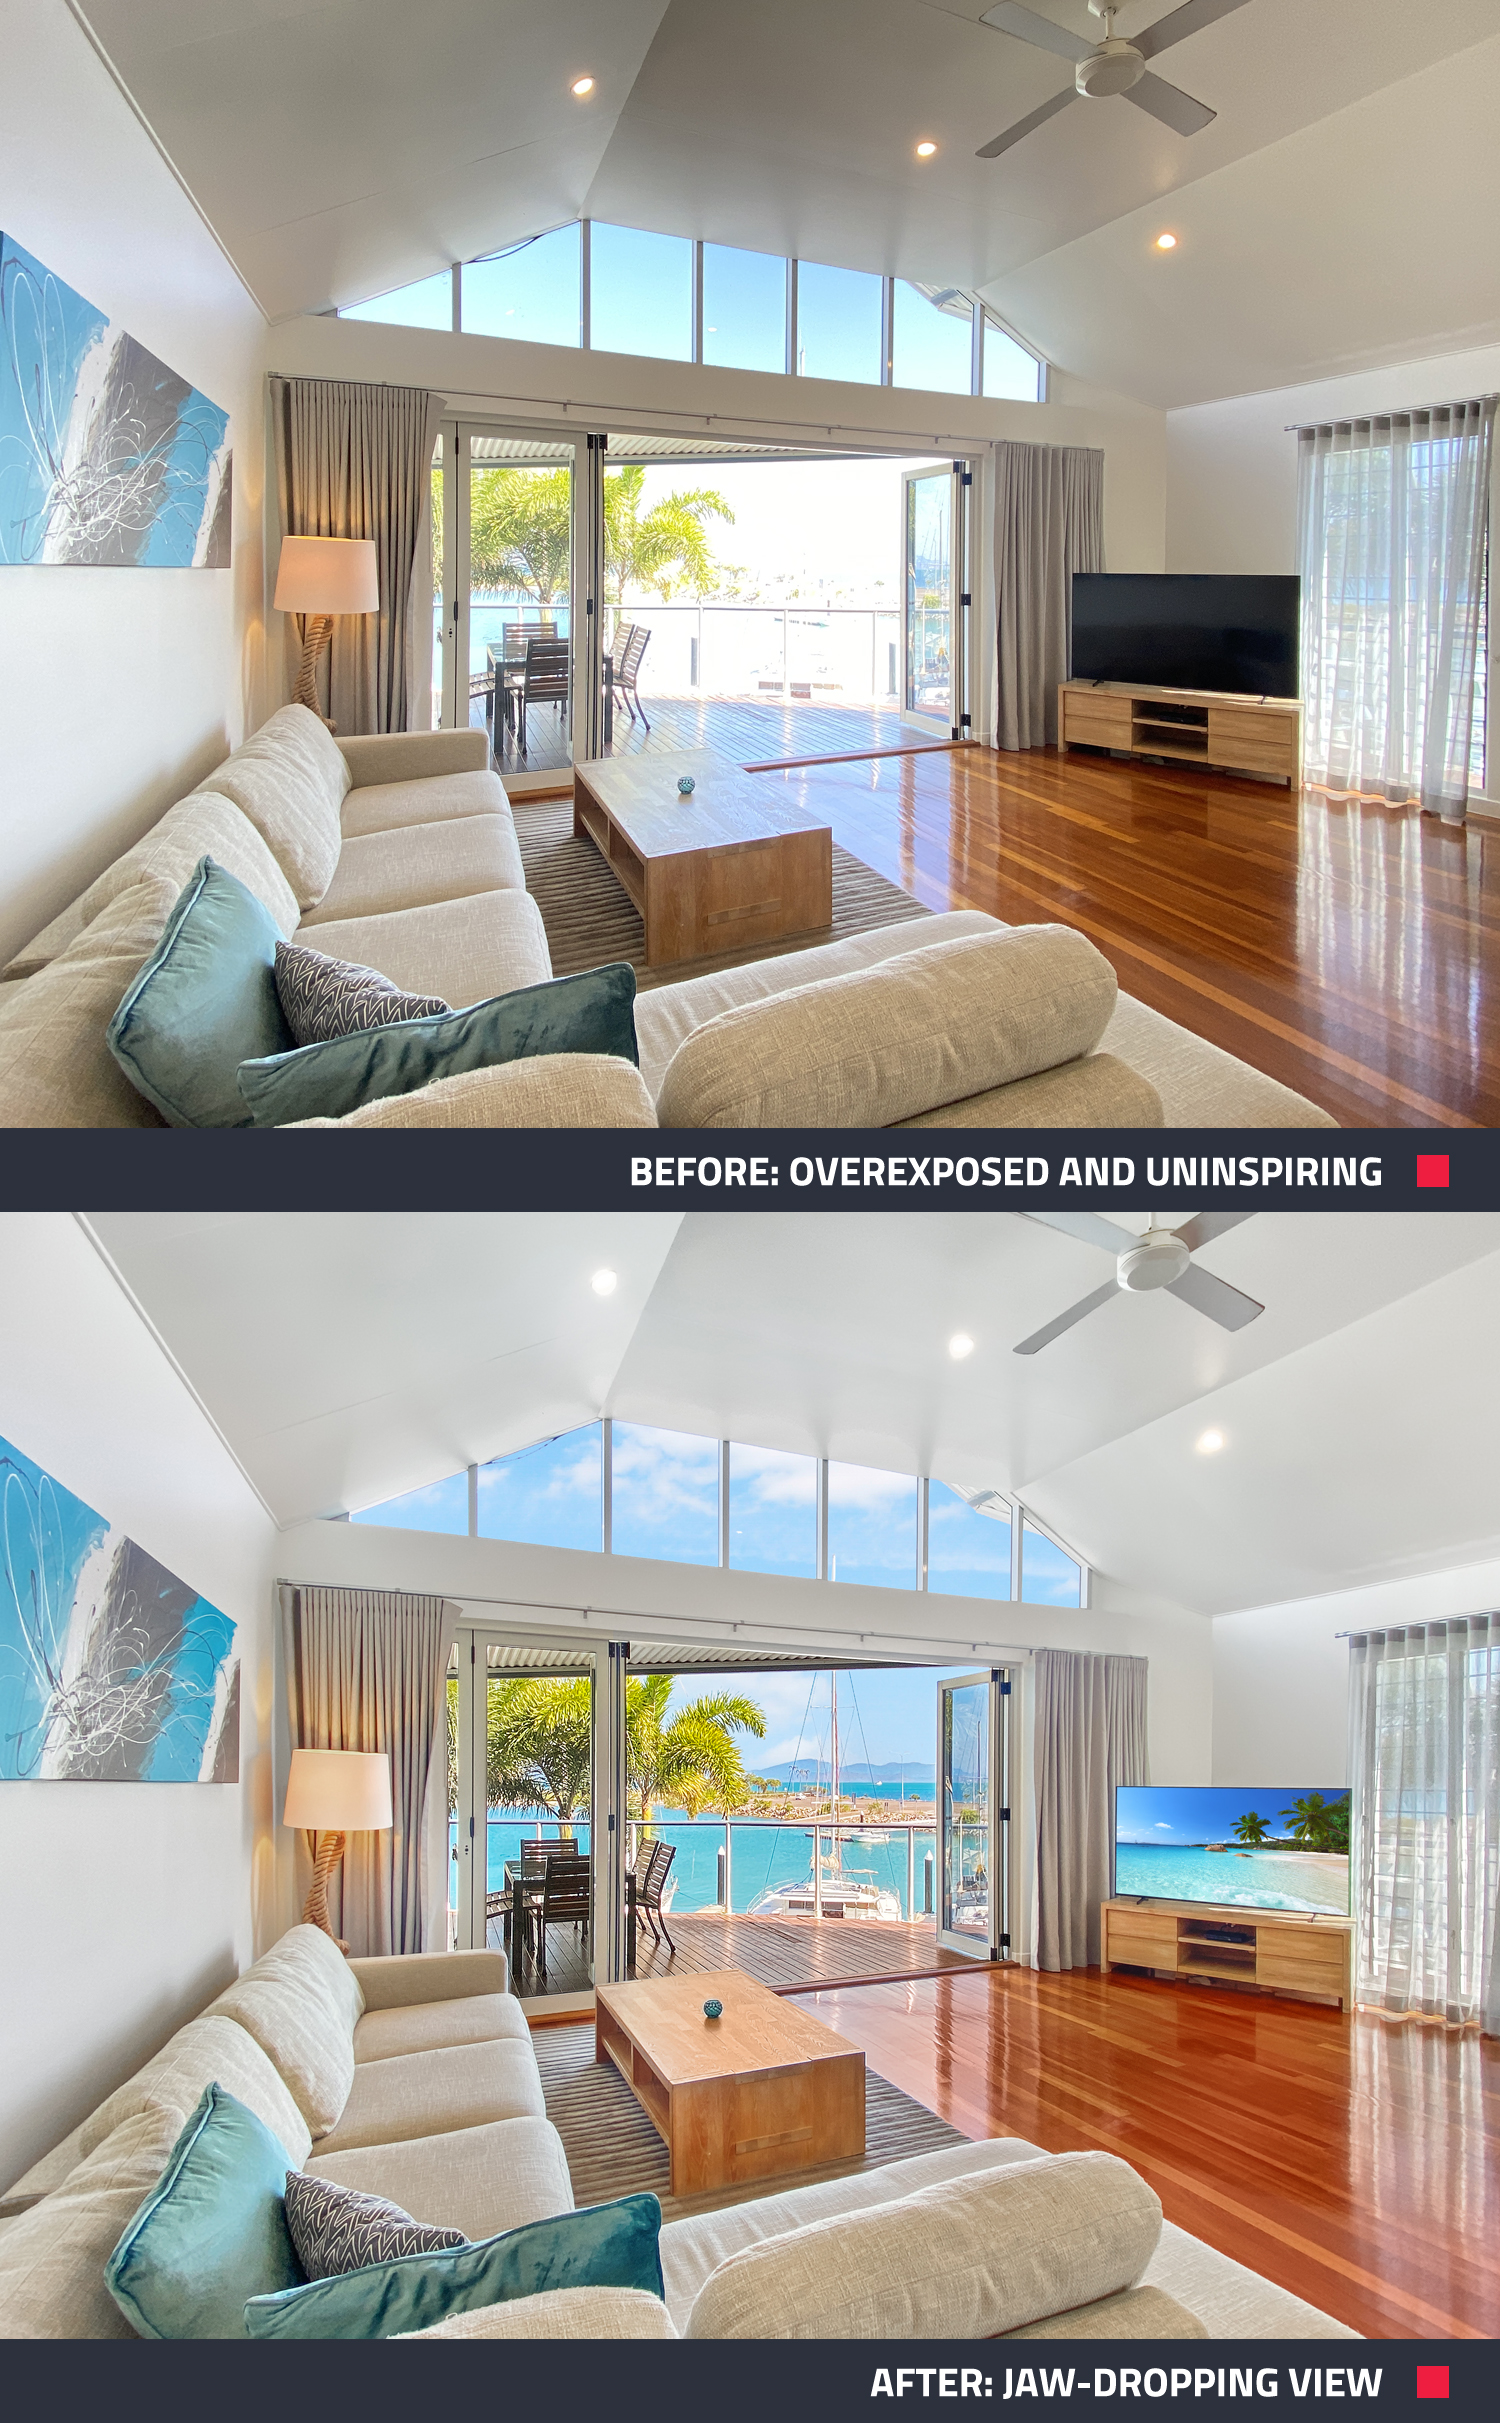
1. Not Using Bracketing for Balanced Lighting
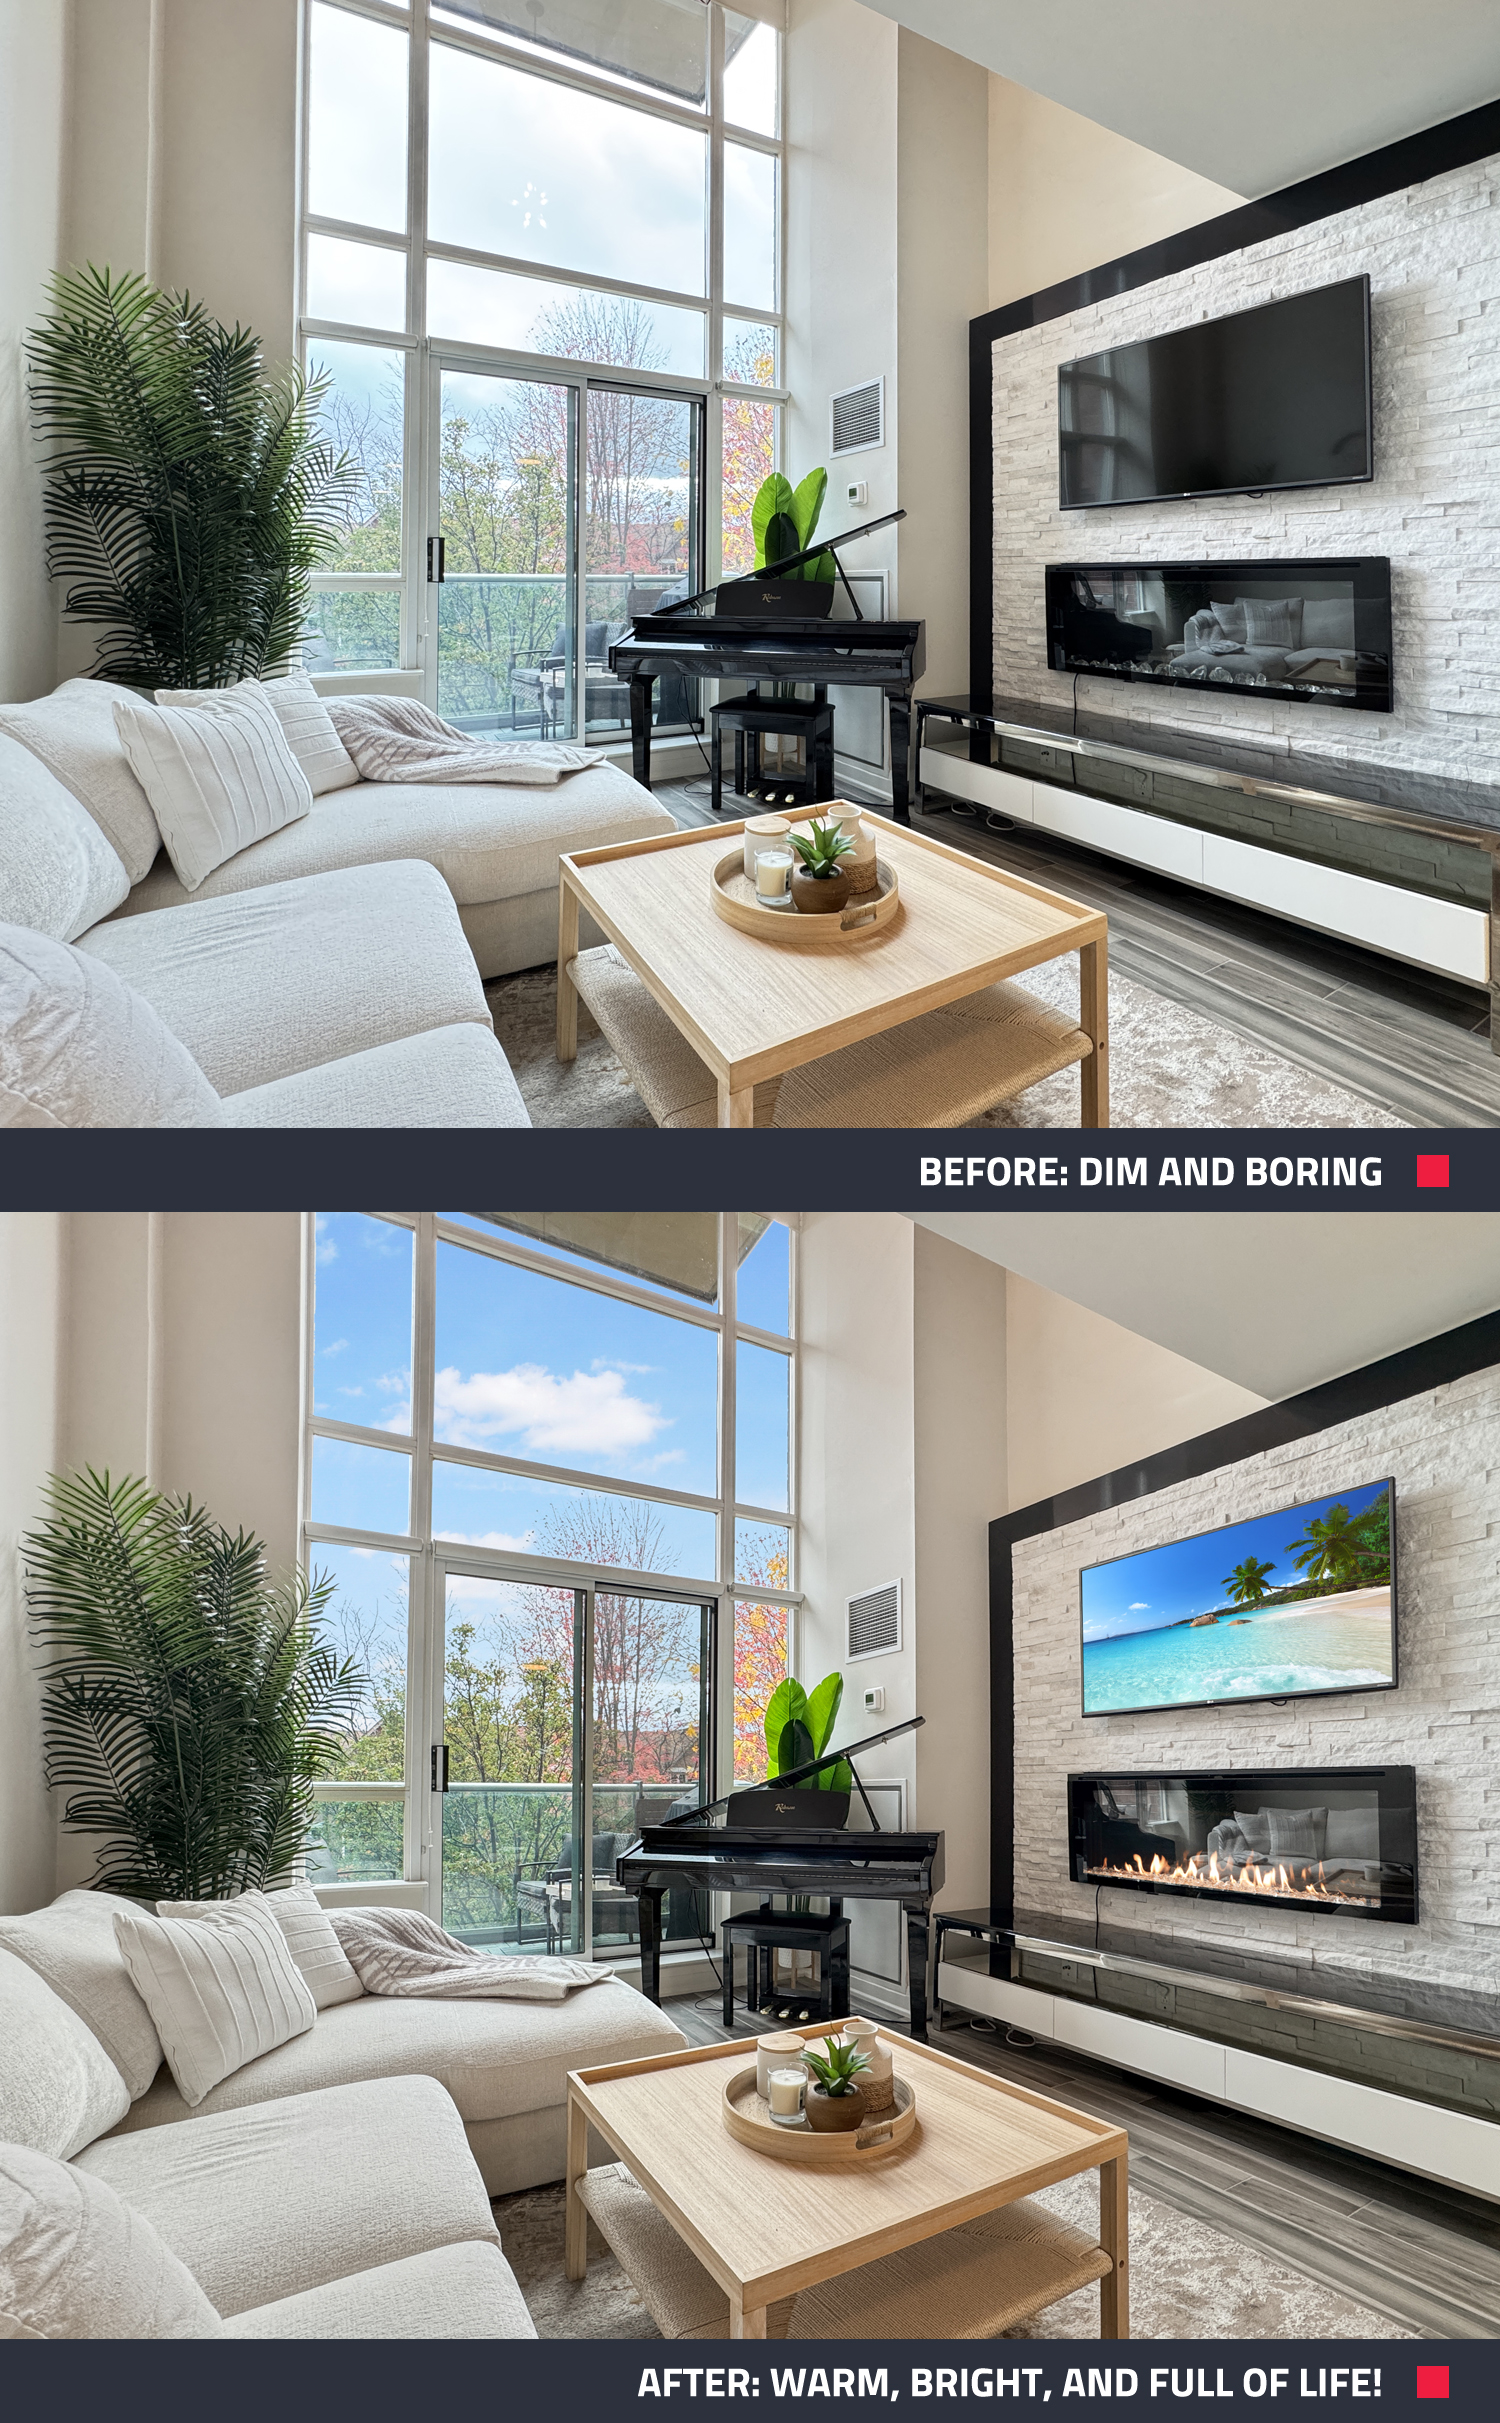
“Bracketing is a game-changer,” says Brad. “It stops overexposed windows and creates perfectly balanced lighting.” Here’s how it works: bracketing images involves taking multiple shots of the same scene at different exposures and blending them to highlight both the interior details and the breathtaking view outside.
With our Image Enhancement tools and bracketing, you can easily achieve professional, eye-catching photos that make a property’s best features pop.
2. Leaving the Lights Off
A dark room feels cold and uninviting—hardly the vibe you want to sell a home. Brad’s advice? Turn on all the lights: ceiling lights, lamps, even the kitchen range hood. “Proper lighting makes a space feel warm and welcoming,” he says.
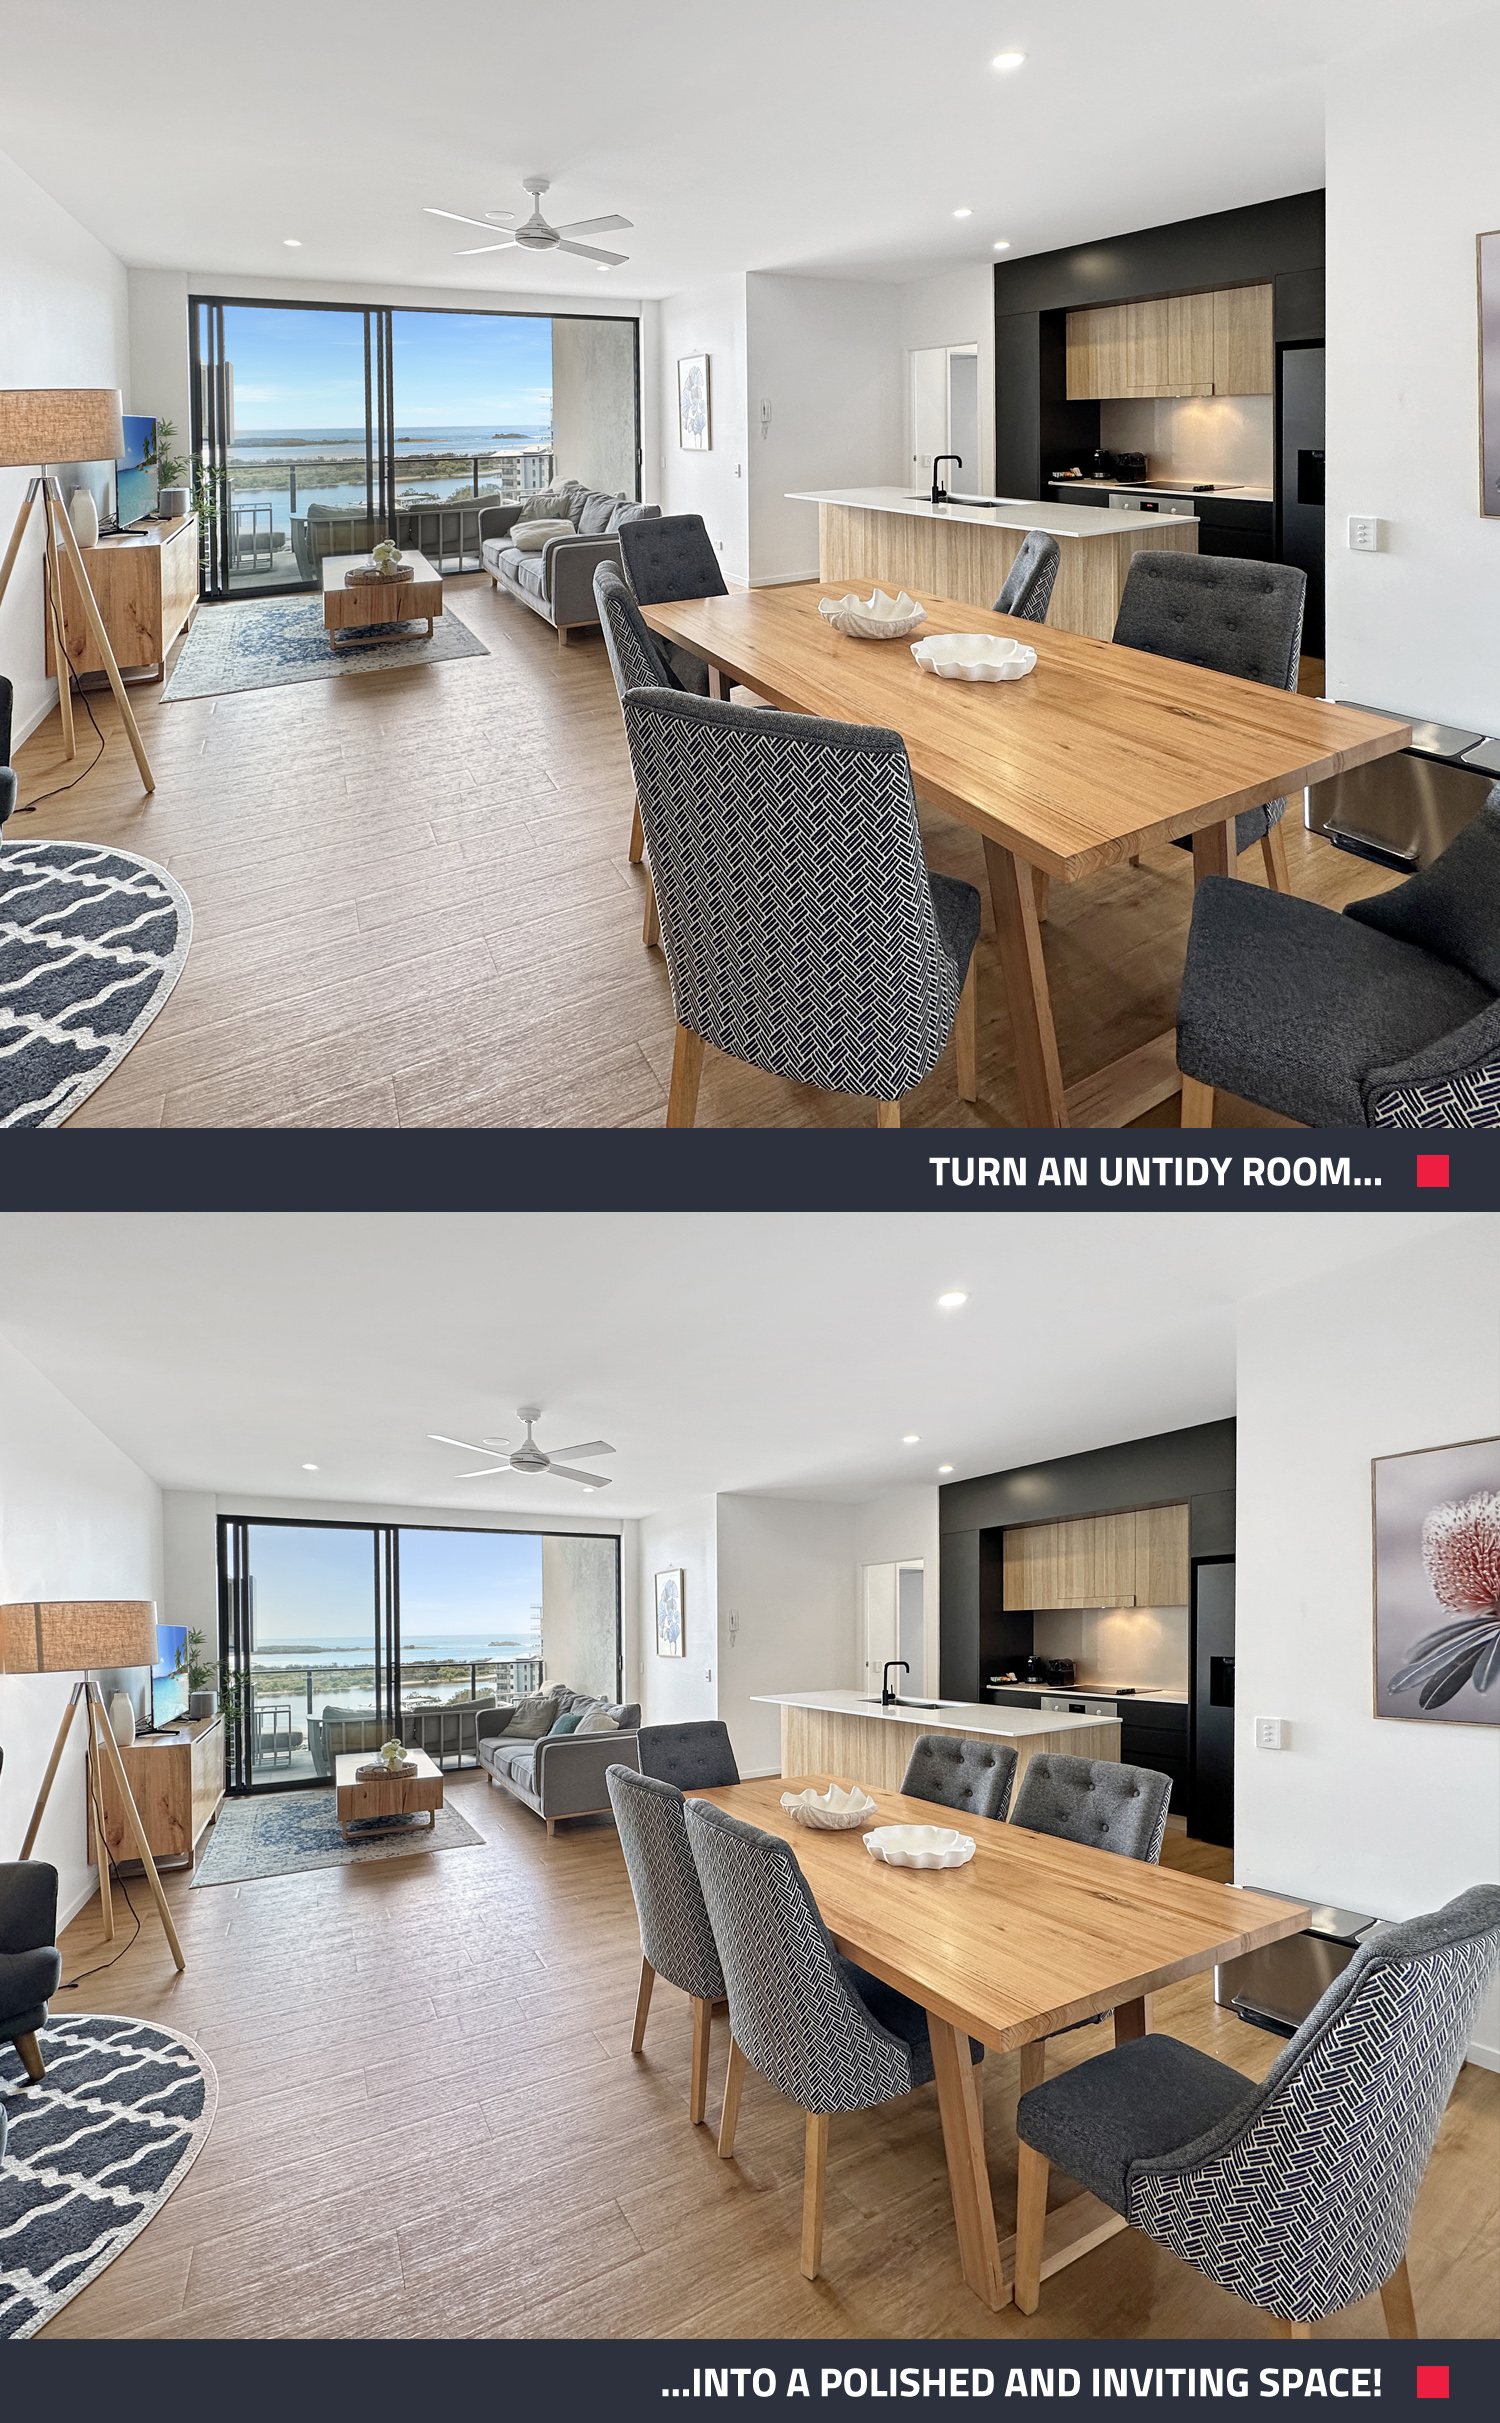
3. Overlooking Furniture Placement
Crooked chairs, messy bedspreads, and flat pillows can make a room look untidy and uninviting. Brad’s tip? “Straighten furniture, fluff pillows, and smooth out bedspreads. It’s a small effort that makes a huge difference in creating a polished, professional look.”
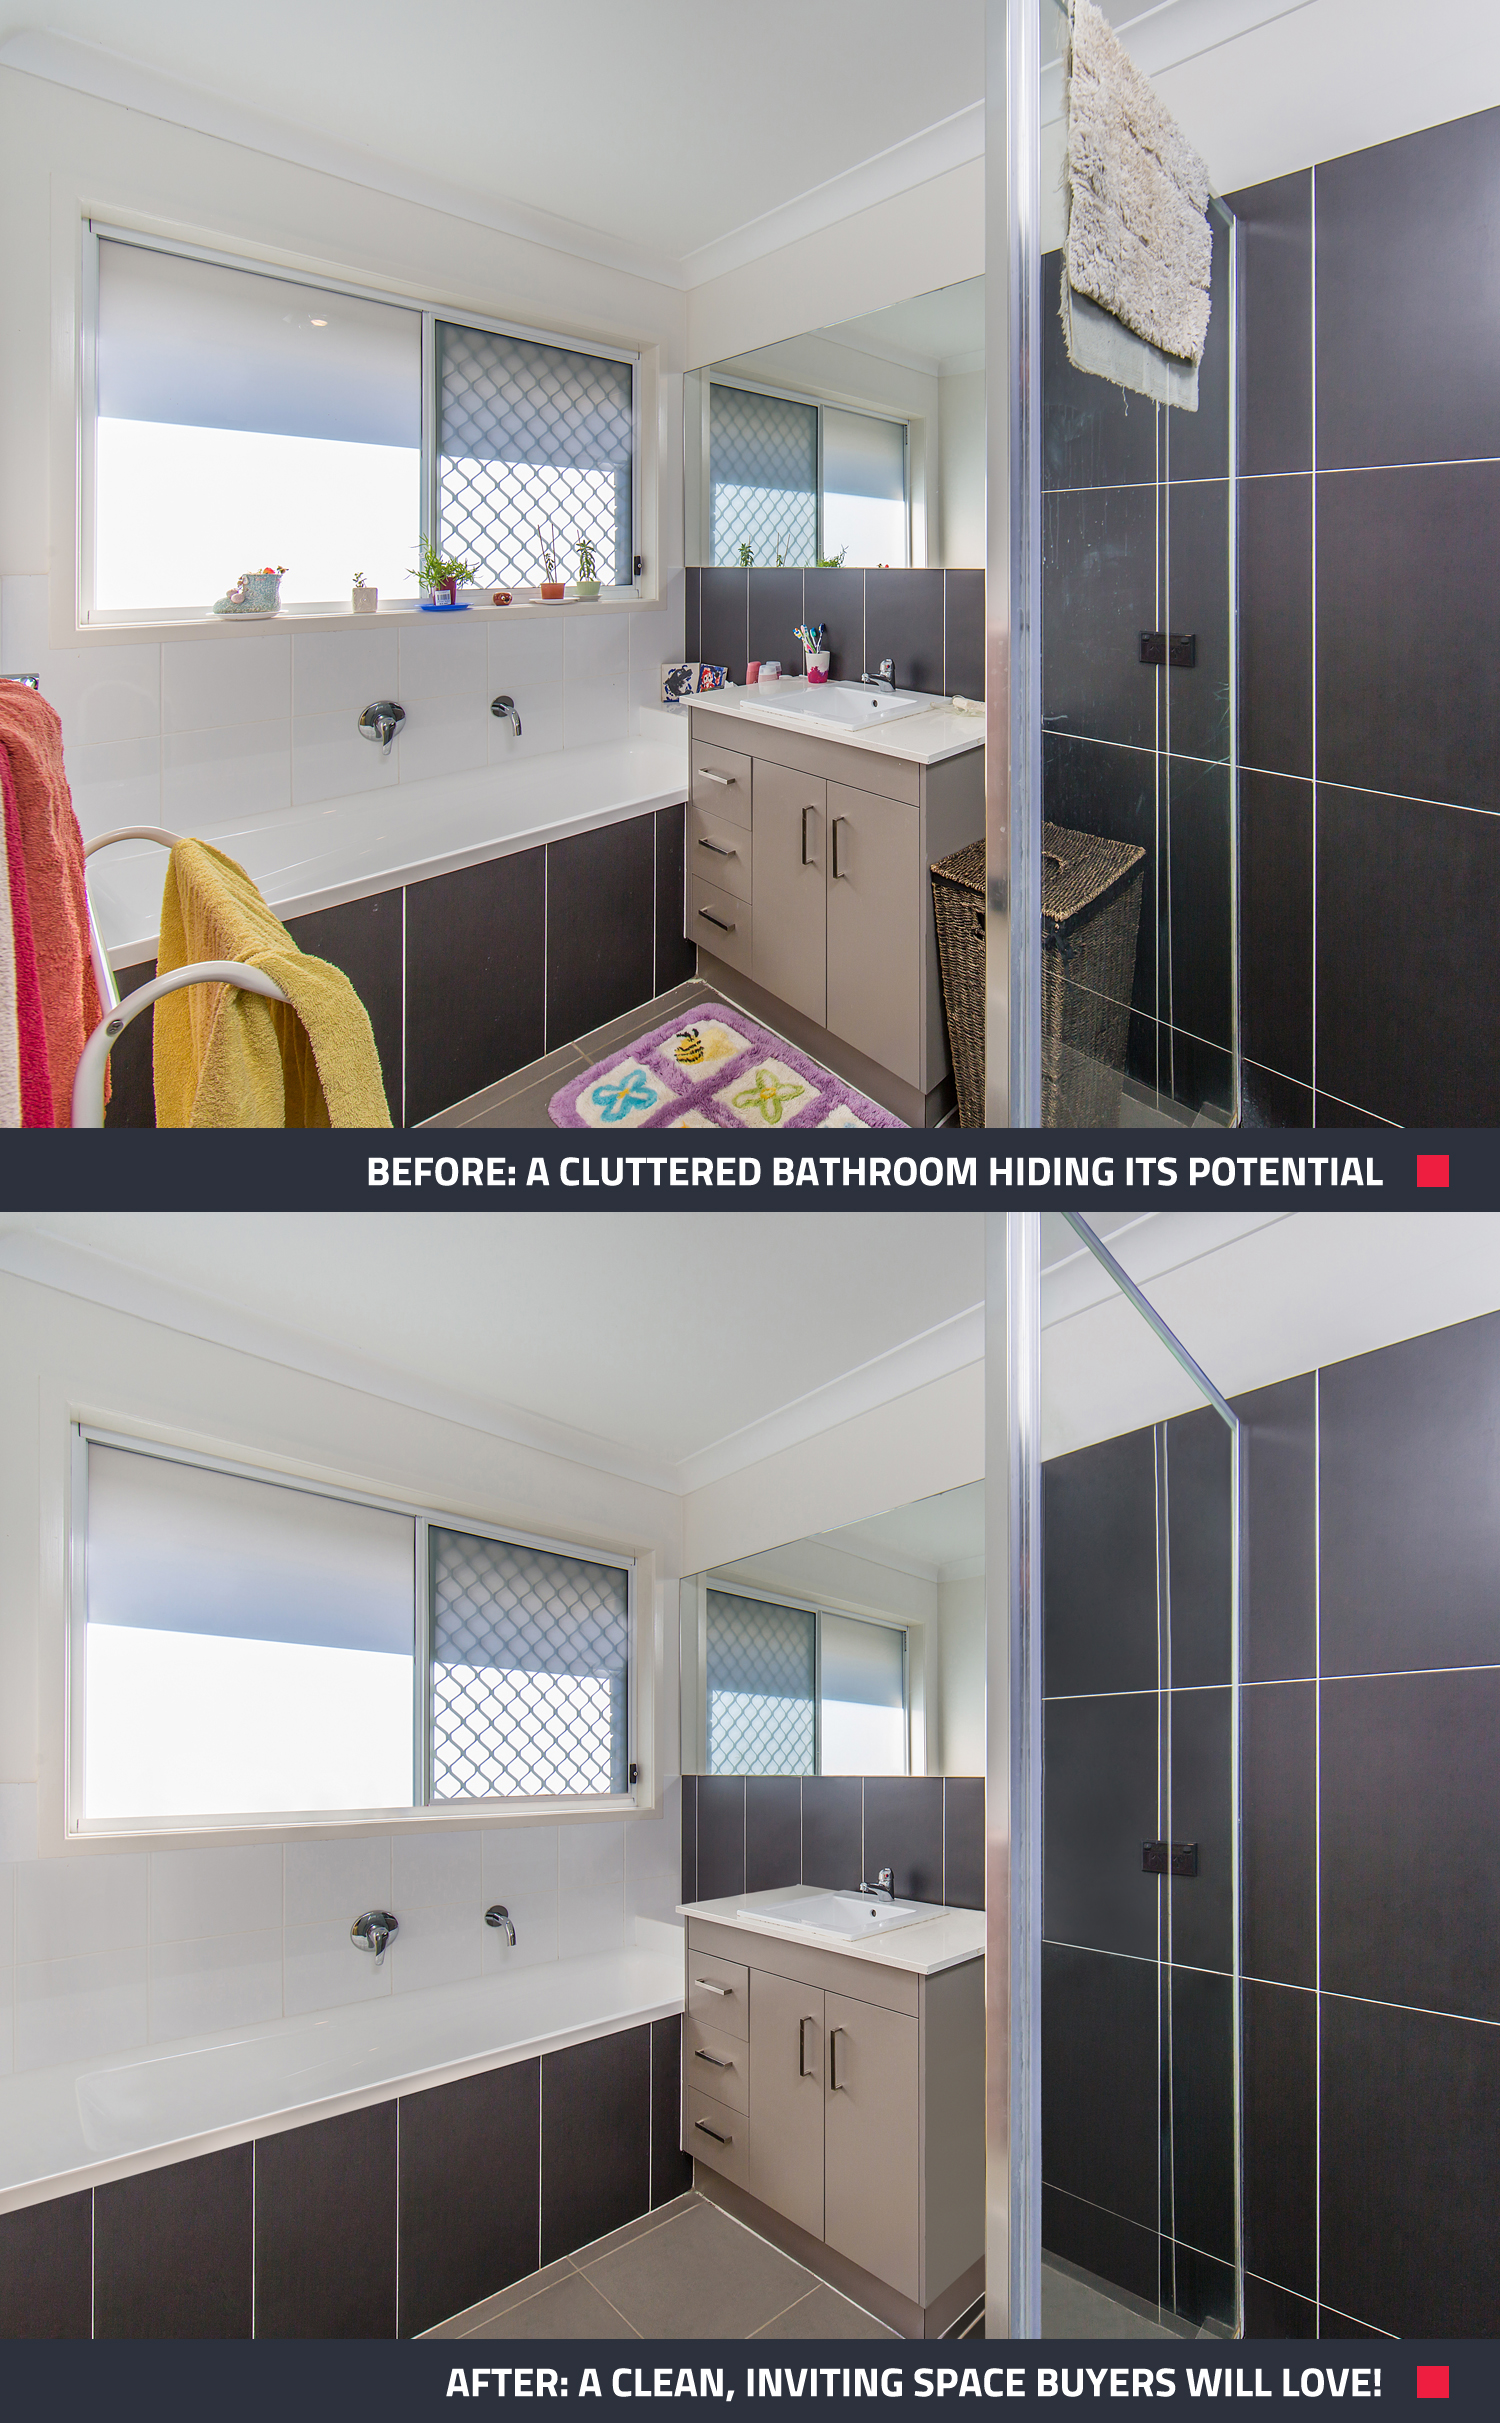
4. Skipping Home Preparation and Decluttering
Shampoo bottles, garbage bins, and personal items can be major distractions in property photos. “Clean, minimal spaces sell homes,” Brad emphasizes. A clutter-free space helps buyers picture themselves living there—so keeping personal items out of sight is key.
But if you’re short on time or missed something before taking photos, don’t worry! Our Item Removal & Virtual Clean edit makes it easy to create clean, polished images that showcase the property at its best.
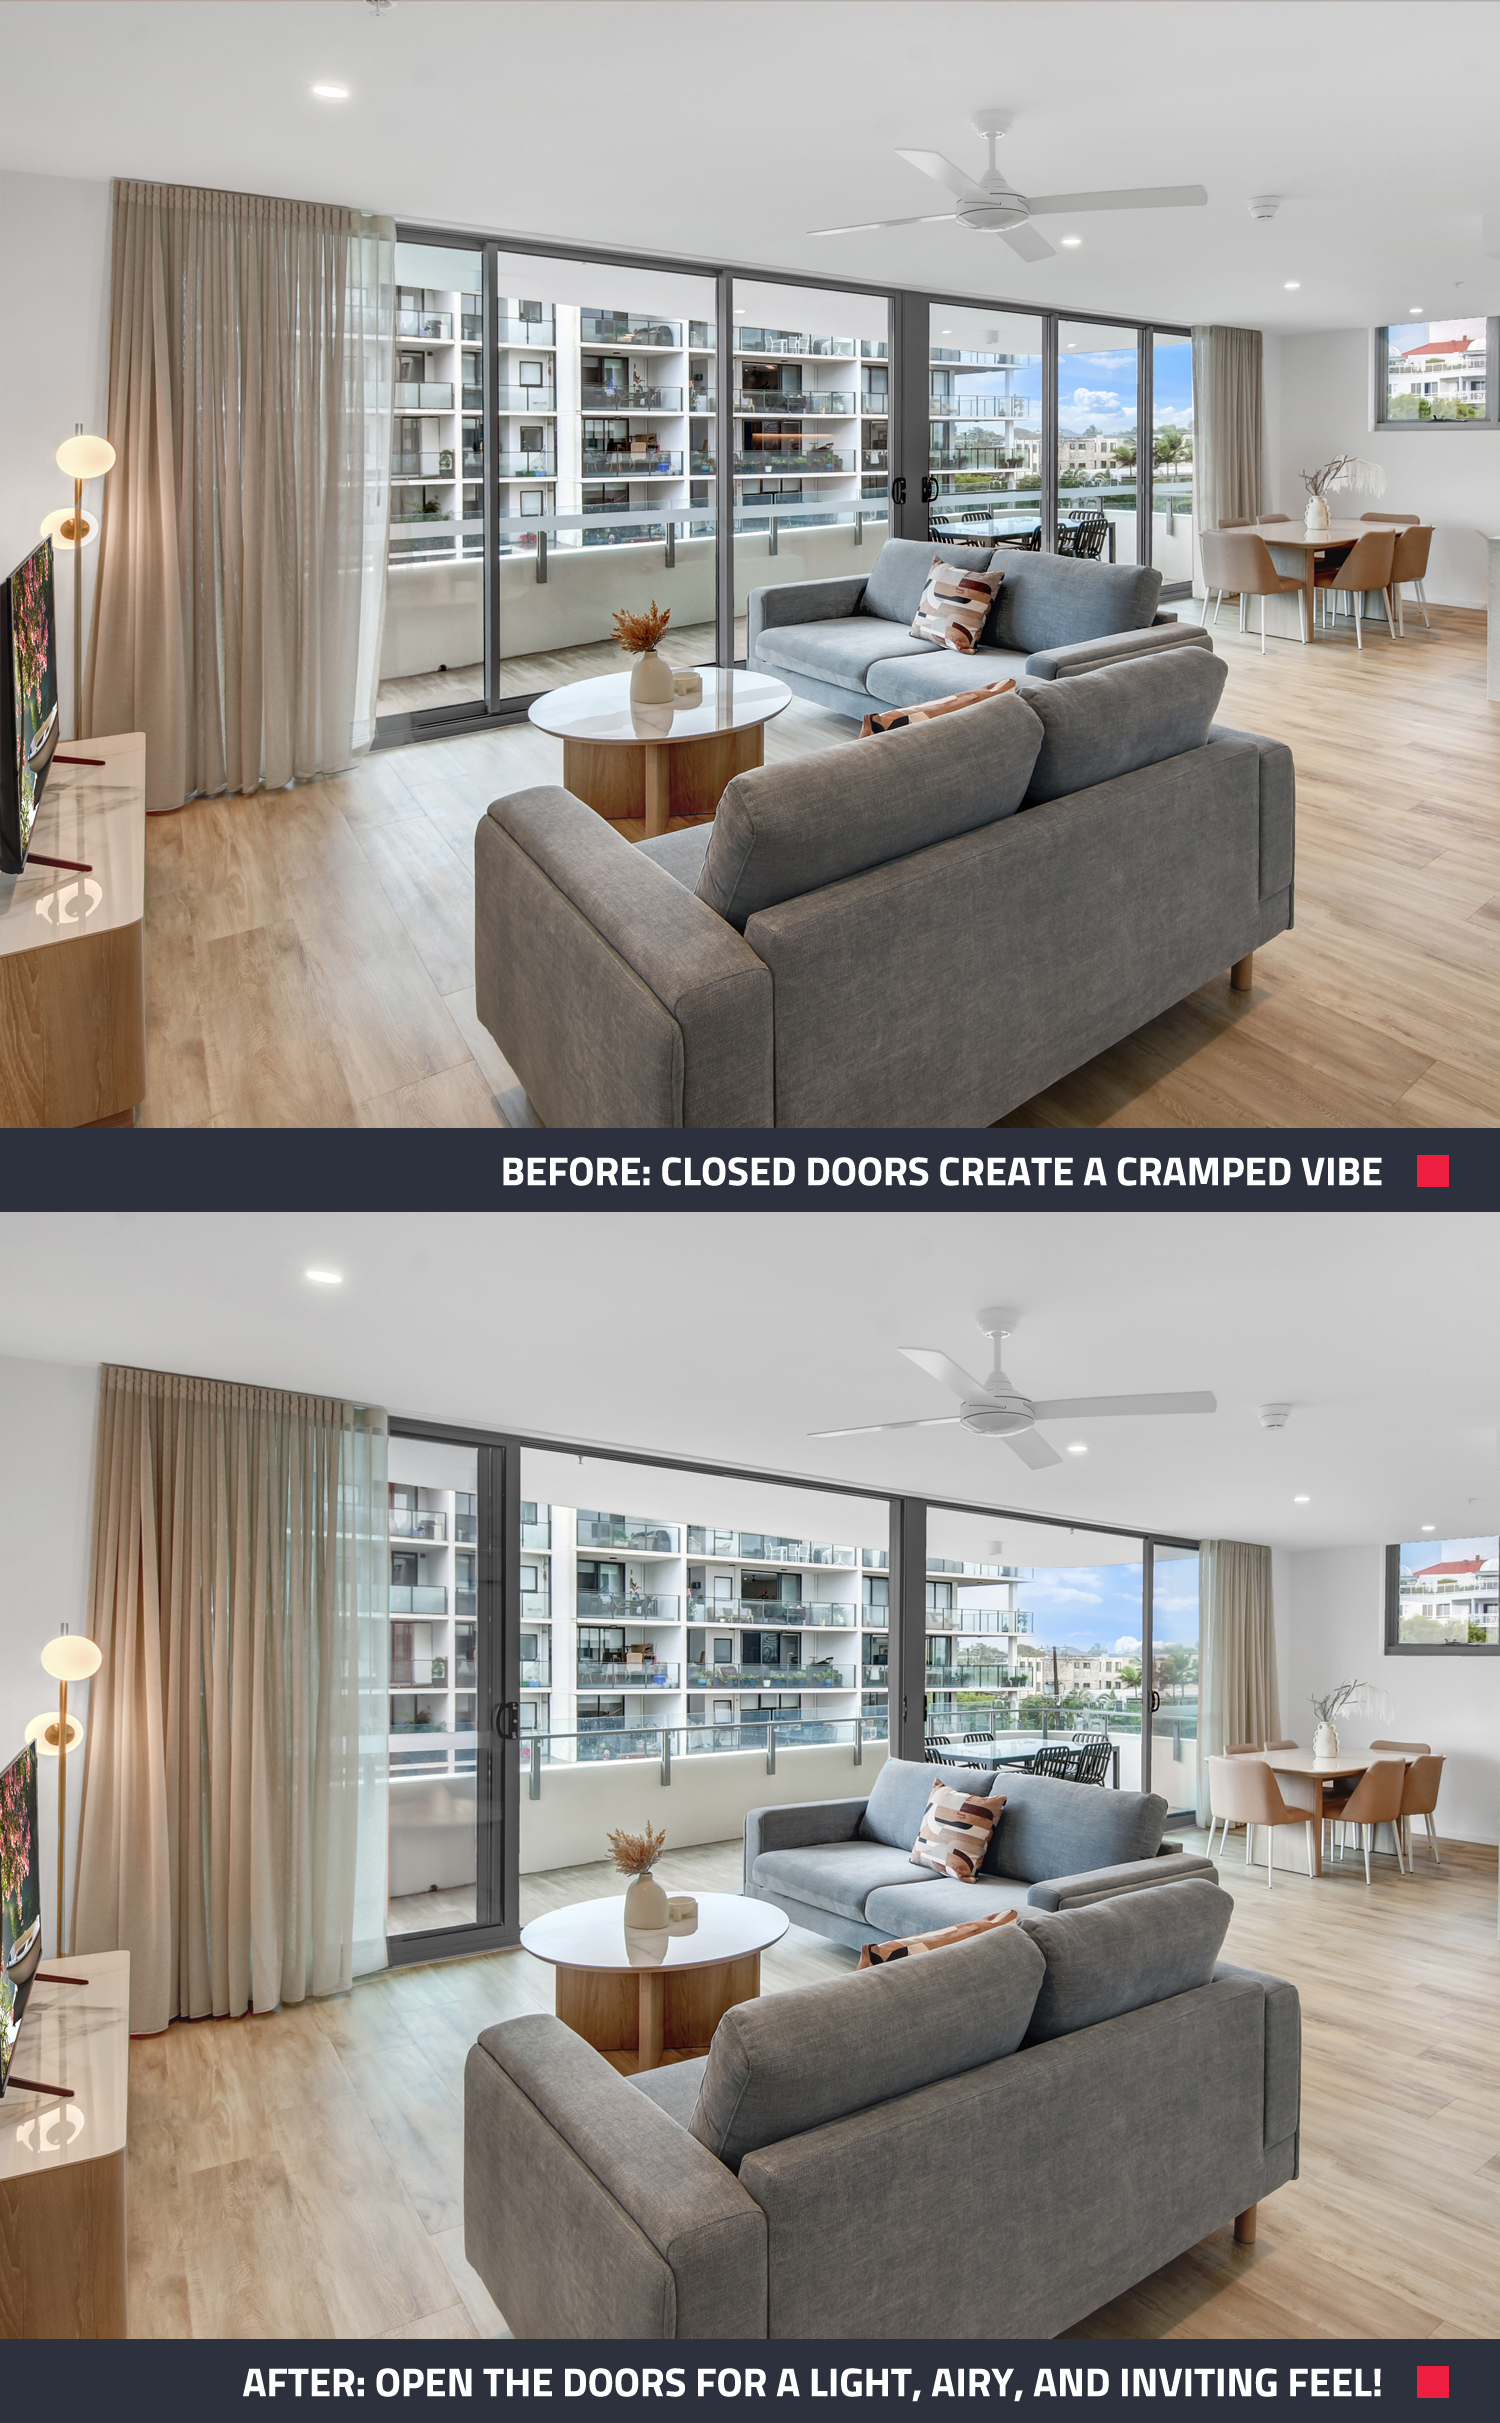
5. Keeping Doors Closed
Closed doors can make a home feel cramped and disjointed. Brad suggests opening them up to create a sense of flow and highlight the property’s layout. “It’s a small change that can drastically transform your photos,” he says.
6. Framing Shots Poorly
Crooked lines and awkward angles can ruin an otherwise great photo. Brad’s advice? “Always ensure vertical lines are straight and position the camera to highlight the room’s best features.” A well-framed shot can make all the difference.
7. Taking Too Few Photos
Don’t skimp on shots! “Capture multiple angles of each room,” Brad advises. Having a variety of photos gives you more options to choose from later, especially when you’re no longer on-site.
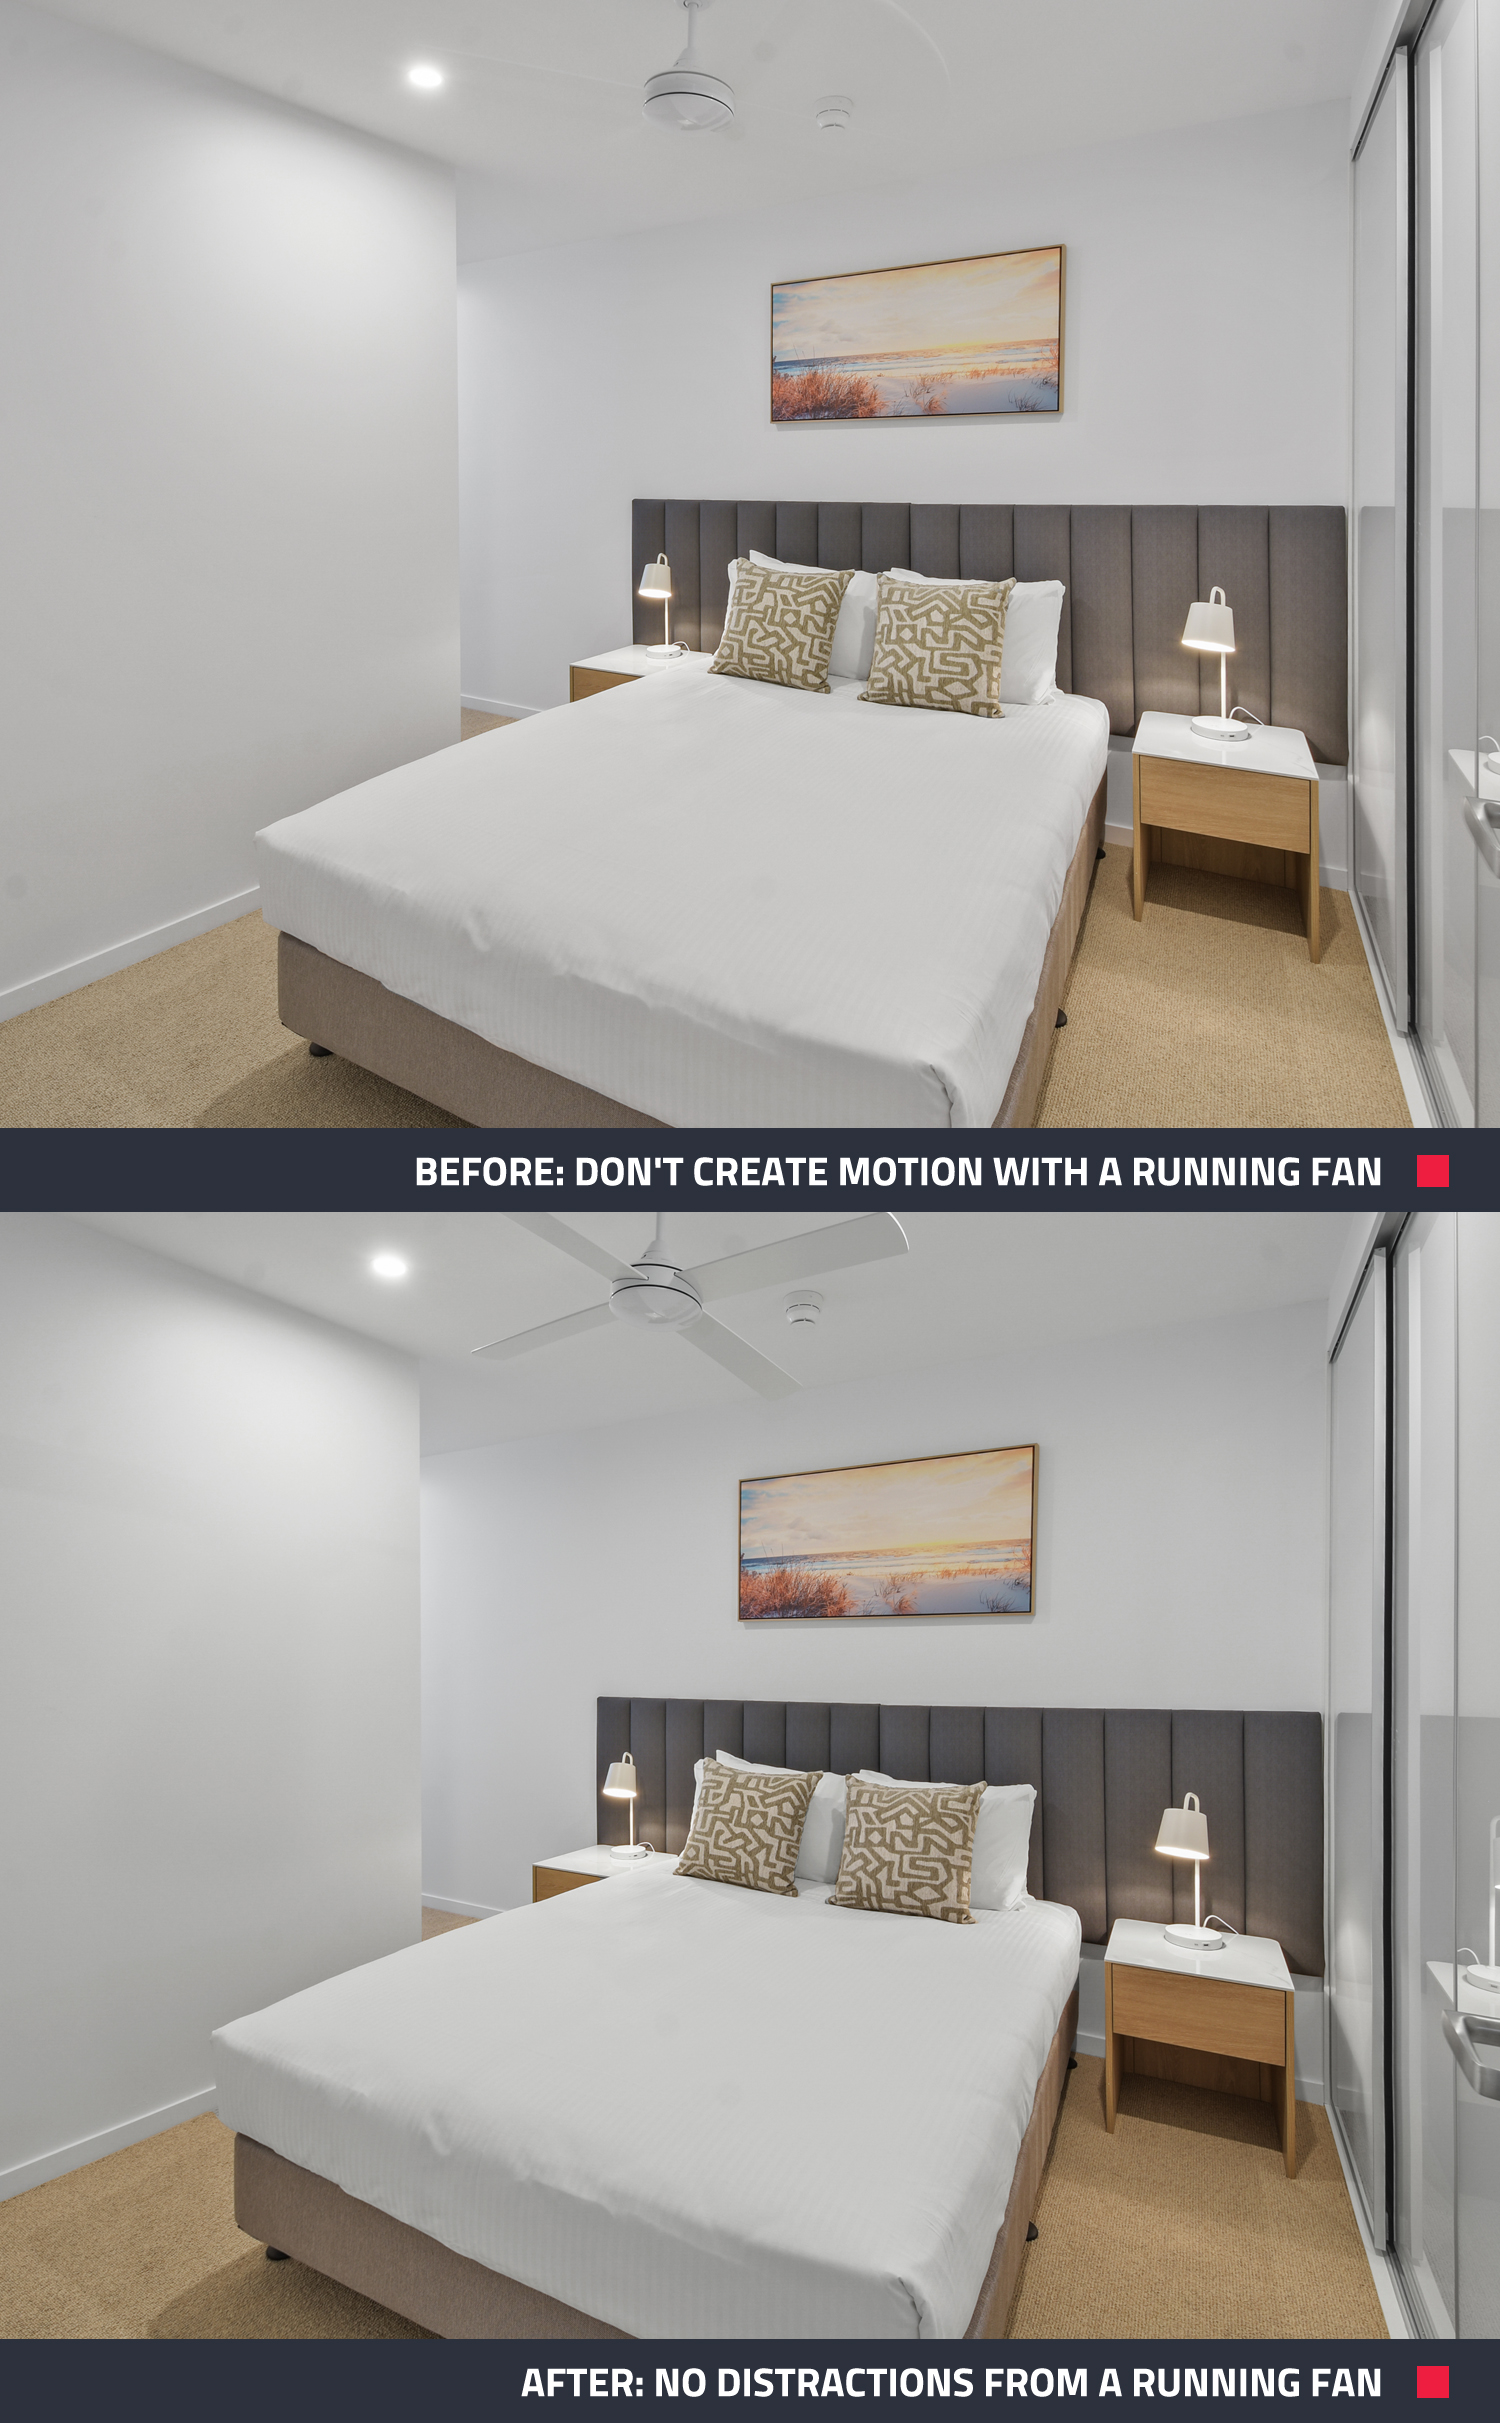
8. Leaving Ceiling Fans On
A spinning fan creates a distracting blur in photos. Brad’s rule? “Always switch off fans before shooting.” The difference between a photo with the fan on versus off is night and day.
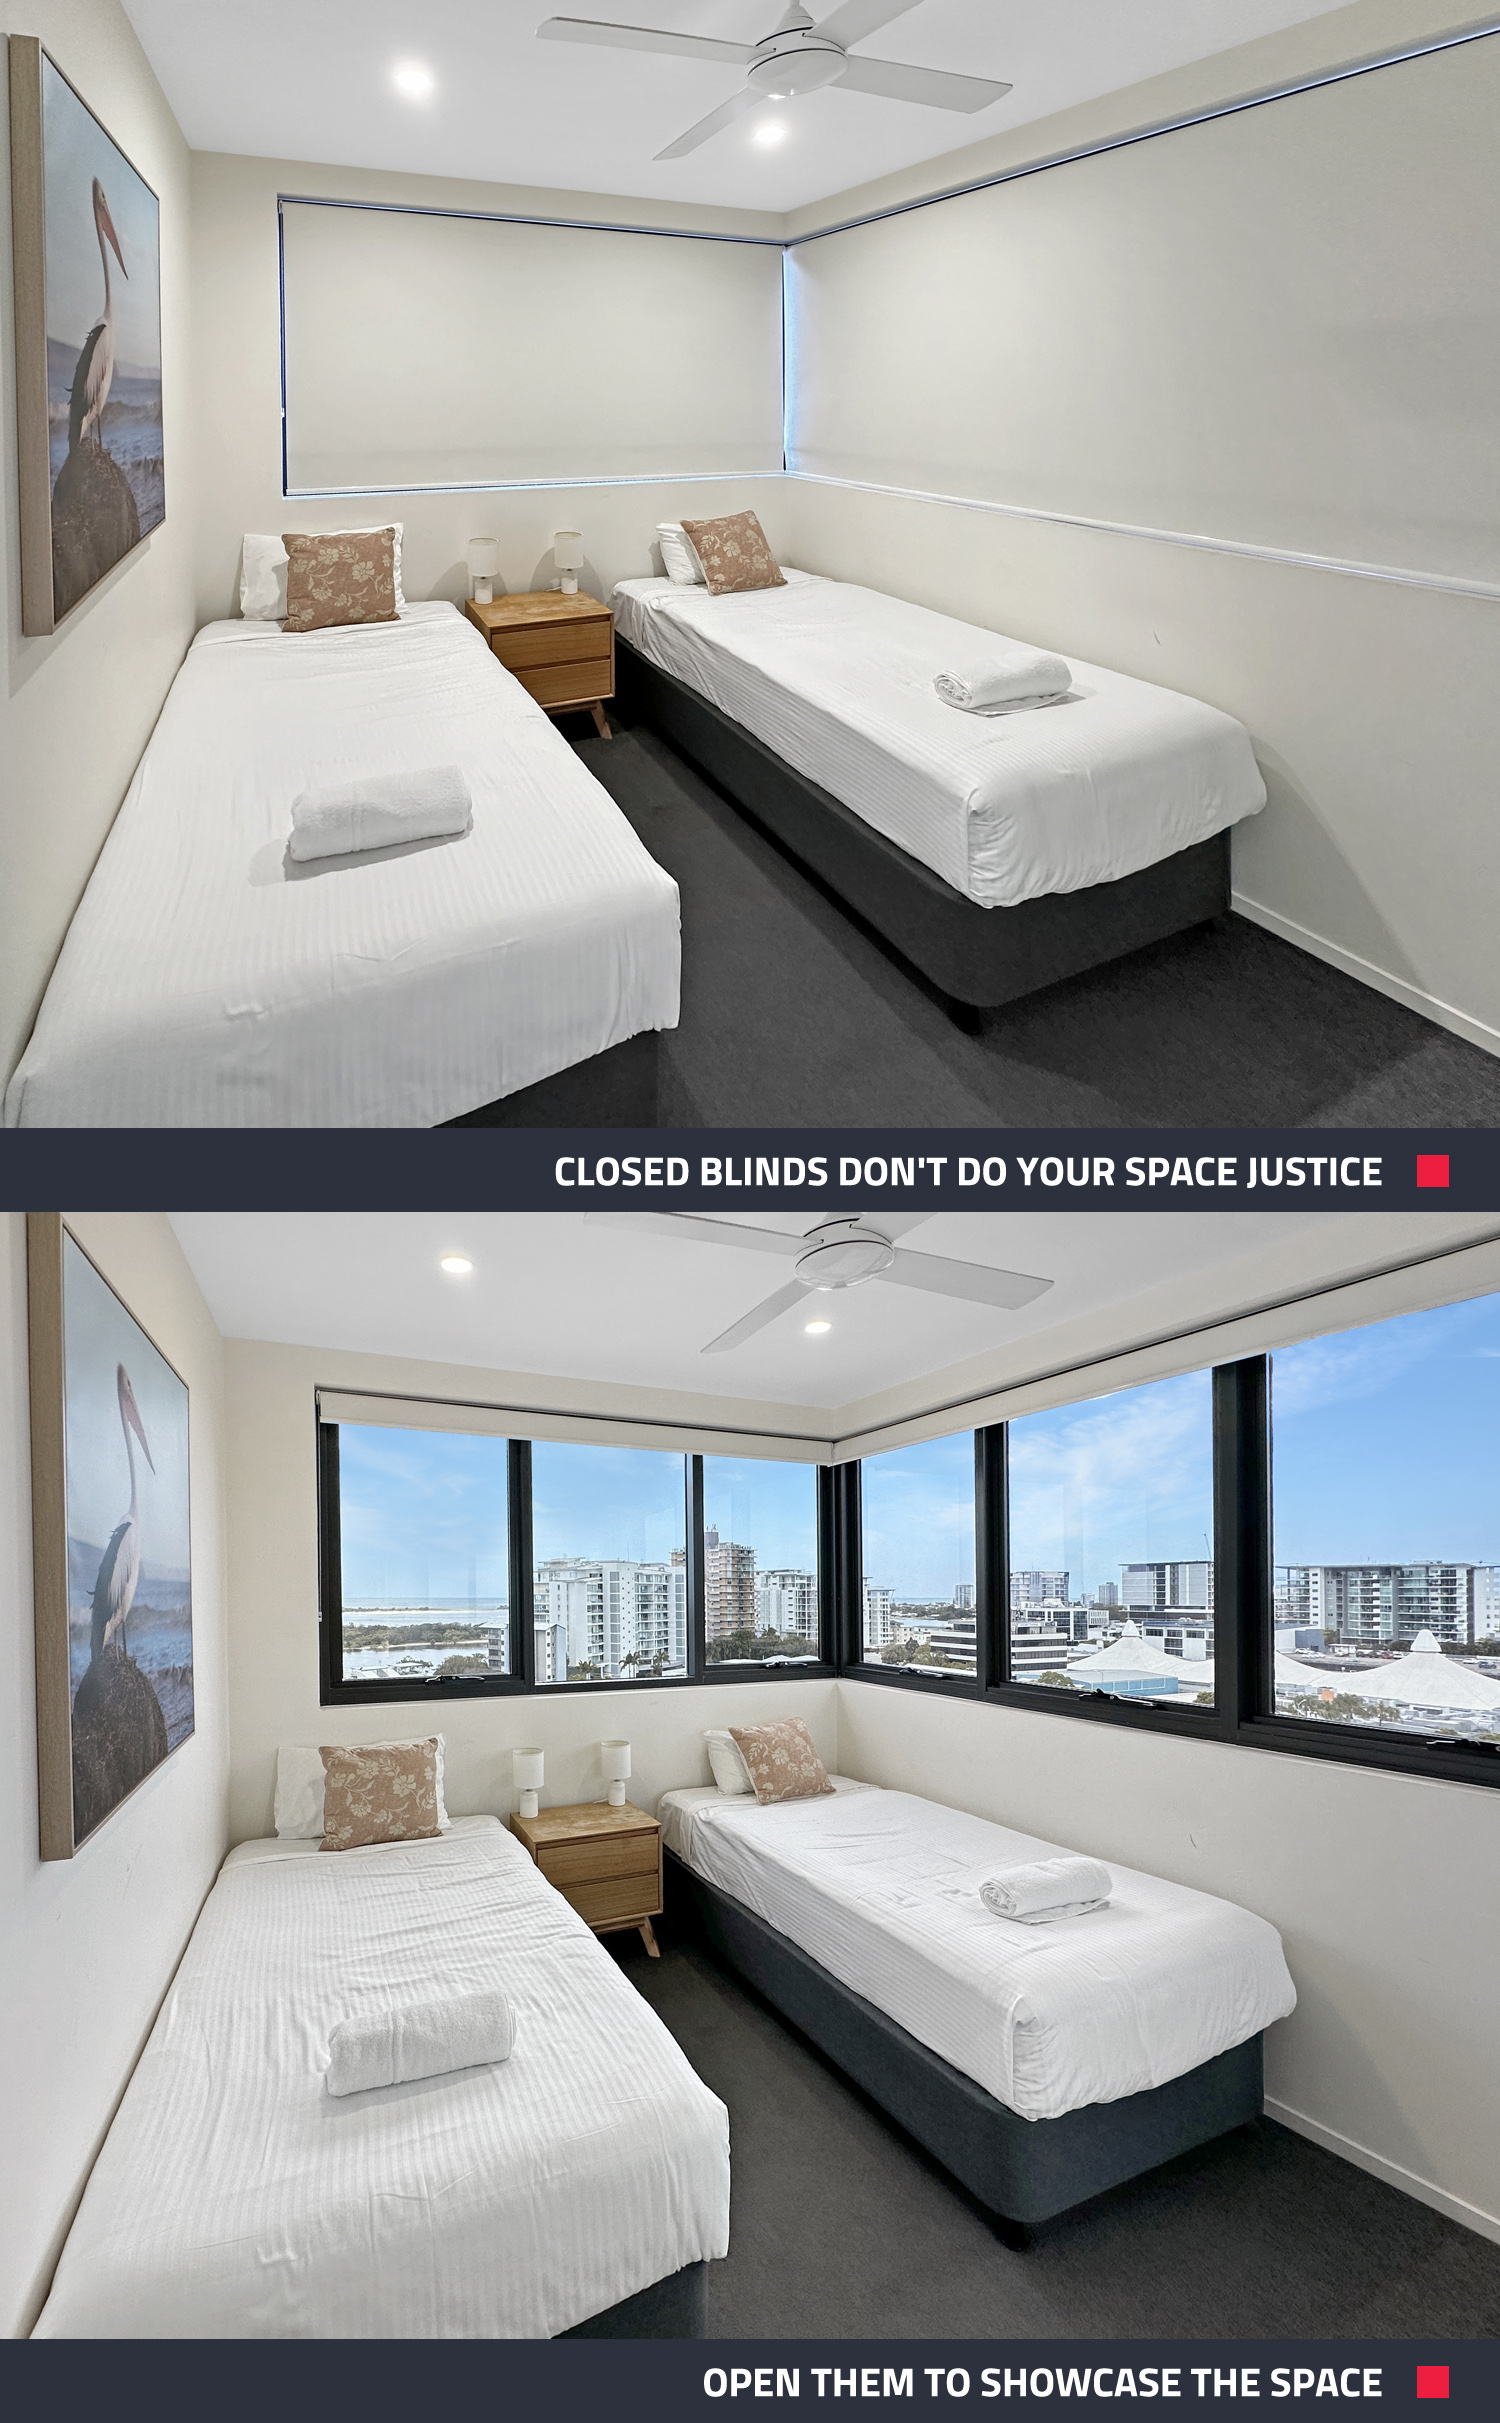
9. Keeping Blinds or Curtains Closed
Natural light is your best friend. Open blinds or curtains to make spaces feel brighter and more inviting. “If there’s a view outside, show it off!” Brad says. A sunny, well-lit room is far more appealing than a dark, closed-off one.
10. Skipping Professional Editing
Unedited photos can look flat and unpolished. “Editing makes a huge difference,” Brad stresses. With our professional editing services starting at just $1.60 per image, it’s an affordable way to elevate your listing and catch a buyer’s eye.
Take Your Real Estate Photography to the Next Level
By avoiding these common mistakes, you can create stunning photos that attract buyers, generate interest, and sell properties faster. As Brad puts it, “Clean, well-lit, and professionally edited photos sell homes.”
New to BoxBrownie.com? Get 4 free photo edits—no credit card or subscription required! Sign up and unlock our expert editing services that transform your images from good to jaw-dropping!
RELATED ARTICLES

Leads are the seeds of real estate success. Like seeds, they require nurturing, attention and care if they are going to bear fruit. Here we’ll go over some foolproof methods of generating and nurturing real estate leads.
READ MORE
Don’t know where to start when it comes to creating your very own 360-degree Virtual House Tour for your latest real estate listing? In this blog, we will walk you through the entire process from choosing the right camera to taking the shots and building the tour itself. It doesn’t have to be a stressful process and can help your properties stand out from the crowd.
READ MORE
Pre-market listings on platforms like Zillow present a powerful opportunity to drive early buyer interest, generate competitive bids, and secure higher sale prices. SnapSnapSnap is key to easily achieving this with your phone – find out how this app fuels faster sales!
READ MORE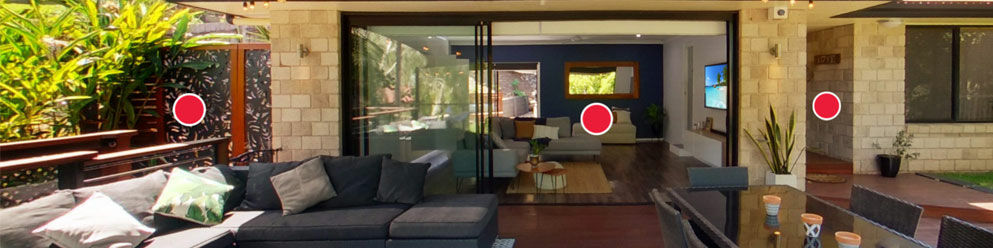
If you're an agent who uses video tours instead of Virtual Tours, your listings might not be attracting the interest they should be. Here we look at why buyers increasingly prefer Virtual Tours over video walkthroughs.
READ MORE
Want to know the winning formula for selling off-plan? If you’re selling an unbuilt home and looking for a cost-effective option, we have the ultimate solution. We have two eye-catching edits that you can use to capture buyers’ hearts and imaginations. Find out how you can make maximum impact at minimal cost.
READ MORE
Explore seven essential tips to capture an impressive real estate hero shot. From perfect timing and lighting to staging and post-editing, implement these strategies to make a lasting impression on house hunters and close more deals.
READ MORE