HOW TO CREATE A VIRTUAL TOUR
Introduction:
They’re increasingly popular and incredibly effective, virtual tours are changing the real estate landscape and the way potential buyers research properties. While there’s no doubting their effectiveness, for many agents, the idea of creating a virtual tour can seem pretty daunting, time-consuming and expensive but it doesn’t have to be that way.
Unsure of what we mean by virtual tour? Check out an example tour here.
In this blog, we’re going to walk you through how to create a virtual tour from understanding which camera and tripod to buy to shooting the property, having the images edited and building the tour itself. And the best part? You don’t have to be tech-savvy or spend a fortune on expensive equipment, so let’s get started!
Step 1 – Which 360 Camera and Tripod To Buy
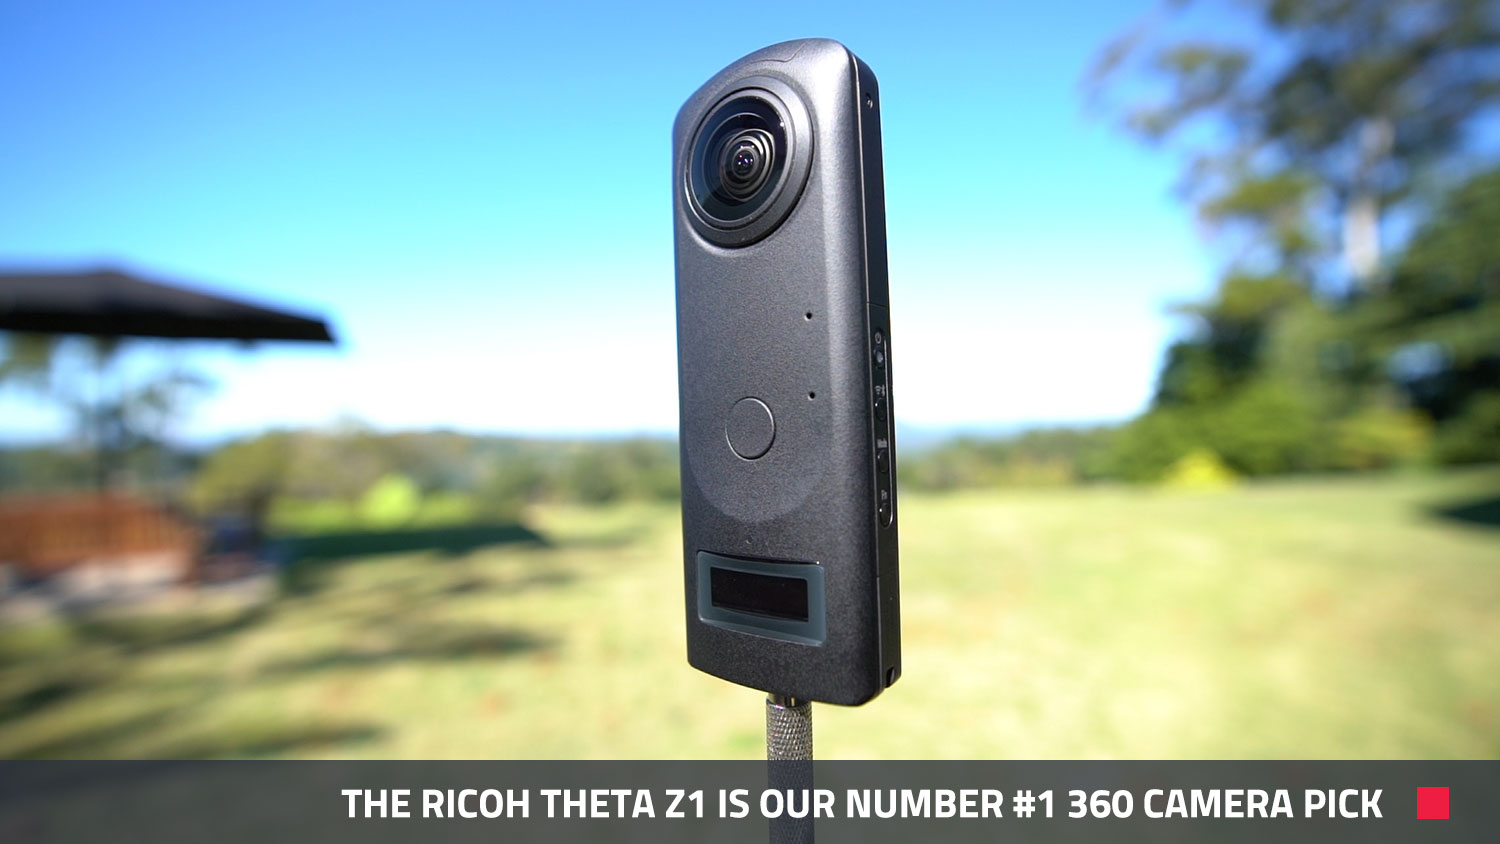
While technology is constantly changing and new awesome products are continually being released, currently, we can’t go past the Ricoh Theta Z1 camera for quality. If you’re shopping on a budget or just want to dip your toe in the water, you could also try the Ricoh Theta V.
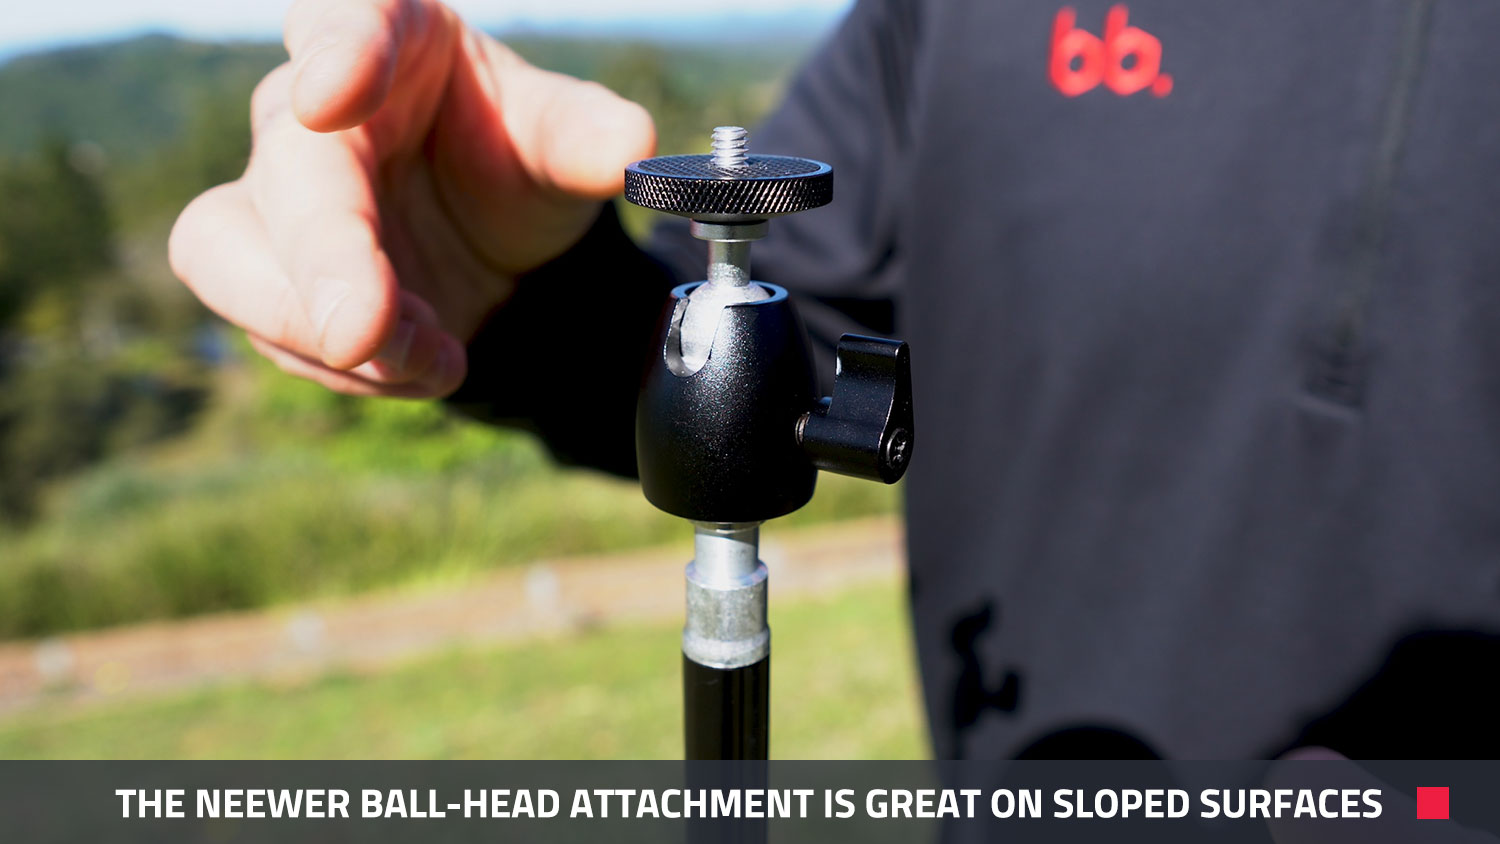
When it comes to the tripod, we recommend the Neewer light stand which will set you back just $40. This stand is sturdy and won’t easily fall over unlike many more expensive monopods on the market today. We also use the Neewer ball-head attachment between the tripod and the 360 camera to make it easier to get the angle right when shooting on sloped surfaces.
Step 2 – Setting Up Your 360 Camera
This step is going to vary depending on the camera you’re using however there are some universal settings which we can get started with. The first step for all cameras will be to pair it with your smartphone using the dedicated app the camera comes with.
Set your ISO to the lowest number possible, in the case of the Ricoh Theta Z1 this will be 100. Always avoid setting your ISO on high or leaving it on ‘automatic’ as this will likely produce a grainy image.
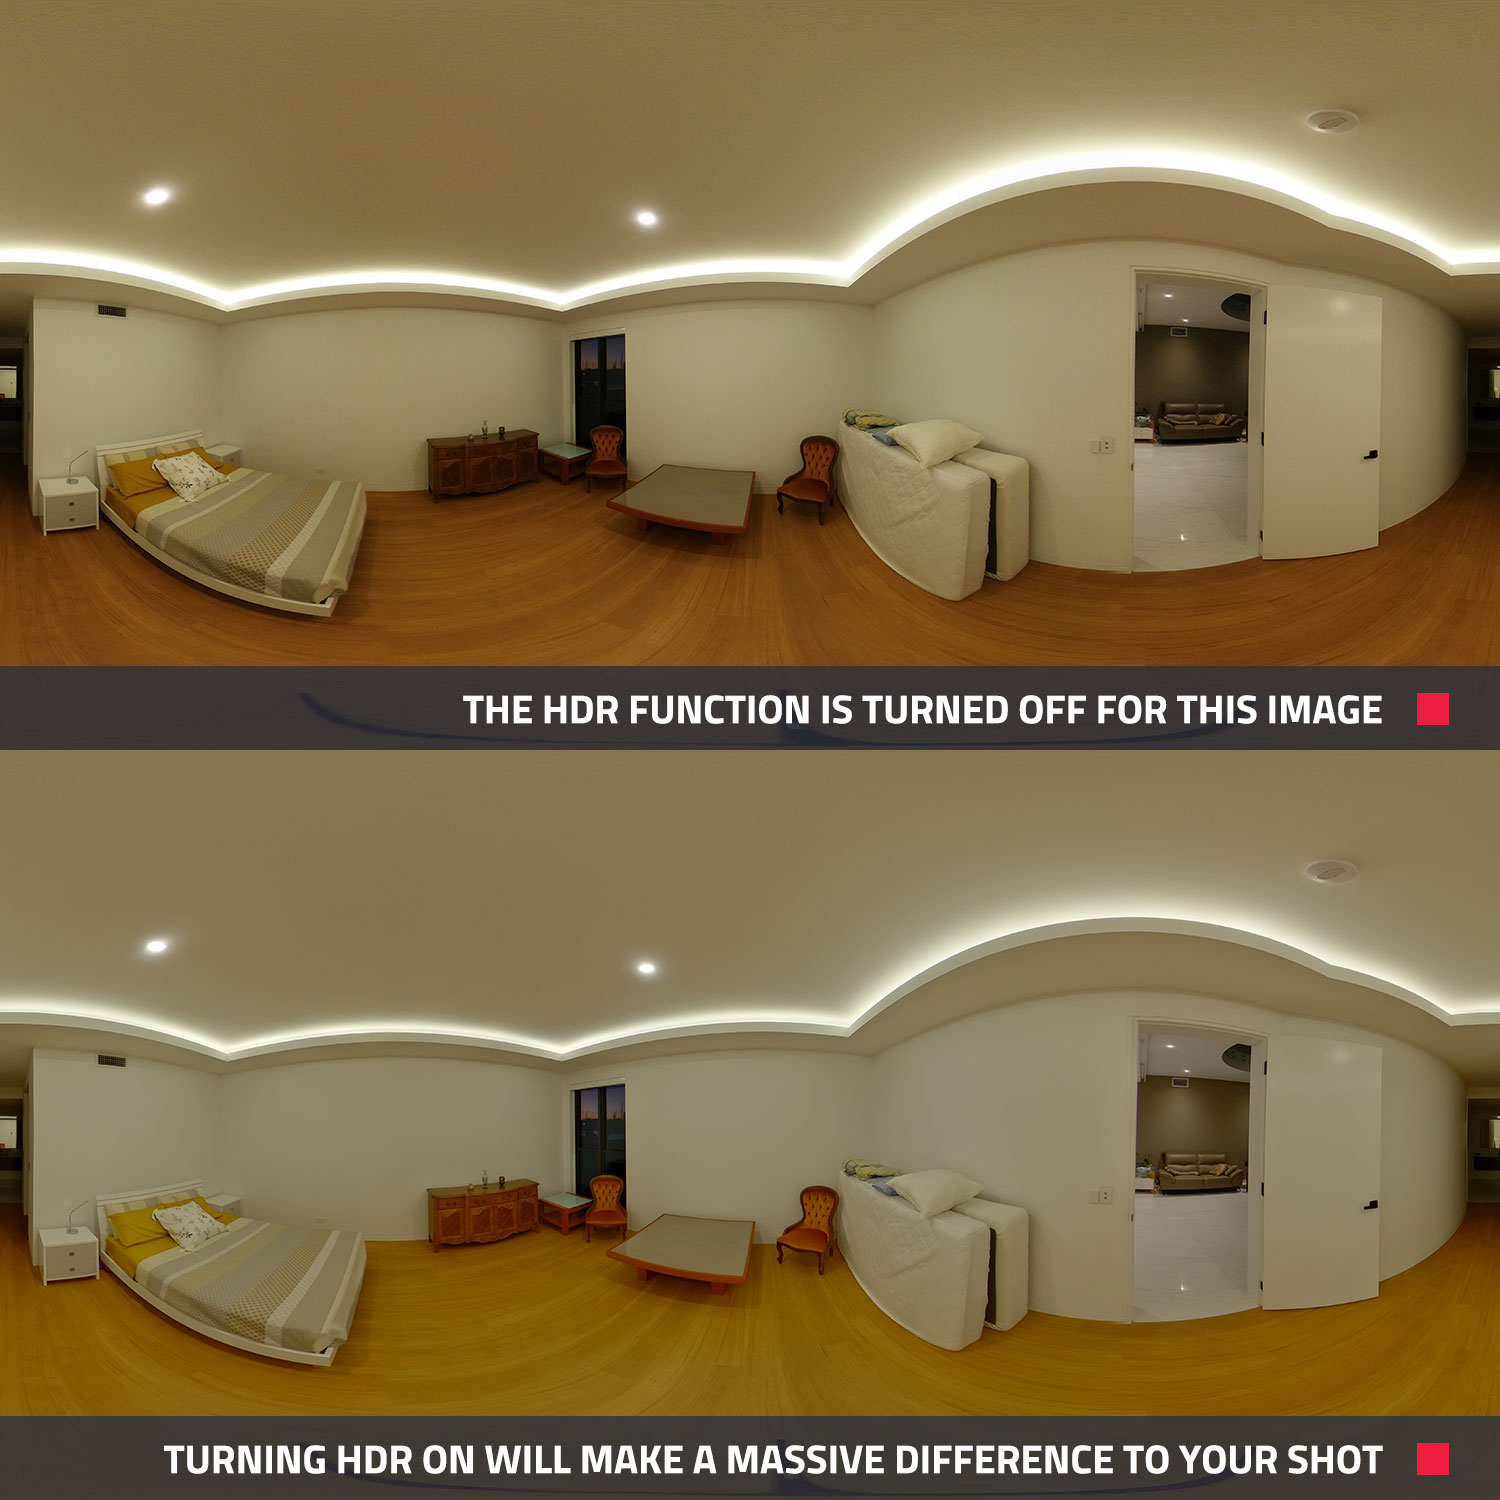
As with the ISO, set your image size or resolution to the highest setting possible. Again, for the Ricoh this is 6720x3360. Some cameras will give you the option to turn on the HDR function, this will make a massive difference to the detail and clarity of the shot.
Step 3 – How To Prepare The Property
This might sound like a no-brainer, but it’s amazing the difference these simple tricks can make to the final result. Always turn on all the lights, including the kitchen rangehood, and straighten the furniture and bed spreads. We recommend you open up all the doors, curtains and blinds to create a sense of space and flow in the shot.
By removing any unnecessary clutter, you can help create a clean and inviting home. This can include things like bath mats, shampoo bottles and bins etc. Less is always more when it comes to real estate photography.
If you’d like to learn more about preparing a property to be shot, you can check out our FREE Pre-Photography Checklist.
Step 4 – How To Shoot A Property With A 360 Camera
Now the house is prepared, it’s time to get to the fun part – shooting the property.
We’re all time-poor and efficiency is important, so to get started, place the camera in the center of the room making sure the tripod is sturdy. Hide out of frame and then use your phone to scan around the room and ensure the shot looks good and nothing is in the way.
If you find the image is too bright or dark, simply adjust your exposure value accordingly so it looks good to the eye. Then press the shutter to take the photo.
Important note – if you’re new to 360 photography, just be aware the image looks stretched-out compared to a conventional photo. This is completely normal.
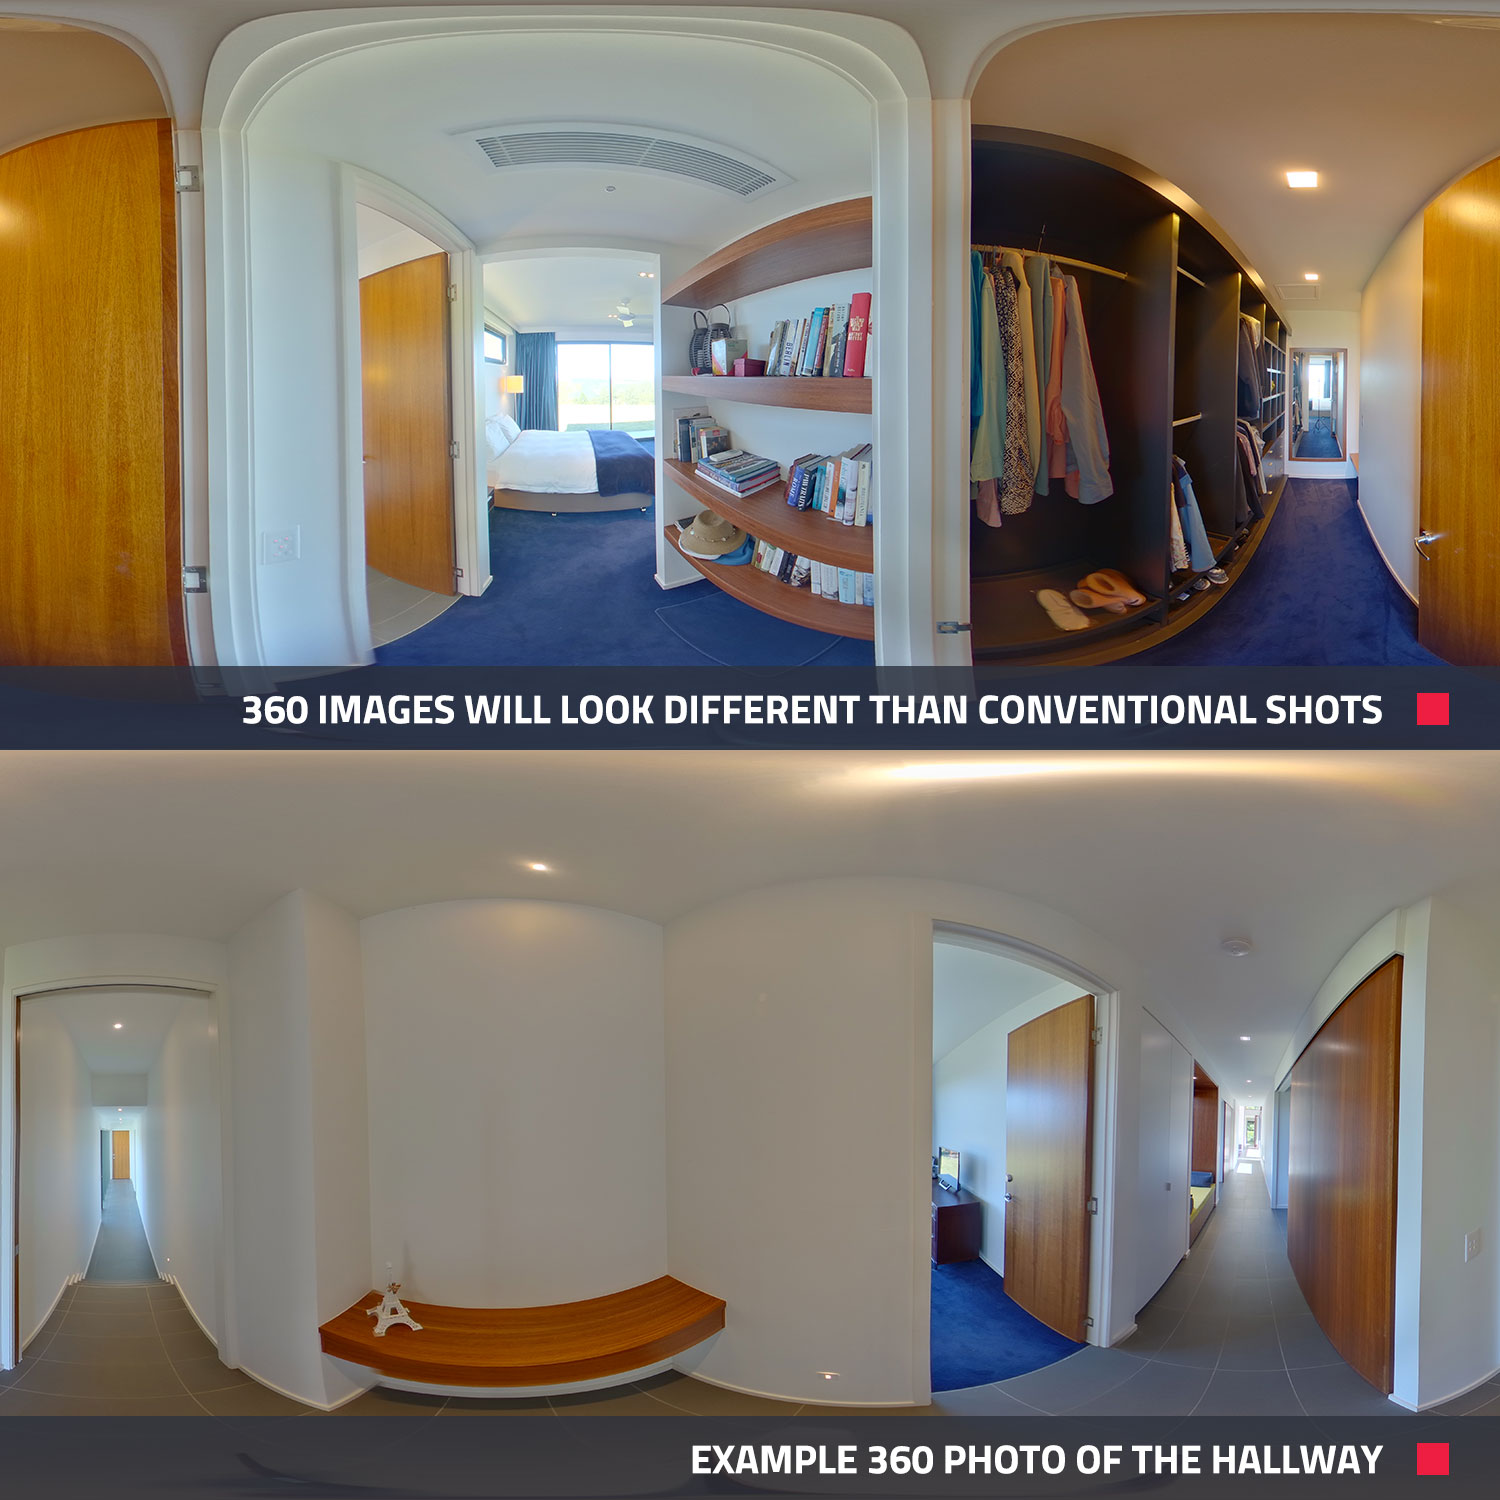
Once you’ve done the first room, repeat this process throughout the house. Be sure to capture key areas like the kitchen, bedrooms, bathrooms and outdoor areas but also don’t forget the hallways. This helps to create a consistent flow in the virtual tour.
Depending on the property, this process should only take roughly 20 minutes. If you’d like to learn more about capturing window detail and how to use bracketing in your virtual tours, you can visit our previous blog here.
Step 5 – Getting Your Images Edited
Having the 360 images edited is not essential in the creation of a virtual tour but it is highly recommended. From just $4 an image, our team of professional editors can green-up the grass, replace the skies and remove any unnecessary items. As you can see below, editing makes a huge difference to the finished product and can help showcase your listing in the best possible light.
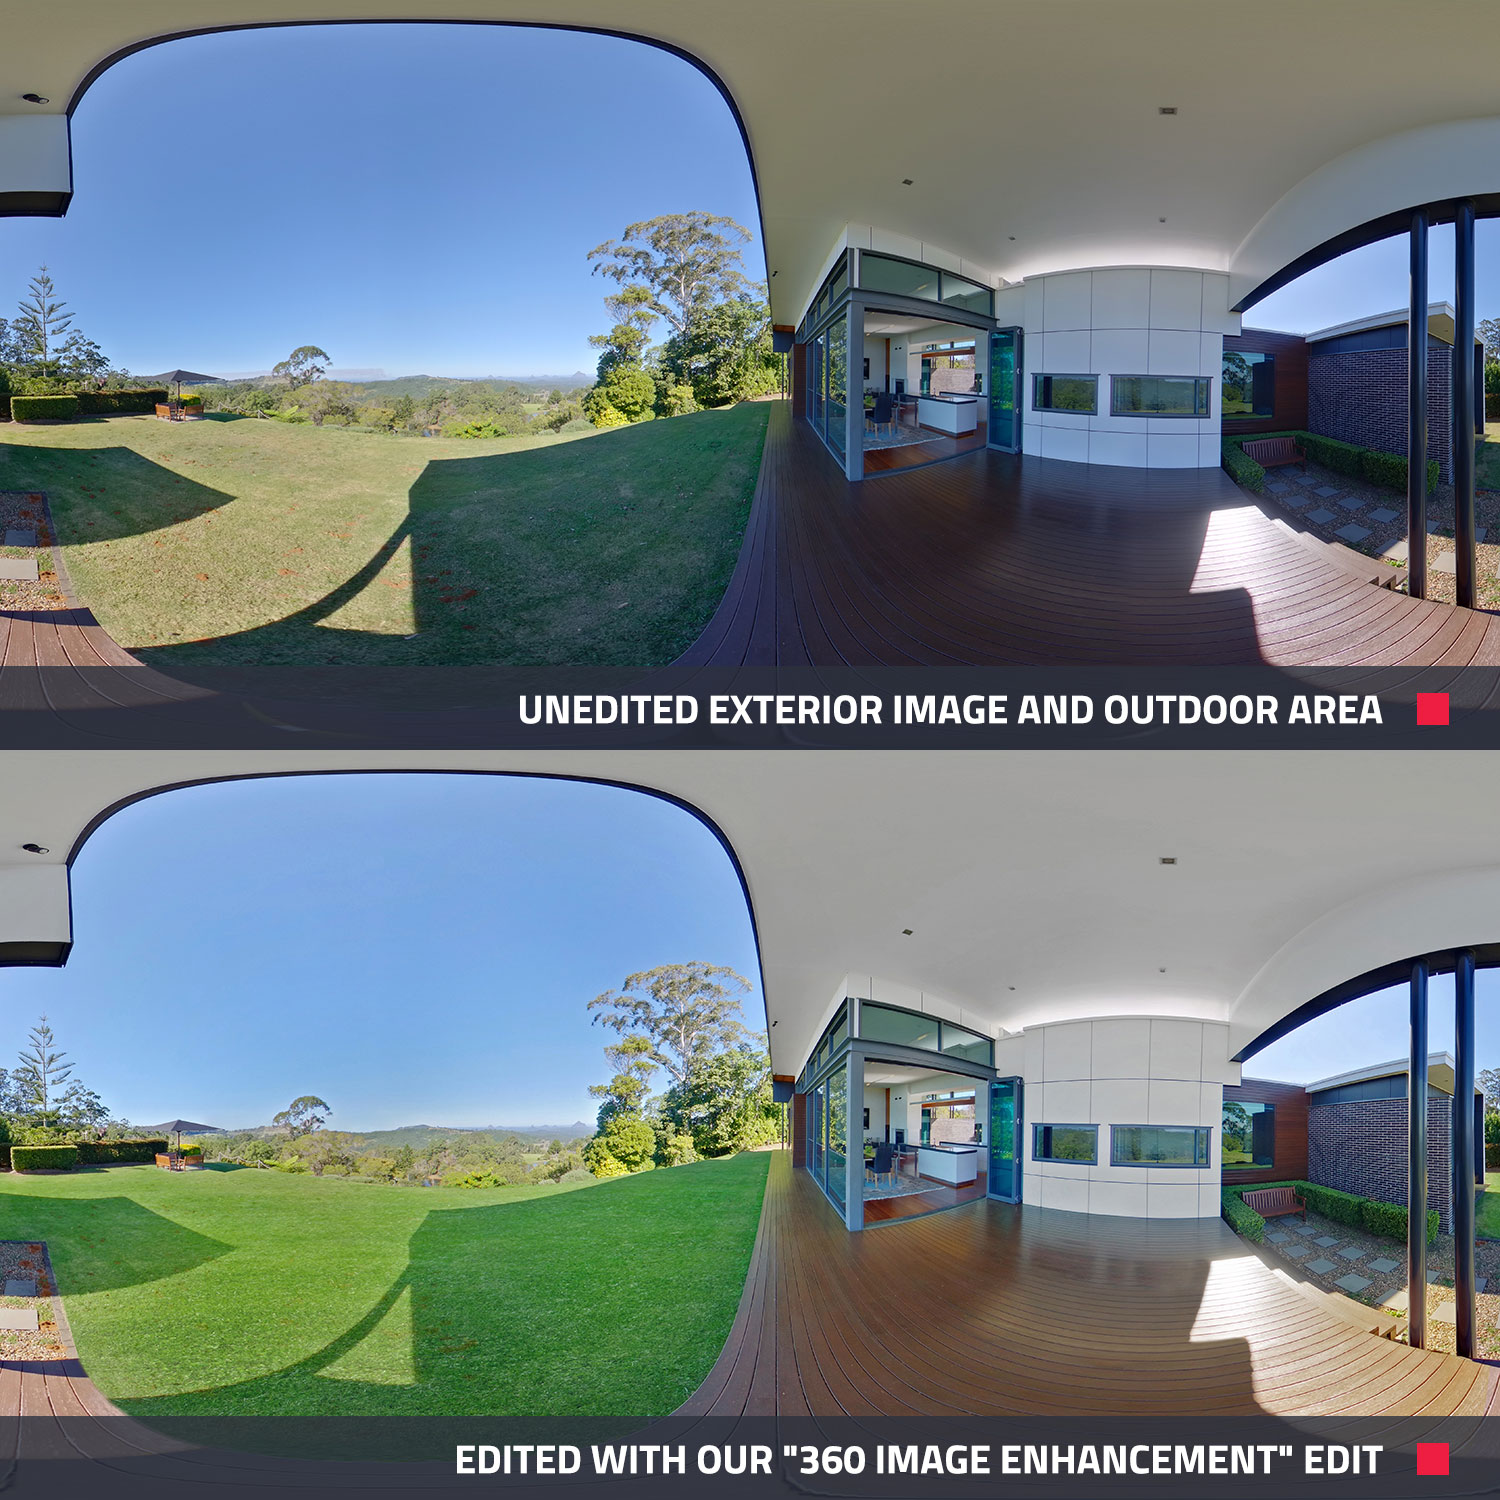
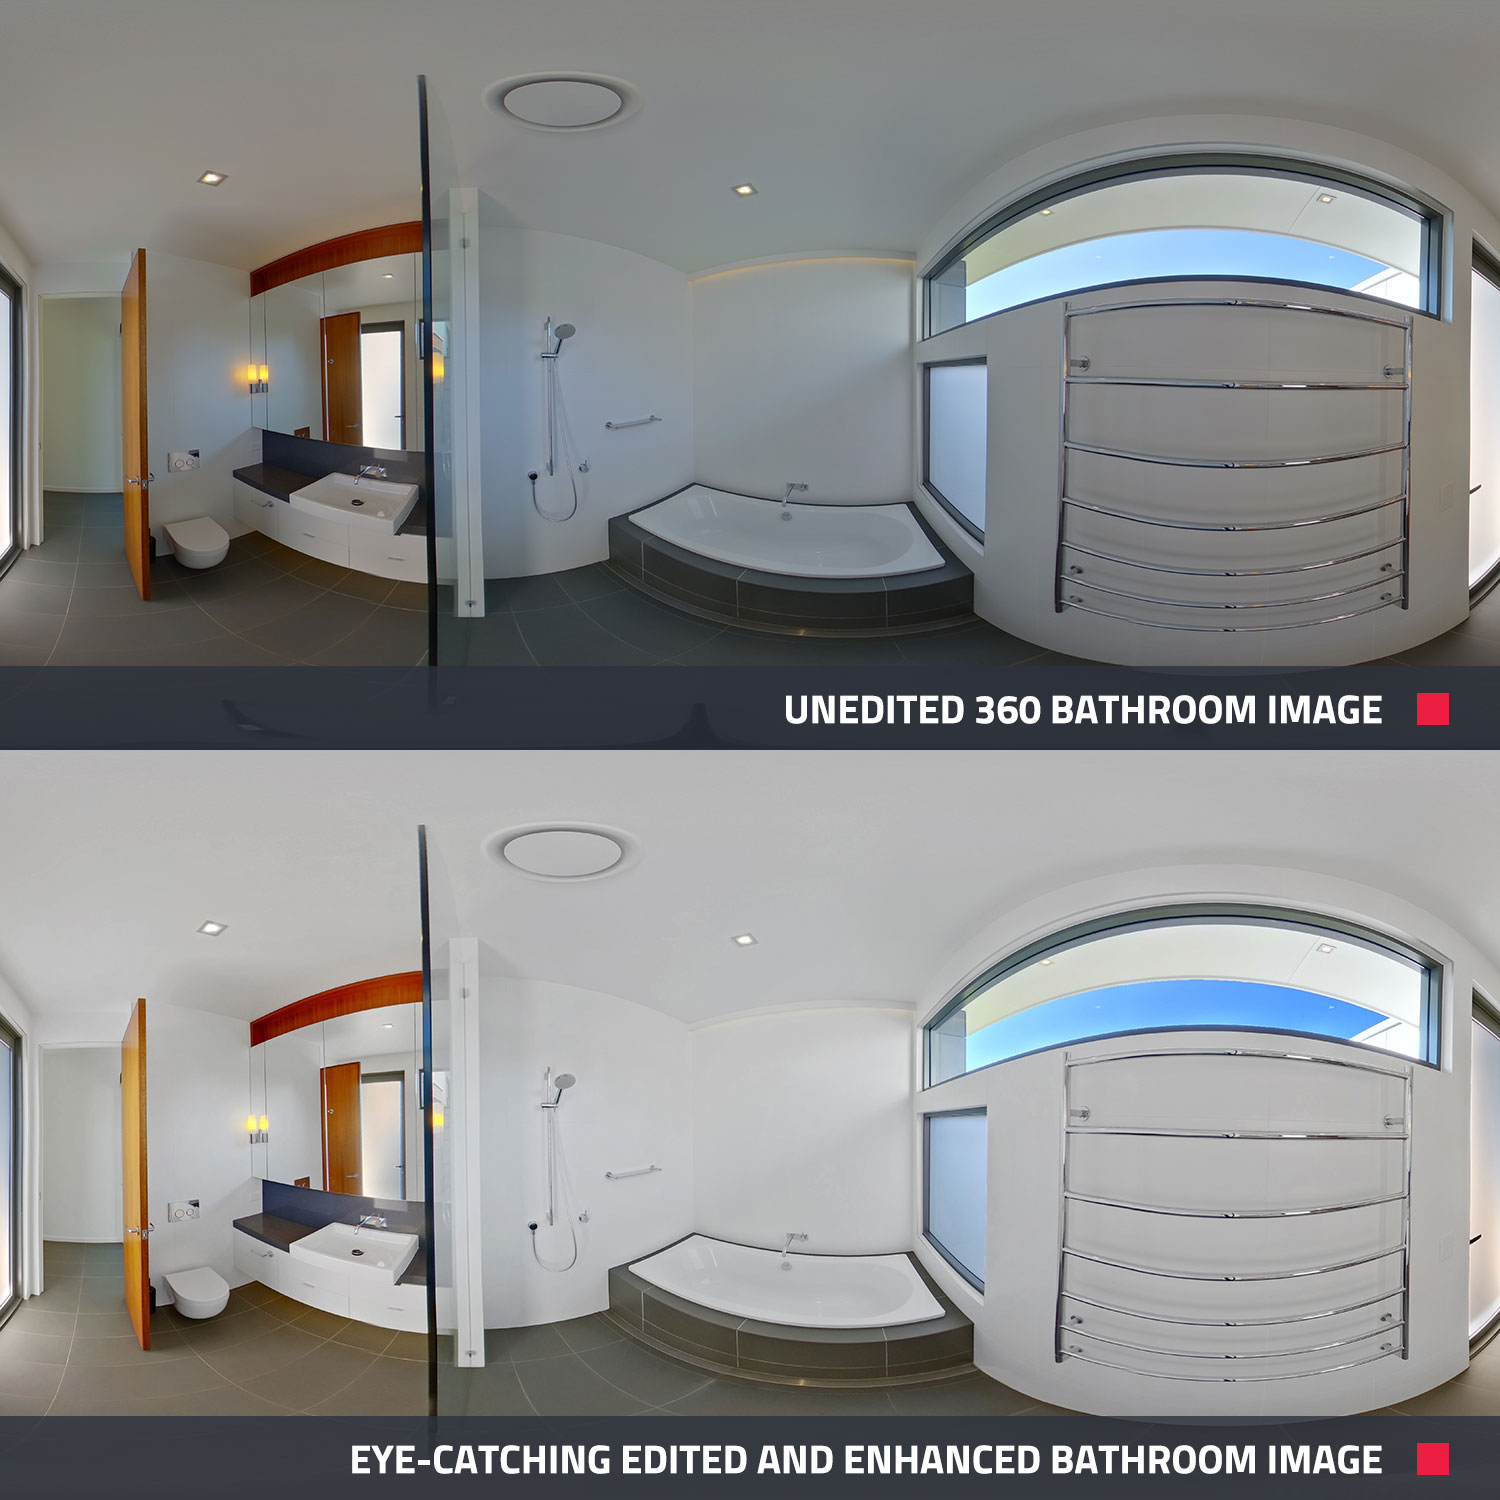
To have your images edited, you simply have to log in to BoxBrownie.com and choose ‘360 Image Enhancement’. Then upload your images and submit your job. The images will be edited by our team of professional editors and sent back to you within 24 hours. It’s that simple.
Step 6 – Building Your Virtual Tour
Now this is where the magic happens but don’t worry, we will handle all the hard work for you.
Log in to BoxBrownie.com and select ‘360 Virtual Tours’. Upload your images and be sure to name each image with the area that is captured i.e. kitchen. You also have the option to upload the property’s floorplan which can show in the final product in the bottom left corner.

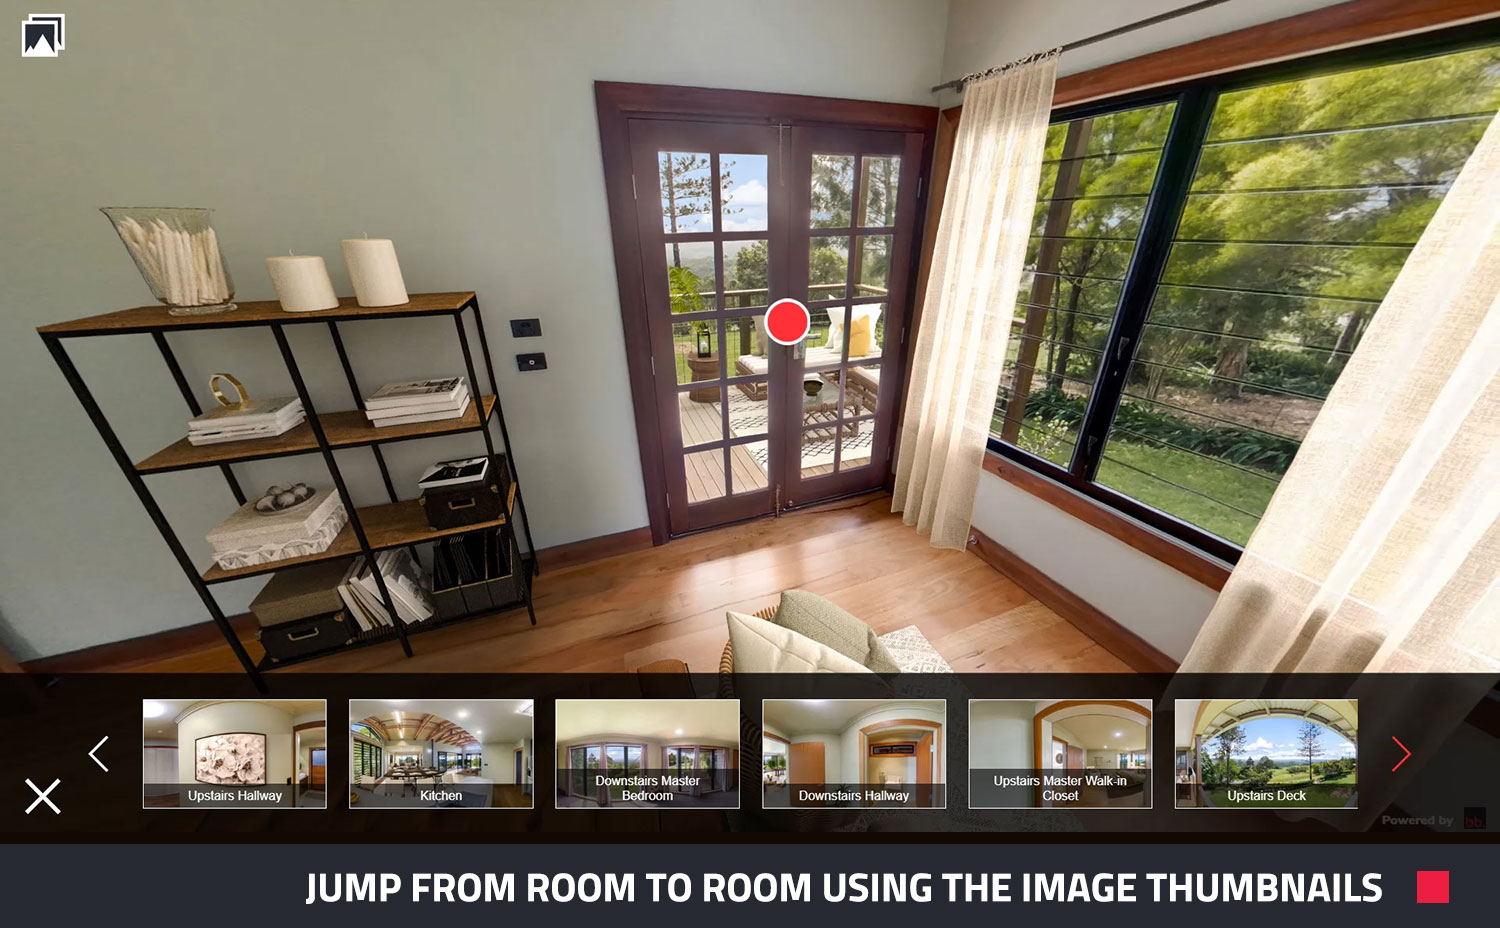
Once you’ve uploaded all your images, simply select ‘Submit’ and you’re done. Within 24 hours of submitting, you’ll receive a link to your very own and completely interactive virtual tour. Your potential buyers can click from hotspot to hotspot while also having the option to spin around and virtually inspect each room.
If you’ve also uploaded a floorplan, you can select to view it from the tour or you can jump from room to room based on the thumbnail images. You can share the link anywhere from social media to your email and of course your MLS or property portal.
Conclusion
And there you have it. It really is as simple as that. As we’ve shown you in this blog, creating a professional virtual tour for your listing doesn’t have to be an expensive, time consuming or difficult task. In case you missed it earlier, here’s an example of a completed tour to give you a feel for how your own tour could look.
If you’ve never created a virtual tour before, why not get started at BoxBrownie.com or if you have any questions, feel free to contact us at [email protected].
RELATED ARTICLES

Shooting a property from start to finish can seem like a bridge too far for many people but it doesn’t have to be that way. In this blog, we walk you through the entire process and highlight some simple tips and tricks to make capturing professional-quality images quick and easy.
READ MORE
Transform furnished listings into buyer magnets with Virtual Staging. Learn step by step how to create a polished, irresistible property that grabs attention, generates more inquiries, and sells faster.
READ MORE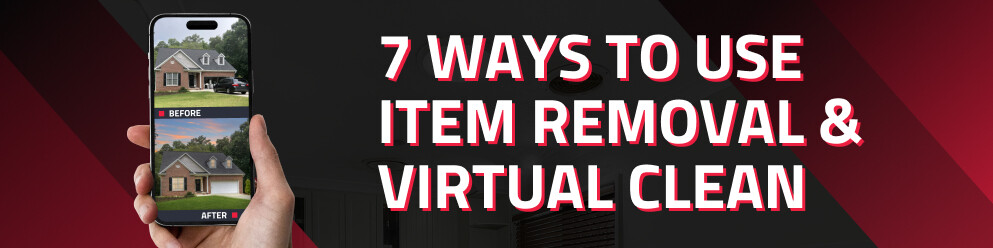
Want your property photos to stand out without reshoots? Discover 7 smart virtual clean tricks you may not know about — easy edits that make your listing photos flawless. Perfect for agents, property managers, Airbnb hosts, and builders alike!
READ MORE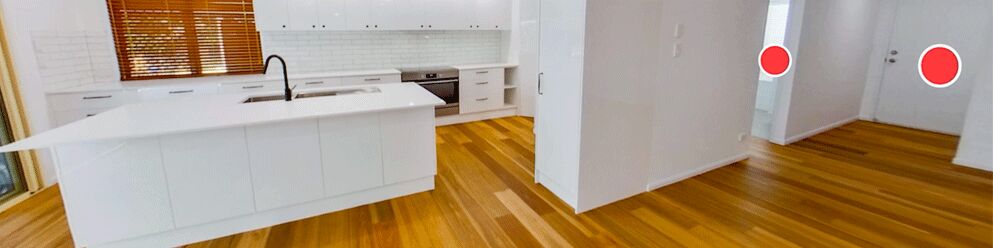
In this post, our resident photography expert Brad Filliponi cuts through the geek speak to determine which 360° camera shoots the best Virtual Tour - the Ricoh Theta Z1 or the newly released Ricoh Theta X.
READ MORE
Great photos drive bookings in the short-stay rental market. Discover how The Holiday Home Girls help owners style properties, capture standout images, and use SnapSnapSnap with BoxBrownie.com to create polished, booking-ready listing photos.
READ MORE
We sat down with the broker and owner of NextHome Next Stepp, Wendy Anderson, to chat all things property marketing, and how she leverages our app and free AI Copywriting service into her team’s workday.
READ MORE