HOW TO DRAW A FLOOR PLAN: A STEP-BY-STEP GUIDE
Ready to turn your property sketches into stunning, professional floor plans? In this video, Brad takes you through the complete process of drawing a floor plan from scratch. This guide provides real estate professionals with an efficient and straightforward method for creating detailed floor plans.
Step 1: The Fastest Way to Get Your Floor Plan
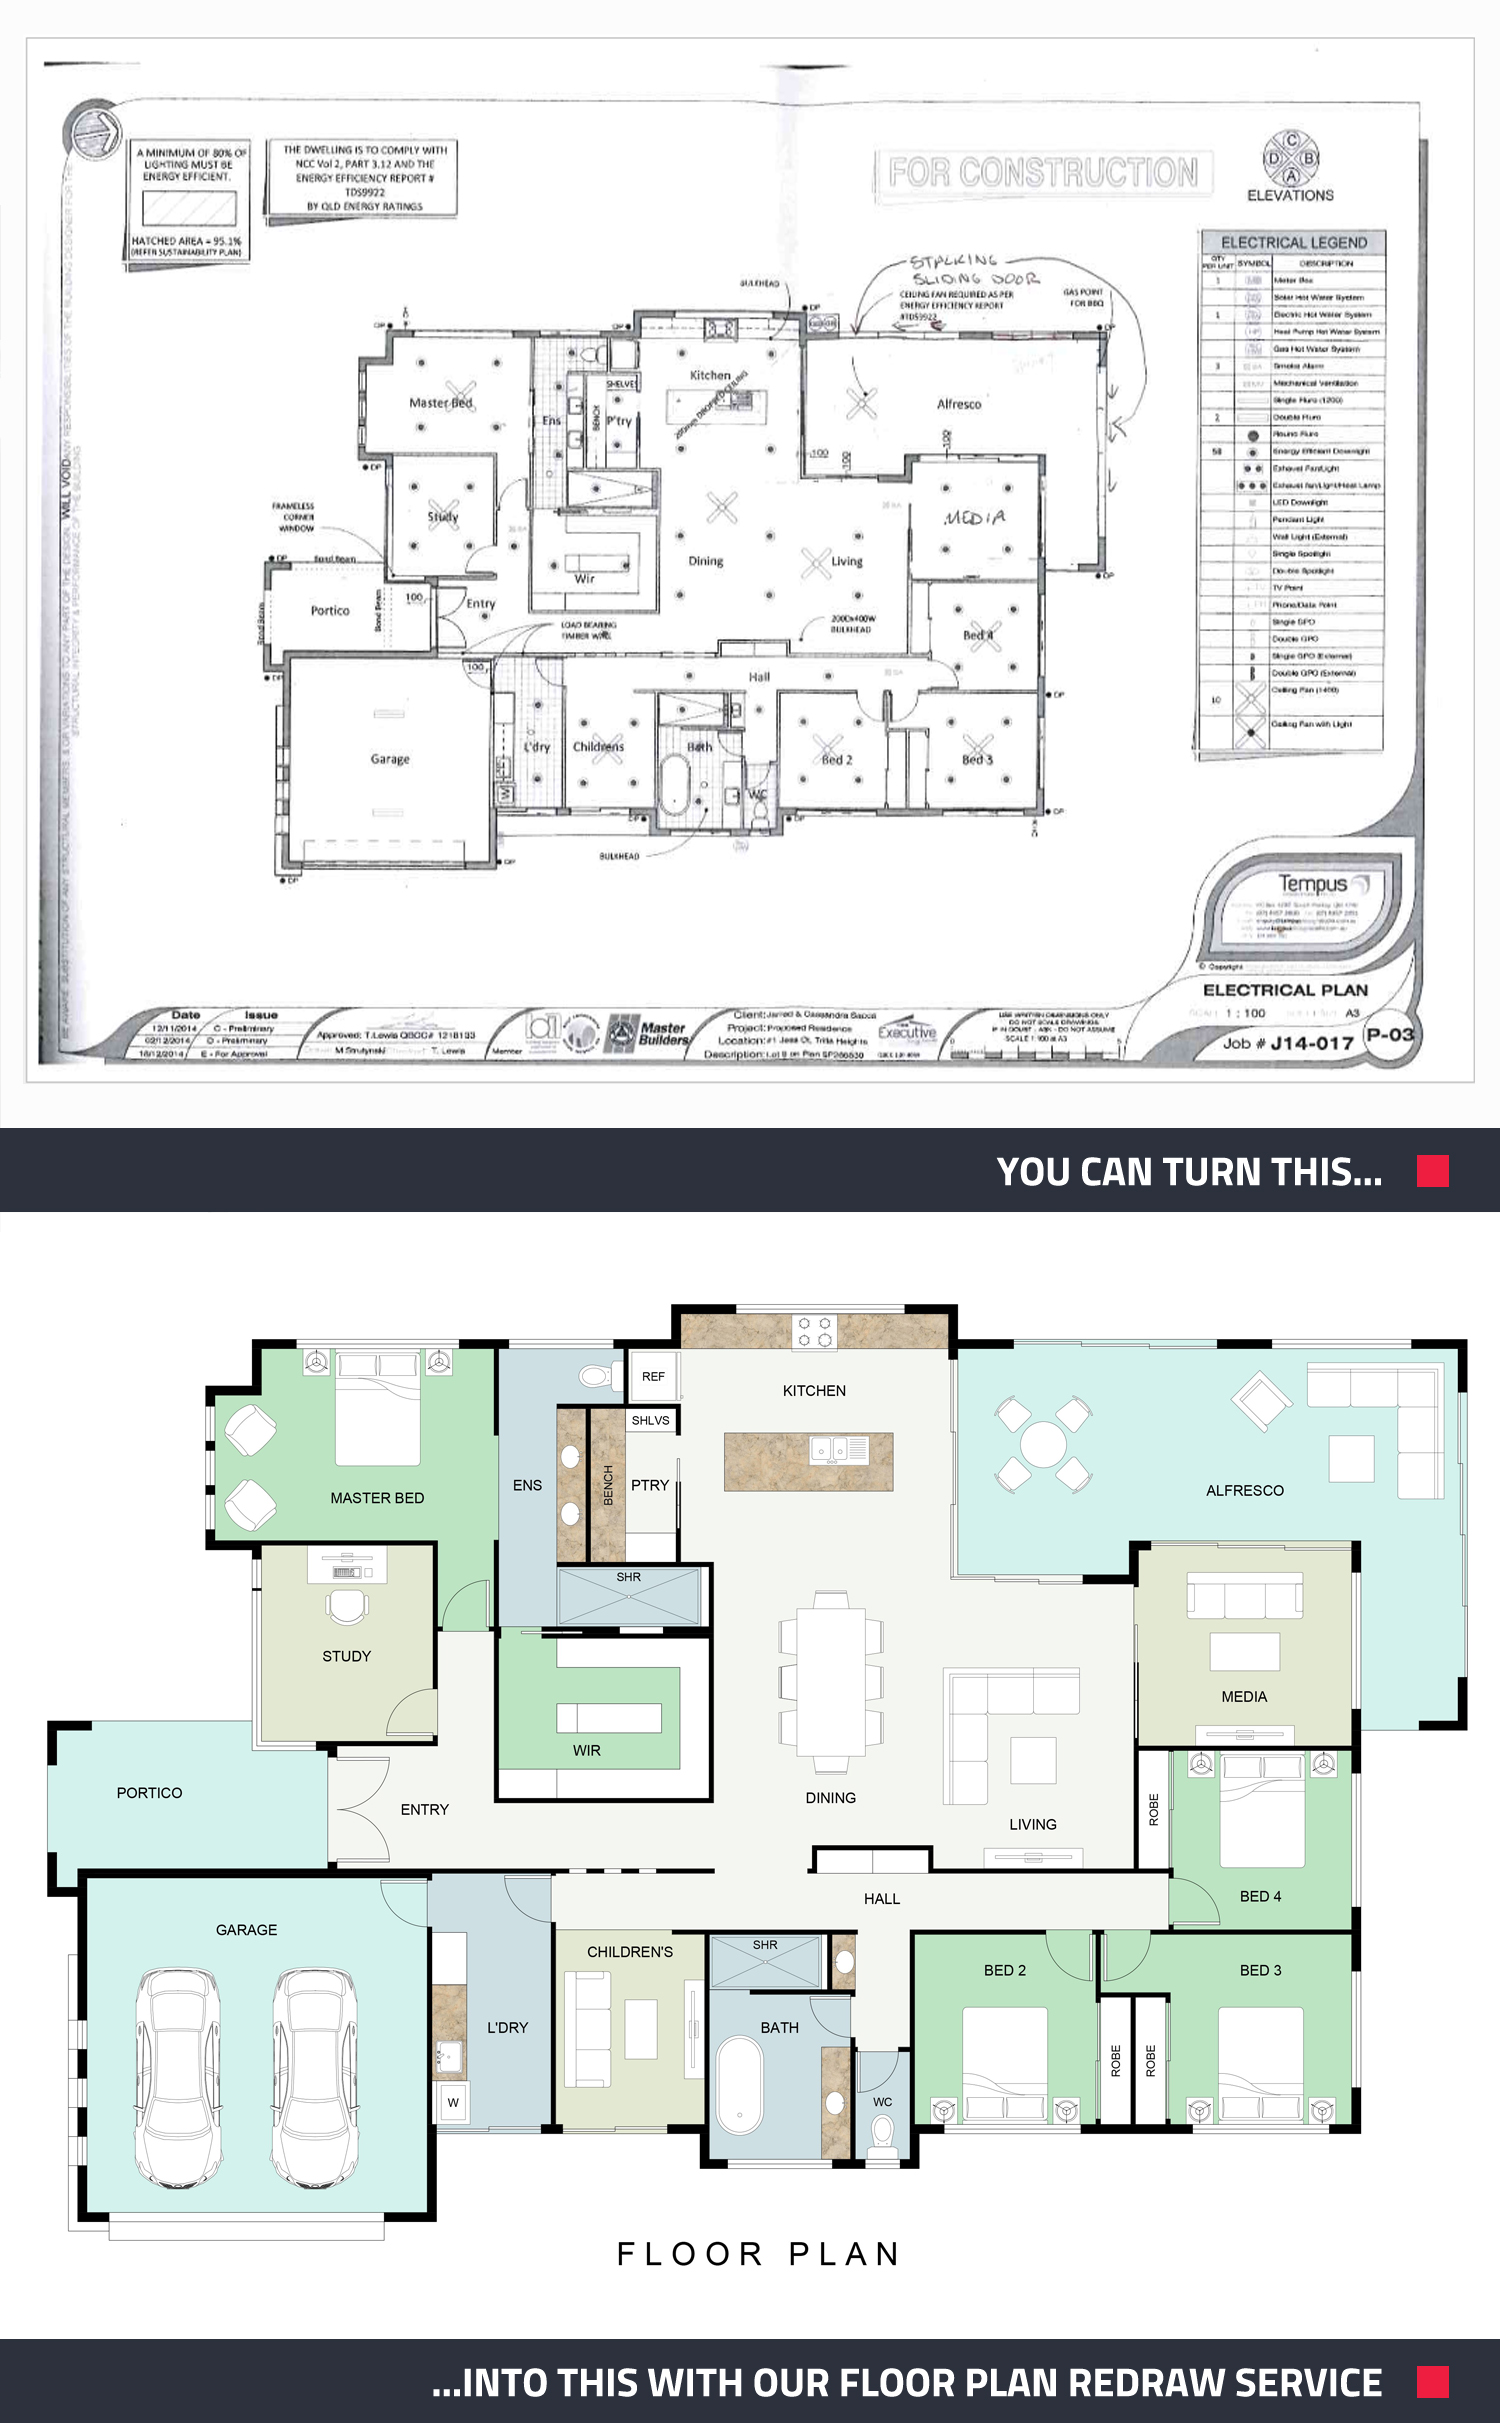
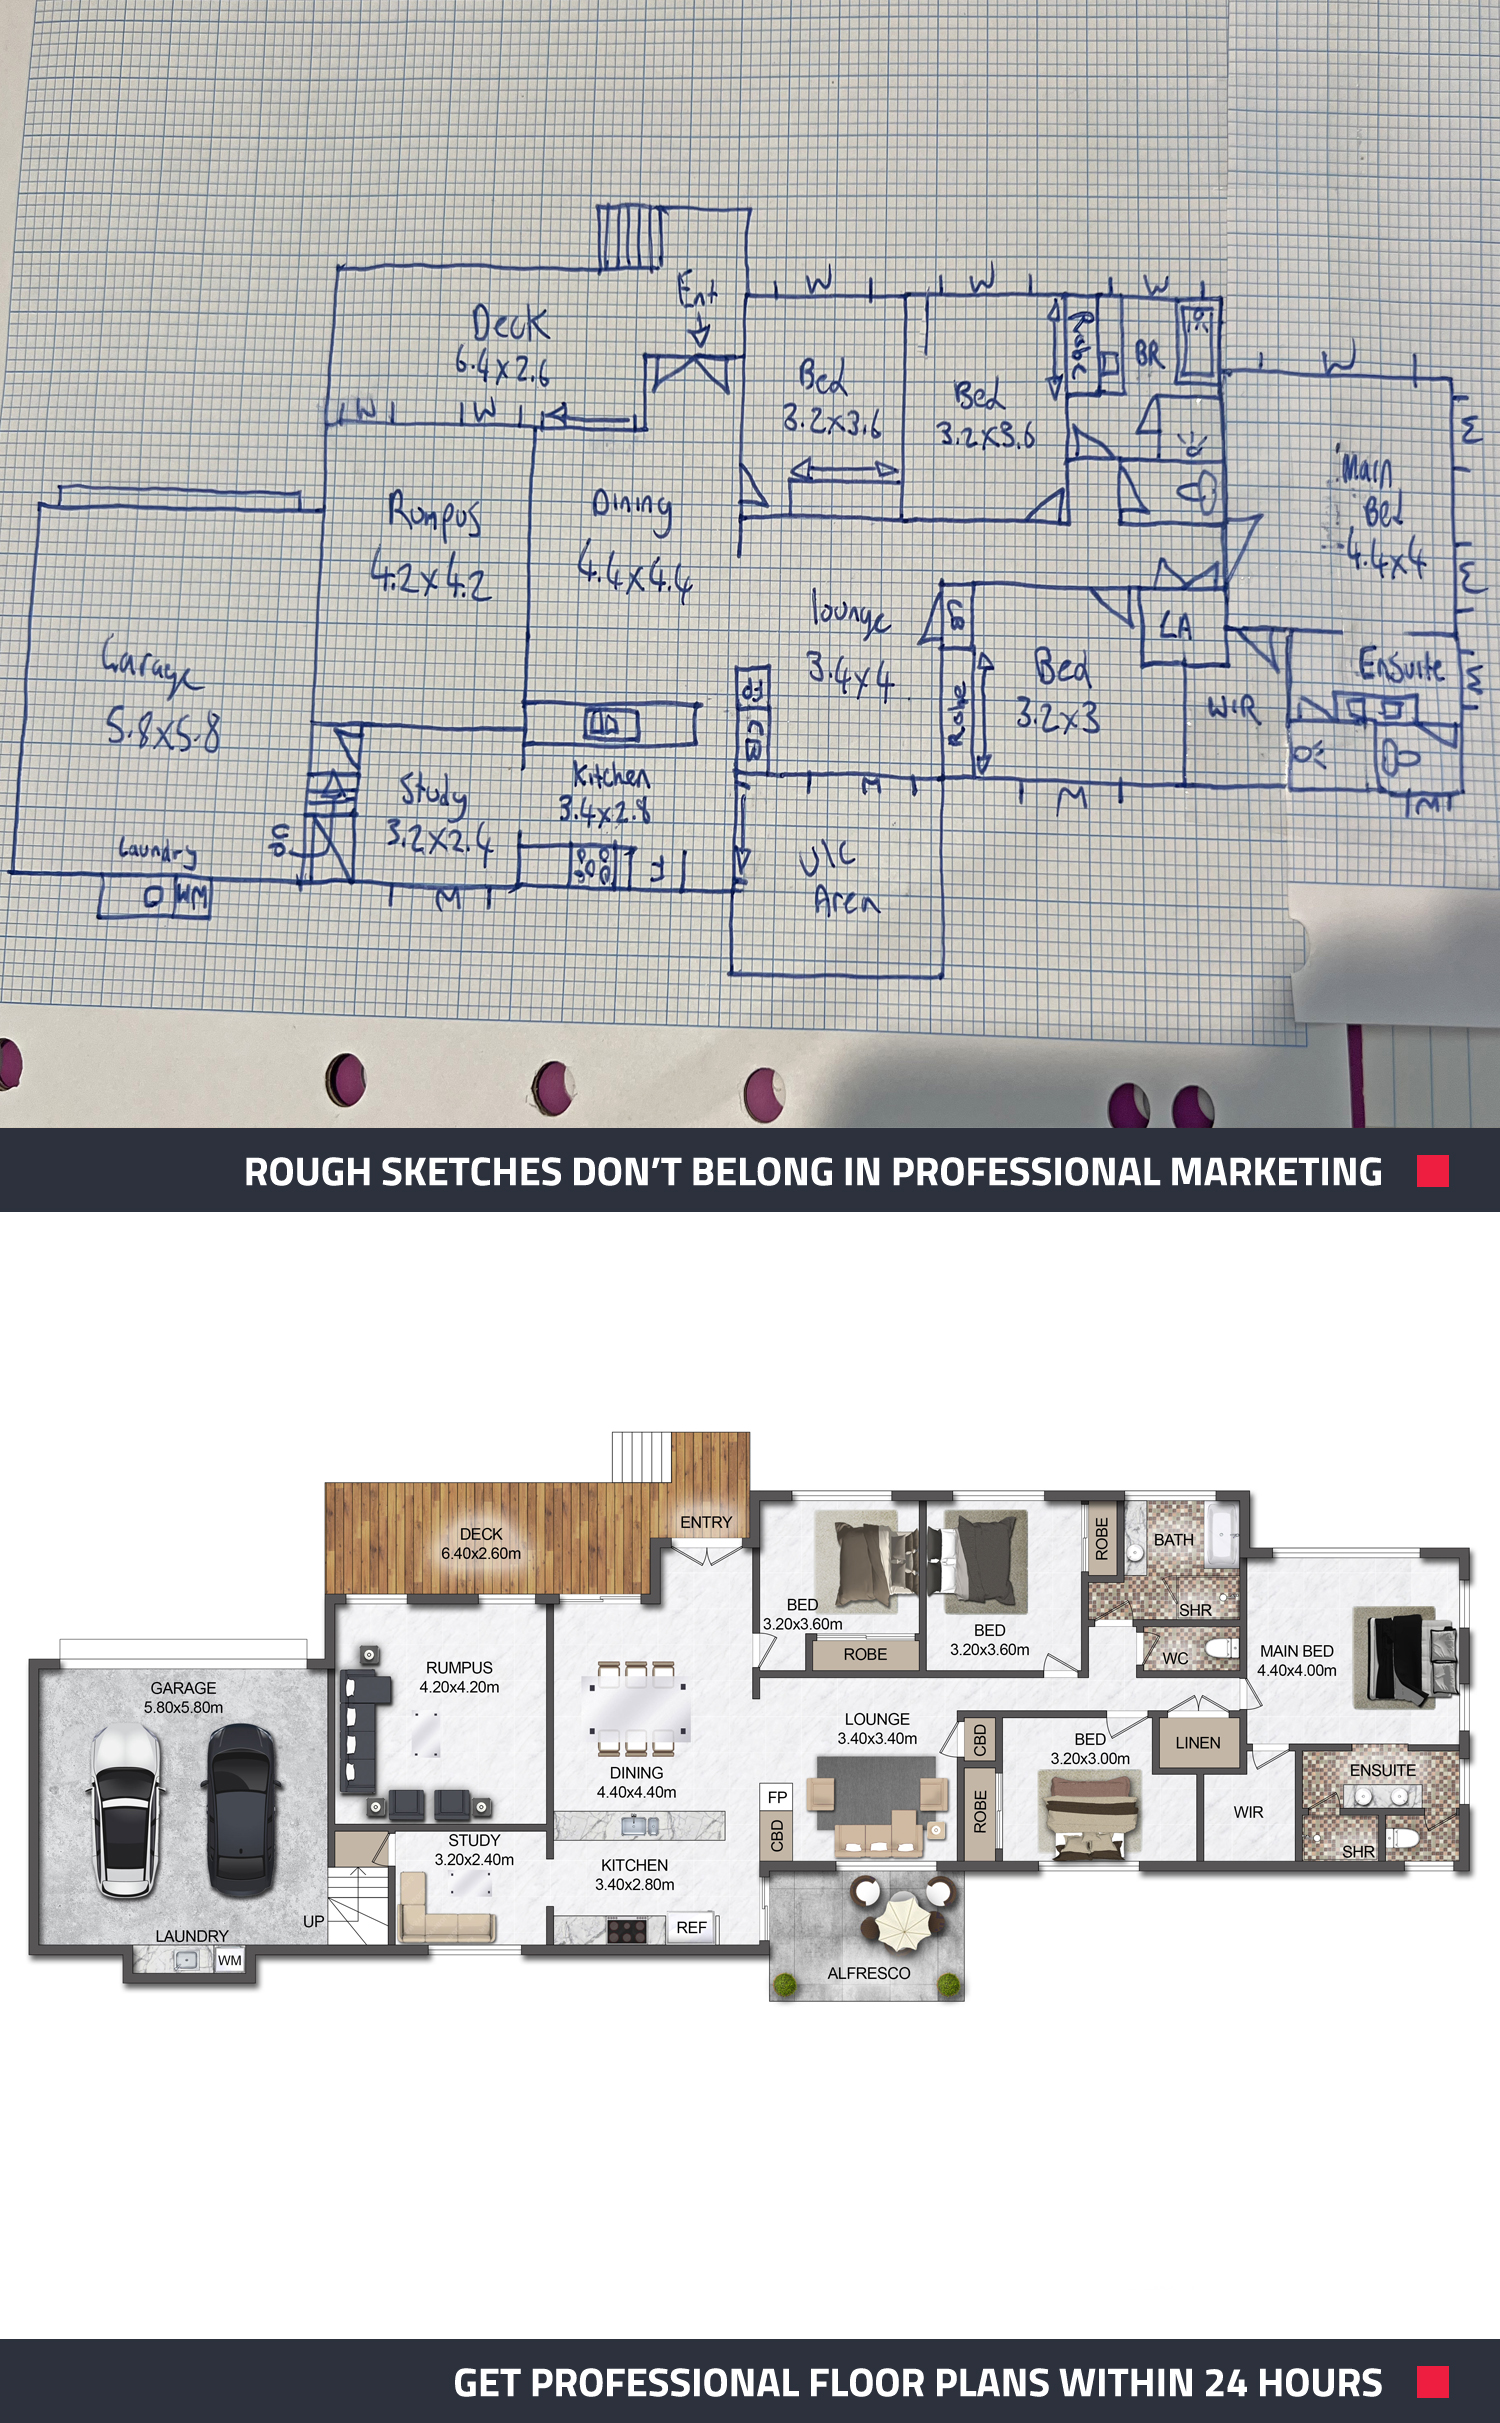
First, check if the homeowner has any builder or architect plans. If they do, simply submit a Floor Plan Redraw job on BoxBrownie.com upload the plans.
We’ll then transform them into a stunning, marketing-ready floor plan within 24 hours.
Step 2: Equipment Needed
To draw a floor plan, you'll need:
- Laser measurer: We recommend the DeWalt Laser Measurer for its quality and affordability.
- Graph paper and clipboard: Use graph paper where one square equals one meter.
- Pencil and eraser: Use a pencil for easy corrections.
- Ruler: For precise measurements.
Step 3: Setting Up Your Laser Measurer
Ensure your laser measurer is set to measure from its base. This setting helps in taking accurate measurements by considering the length of the measurer itself.
Step 4: Orientation of Graph Paper
Decide whether to use portrait or landscape orientation:
- Portrait: Ideal for thinner houses, easier to handle.
- Landscape: Better for wider houses. Always start drawing from the bottom to avoid running out of space.
Step 5: Measuring the Exterior
For square or rectangular houses, measure the front and side walls. For larger or complex properties, walk around and measure each wall. Use a small block of wood to point your laser measure and record measurements to two decimal places. For detailed instructions on measuring and drawing floor plans, refer to our comprehensive How to Measure and Draw a Property Floor Plan guide.
Step 6: Measuring the Interior
Measure from inside wall to inside wall. Place the laser measurer at mid-height and take multiple measurements. Record fixtures like sinks, showers, stoves, and doors, noting their swing direction. Label each room and mark window and door placements accurately.
Step 7: Editing Your Floor Plan
Once your sketch is complete, log in to the BoxBrownie.com dashboard and select Floor Plan Redraws. Choose a template and upload your sketch. Submit your job, and within 24 hours, you'll have a beautiful floor plan ready for marketing.
Want to take your marketing to the next level? Learn how to create the ultimate first impression with a Branded Floor Plan or enhance your property listing with a Tailored 3D Floor Plan.
Watch the Full Video
For a detailed walkthrough, watch the full video above and learn how to draw a floor plan from scratch with Brad.
If you’re new to BoxBrownie.com, sign up now and get four free photo edits!
RELATED ARTICLES

Staging is key to creating a strong first impression when selling a property. We offer ten distinct Virtual Staging styles to suit various tastes and property types. Explore our range of styling options and find the best look to stand out and attract buyers.
READ MORE
We were lucky enough to sit down with Alicia Omand and Neils Mack of Royal LePage Canada, to explore strategies for elevating property listings. We also delved into the long-standing partnership between BoxBrownie.com and Royal LePage, as well as their cutting-edge one-stop-shop CRM, designed to empower their agents throughout Canada.
READ MORE
Discover the best disclaimers to use in real estate marketing and when to use them. Find out why disclaimers are often essential for real estate professionals to ensure transparency, meet requirements, and manage expectations for potential viewers.
READ MORE
Discover the transformative power of shadow removal in property photography. Make images brighter, bolder, and more inviting. Explore seven powerful reasons why this technique is a game-changer for your marketing—capturing more attention and converting more buyers and renters.
READ MORE
Join BoxBrownie.com’s free monthly Property Marketing Power-Up webinar — a 45-minute session packed with expert tips on creating stunning property listing photos using Image Enhancement, Virtual Staging, Floor Plan Redraws, and more to help you market properties faster and close deals!
READ MORE
Real estate listings with aerial photos sell faster than those without, and 73% of sellers would rather list with agents who use aerial photos. It's really a no-brainer, aerial pics can be a lifesaver!
READ MORE