HOW TO VIRTUALLY STAGE A HOME FOR A QUICK SALE
Introduction:
The art of marketing a property for a quick sale might have become a bit neglected during the amazing seller's market we've just passed through. Why? Because homes were selling so fast that many agents began to feel that marketing didn't have to be a priority.
With such low inventory over the past two years, the tough part of the job was acquiring listings. Once this was achieved, properties basically sold themselves - and quickly, often for more than the asking price, sometimes sight unseen.
Now that the pendulum is swinging back towards a buyer's market, the most valuable skill you can cultivate as a real estate agent is the ability to attract a buyer's attention.
For unfurnished, or partially furnished listings, nothing accomplishes this better than Virtual Staging.
Perhaps it's been a while since you've used it? Perhaps you've forgotten how easy (and effective) it is. In either case, this post will be a timely reminder of how easy and effective Virtual Staging is.
Like physical staging, Virtual Staging has been proven to:
- Sell homes faster than homes that are not staged
- Sell homes for the asking price or higher
- Increase clickthrough on MLS sites by 52%
Unlike physical staging, Virtual Staging is fast, easy, and inexpensive. It’s also far more flexible than its physical counterpart - allowing agents to apply different looks to the same space - so that the room will appeal to the varying tastes of a greater number of property buyers.
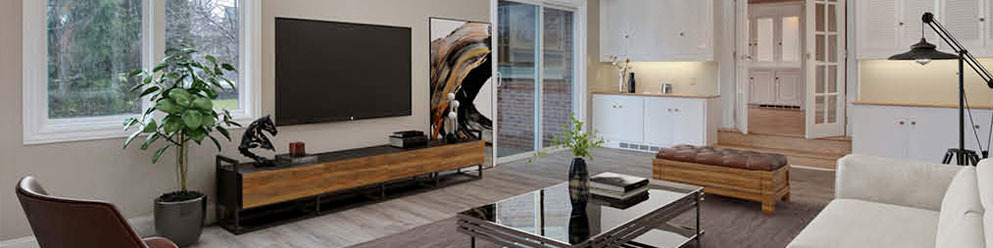
 |
| In this example, the unique talents of Virtual Staging are on display. Top Miami realtor Ines Hegedus-Garcia uses our Virtual Staging to present different looks for the same space. It’s pretty hard to do this with physical staging! |
How To Virtually Stage A Home For A Quick Sale
‘In life, you get back what you put in.’ It’s true in many ways, but it certainly does not apply to Virtual Staging. With our Virtual Staging interface, you get back so much more than you put in - this applies to your time, money, and your effort. It’s just so easy to virtually stage a home.
If you haven't tried it before, or if you could use a refresher course, we'll walk you through the steps in this post. It really is as easy as 1, 2, 3!
- Phase One - Preparation
- Phase Two - The Shoot
- Phase Three - Submitting and styling
Phase 1: Preparing The Space
Clean & Declutter
Less is more in real estate photography. Whether you are shooting a furnished or an unfurnished space - the more ‘stuff’ that appears in your photograph, the more likely that a buyer will see something that dilutes their interest.
In this case dirt in the form of stains, window streaks and dust are probably the worst sorts of ‘stuff’ to include in an image.
But sentimental items like family photos or that ‘World’s Greatest Beer Drinker ' fridge magnet don’t fall far behind.
Clean and declutter as much as possible before shooting, but if you don’t have the time to get the place looking exactly as you want it. Our Item Removal service can get rid of any eyesores your camera can pick up.
Anything from a mirror stain to the miscellaneous mess on a kitchen counter can be made to disappear using our Item Removal edit.
Turn All Interior Lights On
Now that you’ve cleaned your space, illuminate it. ‘A Clean Well-Lighted Space’ is more than just a great Hemingway short story, it is the starting point for appealing visuals in real estate marketing.
Whether you're shooting specifically for Virtual Staging, or just shooting general real estate pics of a furnished property. It's always a good idea to turn the lights on before you begin capturing your images.
If you encounter a room with blown bulbs or are shooting a property where the electricity is switched off, or even if you forget to turn the lights on and only realize it when you get back to the office. Don't worry we have a Turn On Lighting feature in our Image Enhancement package that makes the space appear much more inviting.
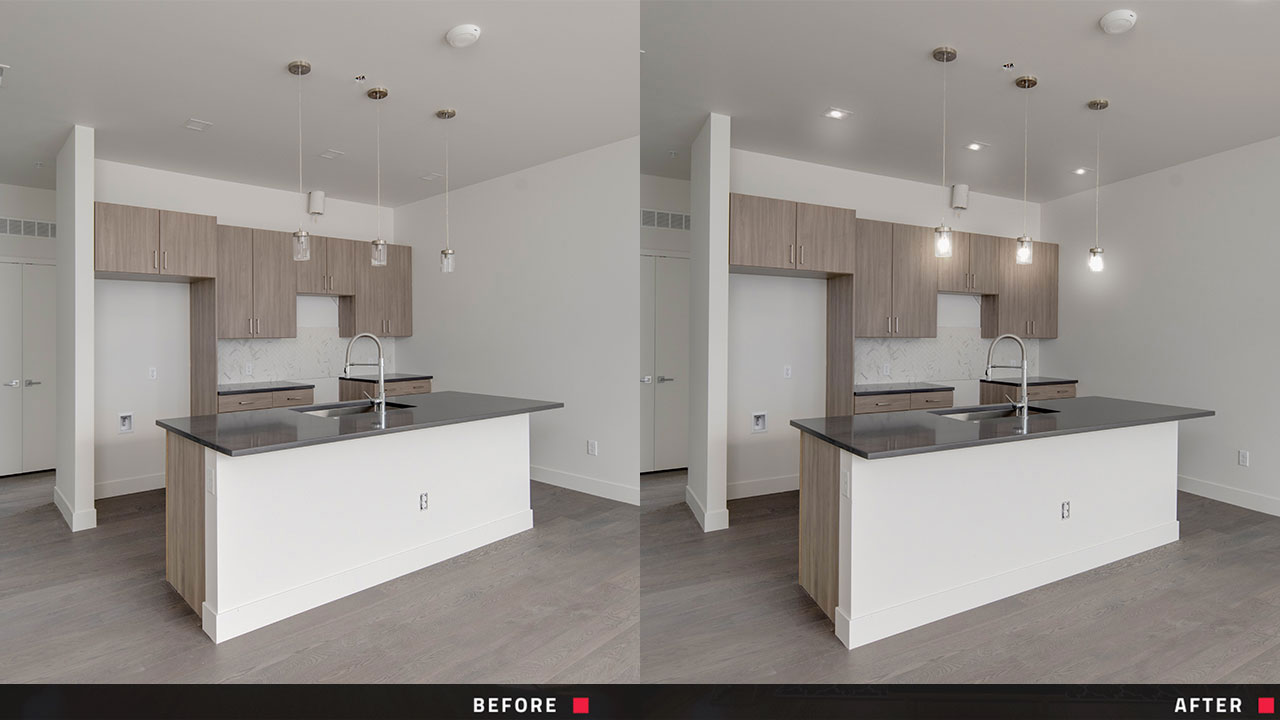 |
| Turning on the lights in a room is an important step in almost all real estate photography. It makes the space seem so much more inviting. If you forget to do so, though, don’t worry. We have an edit for that as an option under our Image Enhancement menu. |
Consult Our Pre-Photography Checklist
A great habit to get into during the preparation stages of real estate photography is to consult the Pre-Photography Checklist that our co-Founder Brad Filliponi developed for all real estate photographers.
Brad cut his teeth in the business as a student of renowned Sunshine Coast (Australia) photographer Greg Gardner, then went on to a 16-year career as a prestige real estate photographer himself.
The Pre-Photography Checklist is a room-by-room guide, containing things to keep in mind when preparing a home for a real estate shoot.
It offers useful but easy-to-forget pointers to keep in mind that make a big difference in the presentation of a listing.
The Pre-Photography Checklist can be downloaded and emailed to clients in advance of photo shoots as well.
This is a great way to spiff a place up for the day of a shoot. It also shows clients that you are thinking about their listing and using your expertise to attract the most possible interest to their property.
Phase 2: Shooting Your Images
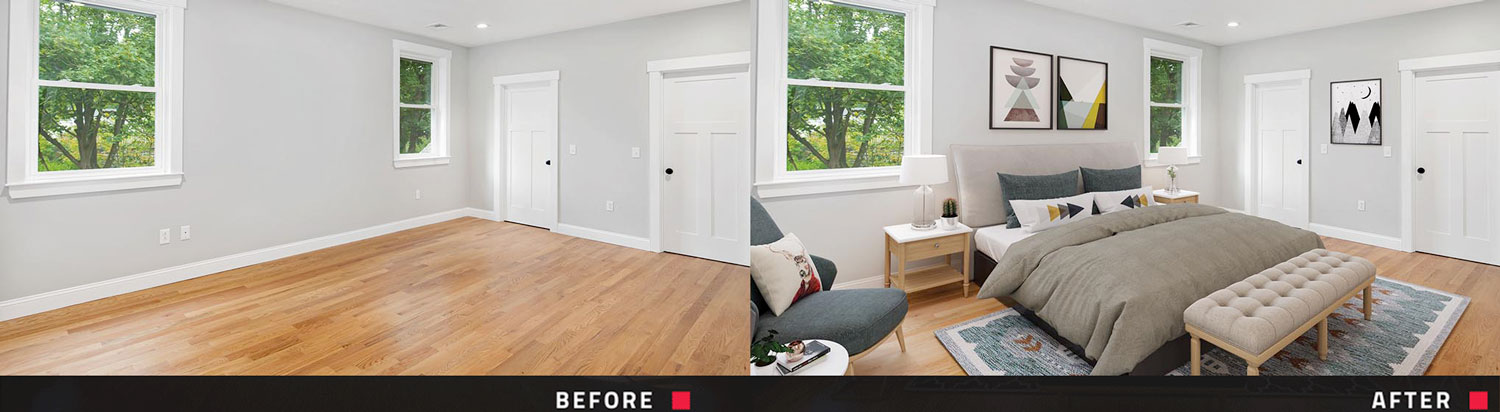 |
| One reason Virtual Staging works so well is that it transforms images of cold and empty spaces into ones that reveal any room's comfortable and stylish potential. Note that this virtually staged photo also employs HDR Bracketing (explained below), which is an underused technique that in this example turns the attractive greenery outside the window into a selling feature. |
Our technology makes shooting for Virtual Staging an absolute breeze. You need no training in real estate photography, nor do you need a professional camera or lighting gear to capture Virtual Staging images that come out looking as though they were shot by a pro.
Any smartphone with a wide-angle camera lens (for iPhone owners that's any model from 11 and up) is more than good enough for a Virtual Staging shoot. You can leave the rest up to our Image Enhancement and Virtual Staging editors.
If you ask Brad Filliponi about it, he’ll tell you. “Virtual Staging photography isn’t really a skill,” he says.
“We can virtually stage any photo, no matter what angle it is shot from. There’s not too much the photographer has to worry about anymore. But, I do feel there are best practices involved with virtual staging photography”
Best Practices Of Virtual Staging Photography
Use HDR Bracketing. HDR Bracketing remains the most overlooked (underused) element of real estate photography. Our 2021 Real Estate Listings Analysis revealed that only 30% of real estate photos on Zillow and Realtor.com bore evidence of Bracketing.
Bracketing is the photographic technique that enables you to capture a room so that the view out the windows appears in the image as it would appear if you were standing in the room in real life. It's a huge difference-maker, but since it involves shooting five images at different exposures (which we later blend during the Image Enhancement phase) many agents still seem to skip this process.
Check out our full tutorial video and blog on How to Shoot HDR Bracketing - it will make your real estate photography go from decent to sensational. And with only 30% of your rival agents taking advantage of this essential process, it won't be long before your listing images start pulling away from the competition.
Use the widest angle lens you have access to (12mm cropped sensor and 16mm full-frame camera). In the past, this might have been the single greatest factor that prevented agents from taking their own photography.
Now, regardless of brand, almost every current model smartphone comes with a wide-angle lens - including all iPhones model 11 and later. It's no coincidence that many of the major brands Samsung, Huawei, and iPhone are advertising the cameras of these products more than they are advertising the communication capabilities of their devices. Google even takes it a step further, naming their smartphone 'the Pixel' - a direct reference to its photographic capability.
Shoot everything at eye level (don’t shoot too high or too low). This is a great general rule for shooting for Virtual Staging. As you get more comfortable behind the lens you'll likely begin to diverge slightly from this ground rule - adjusting your camera angle to capture the unique characters of the various spaces you are in.
According to legendary Sunshine Coast photographer Greg Gardner (who also happens to be our own Brad Filliponi's mentor) the lines and contours of most rooms are usually better suited for an angle slightly below eye level, but how to shoot from this perspective can be difficult for amateur photographers to perceive. Your safest bet is eye-level to avoid errors in an angle like the one below.
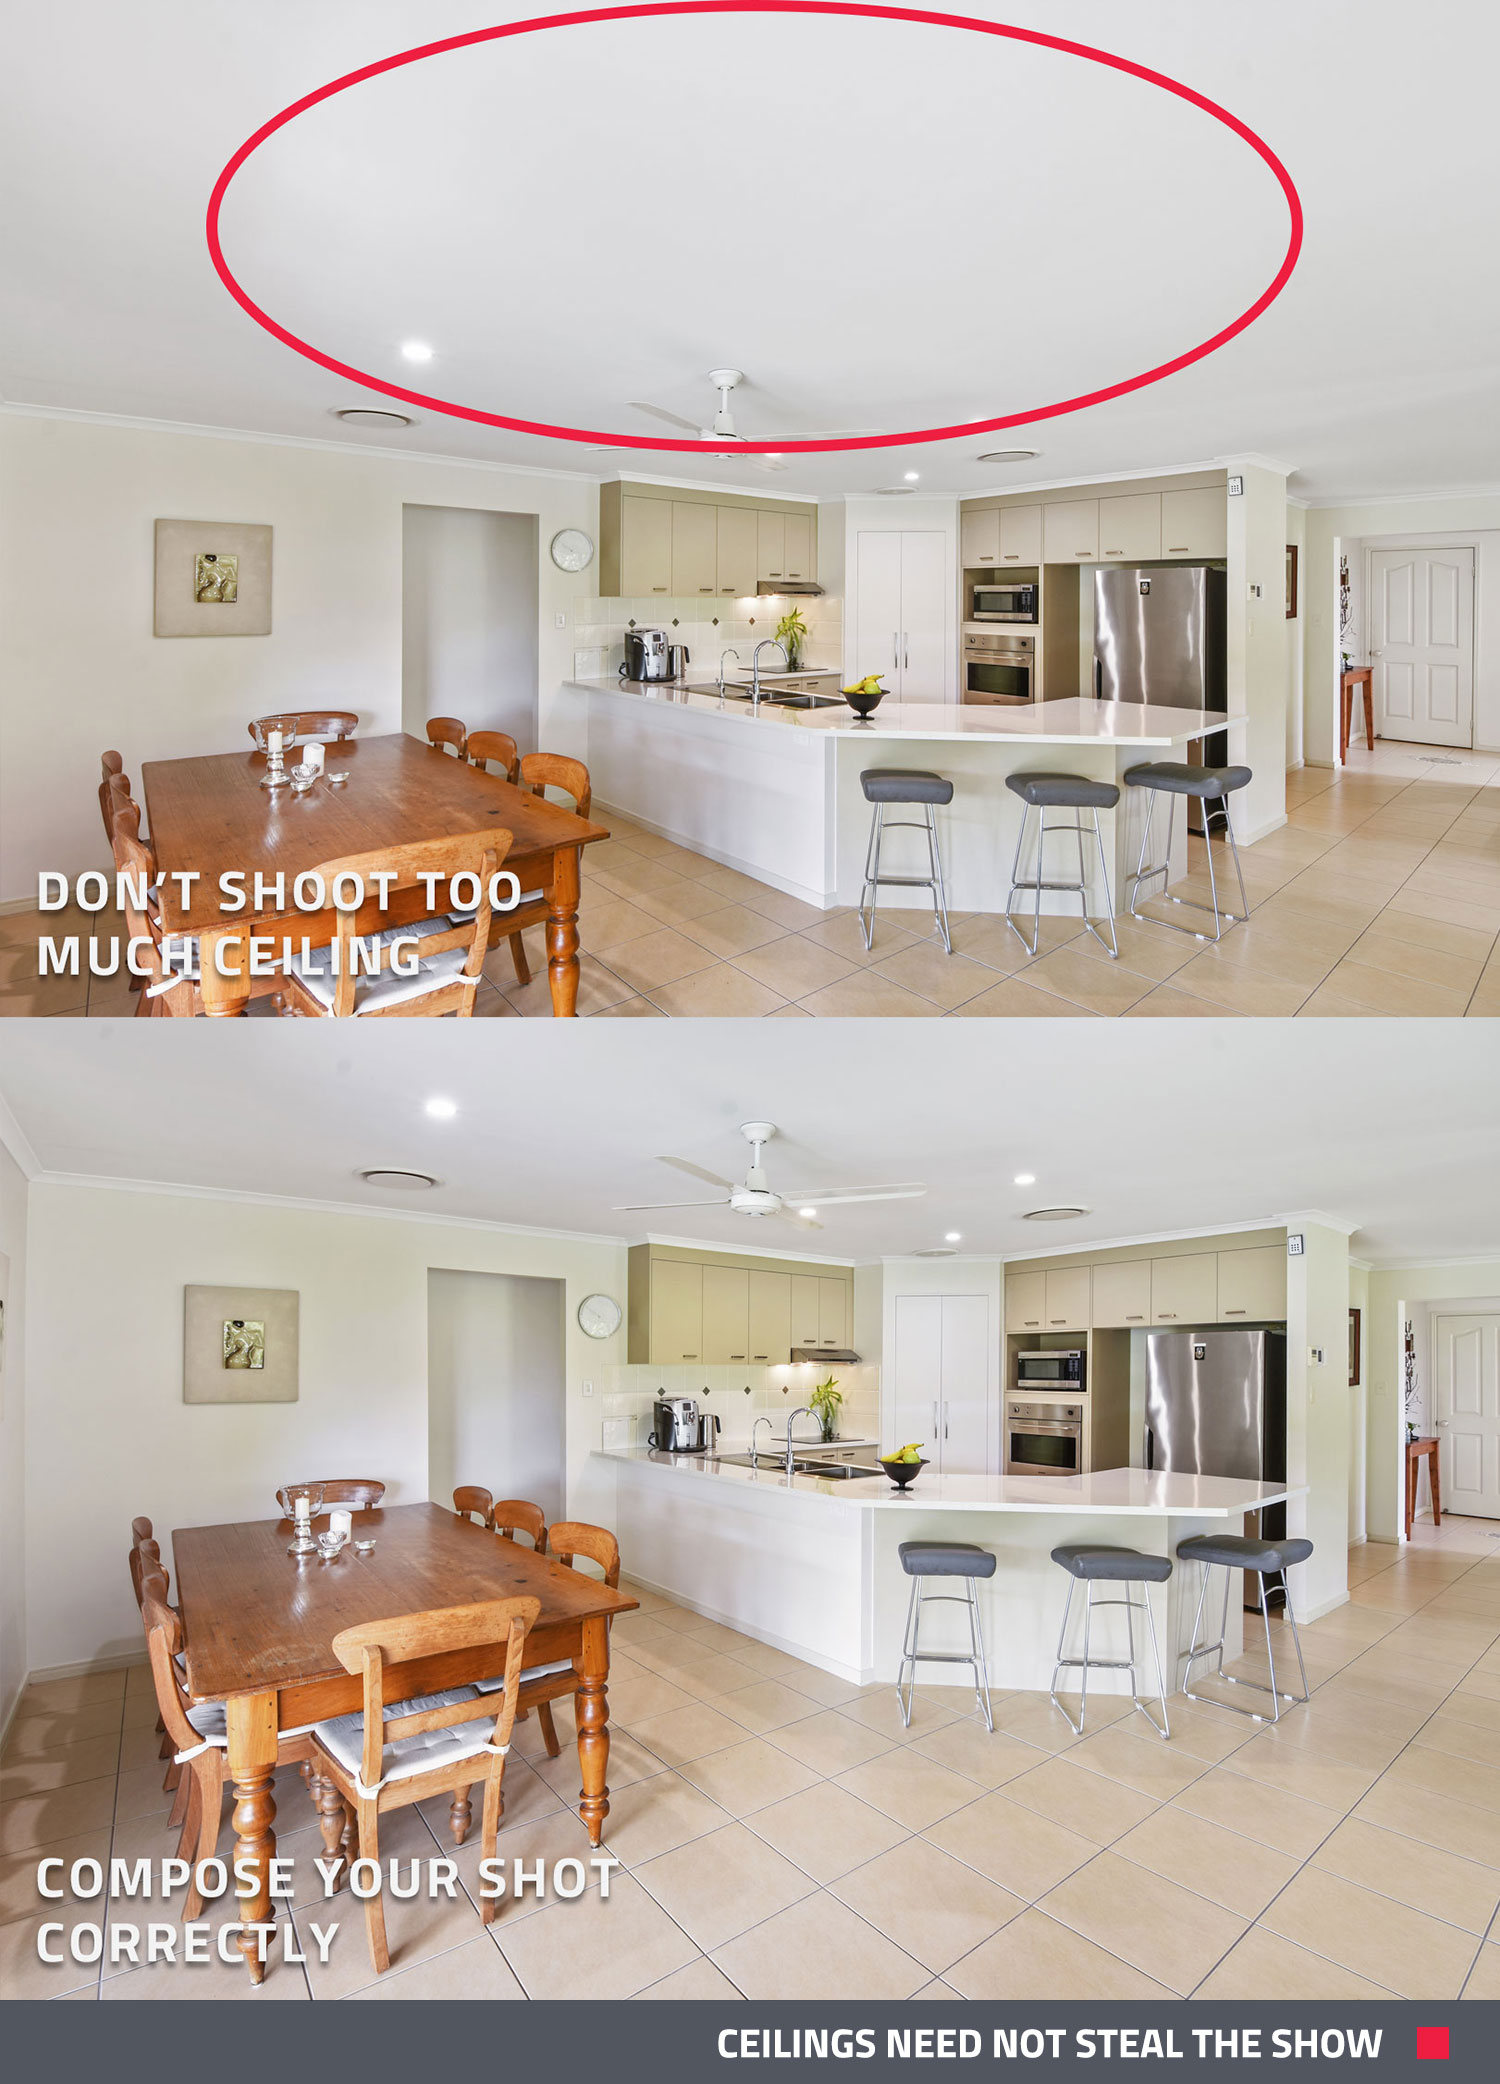 |
| In this example, shot from a much lower angle than eye level, the photographer overcompensated by pointing the camera up - capturing a giant swathe of the ceiling. This is a general no-no, but in Virtual Staging, the error becomes even more evident, as the ceiling of a room is the LAST PLACE you want to fill with furniture. |
Shoot in the corner of the room where possible. Again, this is another solid rule to live by - especially if you are not all that accustomed to shooting unfurnished spaces for Virtual Staging.
Shooting corner-to-corner is a great way to capture an instant vanishing point for your image - the eye is subconsciously drawn to the convergence of two walls, creating the sense of depth the brain requires to interpret the image accurately.
Aside from this perceptual clue, when you shoot from corner to corner you will capture the floor space and the wall space that is ideal for Virtual Staging. As you enter each room. Seek out the corner that would lend itself best to Virtual Staging, then stand in the corner opposite and capture the image.
Keep in mind that, yes windows and elaborate staircases are attractive, but if you are shooting for Virtual Staging try not to allow these features to dominate your image. Just like ceilings which (unless you are photographing the Sistine Chapel!) should never dominate a real estate photo, staircases and windows are not ideal for furniture.
 |
| This is a beautiful staircase, and the image could play a role in your overall marketing materials. But the amount of space the staircase occupies in this image makes it an unideal choice for Virtual Staging. |
Edit your photos before having them virtually staged. Our Image Enhancement package is an essential first step in the Virtual Staging process, just as it is with photos of furnished properties.
Before bringing out the full potential of your marketing materials through Virtual Staging, Image Enhancement ensures that the room is looking its best. When the unfurnished room is presented in its best possible light, the virtual furniture that our editors use to decorate the room will also look its best. This is where you, your clients, and those prospective buyers out there will all experience the true power of Virtual Staging.
For a deeper dive into the ins and outs of shooting real estate for Virtual Staging, check out THIS POST, which covers this second phase of the process in much greater detail. You're bound to pick up a pointer or two!
Phase 3: Image Submission And Style Selection (aka The Fun Part)
This is the fun part. This is also the easy part.
Once you’ve shot your images, all you have to do is send them to us and let us know what style or styles of furniture you’d like the rooms to be decorated in.
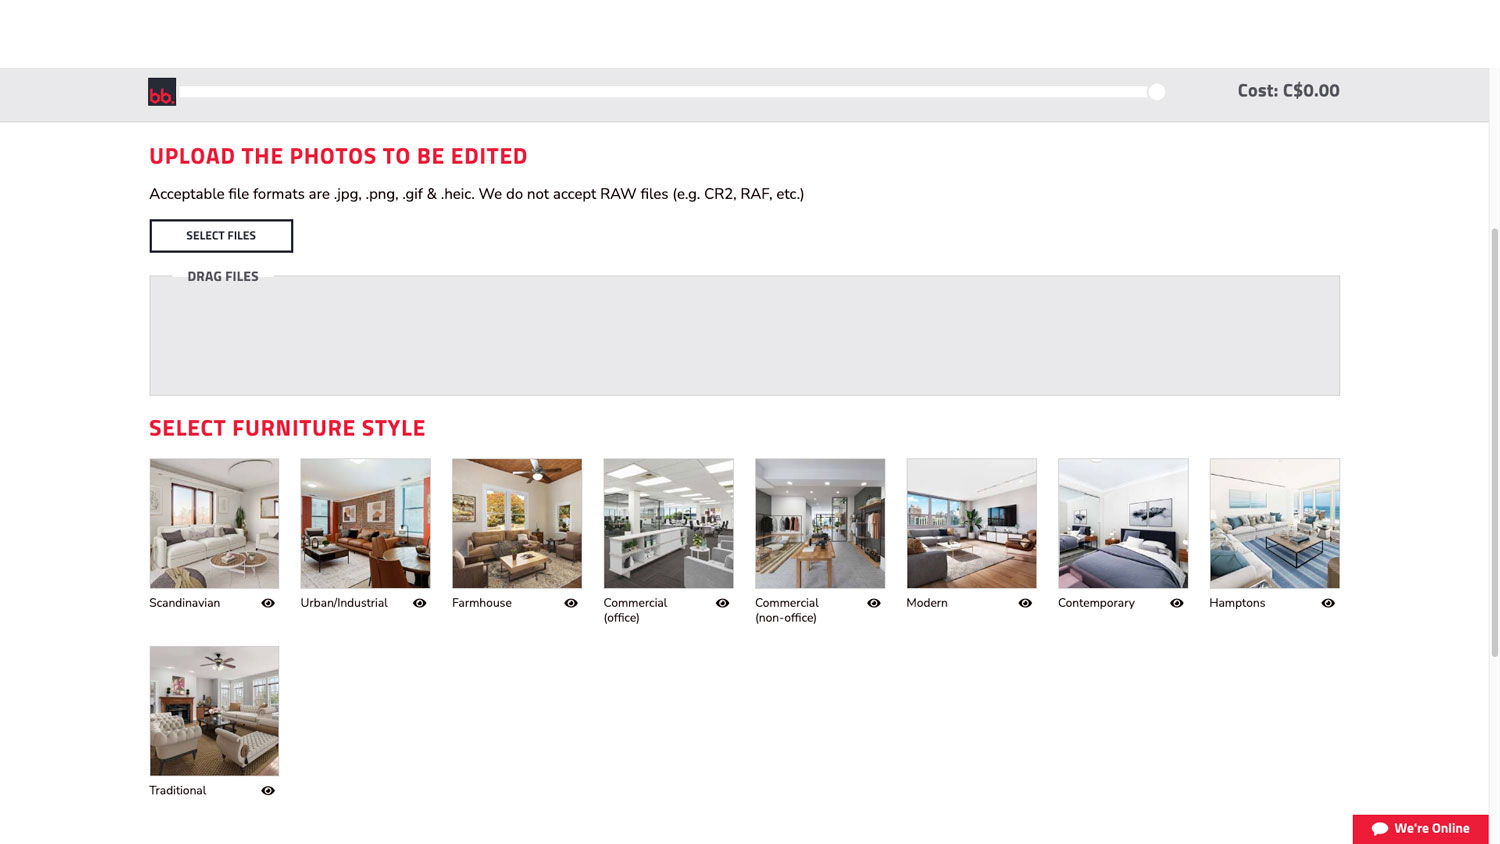 |
| Here’s a look at the back end of our Virtual Staging portal. All you have to do is upload your image and select the style you’d like the room to be staged in. We’ll have a final product back to you within 48 hours. |
It might not be necessary to virtually stage every room in the house. Often the kitchen, living room, main bathroom, and master bedroom are sufficient to draw a prospective buyer's interest. Don't forget that we can also virtually stage outdoor spaces, so if the property has a nice deck, pool, or yard that would help sell the house, we can also furnish these spaces to display their full potential.
There are only two easy steps to complete on the back end of our Virtual Staging portal:
- Upload your images.
- Select the style. We offer multiple styles of decor - from Scandanavian to the Hamptons to Industrial (and many more!). You easily browse through examples on the back end of our site, which can be quite an enjoyable experience as you select the perfect style of furniture and decor to match the photos you have just taken.
We’ll have wonderfully transformed rooms back to you within 48 hours.
Easel Does It: One Final Virtual Staging Tip
 |
| A brilliant way to get the absolute most out of our Virtual Staging edit is to print out the files and place the printouts on easels in the property you are showing. This technique was invented by two of our Australian clients, and they report that it works incredibly well when showing a house to someone who has first encountered the virtually staged images online. |
Now that we've covered the basic steps to virtually staging a home for a quick sale, we've just got to share with you one great way to use the service that a couple of our clients came up with.
Amy Bennett and Jodie Hedley-Ward of McGrath Estate Agents Australia first came up with this idea as a means of establishing a connection between the way the prospective buyer first encountered the property online and the way they first encountered it in real life on an in-person tour.
Their solution: easels. By placing printouts of our virtually staged images on easels in the rooms that the images depicted, Amy and Jody found they had achieved more than just a connection between the online and real-world representation of a space - they had created the most sought-after effect in all of real estate marketing. They had created a 'wow factor'.
The timeframes, the low cost, and the massive impact these Virtual Staging printouts have had on potential buyers have made this practice a staple in their marketing strategies whenever they list an unfurnished home.
As Amy told us:
"These projects cost me $50 per room, including the printing. That's incredible pricing and service. BoxBrownie.com always gives me great results in an incredible time frame, affordability, and also peace of mind, because I know the product will be amazing and won't require additional edits and therefore won't use up more time before I can get a property to market."
Try it for yourself. Sign up NOW and we'll give you three free edits: two Image Enhancements and one free Day to Dusk Hero Image transformation.
RELATED ARTICLES
We often mention that presentation is the key to selling property. In this case, it’s not how you present the property that is most crucial - it’s how you present yourself, your knowledge, and your ability to sell the property that counts the most.
READ MORE
Social media is great for selling real estate. But each platform takes a different kind of mastery. Here's how to use Facebook, Instagram, Twitter (and others) to maximum advantage.
READ MORE
It’s never been more important to ensure your property marketing stands head and shoulders above the rest. In this blog we’ve uncovered the top marketing assets most real estate agents are missing and tell you how you can capitalize and sell your listings faster and more efficiently.
READ MORE
Join BoxBrownie.com’s free monthly Property Marketing Power-Up webinar — a 45-minute session packed with expert tips on creating stunning property listing photos using Image Enhancement, Virtual Staging, Floor Plan Redraws, and more to help you market properties faster and close deals!
READ MORE
BoxBrownie.com is thrilled to announce our new partnership with Engel & Völkers Europe! This collaboration will equip real estate professionals across Europe with the cutting-edge tools they need to excel in a competitive market. Discover more about this powerful alliance.
READ MORE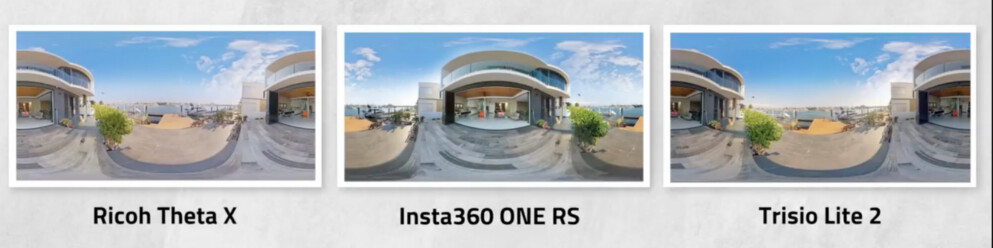
It’s a 360° camera shoot-out! Read to find out how three 360° cameras rank when it comes to shooting panoramic property images and decide which one is the best for your real estate photography needs.
READ MORE